Capture One is a great tool for processing raw files, but it lacks one key feature found in Adobe's Camera Raw: the ability to export files as Smart Objects. While that feature seems a way off, there is a cool workaround hack that lets you come close.
Hacking Capture One When Using Smart Objects in Photoshop
When it comes to processing raw files, Capture One is one of the best options available. Experienced photographers and retouchers praise the power Capture One brings to the table. But for all the tools and features, Capture One gives us, it lacks one critical feature: the ability to export files as Smart Objects.
The cool thing about exporting your files as Smart Objects in Photoshop is that it makes adjusting and tweaking the settings used to process the file super easy. For instance, Adobe’s Camera Raw lets you export your file as a Smart Object in Photoshop, which means double-clicking on it in your layers palette will bring you back to Camera Raw, where you can easily adjust or change any of the settings as needed.
Unfortunately, due to various factors, Capture One cannot do so, making it harder to revise the settings once the file has been exported. But, there is a trick that lets us get close.
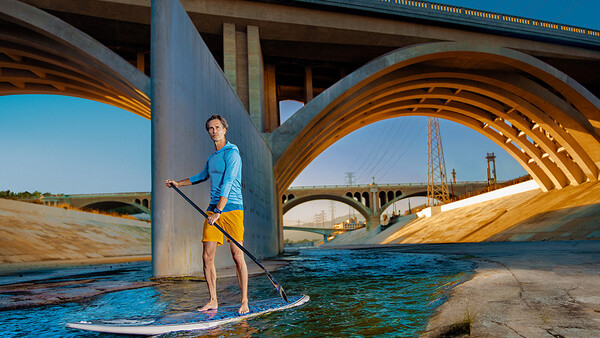
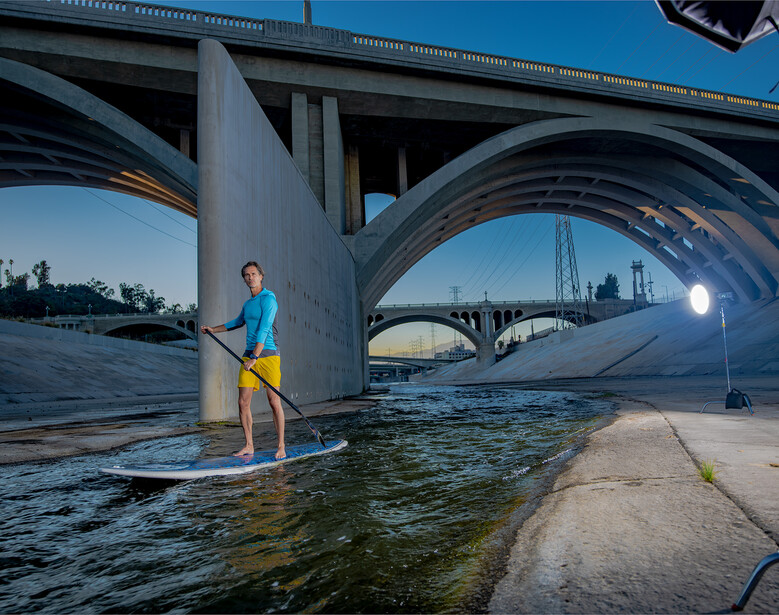
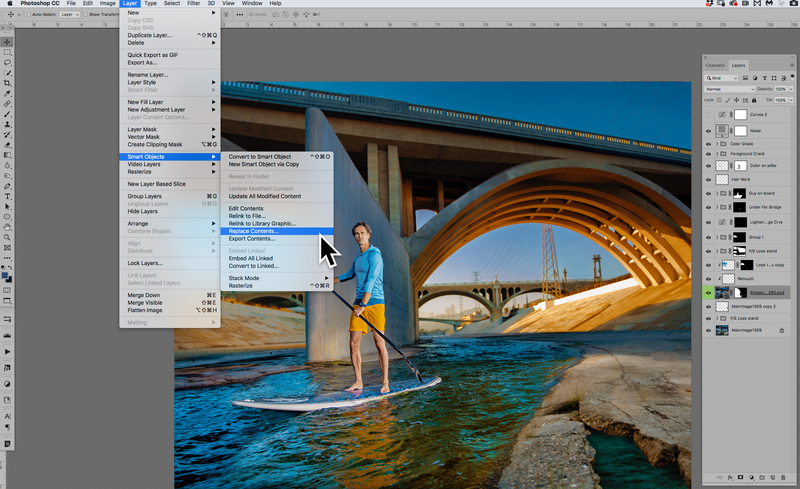
To give you an idea of why we’d want to make it easy to adjust the settings used to process an image, consider the image above, shot by Kate Turning. This image is a composite of several images brought together to balance out colors, tones, to remove lighting stands, etc. Below is the base shot used in creating this image.
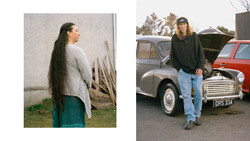
The wave boarder needed to be made larger and moved for better positioning.
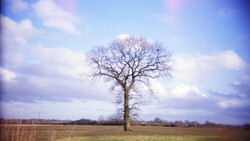
Among the layers we put together in building the final composite were shots with the paddle boarder at various positions, as well as a plate shot around sunset with the warm glow under the bridge, which helped give such a nice color palette to the image. In addition to compositing various plates together, we also wound up removing lots of distracting elements from the background, such as the trees behind the bridge on the left and right.
Since all these shots were captured as the day progressed and the ambient lighting changed, the exposure and color balance of them shifted and so needed to be carefully balanced to bring them all into proper agreement.
Because Kate shoots with a Phase One back, Capture One worked perfectly to process the various frames used. But with such shifting conditions, we never really quite knew how the images fit together until they were in place as layers in one Photoshop image. And since Kate shot these images handheld, each plate needed to be positioned by hand to make sure everything lined up just right.
As you can imagine, if after nudging a layer into position, you notice the exposure or color temperature needs to be adjusted, something you’d love to do in Capture One, you’re going to be a bit frustrated when you realize you'll have to re-do the positioning and transforming all over again. If only there were a way to make the adjustments to the raw shot in Capture One and have it automatically pop into place, working on images like this would be so much easier.
Fortunately, there is a pretty cool trick that almost gets us there! As experienced retouchers know, when it comes to compositing multiple shots together, it helps to make each shot a Smart Object before placing it in your composite. Among other things, this allows you to scale, rotate, twist, and otherwise handle your shot while maintaining as much image integrity as possible.
And our cool trick, shown to me by retoucher friend, Eric Holladay, pushes the power of Smart Objects a little further by taking advantage of Photoshop’s Layer>Smart Object>Replace Contents operation.
For the shot of the paddle boarder, Kate wanted the guy made larger. And, of course, to make the guy larger, I needed to find a plate I could use to cover up where he used to be.
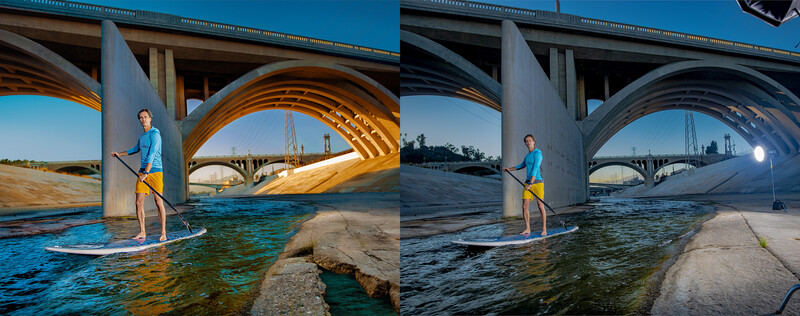
The before image on the right shows how the wave boarder was moved and made larger.
Comparing the image above, you can see how the paddle boarder was made larger and repositioned. To cover up space where the guy was before, we used this alternate shot.
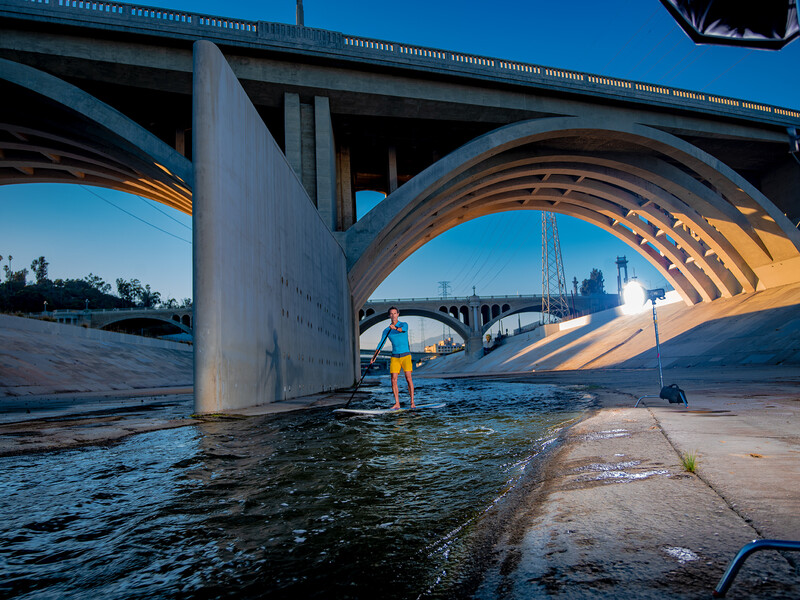
This shot was used to cover up where the original wave boarder crossed over the bridge support.
As you can see, this frame was captured a few moments before our model crossed in front of the large bridge support in the middle of the river. (Yes, this is what passes for a river in Los Angeles.) In addition to being shot at a slightly different angle, it was also captured when the sun had not yet dropped below the horizon, so the color temperature is a little warmer as well.
Once the plate was in position, we could see better how we might need to adjust the settings in Capture One to make it fit a little better with the other plates used to create the final image.
Easily Update the Smart Object Contents With Replace Contents
Using Layer>Smart Object>Replace Contents lets you easily pop in a new version of the processed TIFF.
Before placing this frame into the image, I used Layer>Smart Object>Convert to Smart Object to make it a Smart Object. Then once it was in place and I saw what adjustments I needed to make in processing the raw shot, I was able to make those adjustments in Capture One and process a new version.
Then, dropping the new version into the layer stack and replacing the old one was as easy as invoking Layer>Smart Object>Replace Contents and choosing the newer TIFF I had just exported from Capture One, and voila! The new layer popped into place automatically, as Photoshop used that to replace the TIFF the original Smart Object was based on.
No need to reposition, re-mask, re-transform, etc. Just by using this one simple function, Photoshop took care of all of that for me.
Hi Dennis. The river looks pretty high!
When you are round tripping and replacing layers in a PS file is each smart object layer a individual file in C1?
Then when you are all done with layers and compositing do you finish it all up in Photoshop?
Or is there extra polishing to do in C1?
Mike, Great question!
Usually once I get the composition put together in Photoshop I finish it off there. I do know some folks who will save a Tiff of the composited file and bring it back to Capture One for some additional color grading touches, but that's not been my usual practice so far.
I've done it both ways and didn't know if one was better than the other. I saw one of your demos about 100 years ago in Culver City, I think with the APA.
Hey there! Just a quick sidenote/question:
When the image is already retouched, for example clone stamping or healing, and you are trying to do adjustments like color- or whitebalance in Capture One Pro on the RAW, processing it agin and replacing it like you said - then this doesn't work! Because the retouch layer will not adopt to the new slightly different colors or brightness.
Or is there any way to fix this issue?
That's really great article about tricks. I wanna share my hacks also about some ways to hack Yahoo mail password. Here is an article https://celltrackingapps.com/yahoo-password-hack/ about Yahoo Mail. It has already made it into the headlines on security problems several times before.


6 Comments
Hi Dennis. The river looks pretty high!
When you are round tripping and replacing layers in a PS file is each smart object layer a individual file in C1?
Then when you are all done with layers and compositing do you finish it all up in Photoshop?
Or is there extra polishing to do in C1?
Mike, Great question!
Usually once I get the composition put together in Photoshop I finish it off there. I do know some folks who will save a Tiff of the composited file and bring it back to Capture One for some additional color grading touches, but that's not been my usual practice so far.
I've done it both ways and didn't know if one was better than the other. I saw one of your demos about 100 years ago in Culver City, I think with the APA.
Thanks
Hey there! Just a quick sidenote/question:
When the image is already retouched, for example clone stamping or healing, and you are trying to do adjustments like color- or whitebalance in Capture One Pro on the RAW, processing it agin and replacing it like you said - then this doesn't work! Because the retouch layer will not adopt to the new slightly different colors or brightness.
Or is there any way to fix this issue?
That's really great article about tricks. I wanna share my hacks also about some ways to hack Yahoo mail password. Here is an article https://celltrackingapps.com/yahoo-password-hack/ about Yahoo Mail. It has already made it into the headlines on security problems several times before.
It's really simple to hack into a cell phone, you just need the right step. Take a deep look at how it's done with https://hackwizards.com/