
Adding an element such as fire to an image can really bring your photographs to life and give you that high-end production value without all the added danger.
For those of you who know my work I always try as much as possible to get everything in camera, but there are just times when you can't, and that's when a little post production in Photoshop can save the day. For this particular job I had the pleasure of shooting the band She Drew The Gun. Their music is dark with great lyrics, some of which have political undertones. For this reason, I pitched to the guys my idea of a narrative where they would play the role of freedom fighters standing up to an overbearing authority. I had a cool location in mind, some riot police at my disposal, and the idea to arm the band with some petrol bombs. Thankfully they loved the crazy concept and we worked out a date which would fit into their busy schedule.
A few weeks before the shoot I did some tests with some real petrol bombs and soon realized that not only was it way too dangerous for our shoot but the real flames just didn't photograph that well. At that point, I made the decision we would add the flames in afterwards. Being able to control how the flames would look really did appeal to me as real fire by its own nature will move unpredictably and never form the shapes you want at the moments you shoot. In addition to this, removing a dangerous element such as fire allowed us to concentrate more on how the band and the riot police looked instead of being distracted by the worry of people's eyebrows getting singed off!
A successful shoot in the bag it was now time to process the images and add the flames, these were the steps I took:
1. Create or Source a Picture of Some Flames
Some of you might be handy with the brush tool and be able to make realistic flames from scratch, there are some half decent flame brushes out there. Personally, I would rather source the real thing instead. There are many places you can get free stock images of fire or if this is something you might be doing often or you need something rather specific then I'd highly recommend shooting the flames yourself against a clean background. Either way, once you have your flame image ready it should look something like this:

2. Blend Your Flame Image With Your Background Image
Because our source flames are on a black background we can take advantage of blending modes in Photoshop to leave just the flames and remove the black backdrop with no cutting out involved. This is great as not only does it save a lot of time, but in my opinion, it also leaves a much more convincing image than trying to cut all the little details out. Here is the "Fire" layer imported into my finished picture and placed above our "Background" layer. With the blending mode set to "Screen", you should be just left with the flames. As you can see below the blend mode has made things a little washed out. This can be easily solved by duplicating this layer a few times to bring back some of those details.
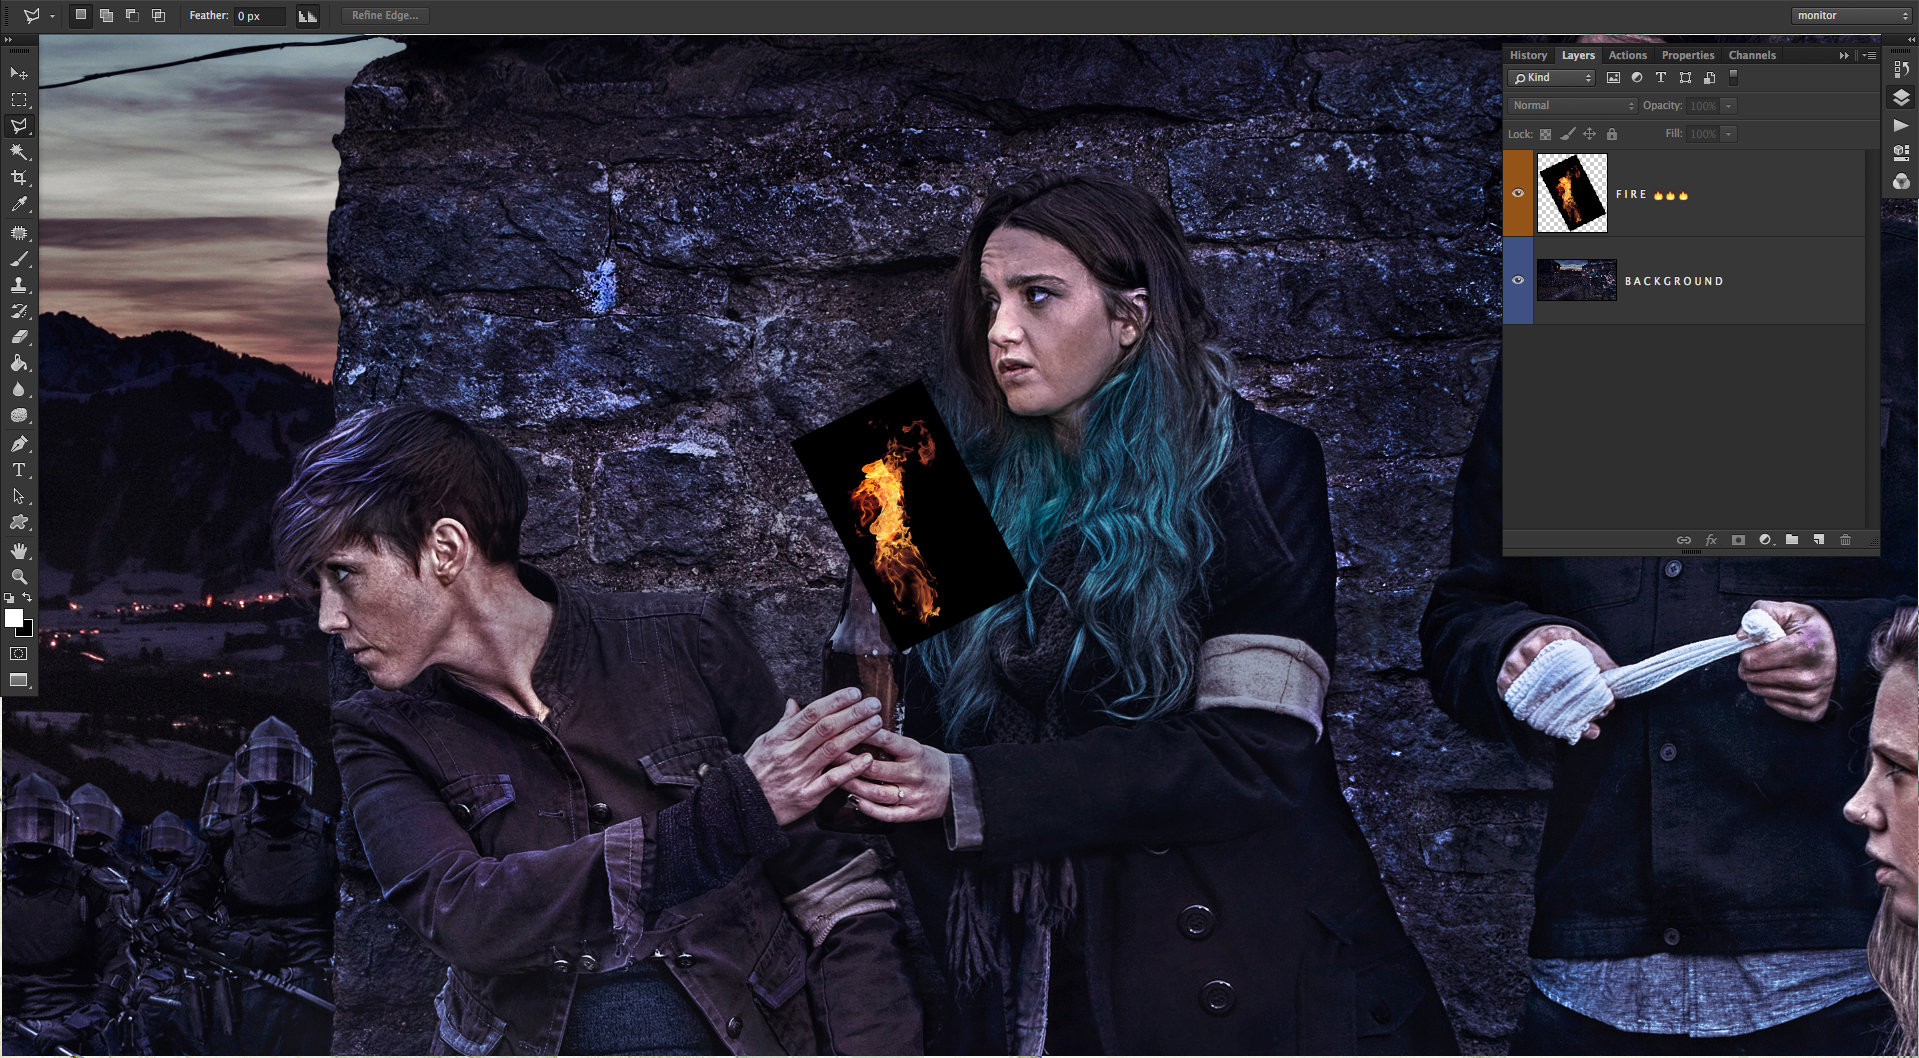

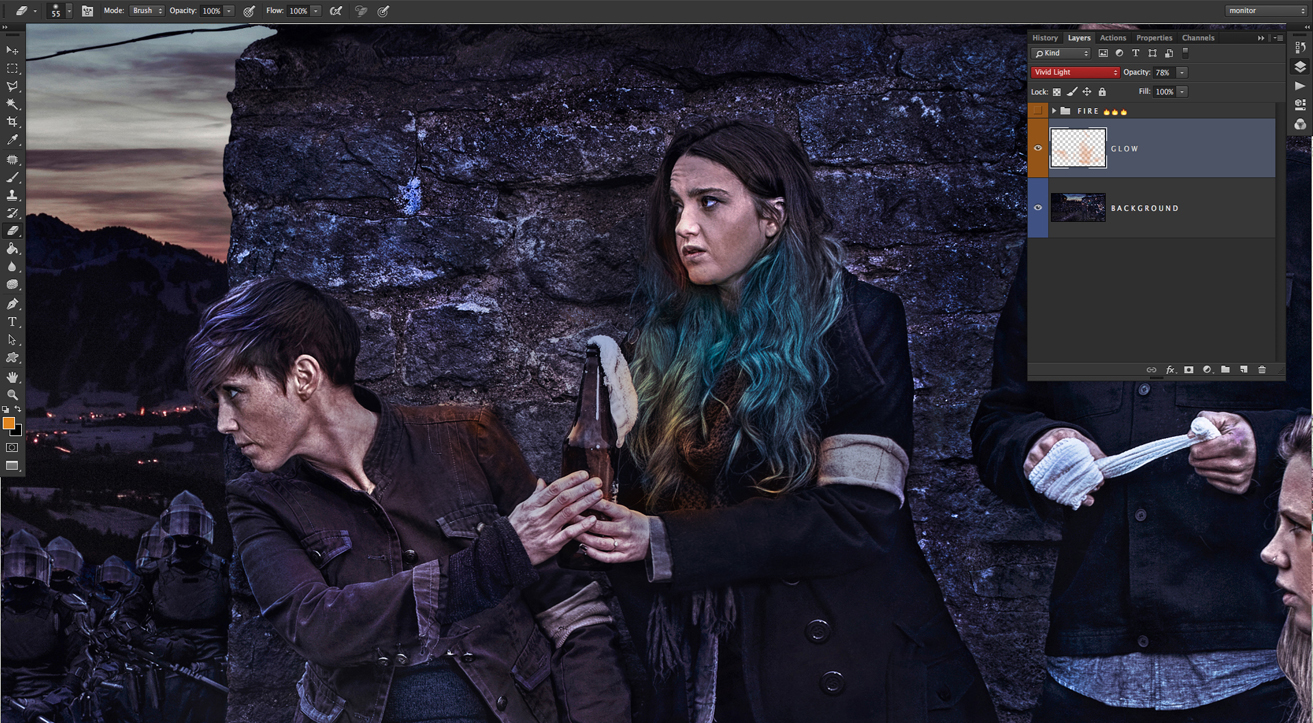
3. Add a Glow to the Surrounding Areas
This stage is optional as some of you might already be happy with the results. For me, the image is missing something. Real flames give off a colored light which would affect the areas they were close to by tinting them, such as the subject's hands and the top of their arms. For this reason, I added a "Glow" layer which is basically a blank layer filed with careful brush strokes which were orange in color. In the first image this "Glow" layer doesn't look too realistic, but the second we change it's blending mode to "Vivid Light" you'll start to see the magic happen. Just like in step 2 you may want to add duplicates to this layer if you want more of an effect or dial down the opacity if you feel it's too much.

4. Add Some Subtle Hints of Light
Not only do real flames give off color they also give off light, who would have thought! Because of this, I wanted to brighten some areas of my image which would have been illuminated if a light source such as a flame would have been present. Selecting the "Background" layer I used the dodge tool set to midtones, with an exposure of 50% and lightly brushed areas which I thought needed lifting. In particular, I was directing my attention to the jackets and scarf area of my subjects. It's only a small change but it really finished off the illusion that the petrol bomb really was on fire.


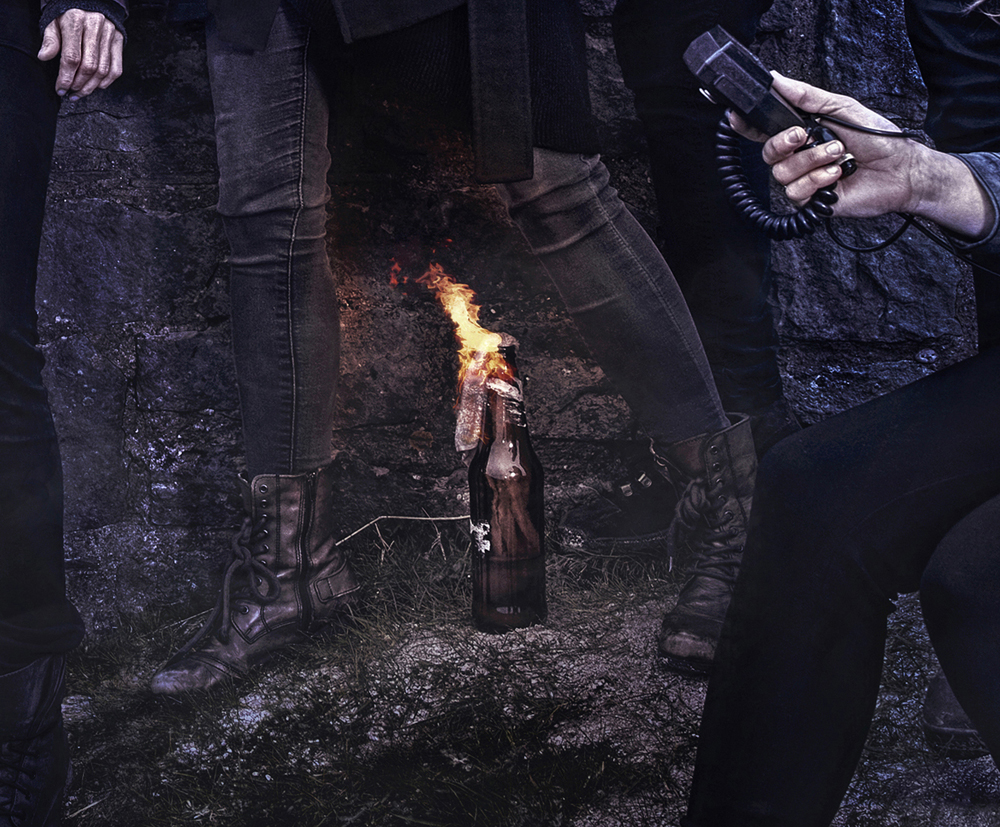
Here is another example using the same techniques just mentioned. For the petrol bomb on the floor, I also added some smoke to add an extra dimension. This was achieved in a similar way to stage three of this guide, but instead of an orange brush I used white and used the blending mode of "Soft Light." I did try this effect on the first bottle which the guys are holding but it looked better without it.

So there you have it. How to quickly add realistic flames to your images in no time at all. The techniques employed should work on any version of Photoshop so don't worry if your particular copy doesn't quite look like the screen shots. Obviously, your own images will react differently to some of the blend modes I used so you might have to play with the opacity, etc., to achieve the look you want.


The last point I wanted to make is that some of the glow effects above could have actually been created in camera if a snooted light was gelled orange and aimed at the unlit bottles. I decided against this as our subjects were moving around a lot and the tight beams of light required would have needed to have been constantly tweaked. Something I didn't need on such a demanding shoot already.
If you have any questions please feel free to ask in the comments and if any of you attempt this tutorial I'd love to see how you get on.


Good tutorial and a nicely done picture for the band!
I have almost the same procedure in my workflow with fire related pictures. Often i work some with the shadows also, depending on how much shadow the fire would cast in the natural light in the picture.
Hey thanks Mikael! yes, a shadow would definitely seal the deal!
Do you use the same blend modes etc?
Yea - most of the time anyway. Screen, soft light, overlay and multiply are my favorites blendingmodes for pictures with fire and shadow, Do you have any good tips for adding sparks to fire?
Good question! I have added sparks before. The trick is to start with a decent stock image on black. There are a few decent brushes out there too. Like I said above though, I prefer the real thing...