
Taking photos at night can be an incredibly creative and rewarding experience. Unfortunately, increasing levels of light pollution in cities and urban areas makes it virtually impossible to include any detail in your sky which is often a major aspect of your composition. Adding stars is an easy and effective answer to this problem. With simple masking and blending techniques you can add interest to your background and give the impression of being in a secluded, faraway place. The most common error is overdoing it by adding too many stars or trying to integrate them into a scene that simply does not look natural. Here are two quick techniques which aim to avoid these pitfalls.
Shooting a Starry Background of Your Own
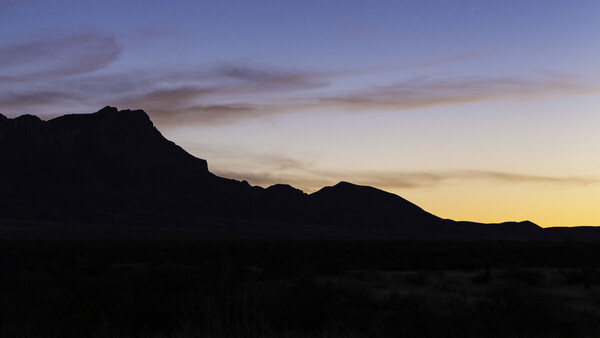
Rarely do we have the opportunity to see a star filled sky, but if you do, make sure to get out and capture them for use later on. I visited Big National Park last week, one of the darkest areas in the continental United States, and the skies did not disappoint. I waited for approximately two hours after dark and went out to take some images. Here are two I came away with:
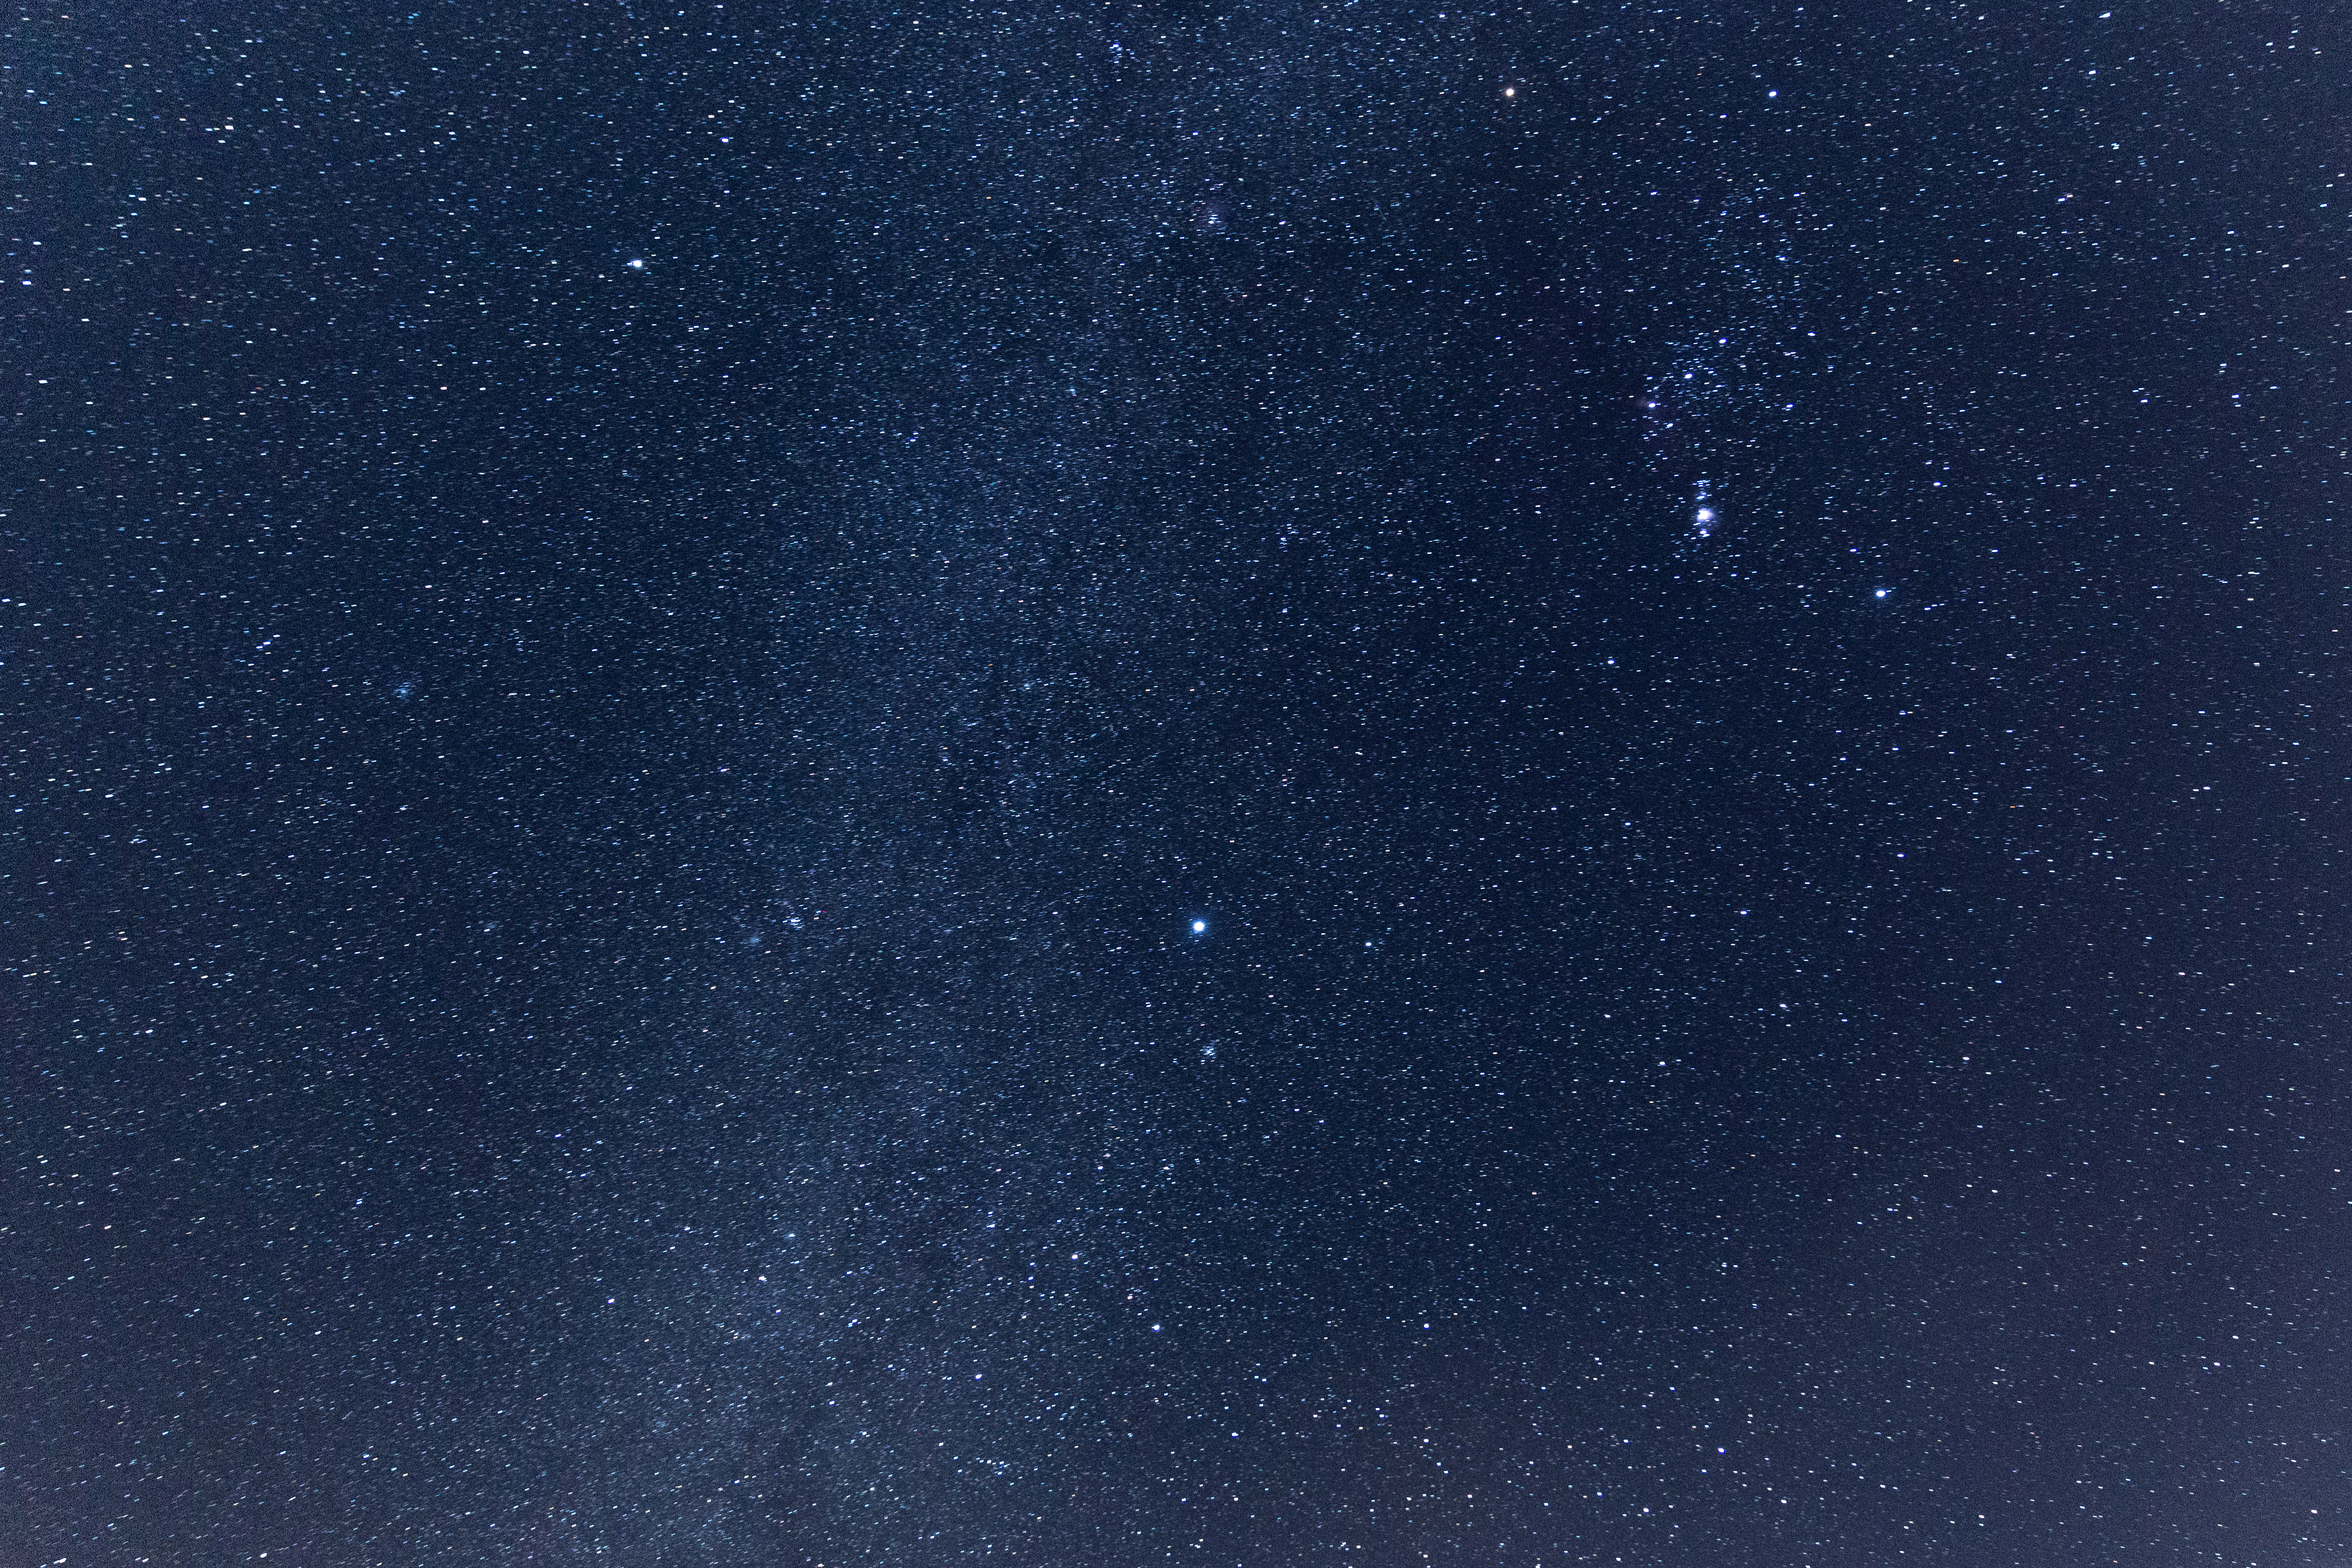
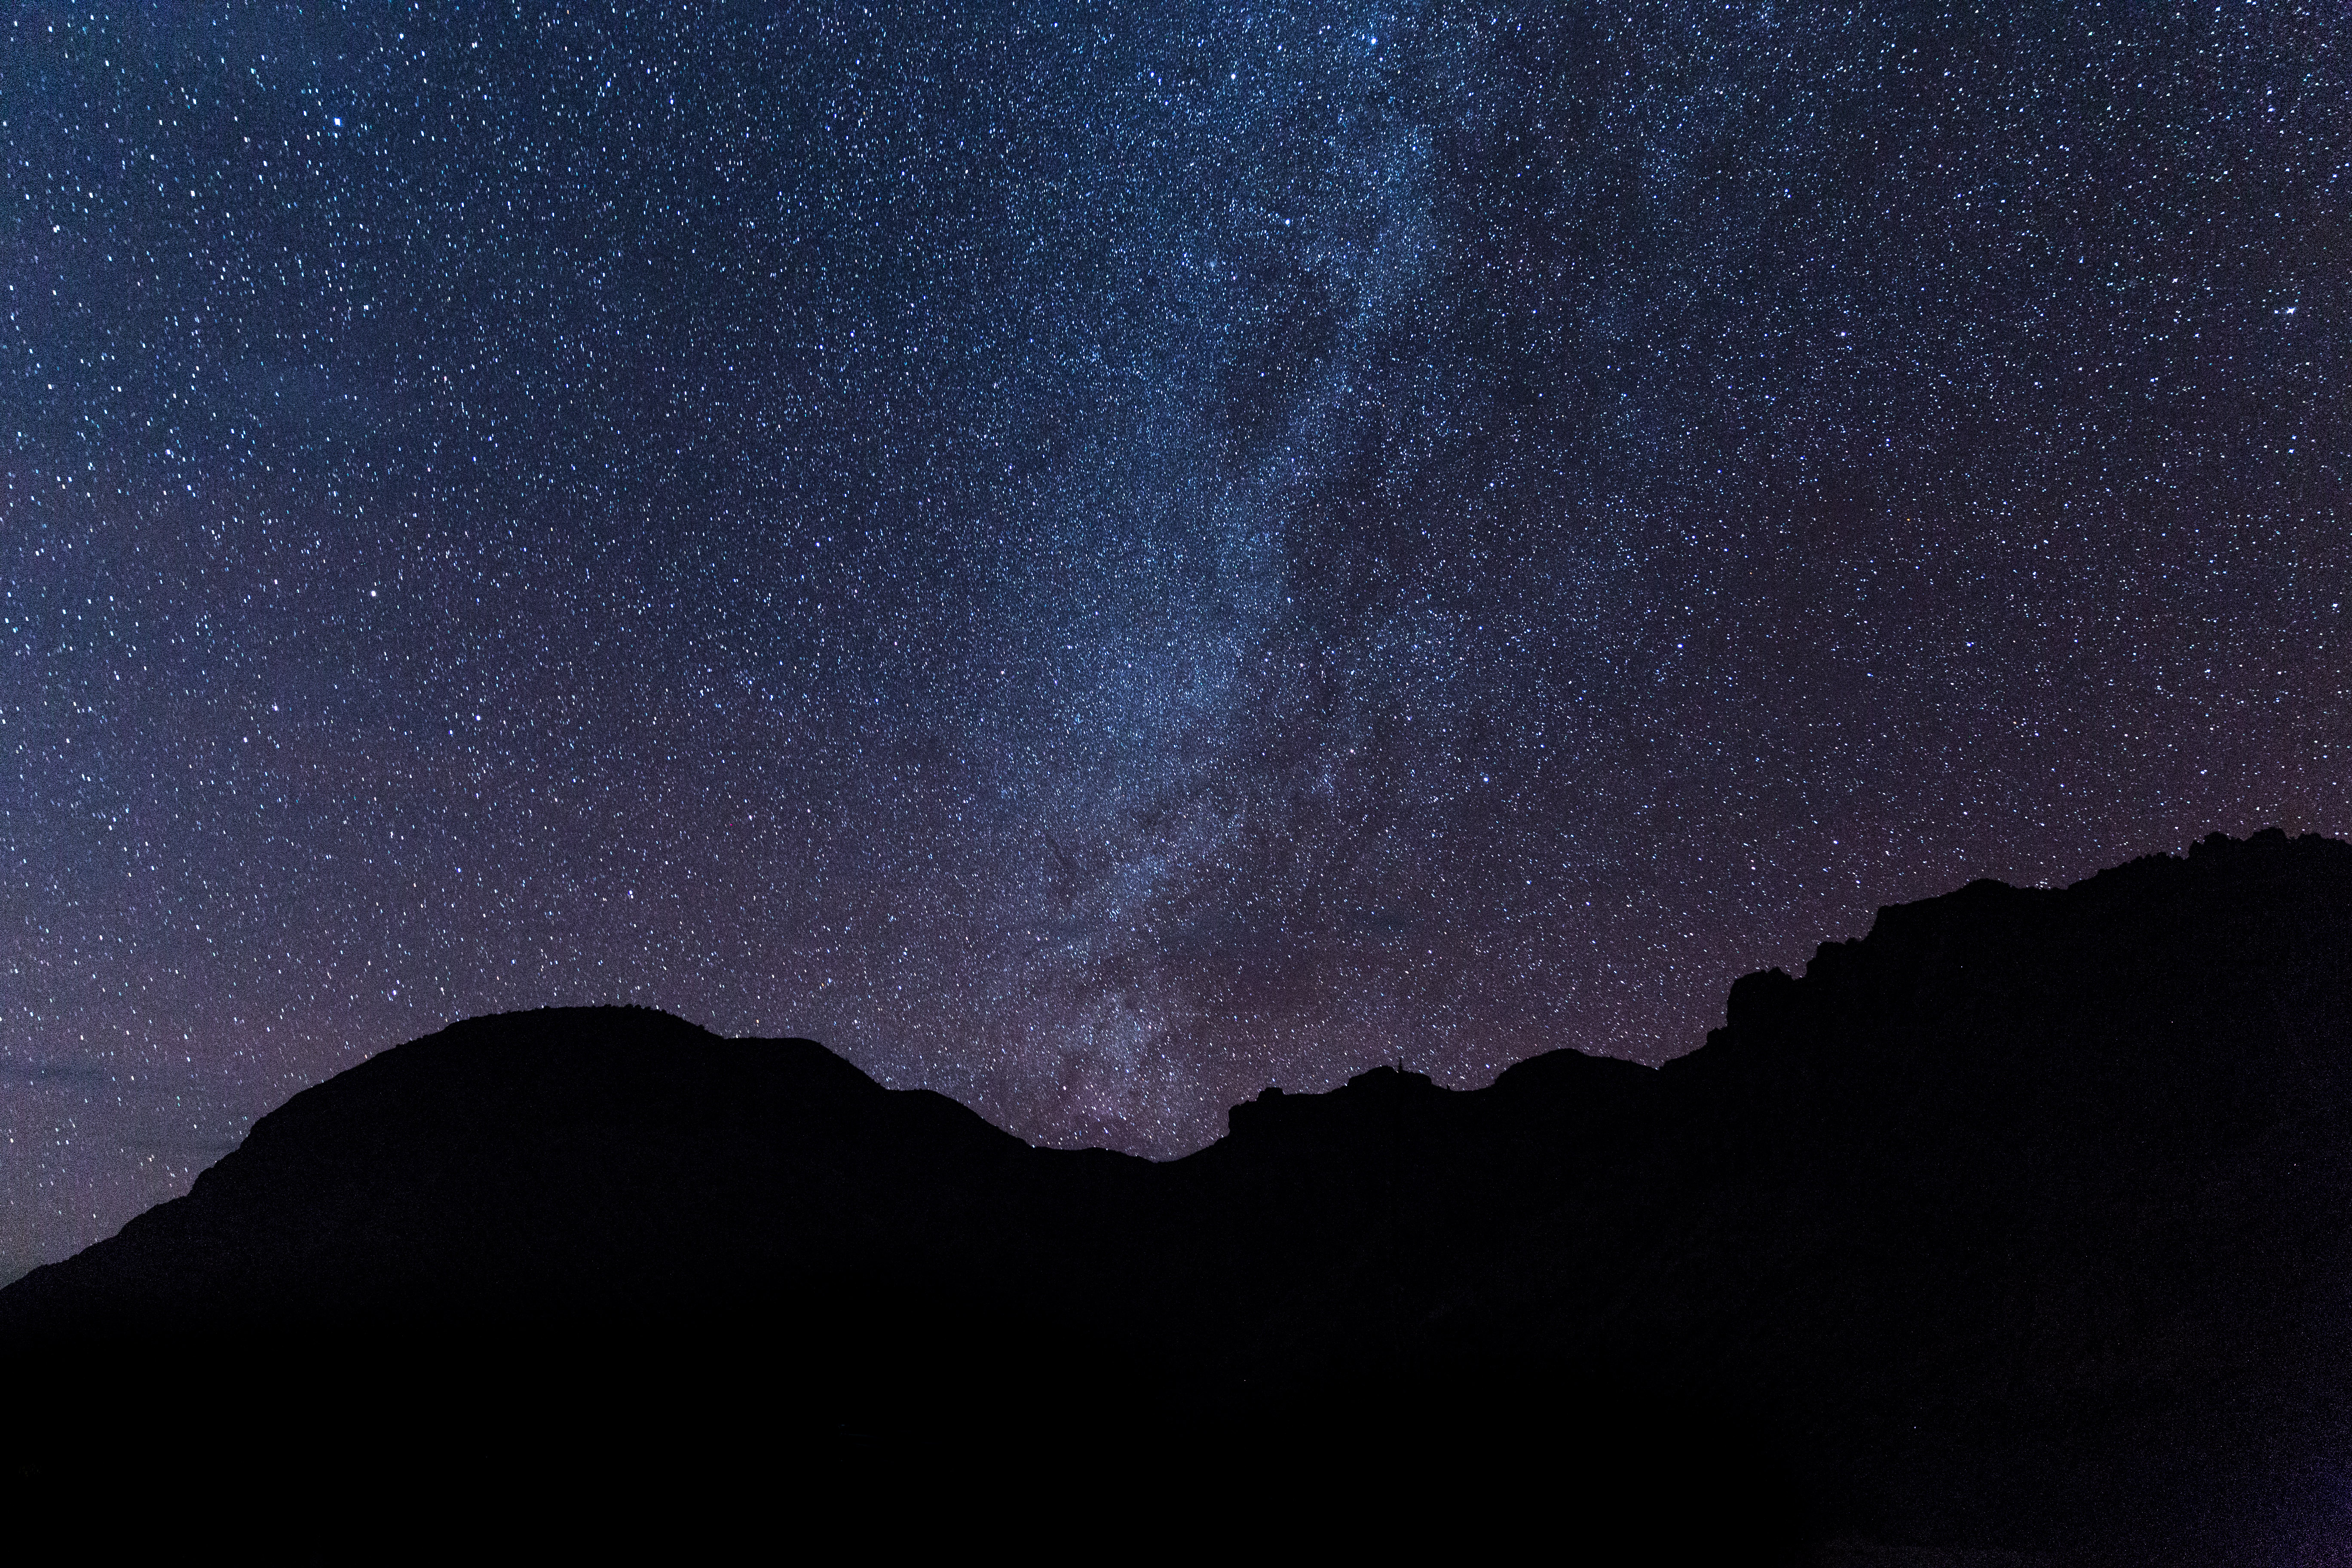
Shooting stars can be tough and it is recommended to have at least an f/2.8 lens, a steady tripod, and a full-frame camera. Focusing is often the hardest part. My suggestion is to use live view, zoom in as far as possible to the brightest star in your scene, and use manual focus until the star is sharp on your screen. My settings for these shots were f/2.8, 25 seconds, and ISO 2,500. In Lightroom I adjusted color temperature to 3100, +.2 exposure, +75 highlights, +50 whites, -15 blacks, and +45 clarity.
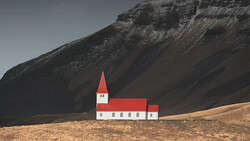
Either of these images is exciting in their own right but what if we wanted to composite them into a separate foreground? To do so, open the foreground image you have chosen with the necessary edits already complete. Open and stack your star layer on top. I chose a photo of an interesting steel bridge that was far too bright to capture along with the stars and therefore required compositing.

Using the pen tool I created a selection around the bridge to remove the extraneous detail that did not add much to the scene in my opinion. This included the flare from the light, a tree, and a telephone pole. I saved this selection in my channels pallet then applied it as a mask to my stars layer. In addition, I added a very dark blue, solid color layer between my foreground layer and the stars to help with blending the stars in the next step. Next I placed the stars layer in a group, applied a mask to the group, and using the gradient tool created a masked gradient that flowed black to white, bottom to top. This creates an illusion of transition through the sky as the stars wouldn’t be 100 percent visible from the bottom of the sky to the top.
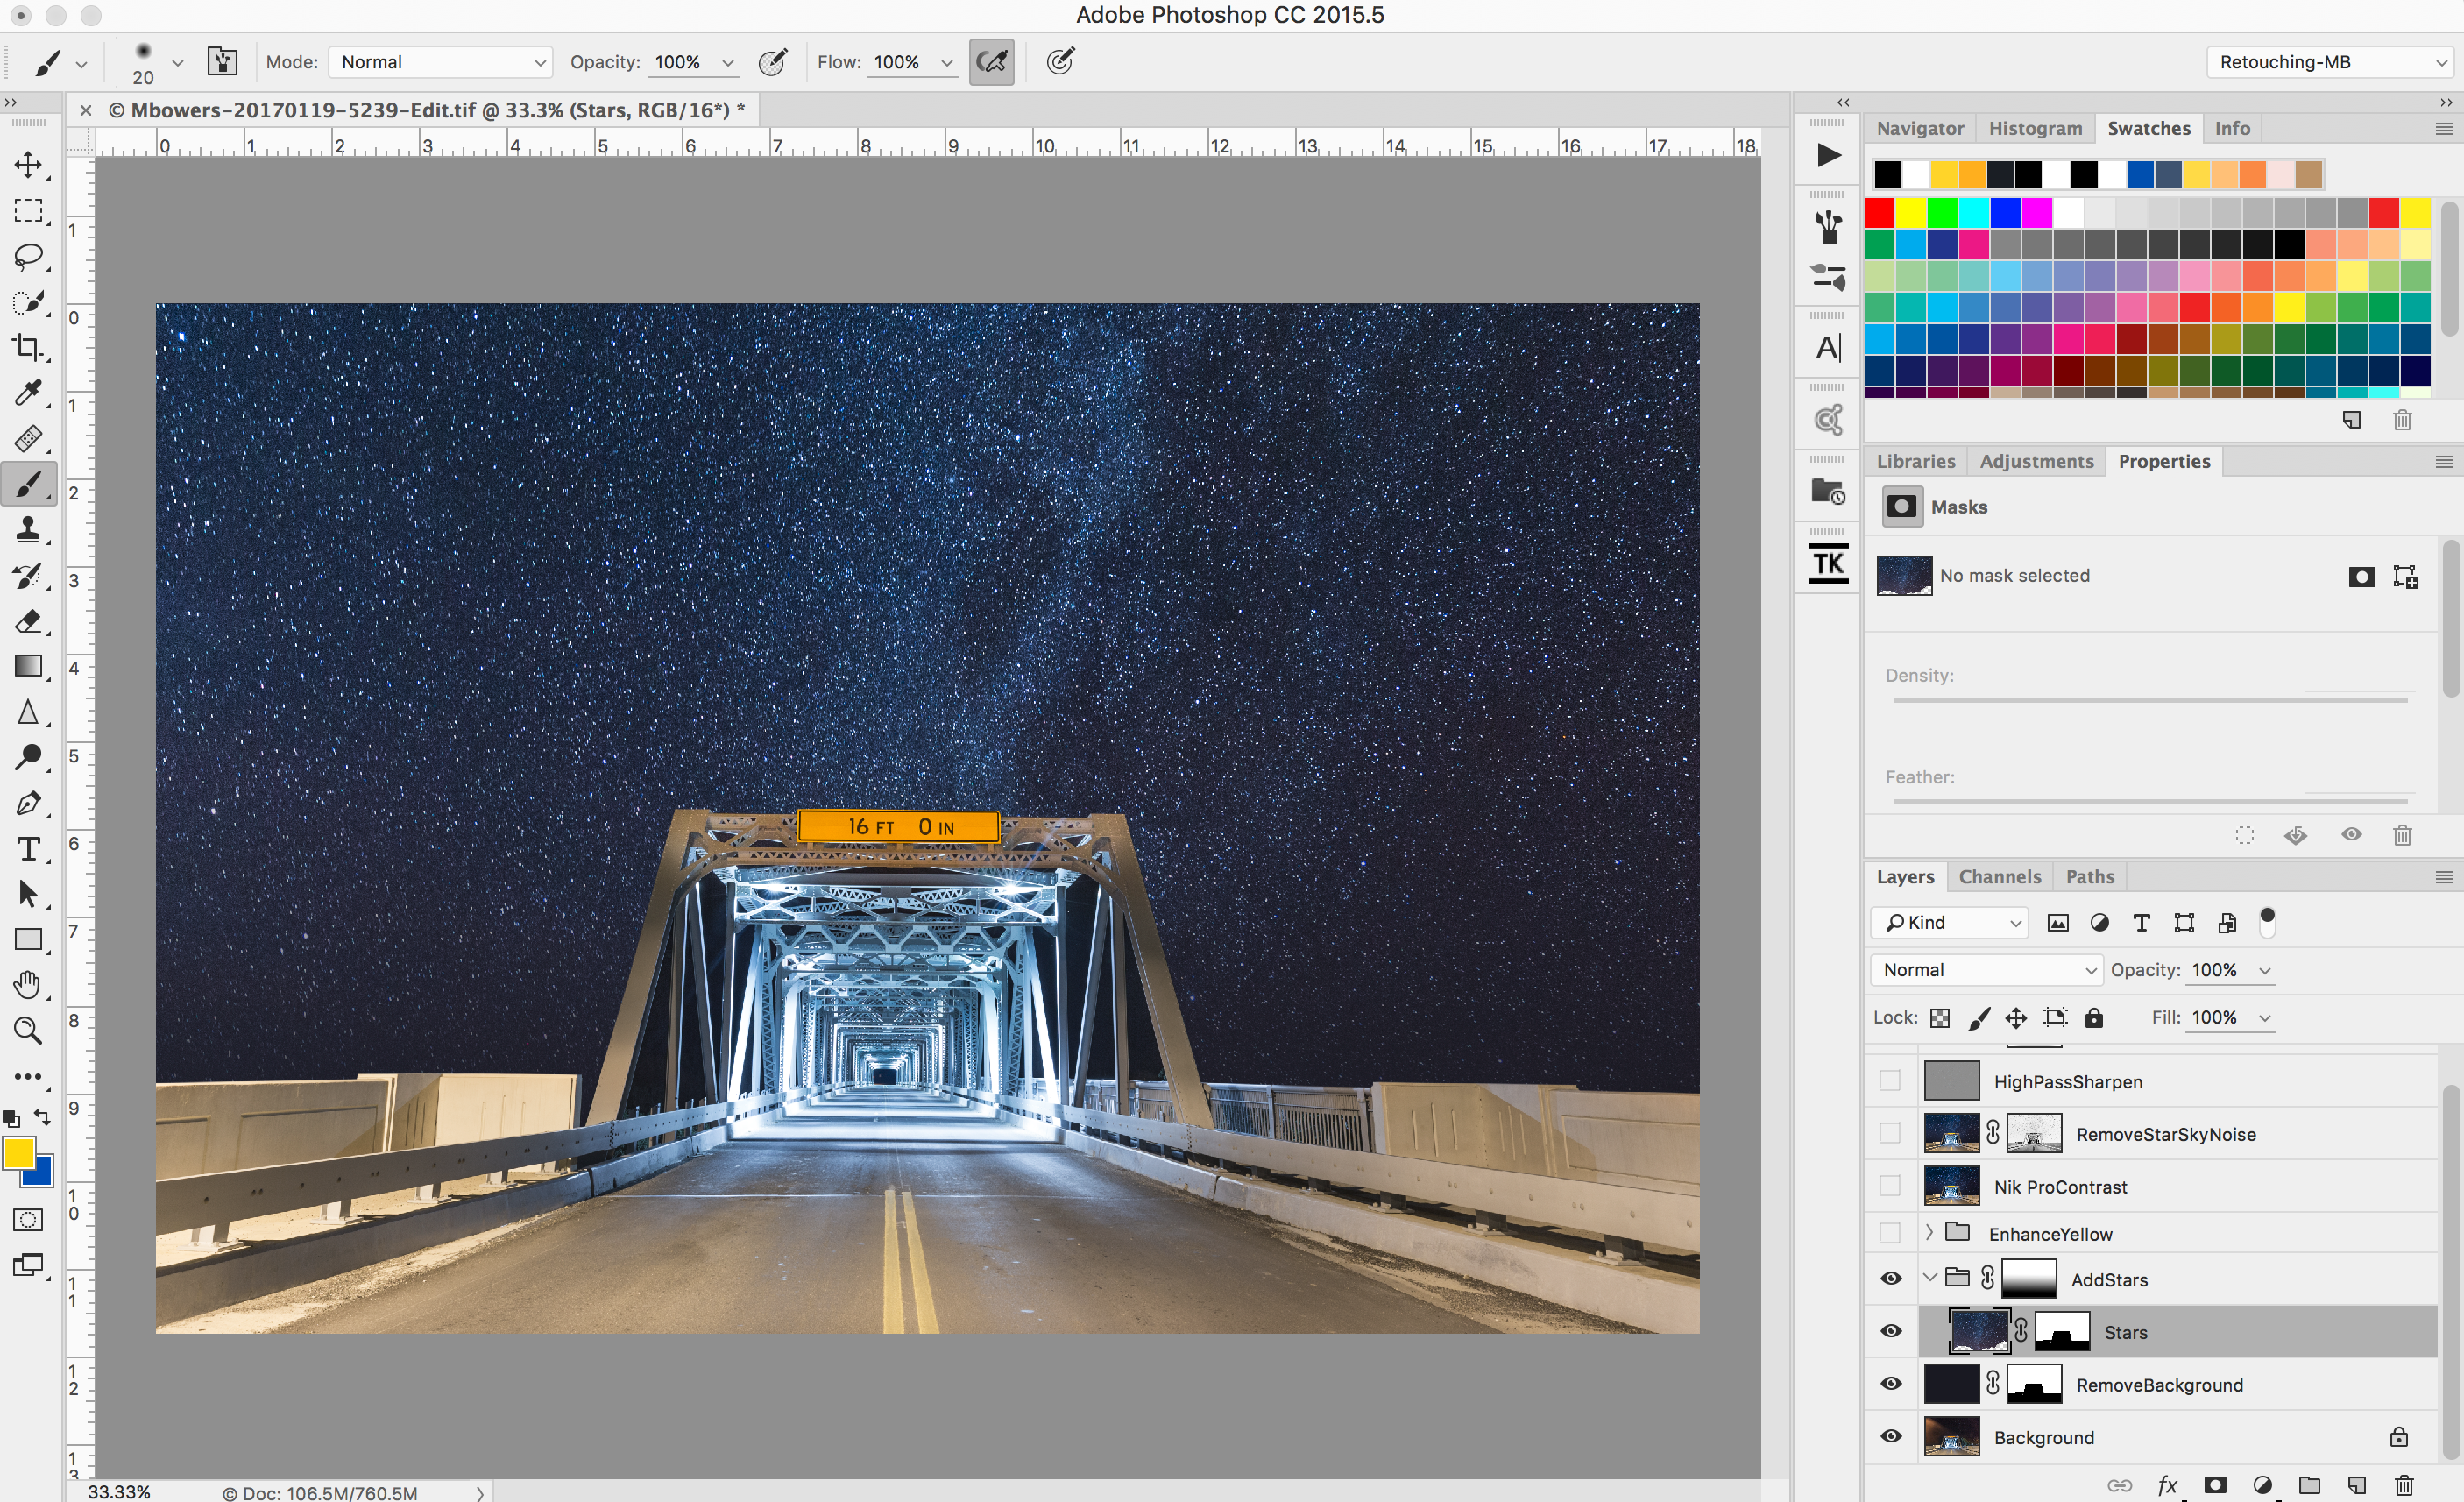
Finally, I made contrast adjustments using Google Nik Pro Contrast, saturated the yellows a bit, added a vignette, and sharpened via a high pass filter. This was the final result:
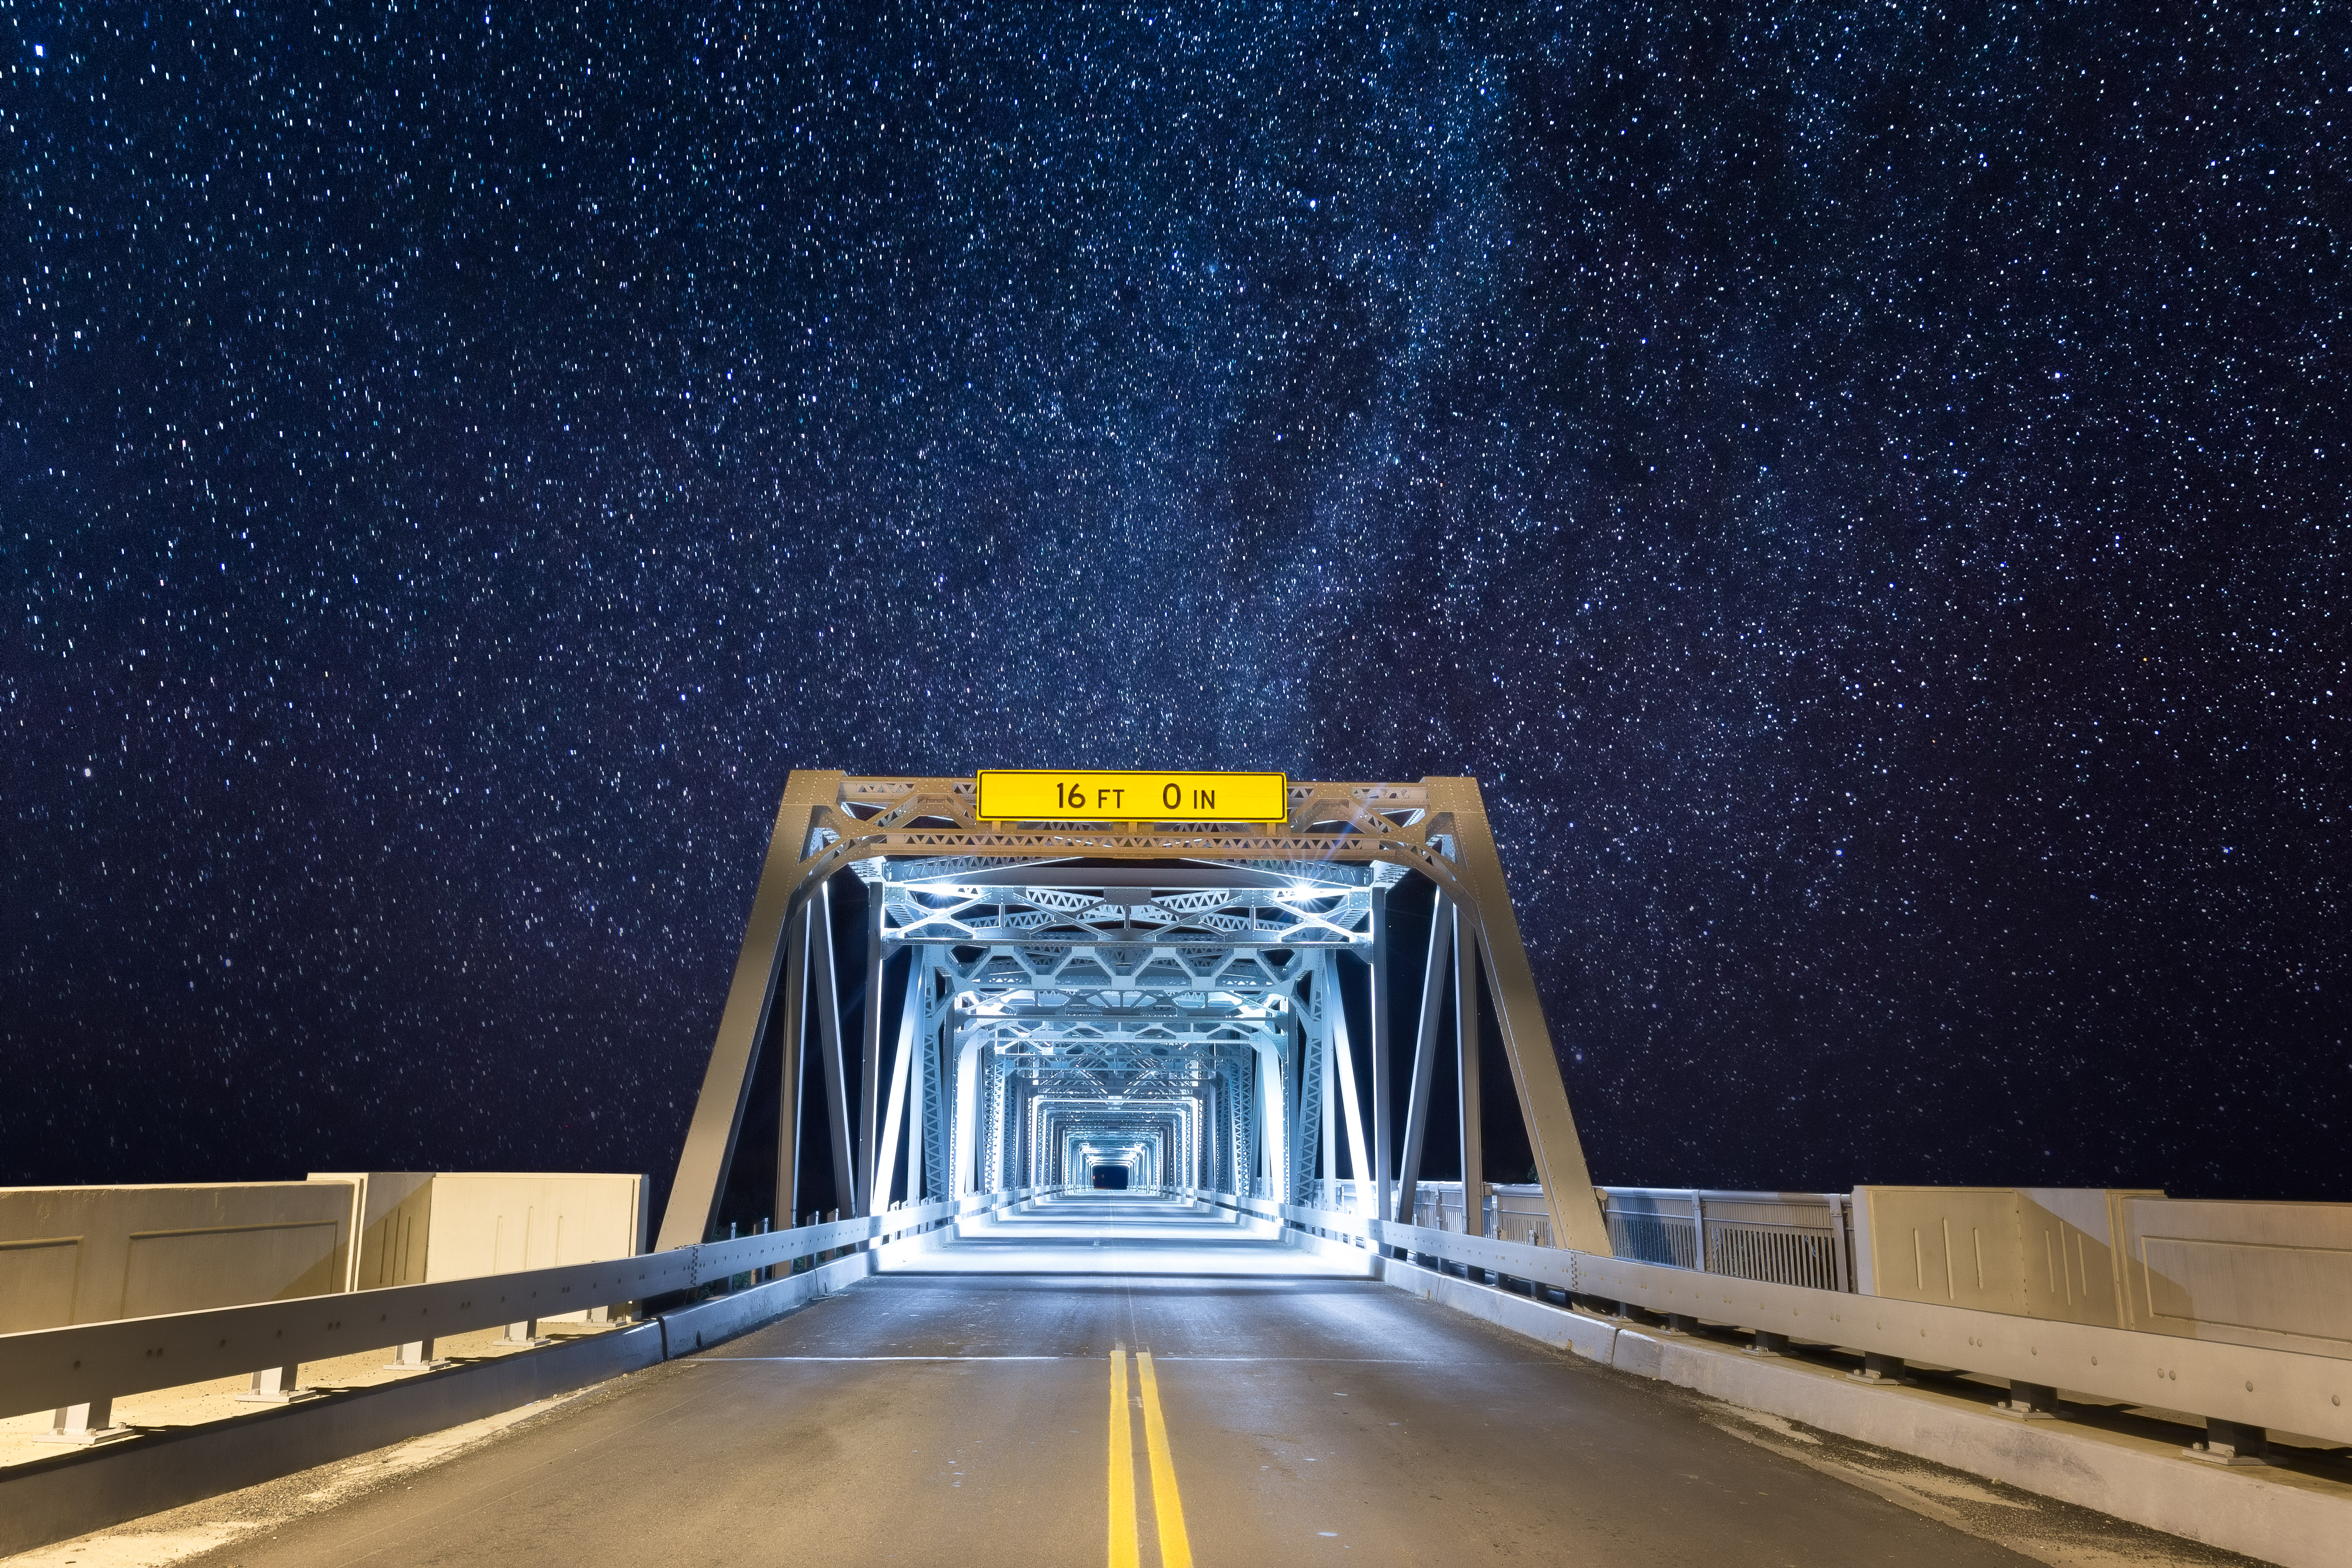
Sometimes it can also be helpful to change the blending mode of the star layer to lighten or screen. This can help create a smoother blend in situations where the stars are simply too bright for the foreground you’ve chosen.
Create Your Own Star Brush
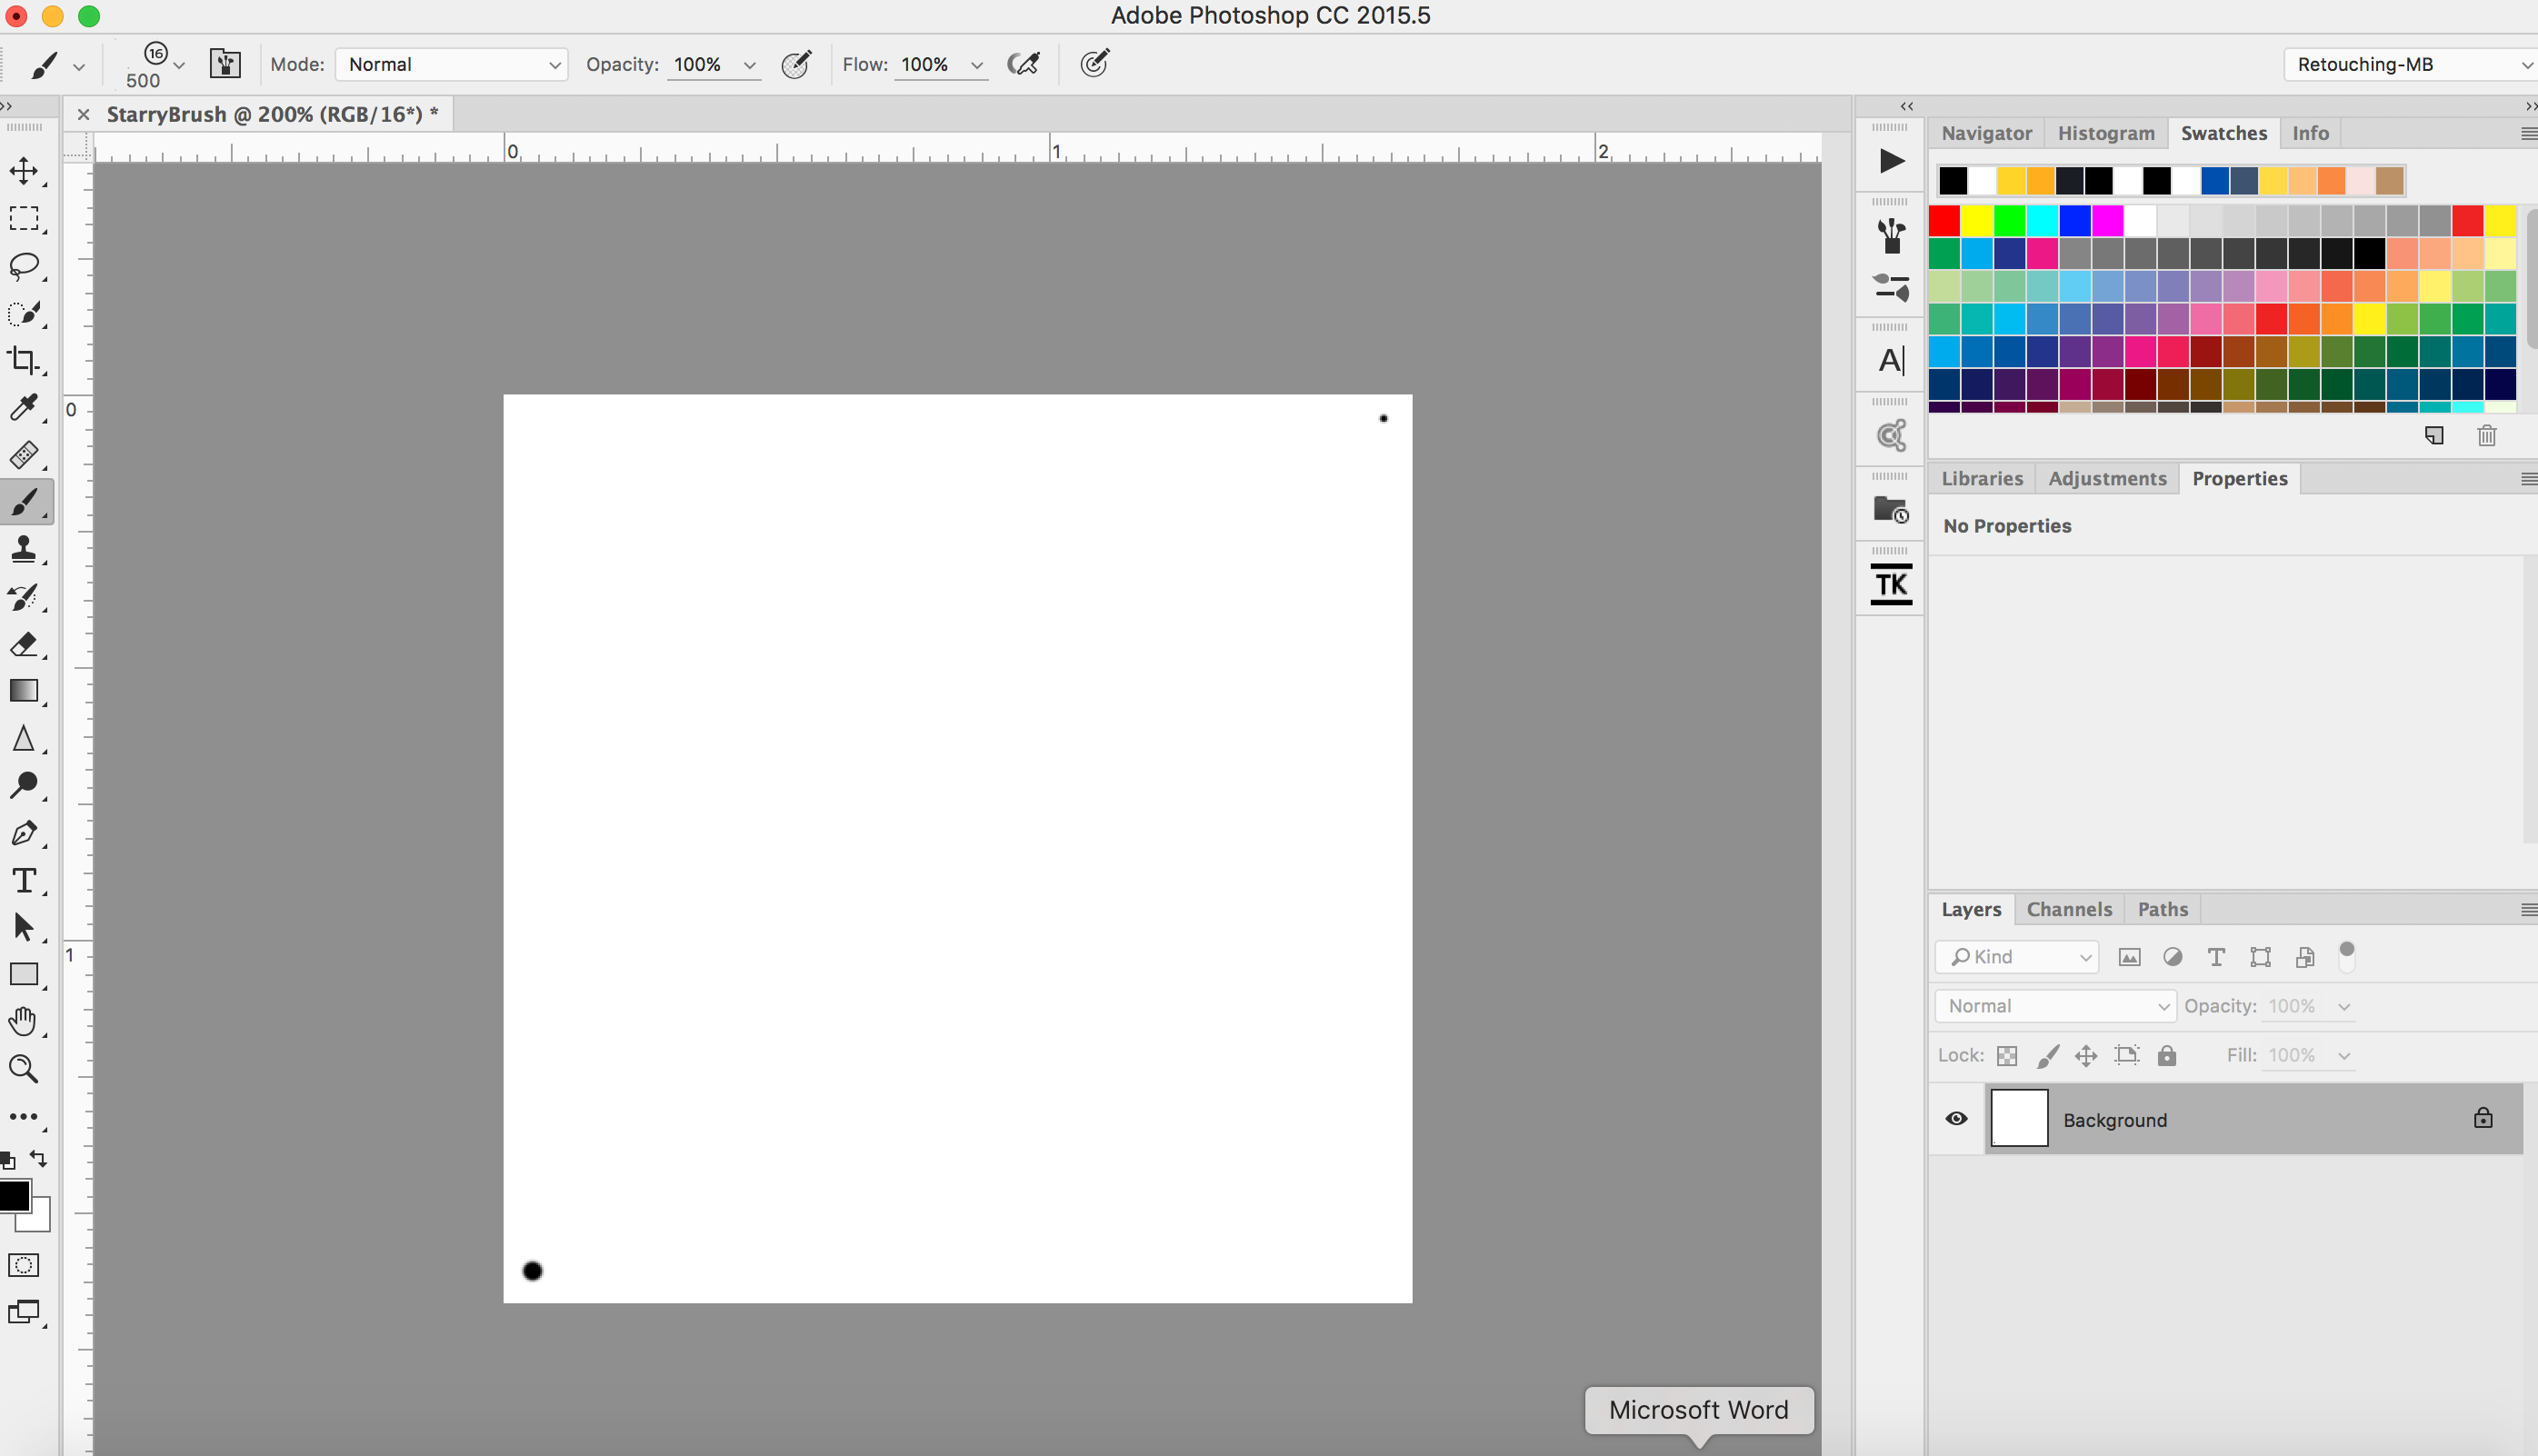
Phlearn has an amazing video on creating a star brush that is worth checking out. The gist is this: Create a new document sized at 500 pixels by 500 pixels. Fill the new document with white and using a small and then smaller sized brush, create two black dots at opposite ends of the document. Then go to edit, define brush preset, and save the layout. I named mine “Starry Brush.”
Open the image you wish to add stars to. With the brush tool selected, choose the brush preset we just created. Now we need to adjust the brush settings. I used the following in my image, but please experiment. Under shape dynamics, I changed size jitter to 100% and angle jitter to 100%. Under scattering, I changed scatter to 600% and checked the “both axes” box. Finally under transfer, I changed opacity jitter to 50% and then saved my updated brush preset.
Add a new layer and using your new brush begin painting in the areas of the sky where you would expect to see stars. Because the preset you created contains various jitter settings, the two dots we started with will be spread evenly as you paint creating an illusion of stars across the sky. This is the creative part as you will need to play around with the brush size and scatter settings to ensure the look is natural. Easy does it here, too many stars may not look real. Here was my final image which is subtle but effective:


Conclusion
If you enjoy nighttime photography, then this technique may be a fun component to incorporate in post for enhancing your images. Besides, who doesn’t love a starry night sky or an epic shot of the galaxy? As always, constructive feedback is appreciated and I’d love to see your images.


Join the Fstoppers community for free
-
Post comments and join in the discussions
-
Browse the site ad-free
-
Share your work and get featured in the community
-
Compete in the photo contests for fun and prizes
7 Comments
Discriminated by location... story of my life
Personally, I have no problem with this, as long as the shots are taken from the same location, shot in the same direction and more or less at the same time. I would not call it photography otherwise, but creating composites.
As for your final before and after, do be carefull not to show stars through clouds. Those would be obscured anyway. :)
Daniel, first off-love your work man. Its incredible.
Second, while I agree with your statement I wonder at what point is it even necessary to disclose whether it is a composite or a photograph? If for your own ethical sanity sure but other than that, not many clients, or fans, are that discerning. Sure, NatGeo, travel or other destination style mags would want to know your images are real and of that place but really who is bothered by this today? I've gone back forth on this topic with my own beliefs and ultimately feel that its an art, its creative and its digital which lends itself to so many possibilities that were not feasible before.
And shame on me for the sloppy stars in the clouds. You are right, they would obviously not be showing there. Many thanks for commenting, I appreciate the discussion!
Thanks a lot, Mark. Appreciate the kind words. :)
It's the discussion that never finds definitive answers. I'm sure that the only ones who really care about any disclosure at all, are either your peers or photographer clients. Non-photographers wouldn't really care. On that point and the fact that it's all art, I agree.
Most of my clients however are themselves photographers: People who want to learn to be a better photographer; not nescessarily be a better artist. I always get that while hosting workshops in the field as well as at the computer. Photographers don't really care about layers, multiple exposures or the limiting factors of the human eye. A pretty picture that's "relatively" easy to create is their primary goal.
Personally, I'm torn between creating art I truly care about and catering for my clients, time and again. The moment those two line up, I think, is the day you forget that this is your job.
A photograph documents a "scene" - all elements, even if composited for exposure purposes, were present together at the same time. Once you composite a sky from one location into another location it is no longer a photograph and becomes photo art or photo art composition or however once wants to label it, but in the end it should be identified as such and not as a true photograph.
People expect a photograph to represent a scene as experienced (yes, with artistic interpretation, but still the scene as witnessed) and expect art to take liberties with reality.
Cool results, although I don't know how I feel about composite images. Where do the rules of photojournalism start and end?
Hey James, thanks for the kind words. I felt "odd" about composites for sometime too and still do on occasion. I rarely try and create an overly "fake" scene nor am I very good at it lol. At the end of the day there are no rules unless you are doing something specific for a client like NatGeo. They would never allow a composite. Otherwise, the digital world is your creative oyster and if you can make a bada** photo by adding in some stars then I would say go for it!