
When learning about retouching, selections and masks should be on top of the list along with curves and brushes. But each of these tools have so many options, and it is hard to know the in and out of each of them. In this article, I will guide you through different ways to create precise and refined luminosity masks to help you improve your retouching skills.
In one of my previous articles, I showed you a quick and easy technique for color grading your images in a meaningful way. One of the tricks we used was luminosity masking to assign different colors to the highlights, midtones, and shadows. This is one example where luminosity mask can be useful, but it does not stop there. Being able to adjust each zone of our histogram independently is great for many things: local color correction, local sharpness, dodging and burning, manual contrast, images blending, and so on.
Creating Luminosity Masks With the Color Range Tool
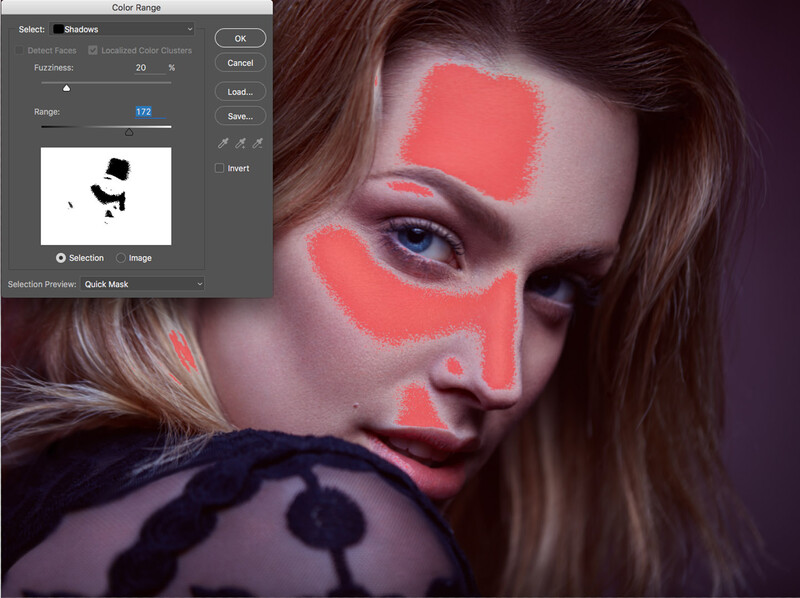
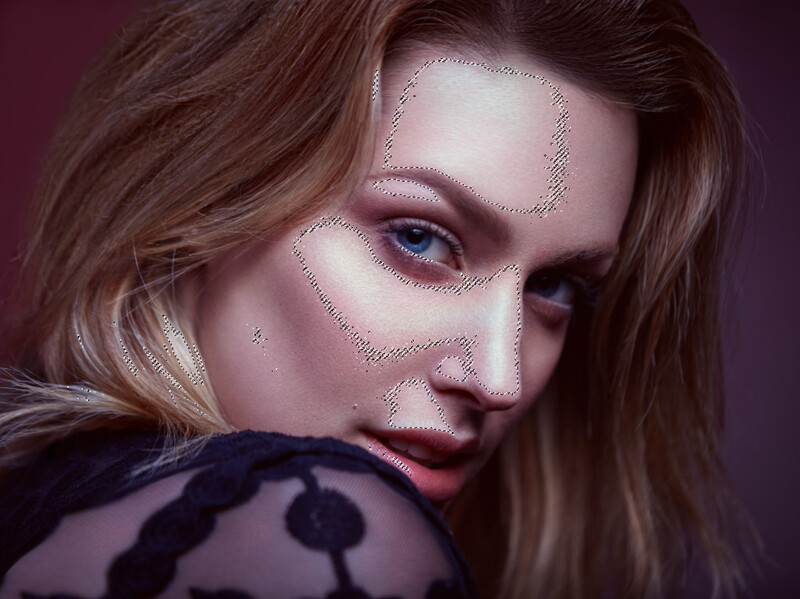
The color range tool is probably the easiest way of creating a luminosity mask. In Photoshop, go to Select > Color Range tool. In the Select drop-down menu, change sampled colors to either highlights, midtones, or shadows depending on the luminosity range you wish to select.
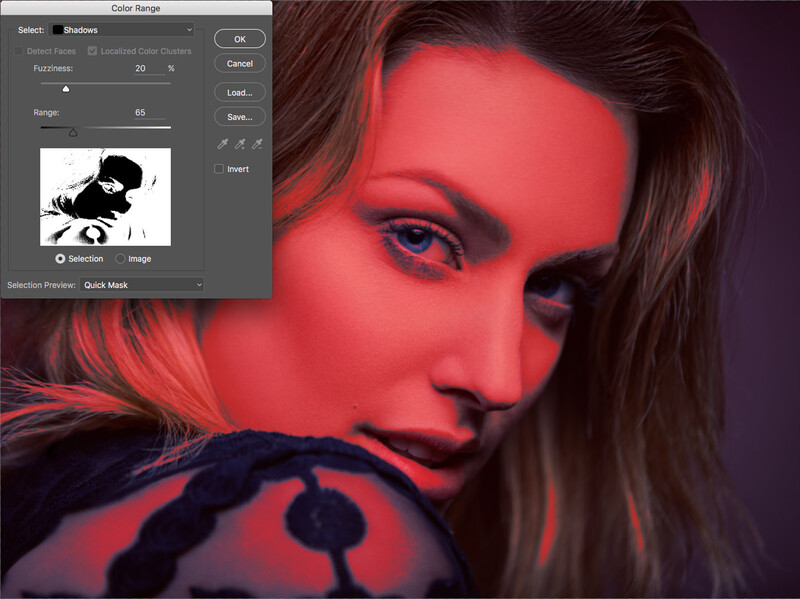
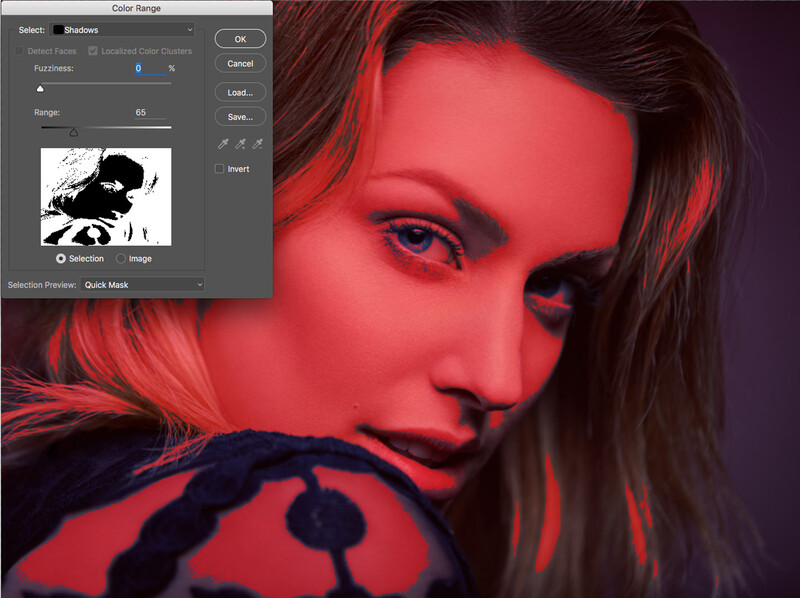
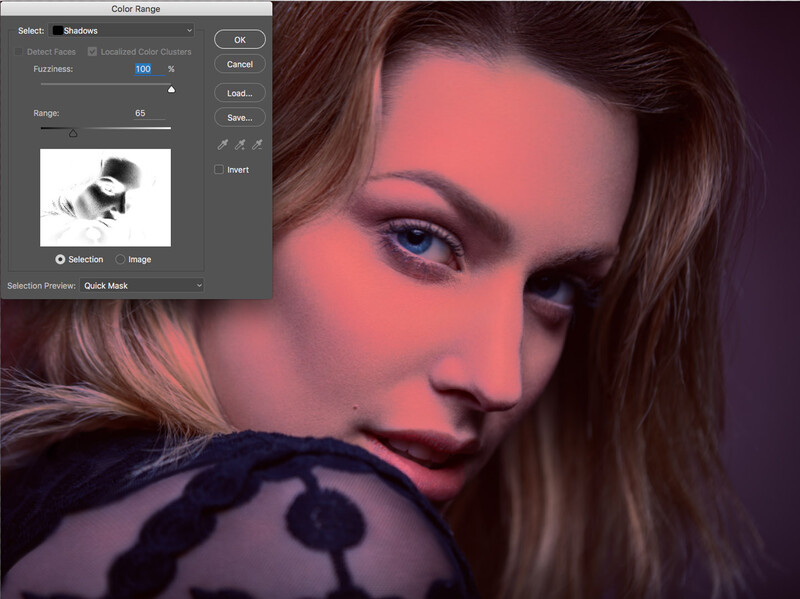
If you wish to further refine the mask, you can play around with the fuzziness and range slider. The first will help you define the softness or sharpness of the mask’s edge. This is especially useful if you want to avoid any harsh transitions between the selection and the rest of the image.
The range slider will help you select more or less of the luminosity range. As you can see below, I have pushed the slider a bit and thus have been able to get midtones in my selection.
Refining Selections With the Quick Mask Mode
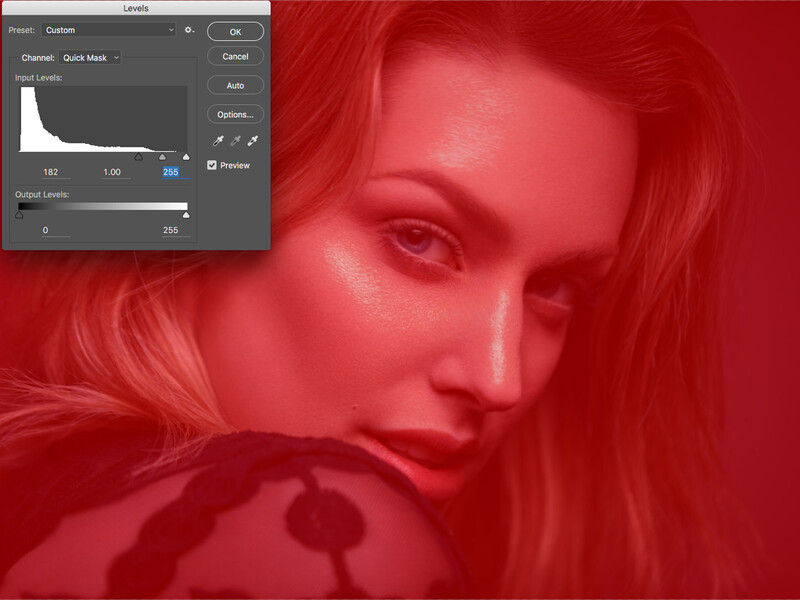
Once the selection is activated, we have a couple of different ways to adjust our mask. One of them is quick mask mode. To access it, press Q on your keyboard. Your masked areas should now be displayed in red.
Quick mask mode will allow you to alter your selection as if you were working on a mask layer. This means you can paint with a brush, or use the image adjustment (Image > Adjustments) tools such as curves and levels, to further enhance your selection.
For example, if we want to brighten highlights and not all of the luminous values, we can press cmd/ctrl+L to open our image level adjustment tool. Then we can boost the shadows and midtones up until we have only the brightest part of the picture showing through our quick mask selection. Press OK to confirm the adjustment, and then Q again to exit the quick mask mode.
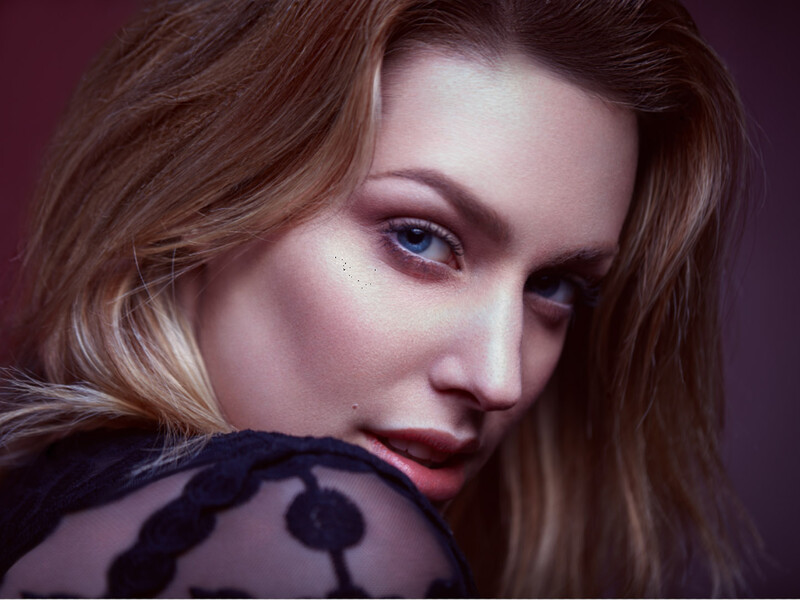
We now have a selection containing only our highlights.
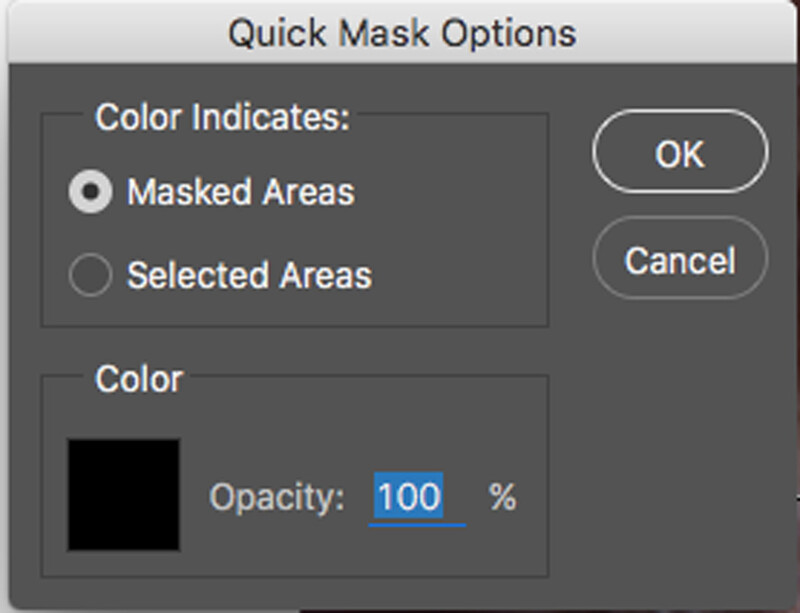
Note that the red of the quick mask mode is not the best way of showing what is selected or not in our case. By double clicking on its icon in the Tools menu, you will be able to set its color and opacity. If you want it to look just like a mask, set it to 100% opacity and black. However, be aware that if you use the brush tool to refine your mask, by setting the opacity to 100%, you will not be able to see what is outside the selection.

Using the Channels to Create Luminosity Masks
Channels to me are just like the pen tool: remarkable but something that most people just give up on because it looks too complicated to use. So let’s try to make them easy and see how we can use them to our advantage.
First, let’s open the channels panel if it is not already (Window > Channels).

By default you should have four channels: RGB, Red, Green, and Blue. However, be careful if you are using a file that is in either CMYK or Lab, your channels will be different:
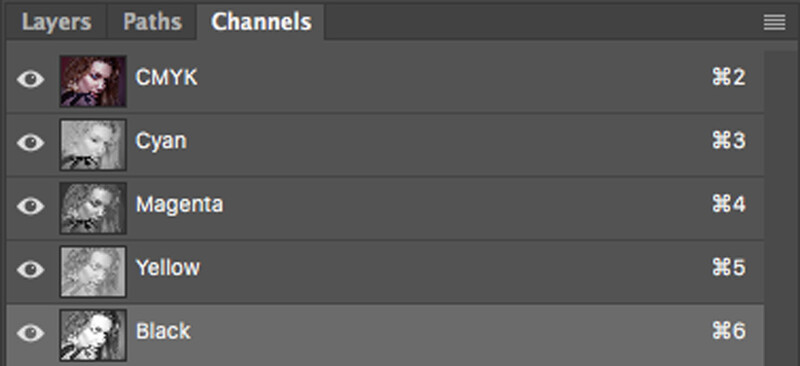
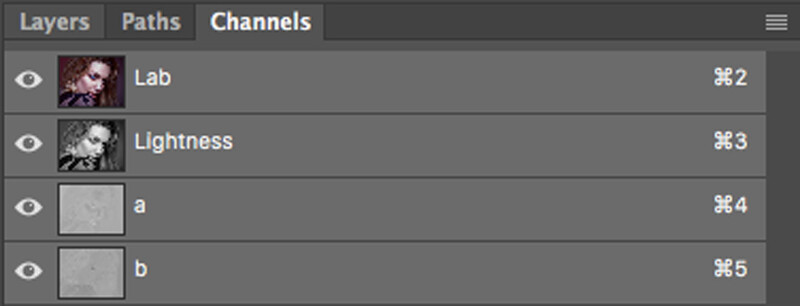
For this article, it will not make a difference what gamut or color profile you use, but be aware there might be differences if you start using the color channels.
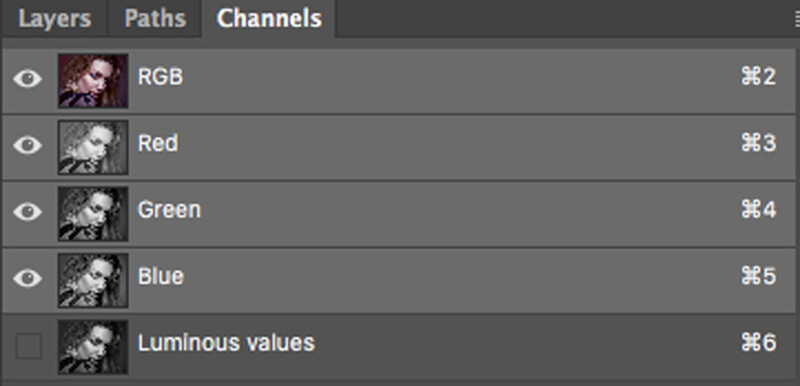
Let’s make a first selection by either cmd/ctrl+click on the RGB channel or by pressing cmd/ctrl+alt+2. It will create a selection containing our luminous areas.
With the selection loaded we can do a couple of things. The first we can do is save our selection by clicking the "Save selection as channel" button at the bottom of the panel. It will create a new channel called Alpha 1 which is basically our RGB channel in black and white.
We could also use the quick mask as we have already seen before, or we could use the channels to remove or add luminosity zones to our selection.
If we want to add more of the midtones and shadows to our current selection, we must cmd/ctrl+shift+click on the RGB channel. This will create a larger selection, which again, we can save if we desire to.

We can do the opposite by pressing cmd/ctrl+alt+shift while clicking on the RGB channel. This will restrain the selection to even brighter areas.
Another possibility is inverting the mask to select the shadows of our image. To invert a selection, press cmd/ctrl+shift+i. Inverting a selection can also prove to be useful to create a mask containing only the midtones.
Midtones are everything but highlights and shadows. So if you create one channel containing highlights, another containing shadows, then select both (cmd/ctrl+click on one, cmd/ctrl+shift+click on the other) and you end up with a selection of everything but midtones. Invert that selection and you have only midtones selected.
The power of the channels is that you can add and subtract saved selections quite quickly. You can also use it in conjunction with the color range selection tool as you can save any selection as a channel, not just the one you create from a channel.
Channels, however, have two issues. First, if you create a lot of different channels (which landscape and product photographers will be probably be tempted to), your files will blow up in size. The second problem is that some raw processors, such as Capture One, cannot read TIFF files that have more than the default channels.
So if space on your hard drive is an issue, or if you must re-import your files in your raw processor for archiving reasons, be careful and keep on reading. The next solution to create luminosity masks will probably fit your needs best.
Creating Luminosity Masks With Image Calculations
This is probably not something everyone uses every day. Yes, your Photoshop version also has the Image Calculations tool, it is not a plugin I installed. Look for yourself in the menu Image and you'll find Calculations.
Unlike channels, it will not blow up your files. The technique will also be much more visual and less keyboard-shortcut intense than channel selections.
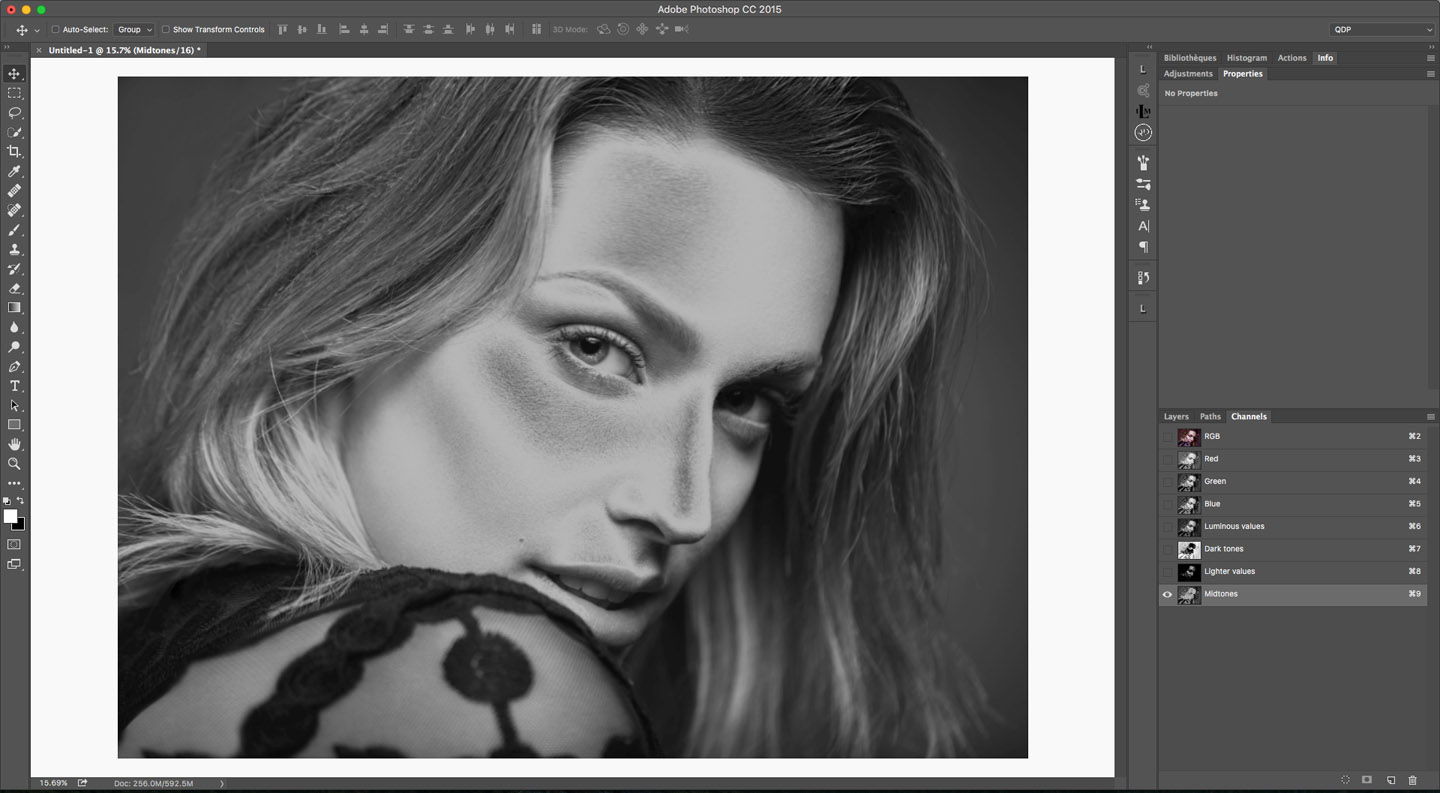
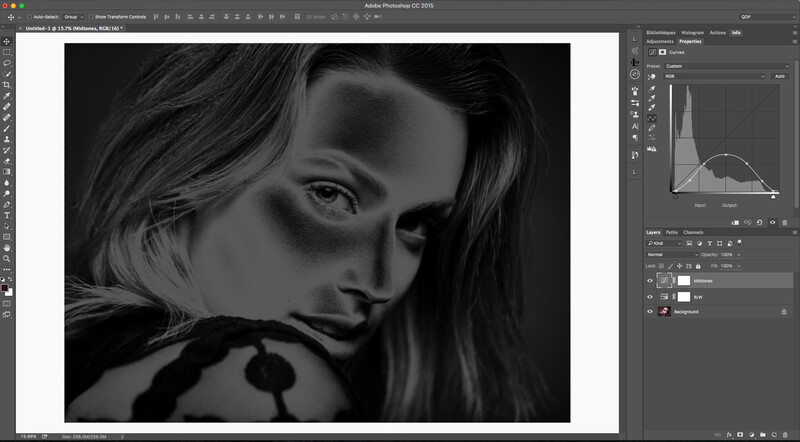
Luminosity is best seen in black and white, so let’s start by turning our image in black and white but in a non-destructive way.
Create a hue/saturation adjustment layer, turn the saturation down all the way, and change its blending mode to color. The blending mode change just helps to keep the luminosity values correct, so make sure you change it.

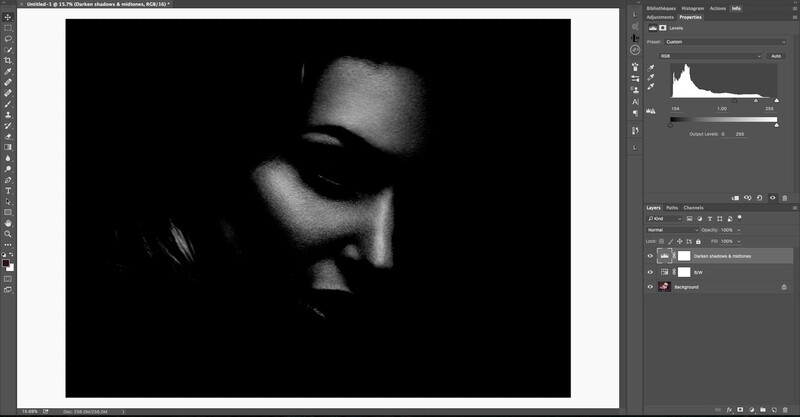
Think of this black and white conversion as a mask. If you’d like less of the shadows and mid-tones visible, you’d want to darken them. To achieve this, you can simply add a level adjustment layer and darken the shadows and midtones until it looks like the mask you wish to create.
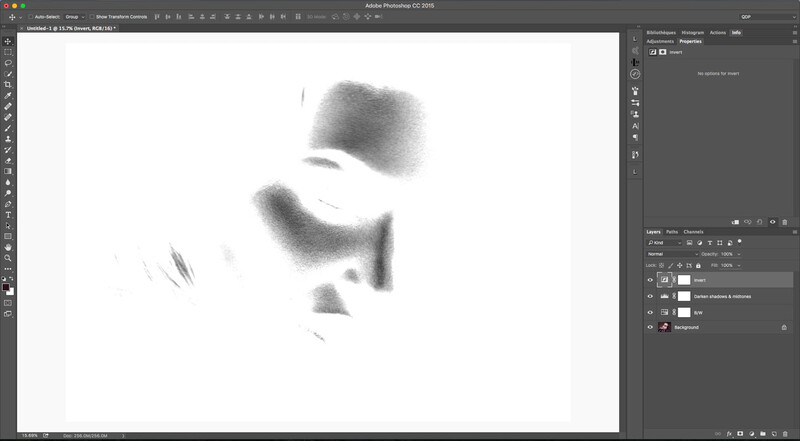
Or perhaps you actually want to select everything but your highlights and whites. Then create an invert adjustment layer on top.
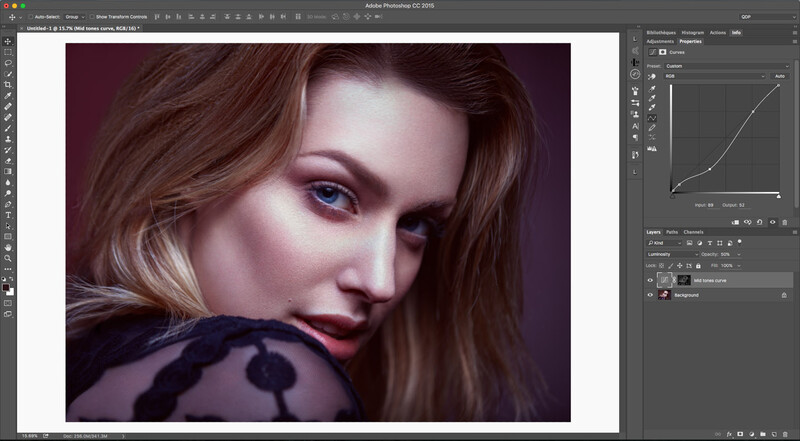
Then if you decide to remove the shadows from your selection and keep only the midtones, delete the invert and level adjustment layers, and create a curve instead.
Adjustment layers will let you create any kind of selection you may wish to obtain. It is really easy. You can even do everything with curves, it just takes a bit of time to master, but it is well worth it.
Now that our "mask" is perfect, we can make it come to life.
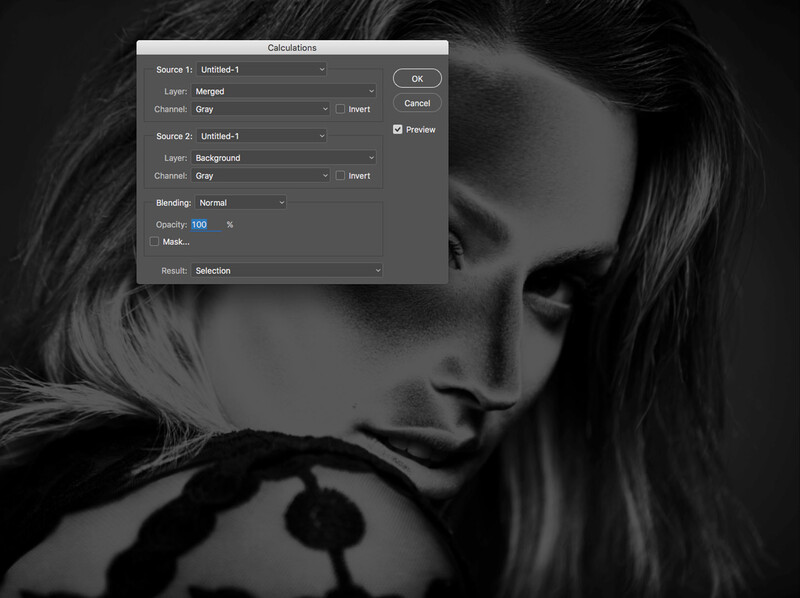
Go to the Image menu and open Calculations. In source 1 and source 2, you should have your active file. The layer for source 1 should be "Merged," and the layer for source 2 should be the background. Both sources should have their channel set to gray. Finally, make sure normal is selected for the blending mode, 100% is set for opacity, and that your result is sent to a selection.
With your selection loaded, you can now create the adjustments layers of your choice. You can also save your selection to a channel or using the Select > Save Selection menu for future uses.
Of course, you can always refine the selection further once it is active or placed as a mask on a layer. If the edges are too harsh, as you do not have the fuzziness slider, you can always play with the gaussian blur or surface blur to soften the transitions. You can also brush some areas to remove the mask from certain places (all highlights but the hair for example).
Actions, Scripts, and Panels
If you are lazy, also know that there are some panels and actions sets out there that will make the job for you. It is still a great idea to understand the principles behind it, but the panels and actions can simplify your job as well as make the process quite a bit faster.
I personally use and recommend anyone to try Sven Stork Luminosity Masks panel (free but seems to create some rough transitions sometimes) and Lumenzia ($40, but for me it is worth it if you are serious about your retouching). There are other options out there, feel free to try them. The reasons I stick to those two is that Sven Stork’s option is free and very simple to use, so it is an excellent choice for beginners; Lumenzia is not too expensive, works beautifully, and doesn’t create channels like many other panels or actions.
Luminosity masks are truly a wonderful tool, and not just for landscape photography. It might take a bit of time to understand when and where they are useful, but once you do, you will wonder how you have ever been able to work without them. So be sure to give it a try if you have not already and I'll get you more articles with practical examples very soon.
Join the Fstoppers community for free
-
Post comments and join in the discussions
-
Browse the site ad-free
-
Share your work and get featured in the community
-
Compete in the photo contests for fun and prizes
19 Comments
Really great article Quentin! I've never really taken the time to learn these techniques as they have always seemed just too time consuming, but perhaps this will inspire me to give them another go. Thank you!
I first was introduced to luminosity masks by a landscape photographer but never really found any interest for my work (portraits & weddings). But then, in 2014, I attended a workshop given by Rocco Ancora & Ryan Schembri and it clicked. During Rocco's segment on post-production, he explained how he retouches his images with the digital zone system in mind. I found it really clever.
In my opinion, it is worth trying to understand the concept. Then, if you don't totally get how the technique works, try the panels I mentioned at the end of my article. They will make the process much easier ;)
I'm with Jonathan, knew about this technique but just never gave it enough time to get use to. Fantastic article Quentin! Giving these techniques a try!
Just buy a copy of TK Actions Panels, and get Luminosity Masks done properly with a single click.
would be great if you can make video on this topic.
Thank you.
Hi Quentin, I think you linked to the wrong page. My panel is located here:
http://svenstork.com/essays/interactive-luminosity-masks/
Hey Sven, you're right, I linked to the action. Just changed it. By the way, great job on the panel! I :)
Hi! Do a video on this!.. :)
I bought Lumenzia a few months ago, and it was the best $40 I've ever spent on my post processing. It does all of this in literally a second.
Quentin, this is a really great article. Thanks for sharing your knowledge. Your other articles have been great too.
Question for you: in your section on Image Calculations, it seems I get the same results if create my adjustment layer "masks" as you say, but then instead of using Image Calculations, I go to the Channels palette and cmd/ctrl+click on the RGB channel. Is that right? If so, it seems like an quicker/easier step to take than the confusing Image Calculations dialog.
Cheers.
It will work as well, but not sure if you are doing so that the calculations of the selection is made on an 8-bit or 16-bit base. The calculations module will create the a selection based on 16-bit calculations (if your image is in 16-bit) but create a selection that is 8-bit (selection cannot be 16-bit as far as I know). So calculation should render smoother results.
Another way, even better way probably, and I'll talk about it in another article, is to create a copy of all the layers merged (cmd/ctrl+a and then cmd/ctrl+shift+c) and paste it directly in the mask of a layer (alt+click on the mask of the layer, cmd/ctrl+v to paste the mask). By doing so, you end up with a mask that is purely 16-bit. Selections are limited to an 8-bit depth even if your image is 16-bit, but masks are the same depth as your image. The difference will only be very minimally visible if visible at all ;)
Hope that makes sens ;)
Makes sense. Thanks.
Thank you.
Awesome advice Quentin. You seem to pick the very topics that I am always in need of understanding. Your articles really help achieve the "next level". I just wish you'd make videos as well... please??. I appreciate the hard work you put in to give us these awesome articles.
Hey Ray! Thanks for your comment, I really appreciate your kind words, because articles take time to write :) There have been a few comments asking for videos and people also sent me mp asking for it, so I might consider giving it a try. I've done it only in French until now, but will try to find the time and record videos of past – and for future – articles :)
Hi Quentin,
When I select shadows, midtones or highlights in color range, my fuzziness and range sliders go gray. I have followed your screen capture precisely to my knowledge. I'm using Photoshop CS6. Can you give me a clue?
Great concept,
Duffy
Hey Duffy!
I had another photographer asking me the exact same thing today and he used CS6 as well. So I just tried reinstalling it on my computer and I encountered the very same issue and also noticed that the sliders didn't even have the same name in CS6.
I guess Adobe implemented this only later on. CC 2014, CC 2015 and CC 2015.1 all have this working like explained. Not sure about the original CC though.
If upgrading is not an option, you may want to use the other solutions. Calculations were already present on CS6, so at least that should work ;)
The principle remains a good one. I just have to create it my own way. I remember when drop shadows had to be created with channels, so I'm used to "work arounds." Thanks for your response!