
Luminosity masks are a fantastic way to make precise selections based on luminance values (hence the name). As with all things Photoshop, there are multiple ways to achieve the same result. I find using channel selections to be the easiest way to manually create my masks. I realize I'm probably preaching to the choir, but for those yet to join in on the singing, I hope you find this information useful as you continue to build your editing tool set.
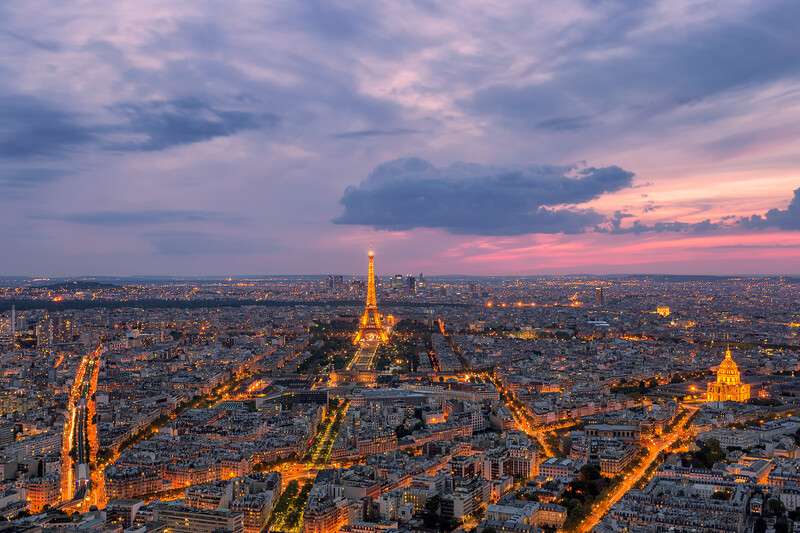
Cityscape and landscape photography often requires blending multiple exposures together to truly recreate what our eyes can see and appreciate in the field but our cameras sadly cannot yet capture in a single frame. Compositing utilizes this technique - putting together parts of multiple, sometimes disparate, pictures to create unique images that don't exist in the real world. An example is this image of Paris as seen from Tour Montparnasse - I combined sunset and blue hour cityscape shots (make sure to keep your tripod locked down so the images perfectly align in post) to achieve a composite with sunset colors and city lights, something you wouldn't usually see.
Blending portions of various exposures together to achieve a seamless final image is no easy task; halos are a common sign of a poor blend. Imagine jagged mountain peaks or ornate architecture - the idea of perfectly pen tooling my way around these sorts of detailed objects is enough to send me into a cold sweat. But wait, there's another way! Enter luminosity masks.
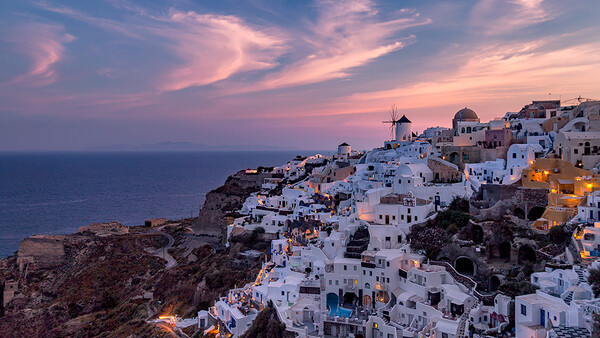
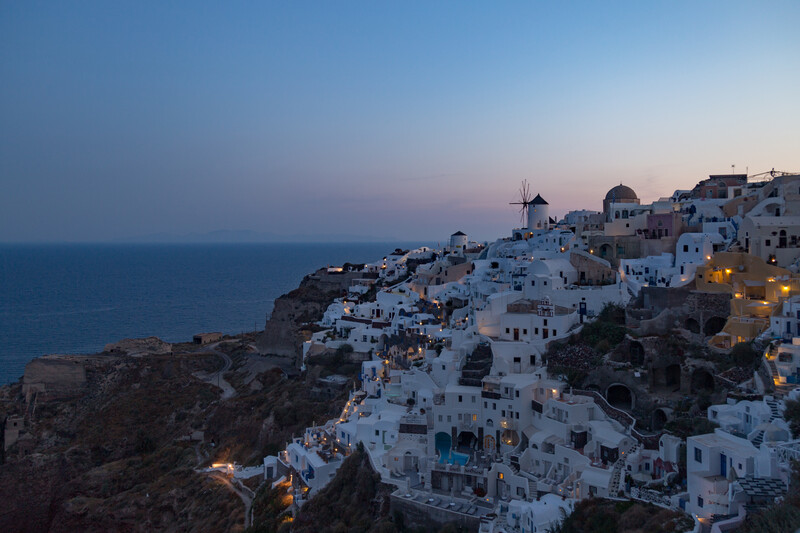
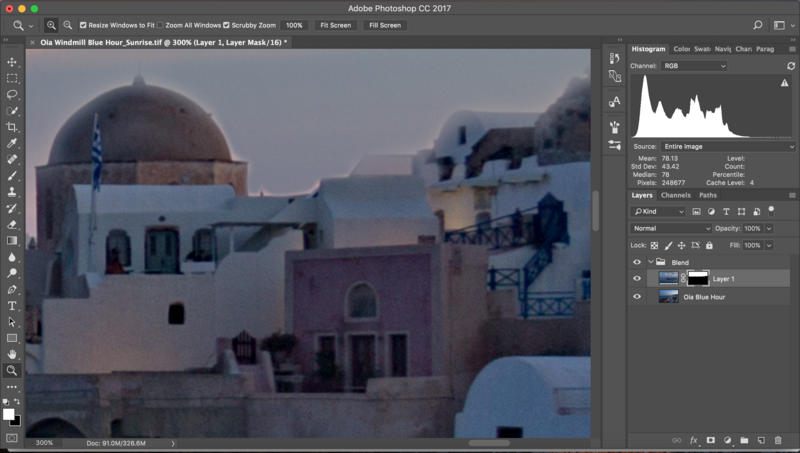
I wanted to capture the classic overlook shot in Oia, Santorini on a recent trip to Greece. Unfortunately, the morning that I chose to shoot featured a cloudless sky. While lovely to see in person, the scene lacked the drama I was looking for. I persevered and ended up with a nice frame of the town during the early blue hour with the town lights turned on.
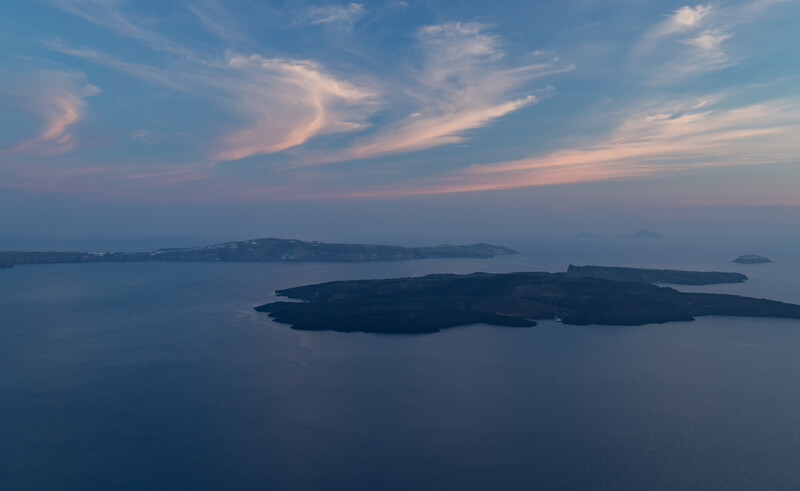
When I got back home, I combed through my Greece library and came upon a sunset image I had shot earlier in the trip. I immediately knew (or at least hoped) that the clouds and colors from this image would blend well with my Oia picture.
I made my Lightroom adjustments to both images and opened them as layers in Photoshop. Masking the clouds image and painting it into the Oia town image on the layer below could work but would leave obvious blend issues.
This is where luminosity masks came into play. The channels panel in Photoshop gives you Red, Green, and Blue channel selections as well as composite RGB channel (obviously in this example, I was using RGB for my color space).
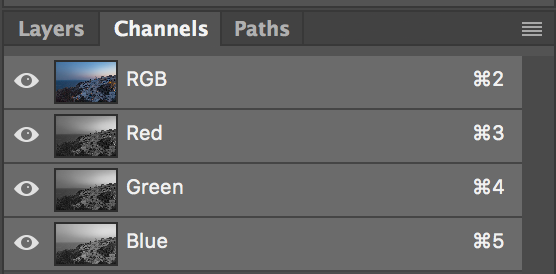
Looking through my choices, it seemed that the Blue channel would result in the best mask for the sky as the primary sky color was, after all, blue. I selected the Blue channel, Cmd+Clicked (Ctrl+Click on a PC) on it, and clicked on the "Save selection as channel" button at the bottom of the panel, creating a new Alpha channel.

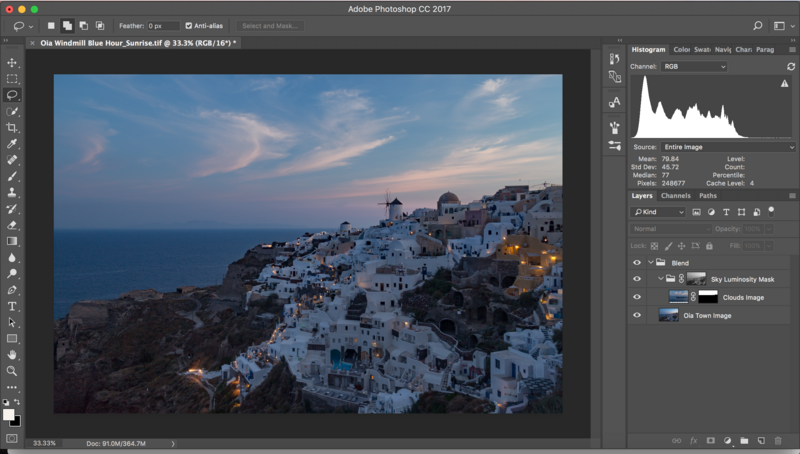
This selection was now ready to be applied to a new layer. In his seminal photography tutorial "Photographing The World: Landscape Photography and Post-Processing with Elia Locardi," Elia Locardi applies luminosity masks as a mask on a new folder. This clever concept allows you to then add adjustment tools within the mask, enabling an extra level of masking to further refine your blend.
I used Elia's concept in my composite by applying the Blue channel mask I created to a new folder. I moved my clouds image within that folder and added a mask to it. Now, the clouds image lived only within the Blue channel mask I had created. I could then further paint white or black on the sub-level mask to make my blend cleaner.
You always want to blend together your images before starting any other Photoshop work. After you have your blend the way you want it, you can proceed with various adjustment layers or filters like Nik Color Efex Pro. Applying these adjustments to the blend helps to unify the image for the viewer.
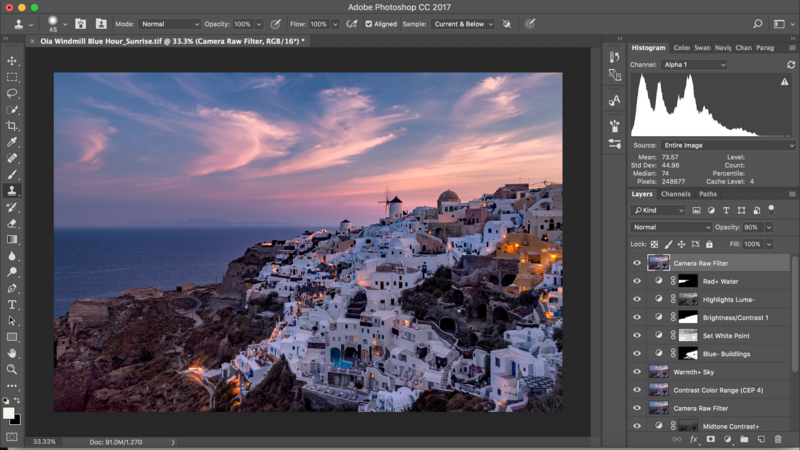
After going through my usual Photoshop editing workflow (Nik Color Efex Pro, various Curves adjustments, selective noise reduction and sharpening, Dodge and Burn, and some Clone Stamp cleanup work), my image was complete:
Luminosity masks can be created not only for the color channels but also for the highlights, shadows, and midtones of an image. Making a selection out of the main RGB channel gives you the highlights. Inverting that selection (using the Cmd+i keyboard shortcut) will select the shadows. To get the midtones, first create separate highlights and shadows Alpha channels. Next, press Cmd+a to select the entire image. Finally, press Cmd+Option and click on the highlights channel to subtract the highlights from the selection. Do the same thing for the shadows channel and what's left is the midtones of the image.

You can use any of these selections as masks on a folder or adjustment layer based on your specific needs. One thing I like to do is add my midtones mask to a Curves adjustment layer and add contrast by creating an S-curve.
You can always make your selections more granular. For example, if you create a highlights luminosity mask, you can press CMD+Option+Shift and click on that selection to select only the extreme highlights within the original highlights selection. You can continue to repeat this until you are only selecting the very highest luminance values in the image. This can be a good way to make adjustments to any "hot" spots in the image (usually found in the sky or the clouds). The same concept applies to the shadows.
Luminosity masks are daunting to most Photoshop beginners. Though they sound complicated, they can be easily mastered with a little bit of practice. While there are many great automated tools out there like Tony Kuyper's TKActions panels or Jimmy McIntyre's Raya Pro panel, I think it's important to be able to manually create these masks and understand how they work. Adding this weapon to your editing arsenal can quickly become a game-changer, allowing for precise selections for blending and adjustments within your Photoshop file.
Happy editing!


Join the Fstoppers community for free
-
Post comments and join in the discussions
-
Browse the site ad-free
-
Share your work and get featured in the community
-
Compete in the photo contests for fun and prizes
11 Comments
Great article! Another way to take advantage of luminosity masks is through the use of an excellent panel developed for Photoshop by photographer Aaron Dowling. You can check it out here. I have tried many and this is the best option. http://www.aarondowlingphotography.com/luminosity-action-panel/
Thanks, Michael! Interesting, I'll have to check it out. I haven't personally used any of the automated panels that are out there but I'm sure Aaron's is good. I like working manually in Photoshop as much as possible.
For anyone interested in digging deeper, I also have a free luminosity masking panel for Photoshop and tutorials available here: https://gregbenzphotography.com/luminosity-masking-tutorial/
Not free but probably the best
http://goodlight.us/writing/luminositymasks/luminositymasks-1.html
If the usability of your site is any indication of the usability of your product. . . I'm scared. WAYYYY to much text, it took my 5 minutes of clicking to find out where to give you money, barely any photo examples. Just some feedback to hopefully help you make more $$ -
what do you mean by "your site" "your product" Its not my product I just use it and once you have installed the panel you will see how easy it is to use. Of course it is a very sophisticated technique and it needs some practice.
I can't seem to get a midtones selection. I can create separate highlights and shadows Alpha channels, but because one is just the inverse of the other, subtracting the two selections from the whole image leaves you with nothing! Anyone know where I'm going wrong with this please?
After you create your separate highlight and shadows Alpha channels, click CMD+a to select the whole image. Then subtract the highlights channel using CMD+Option/Alt and clicking on the highlights channel. Then do the same for the Shadows channel. You should then get a message that says "Warning: No pixels are more than 50% selected. The selection edges will not be visible." That's good! That means you've created your midtones mask.
You can go back to your layers panel and create a new folder or Curves adjustment layer or whatever you want. Once you click on the Mask icon, it will load the midtones mask on that layer for you and you should be good to go. Personally, I like loading it onto a Curves layer and then adding some contrast for subtle pop. Let me know if you have any other questions and thanks for reading!
Ah thank you Aneesh! This has now worked and I have my midtones selection. I got as far as the message popping up and thought it wasn't selecting anything but it makes a lot more sense now. I'm trying to get my head around how all these layers/masks work together but I'll keep practicing until I crack it. Thanks for your article!
Anytime - I'm glad it worked! Best of luck and let me know if you have any other questions