
They say the best camera is the one that is with you, but what if that particular camera is lacking in megapixels? Here's how to take advantage of the camera you already own and make some giant image files and extra large photo prints.
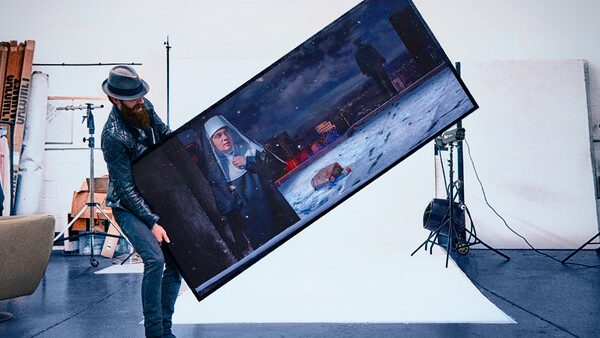
They say that size isn't everything, but when it comes to printing out photographs I have always believed that the bigger you can print something the better. This sentiment is especially relevant for my fine art work as I intentionally place a lot of props and hidden narratives into the images I make. It really would be a shame if those details were lost on the viewer because the print was too small or things were a little pixelated when inspected up close. For that reason, I always try to make the largest files I possibly can to give myself the best chance that the prints will look how I want them to.
My go-to camera of choice for this kind of work is the Canon 5Ds due to the 50-megapixel files it can create. As I tend to only produce a handful of fine art pieces each year, I rent the camera when I need it rather than having one collecting dust and depreciating in my camera bag.
Here lies the problem which faced me last weekend. Upon almost finishing my latest large-format piece I decided that I needed to shoot a large area of road texture to add into my final shot. Being 150 kilometers away from my usual camera rental store and without the luxury of my workhorse Canon 5D Mark III at hand, I decided to blow the cobwebs off a 10-year-old Canon 1Ds Mark III and use that instead.
Even though the 1Ds Mark III is old it's still a pretty decent camera and I have many fond memories of using it back in the day. The only problem with it for me is the file size. It shoots 20 megapixels and the art piece I need the texture for is a whopping 139 megapixels in size. The size difference didn't worry me as I knew I could use a technique I take advantage of quite often and that is to shoot several images and digitally stitch them together to make a much larger picture.
For those unfamiliar with the stitching technique here's how to do it.
1. Shooting the Scene
I'm not a big fan of shooting on a tripod, but for stitching purposes it will make your life a lot easier. That's not to say you can't create this kind of image while shooting handheld, but you may just give yourself some extra work in postproduction later. I also find a tripod minimizes the chances of you missing an area in the scene as you methodically move the camera to capture the various sections.
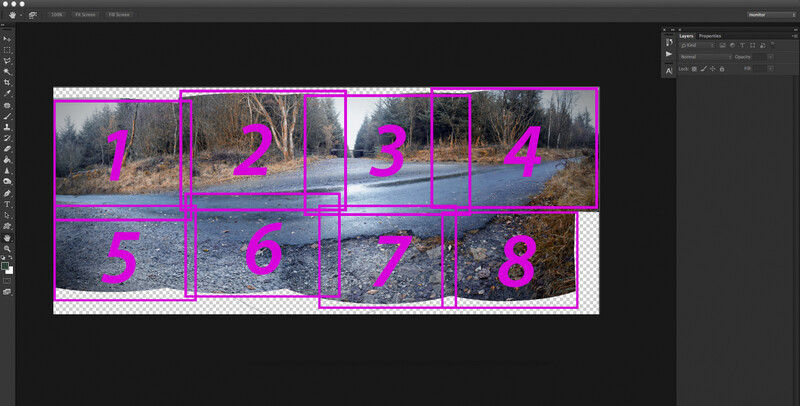
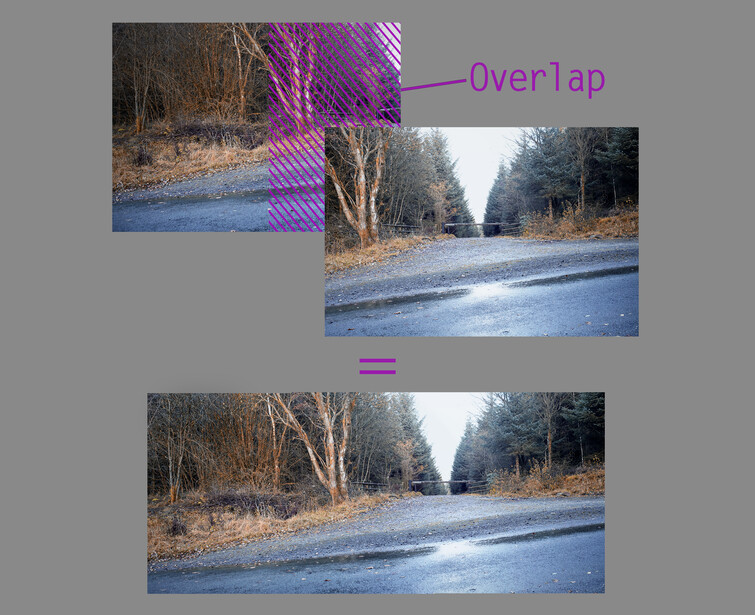
The two things you need to know about photo stitching is that you need quite a few images to make large files and a fair amount of overlap in the images you take for the process to work effectively. I overlap my images by at least 25 percent each time which means in my case the 20-megapixel images I am capturing are effectively only 15 megapixels each. This is worth knowing if you have a particular file size you would like to create in mind as you will probably need to take more pictures than you think.
It is best if you avoid using any kind of automatic modes on your camera when you shoot these kinds of pictures. You may find if you don't shoot manually the camera could change the settings between the various parts of the picture as you move around. This would make the stitching process much harder later on.
Focusing is another consideration to think about when making these kinds of pictures as the focal point will change as you move the camera around. For that reason, I find it best not to rely on automatic focus either.
2. Preparing the Files
Once you have captured the pictures it is time to process the images. Hopefully, you shot everything manually and the exposure and color balance of each image is about the same. Don't worry if things are slightly different between pictures just as long as everything is in the same ballpark it will work fine. If you do decide to make any adjustments to your files at this stage make sure you apply it to all of them.
3. Using Photomerge in Photoshop
Now you have several files all processed and ready to stitch together it's time to move into Photoshop. Go to File > Automate > Photomerge where you will be greeted with the following screen.
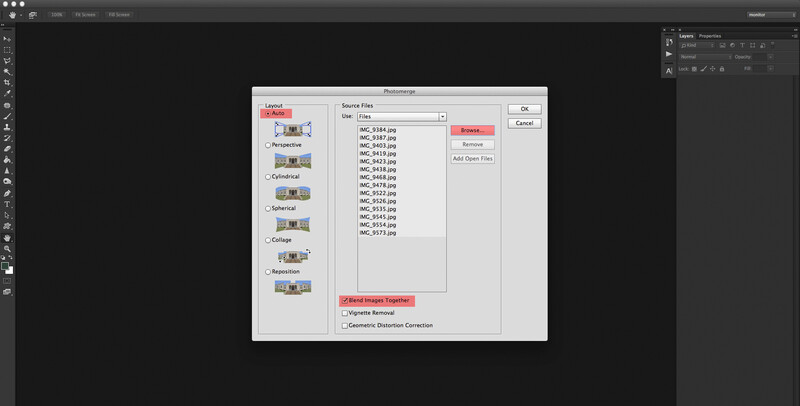
From here click on "Browse" and find the pictures to be used and load them into Photomerge. You have a few options to pick from regarding how you want Photoshop to correct your images. "Vignette Removal" is a handy one to use although most of the time I just tick "Blend Images Together" and leave the Layout option set to "Auto" and it usually does a great job. Once you have decided on all the settings it's just a matter of clicking OK and letting Photoshop do its magic.
4. Checking for Mistakes
All being well Photoshop should have aligned, blended, and stitched your collection of pictures together to form a seamless image. Even now after all these years, I'm still impressed at how well it manages to perform this task. Saying that, I still like to zoom in and check for any mistakes. Sometimes Photoshop may have got confused if things have moved between shots. If you do find anything it can usually be fixed with the content aware tool or by using an image mask on the offending layer.
5. Finishing Touches
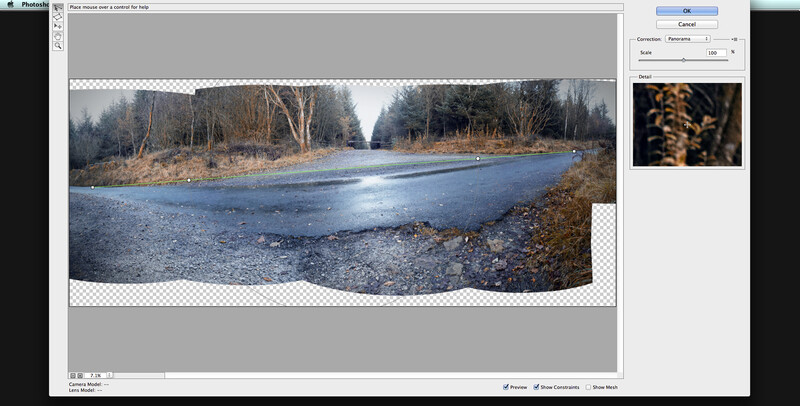
Once you're happy with everything it's time to merge the layers into one. One last adjustment which you may want to make is to reduce any perspective issues which can come with stitching so many images together.
Choose Filter > Adaptive Wide Angle where you will be greeted with tools to help correct this.
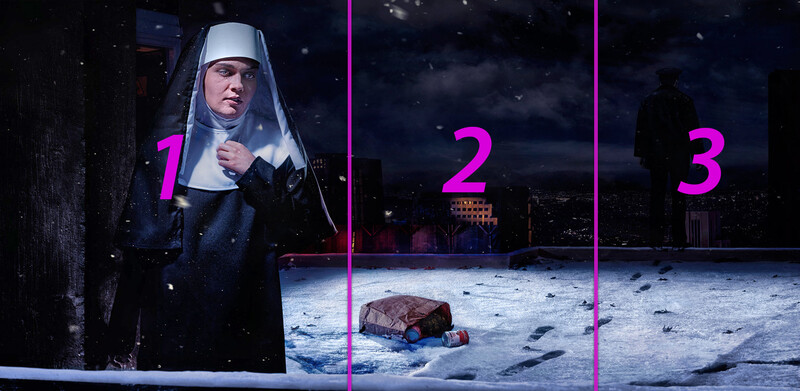
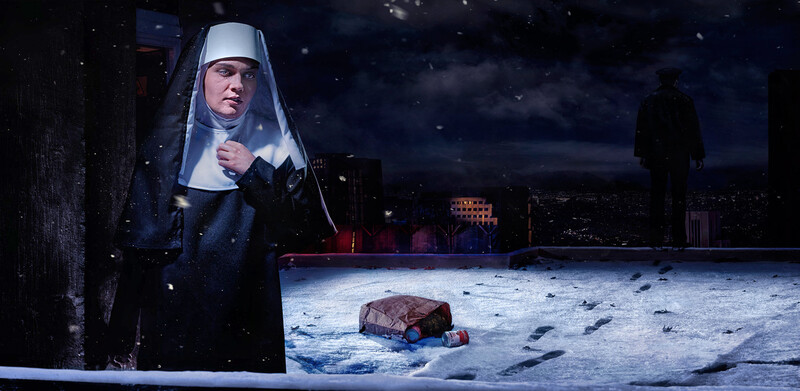
This stitching technique is not just reserved for landscape images either. I use this technique when I have people featuring in my work too. Just be mindful of the position of these people and where the joins and the overlaps of each picture you take will be. For obvious reasons it is best to keep anything moving away from the overlaps if you can.
So there you have it, how I managed to create a 150-megapixel photograph with a 10-year-old camera. I do appreciate the file sizes I create are a bit excessive for everyday use, but for my work, it's important that everything holds up when printed at such large sizes. Even if you don't use this technique in your day-to-day shooting practice, it's a handy concept to have up your sleeve when you want an extra large file or the camera sensor you have is lacking in size.
Is this something you may consider using? Do you have any tips for capturing these kinds of images? I'd love to hear your thoughts in the comments below.


Join the Fstoppers community for free
-
Post comments and join in the discussions
-
Browse the site ad-free
-
Share your work and get featured in the community
-
Compete in the photo contests for fun and prizes
11 Comments
I love making panoramas, too. You can get so much more detail in your final shot! And you can use it to get "impossible" shots, like in the case of bokeh panoramas. A technique I've used for creating big images with a texture was to take multiple shots of a surface, from above, and manually blend them with masks and cloning to make the texture match throughout the photo.
Hey Jonathan, "bokeh panoramas" is something I haven't really played around with much. You've inspired me to give it a go. Many thanks!
As for your texture shots, you might be surprised how well photomerge in photoshop could blend them shots for you. Save you hours of manual work...
The largest panorama I shot was 1000 photos. The image took 4 days of processing in Autopano Giga. I shot it on my Canon t3i and my 70-200 f4L. I had to output it at 10% of the real size due to file limation from the .jpeg and .tiff formats. The total project was over 100gbs.
Wow! that is some big numbers, Daniel. What was the pano of?
Good info Paul. Leading photo tours in the Grand Tetons where I live I am constantly teaching explaining why photo-stitching is often better than using a wide angle for the mountains. Wide angle lenses shrink mountains; hence an article I wrote once "Wide Angle or Photo-stitch". By photo stitching you can still include a large swath of mountains without turning them into a little ribbon in the center of the frame. I learned early with my first digital camera a Canon 30D 8 megapixel camera. My wide angle lens was a 28mm from my film cameras. This was before I had learned the censor size was smaller than "slide" size. I had to photo-stitch to include any landscape. Even though photo below is a stitch, it still only achieved a file size of 49 megapixels LOL
Hi Daryl, thanks for sharing your image it really is a great shot! Nice to hear someone else championing the photo-stitching too.
You make a great point about stitching over wide angle lenses. In the context you talk about it really is a win-win situation, better mountains, and bigger files!
Thanks for stopping by...
Awesome image made. I use that technique a lot and it is certainly a great way to build bigger images for print - Large prints are the BEST (if you have space)
Hey Randy, great to hear so many people using the stitching technique. Also nice to hear you're a big fan of large prints too.
Wall space is definitely a problem for me!
Very cool story and responses. I am exploring this too for my cafe displays - started with a few simple frames, the the auto pano feature on my Sony A7RII at theTetons, with a 60” print below. Then taking it up notch I looked into robotics and found http://www.shutterfire.com — perhaps to an extreme, but it works for prints and time lapse, and is affordable at $300 to gather more complex rows/columns vs pricy Gigapixel. Just need to find a big wall and printer budget. Paul’s approach also works great with drone shots, improving the crappy DJI cameras.
Hey Jim, love the pano you made and thanks for the link. That product sure does look interesting. Will investigate that further...
You make an excellent point about the technique being used for drones too. Hadn't even thought about that!
Thanks for stopping by : )
Hey Jim, do you have any contact details for http://www.shutterfire.com? Their website is a little lacking...