
Food and product photography backgrounds can be incredibly difficult to come by in certain parts of the world. There are lots of tutorials out there about how to create your own textured backgrounds and wood backgrounds. But vinyl backgrounds are the bomb when it comes to portability and saving space. Creating them isn’t too difficult either.
Ninety percent of the backgrounds I use in my own photography are ones I have created. My textured backgrounds I created by following the Joanie Simon method. My vinyl backgrounds I paint using my skills as an oil painter and a fan of the Bob Ross school of happy trees and blending skies.
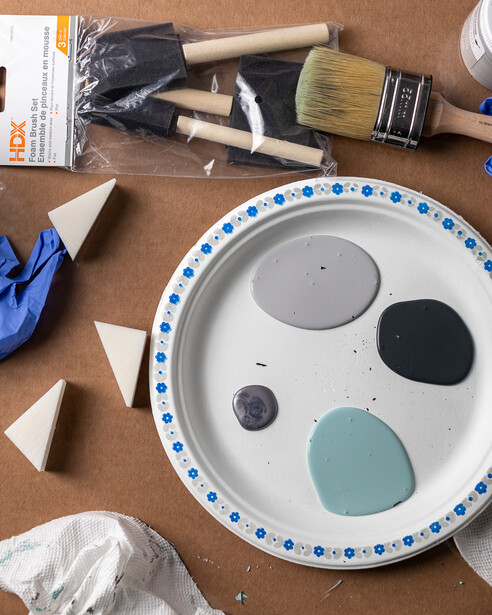
You will need a big roll of PCT vinyl sheeting. I go for the 16 mil variety. Do not use anything thinner, it doesn’t work out. You’ll also need some matte chalk paint. I’m a fan of both Rust-Olium and FolkArt variety. If you want to go even cheaper, you can always get matte acrylic paint samples from your nearest home store. But you won’t get a stone- or concrete-like finish if it’s not chalk paint. It must be acrylic paint to stick to the vinyl and it must be matte so you don’t have to fight against horrible glare. You will also need a matte sealer so you can clean it and so it doesn’t get ruined if food spills. Finally, you’ll need some cardboard, brushes, sponges, paper towel, and clamps to hold down the vinyl while you paint.
Step 1: Assemble Everything You Will Need
You will first need to find a piece of cardboard slightly larger than the size of the background you are going to paint. This is to protect whatever surface on which you will paint the background. You will also need to cut your piece of vinyl sheeting to size. I like to cut my slightly larger than needed so that I can clamp it down to the table or sawhorses I’m about to use as my surface.
Next, you need to decide on paint colors. This can be the most difficult step. When I’m painting a gray background, I’ll grab different shades plus a shade of blue found in one of the grays. If doing a green background, I’ll also grab some yellow and blue. If a brown background, I’ll also incorporate some purple and orange. Look through a bunch of different backgrounds online to draw some color inspiration.
Next, I grab my brushes and sponges because I never know exactly which I want to use until I start painting and begin to get a feel for what I want to accomplish.
Finally, I put my chosen paints on a paper plate to use as my palette.
Step 2: Start Painting Happy Little Tree Leaves
With a dry brush and using the Bob Ross method of putting happy little leaves on happy little trees, stipple a little area with the lightest shade. Next, add a light layer of the complementary color. Be sure to not over blend. Next, do the same with the darkest shade. Next, dab in some metallic paint. Do not go overboard with the metallic paint. Repeat another layer of the lightest shade. Finally, using the Bob Ross method of softening happy clouds, very lightly blend all of those layers.
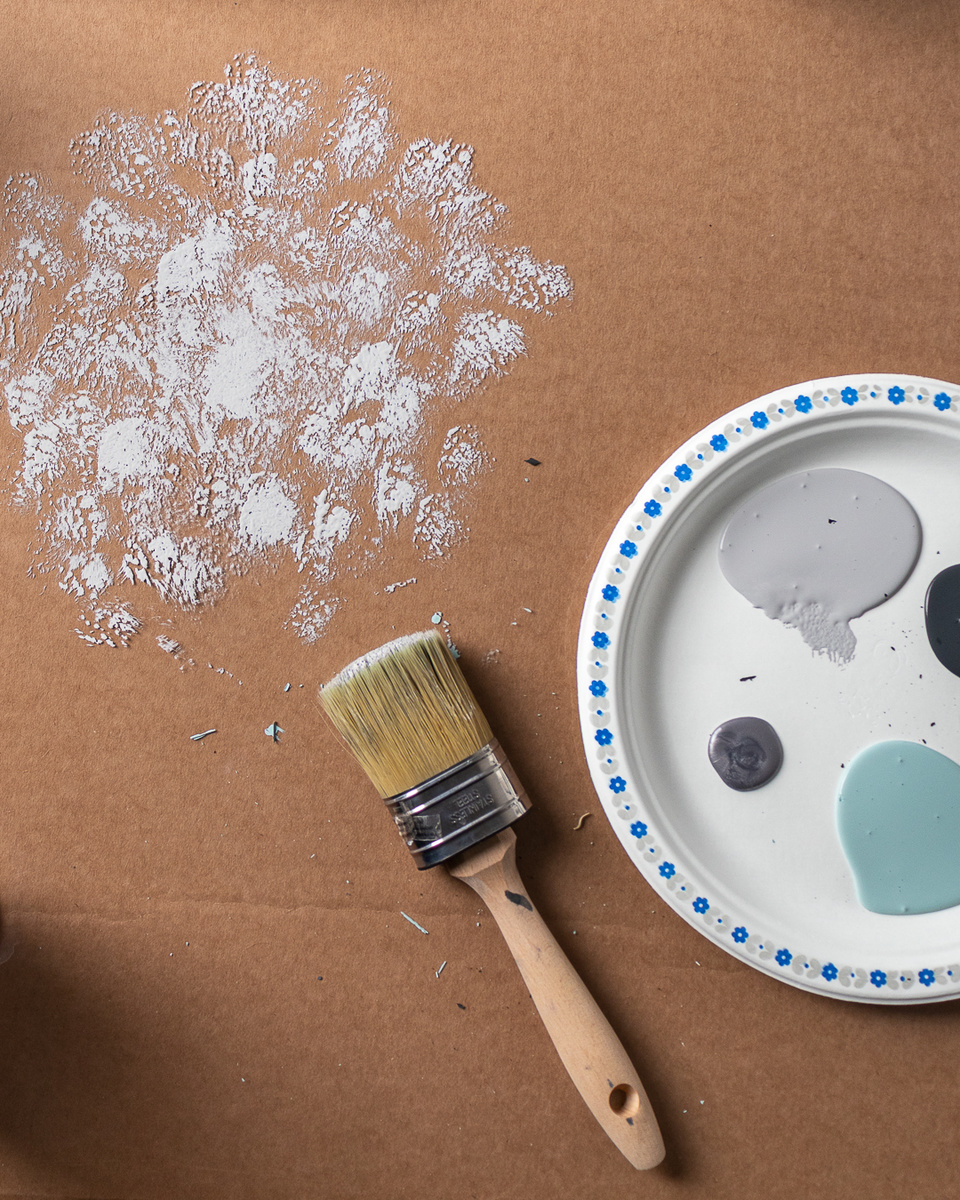
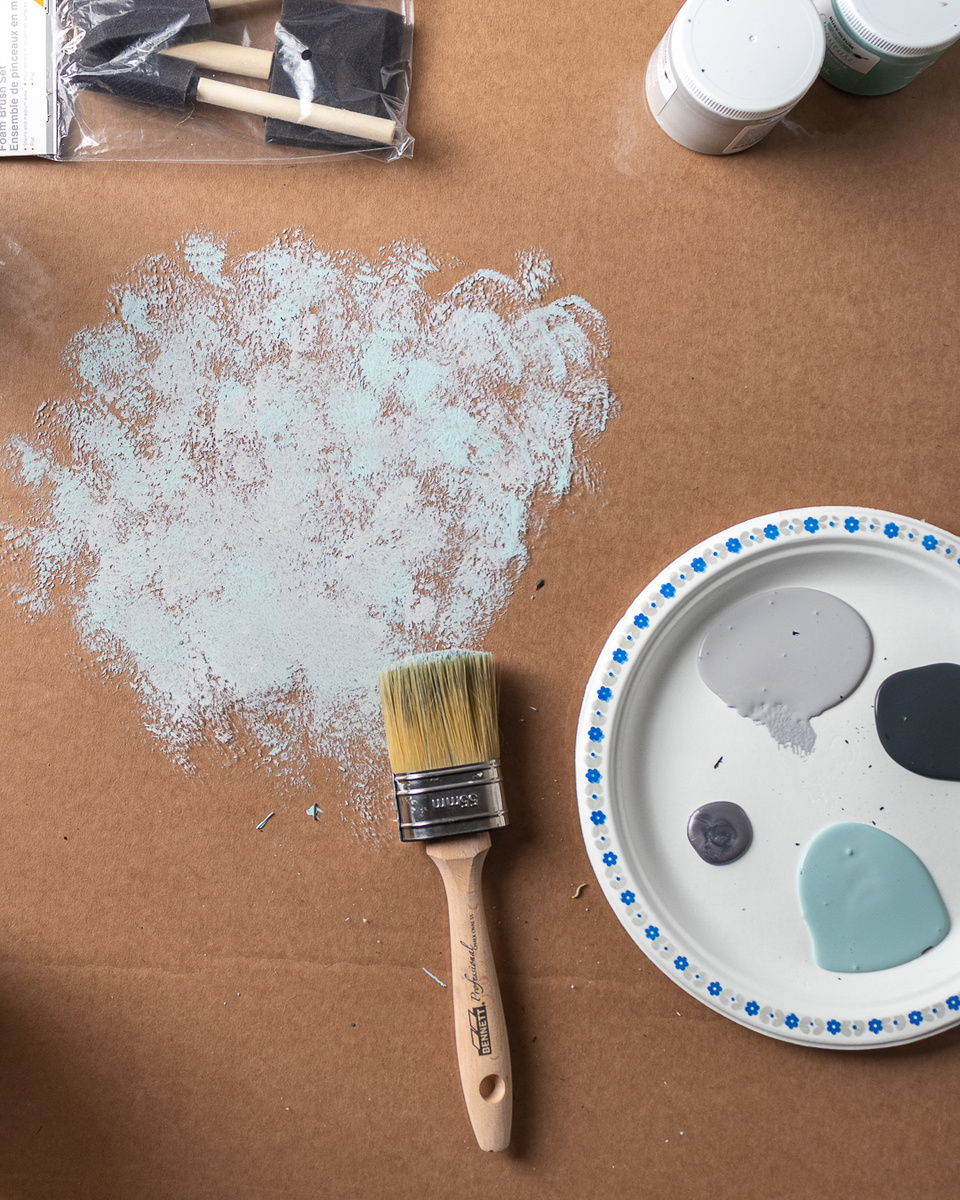
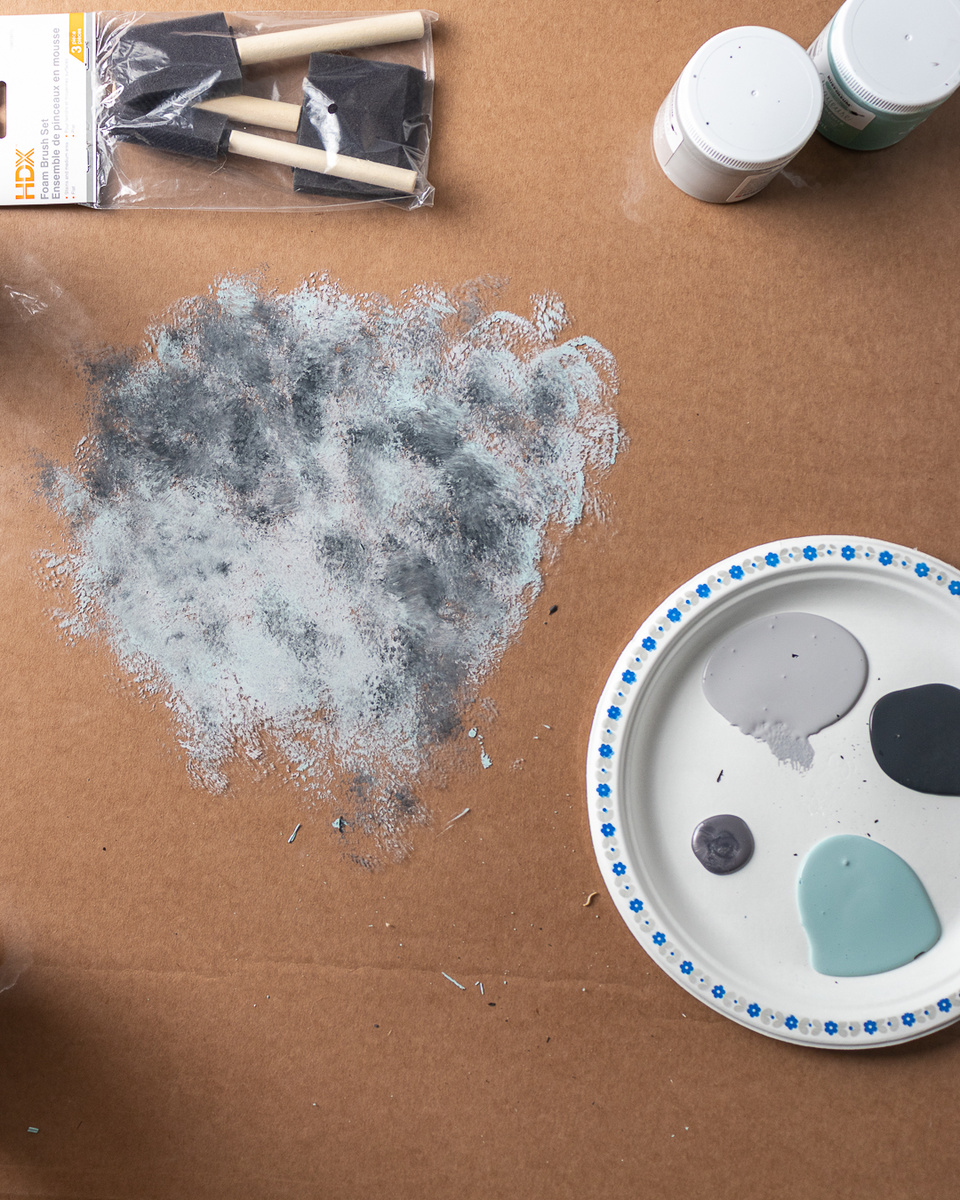
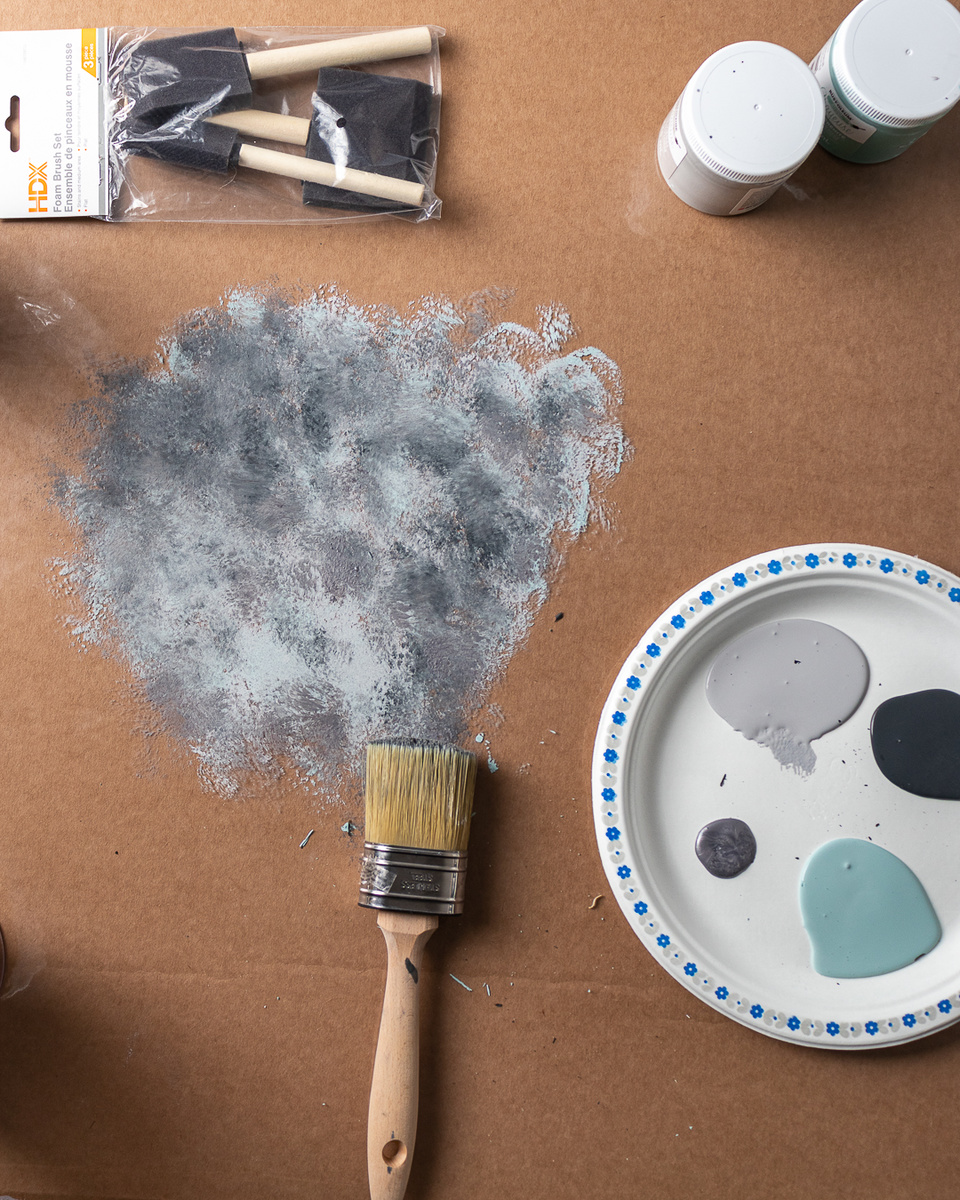
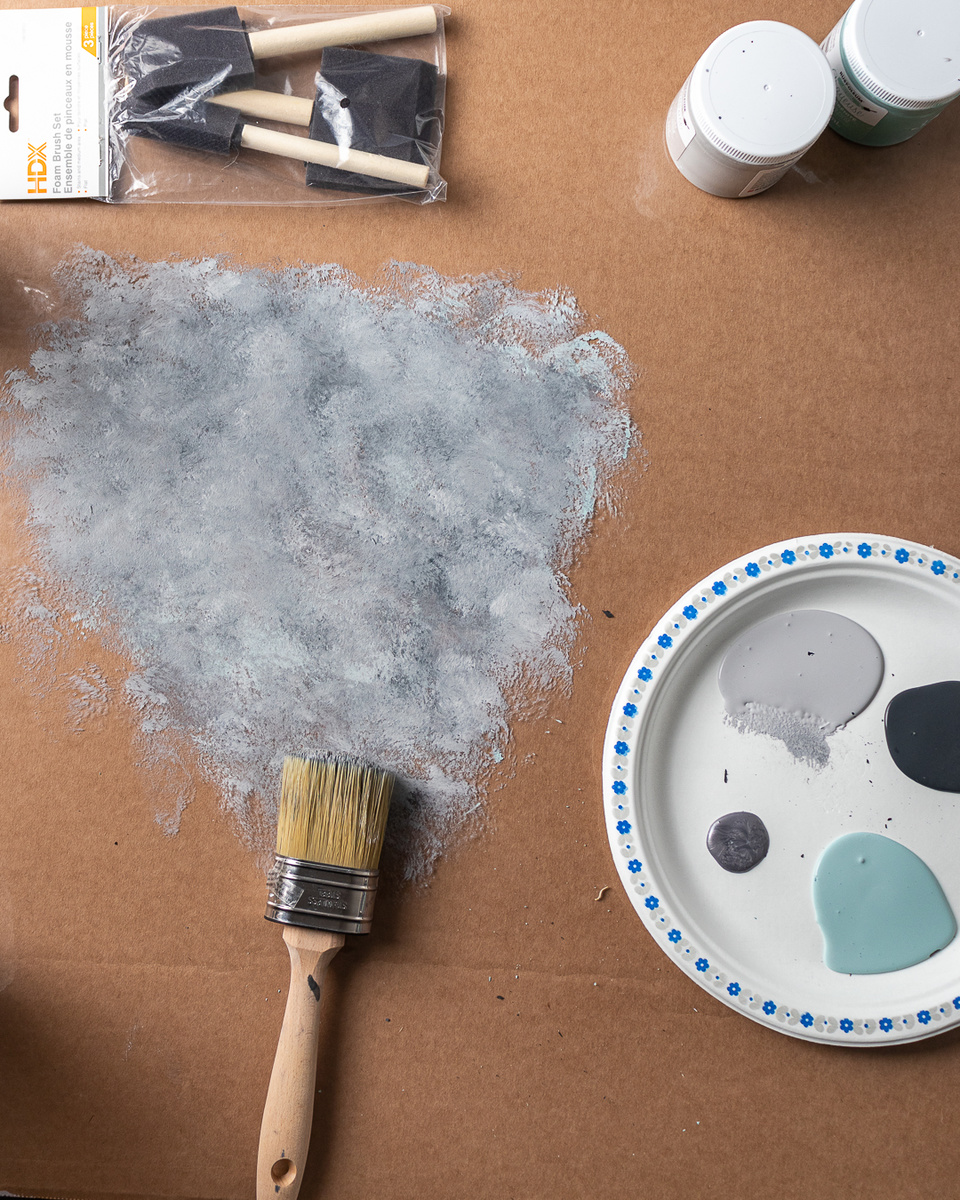
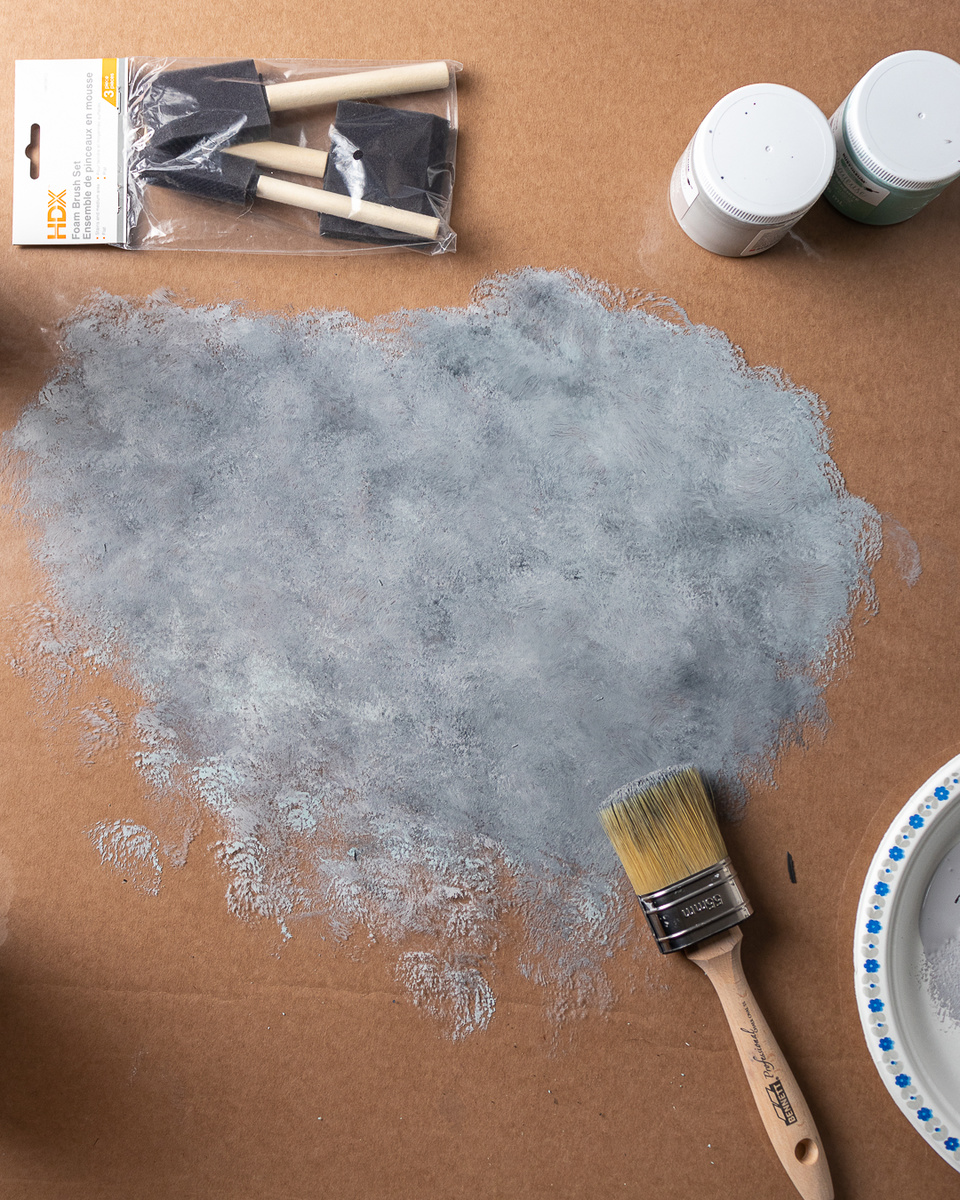
You need to work through each layer quickly because the paint dries fast. If you need to add another layer or two in that area to get it just right and be able to soften it a bit, do it. There are no mistakes.
Step 3: Repeat Until Finished
You may get worried as you work through sections of your background that there is too much variation in the background. Trust me when I say, this is an illusion. If you are sure to paint overlap the edges of each section, you won’t be able to see it once you pull back as the camera does. It won’t be noticed when shooting close-ups either because of how small of a section you will be capturing.
Step 4: Seal with a Matte Sealer
This is important. If you don’t seal it, the paint will wipe off when cleaning. It is also important to note that sealing it won’t protect it from everything. Don’t use bleach cleansing wipes. That will remove both the sealant and the paint, though not completely unless you really scrub. Certain foods that stain marble countertops will also stain the background. But this is true of any background that you may purchase or create.
Step 5: Create Another One but Play With Application Methods
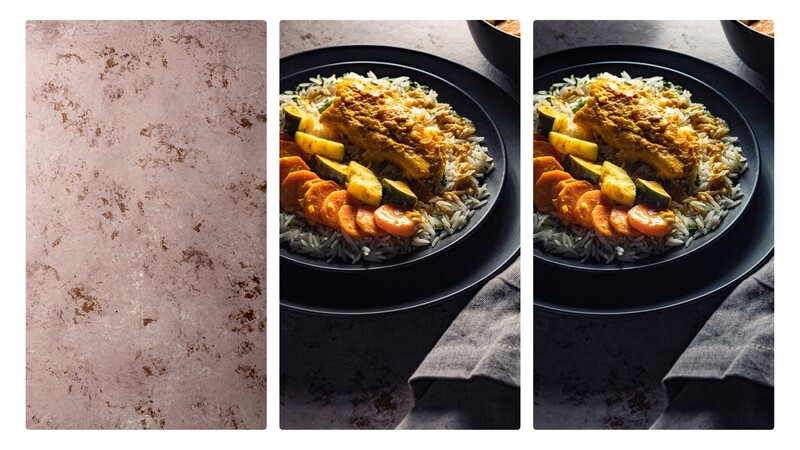
Brush and sponges create two vastly different effects even if using the same stippling technique. You really need to keep in mind when creating different types of backgrounds that they never look all that great when your face is right in them.

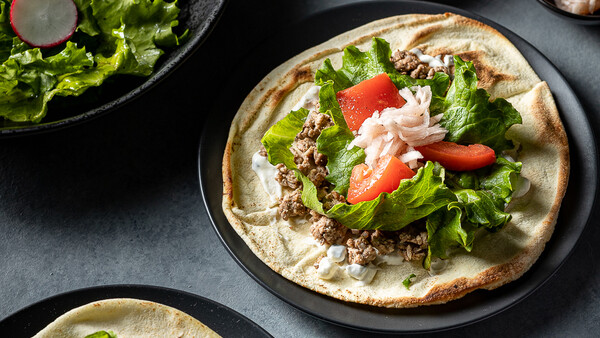
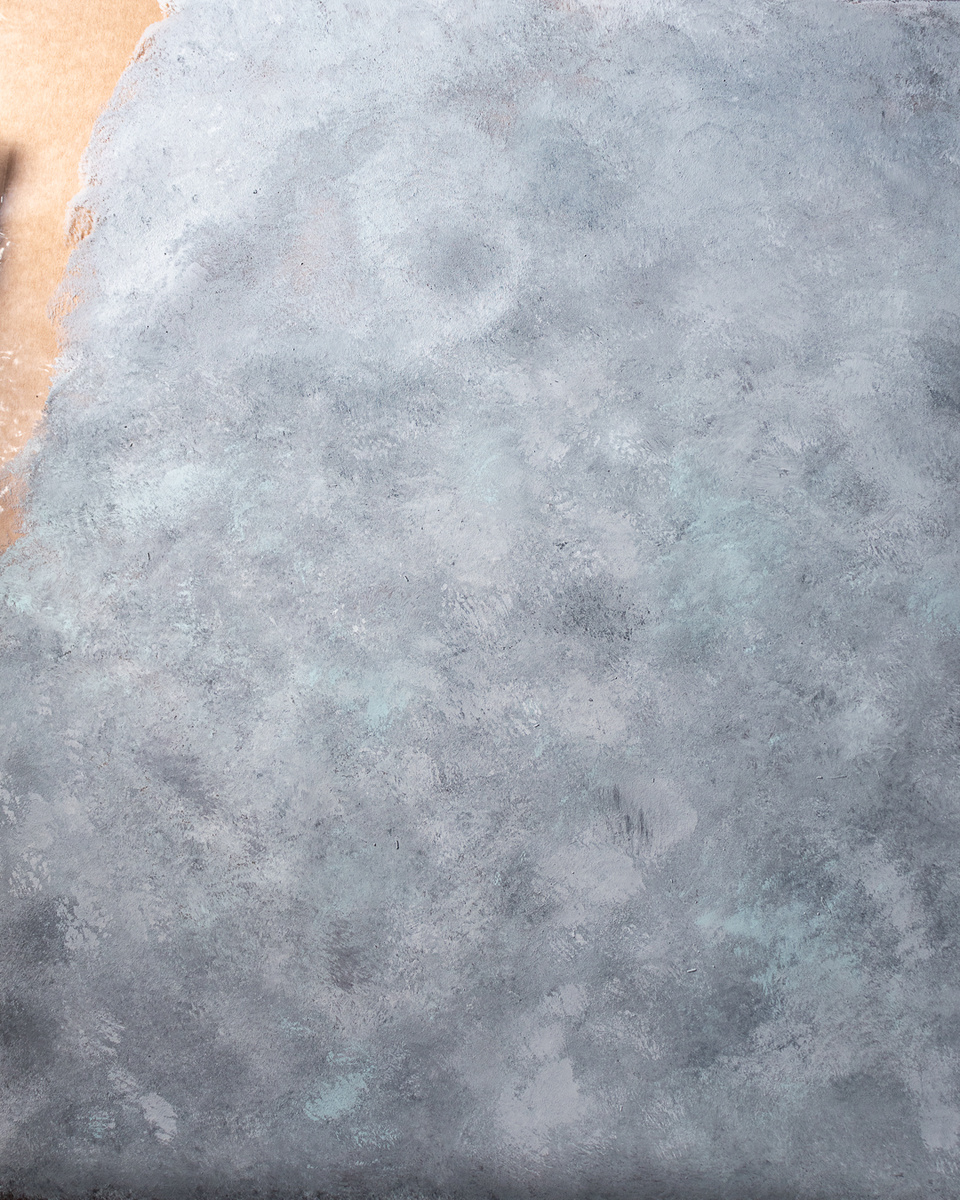
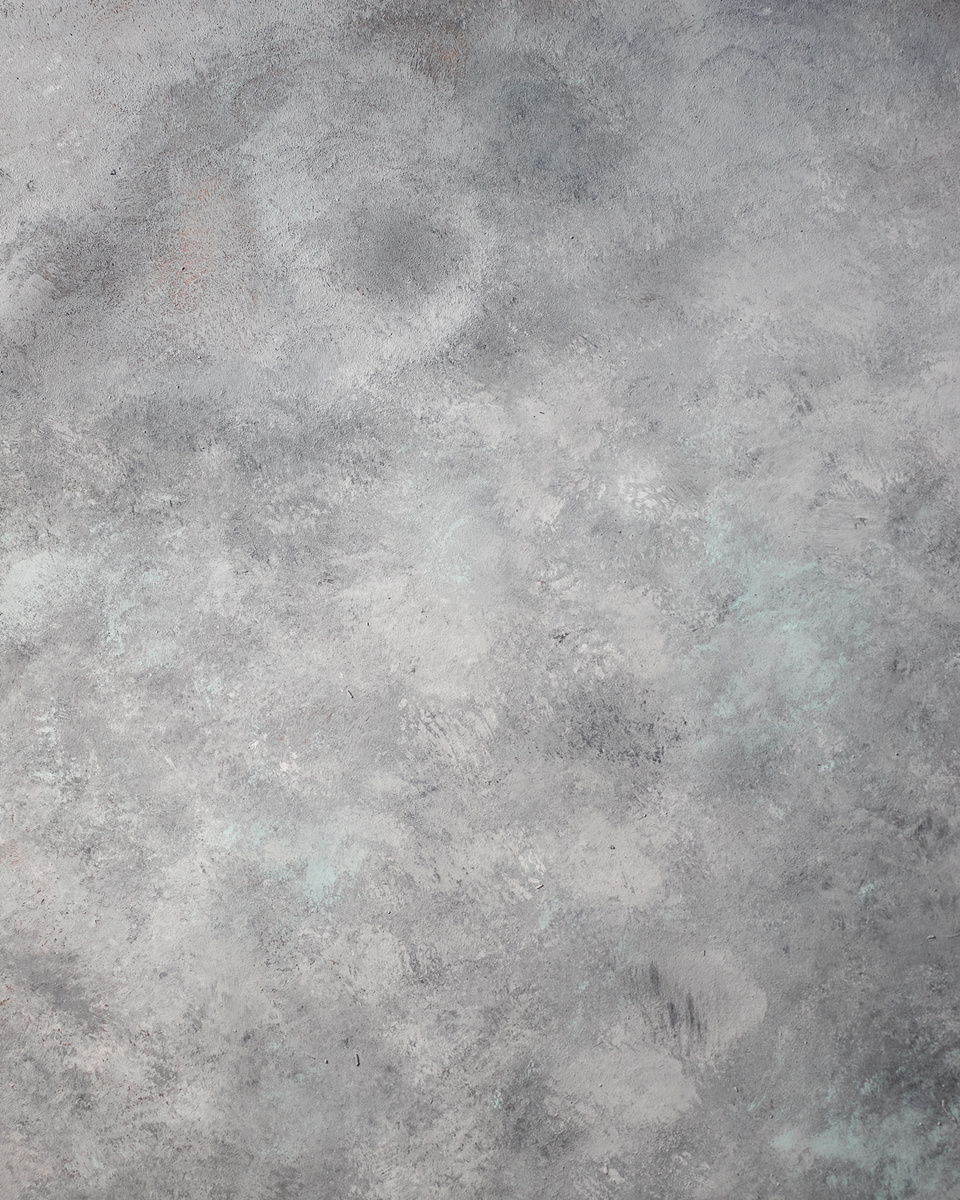
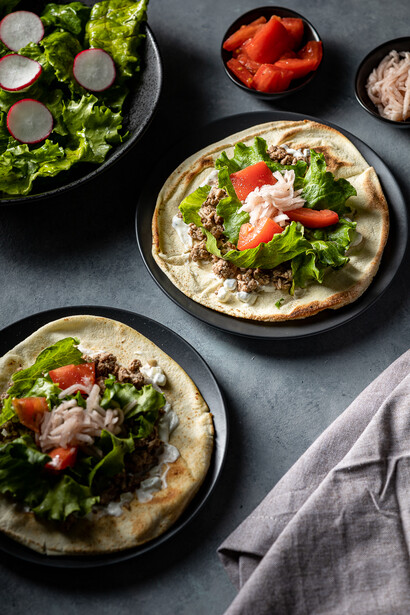
This brown background I created looks gross when close-up. But when used as it is intended to be used, it looks like a table that has been sitting in some old house or work shed. It lends well to images where I want to pull on antique aesthetics. The gray background in this image of an old scale I found at an antique shop is the same background above with the ground turkey on pita.
Step 6: Use in Some Photographs and Repaint if Necessary
My first attempt at the brown background when horribly wrong. Well, if we are going to continue to use the Bob Ross school of painting, it was a happy accident because I learned what works and what didn’t work so I could do better next time.
I don’t even want to show the above image of it in use because I had to breakout the brush in Lightroom and turn down the exposure in certain areas of the background to stop it from looking like some bland yuck going on, all nice and bright in the top of the image. But, in the end, it all turned out okay since it is super easy to paint over these backgrounds and get to something that is usable and fits your photographic style.
I hope this gave you a good idea of how to create your own vinyl backgrounds for a fraction of the cost of buying them. If you average background is just over two feet by three feet, you’ll be able to get at anywhere from 15 – 18 backgrounds out of one role of PCT vinyl.


Join the Fstoppers community for free
-
Post comments and join in the discussions
-
Browse the site ad-free
-
Share your work and get featured in the community
-
Compete in the photo contests for fun and prizes
2 Comments
I use a Program by Boris-Effects, It's called "Optics" It's for Photoshop and can be stand alone. I found out about it here on Fstoppers in a article. If you know the basics of PS then you can easily learn Optics. It's a very powerful program. Lots of options, and I think is the best bang for a Plugin Dollar! I use it to create backgrounds for Still-Life shots. I highly recommend it. Here are a few of background images I created using Optics. I believe there is a Free-Trial. You have to excuse the poor Jpeg images and limitations of file size here on Fstoppers.
Firstly, love your images, very cool! Thanks for the recommendation. While photoshop can do many things creating backgrounds like yours is pretty involved to get a good result. Will download today.