
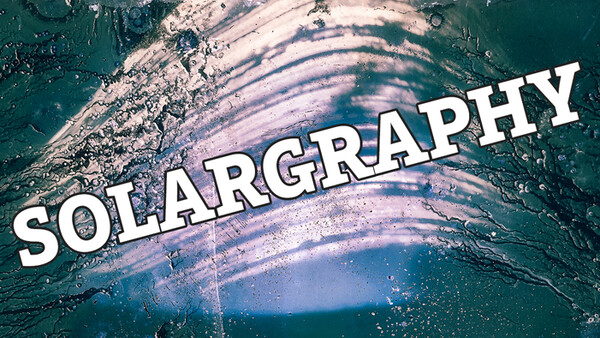
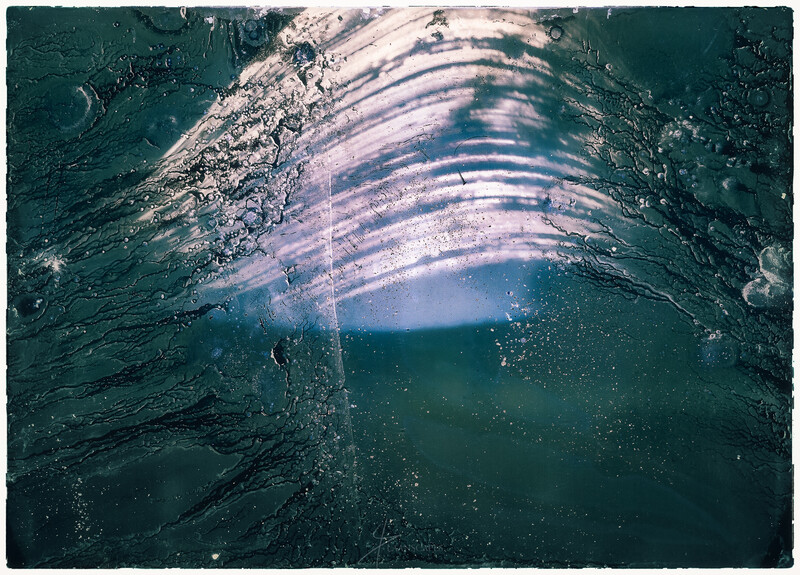
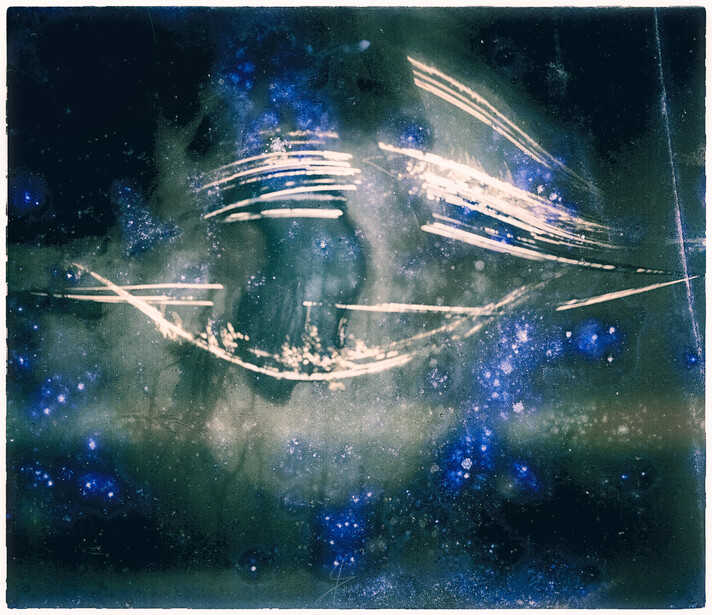
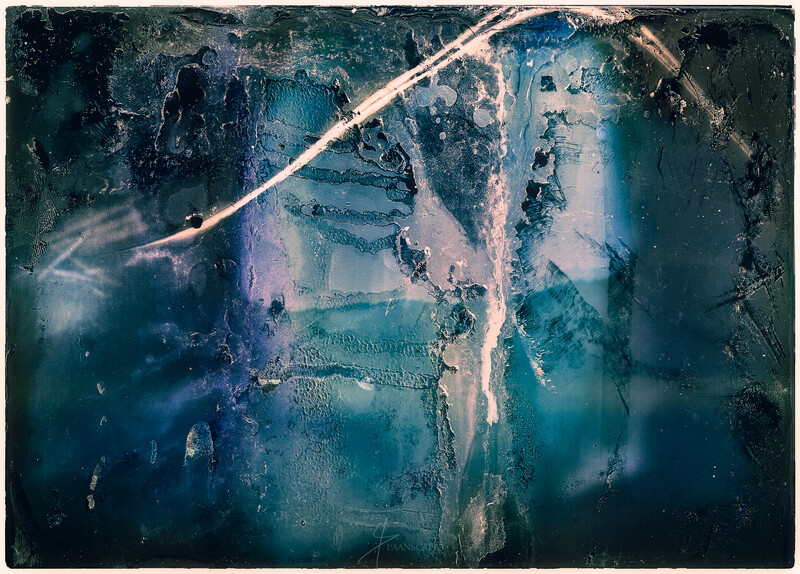
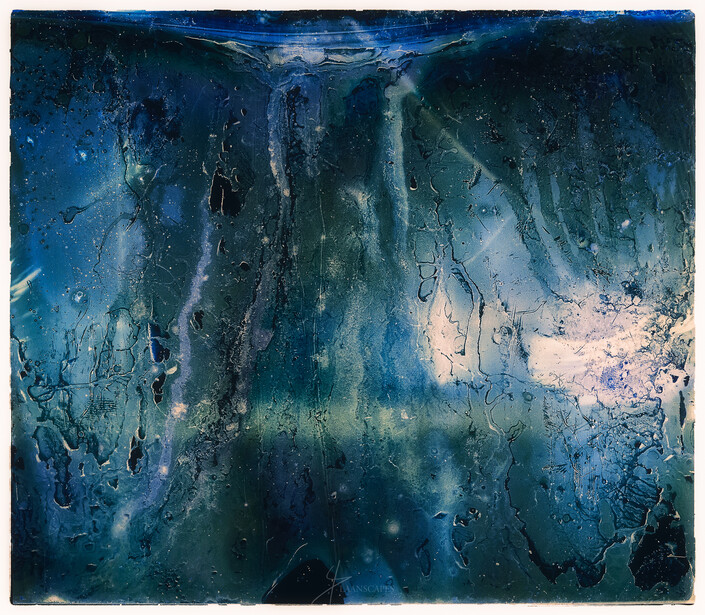
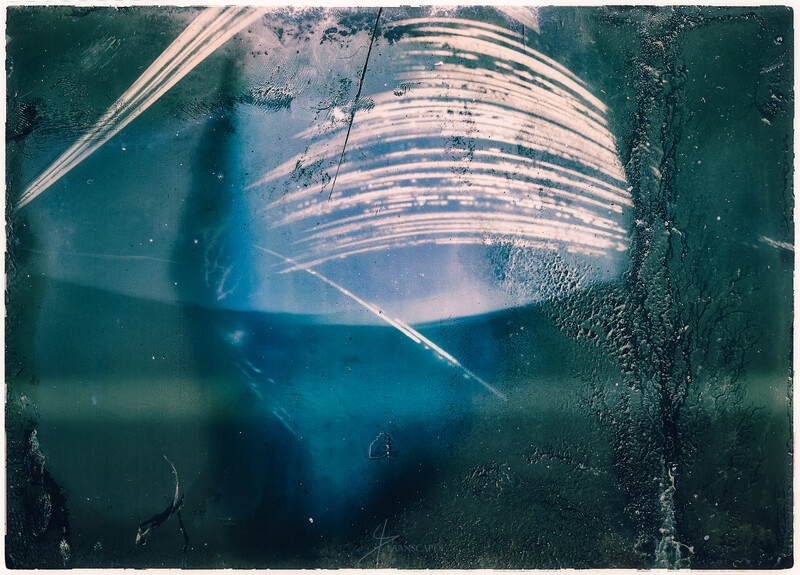
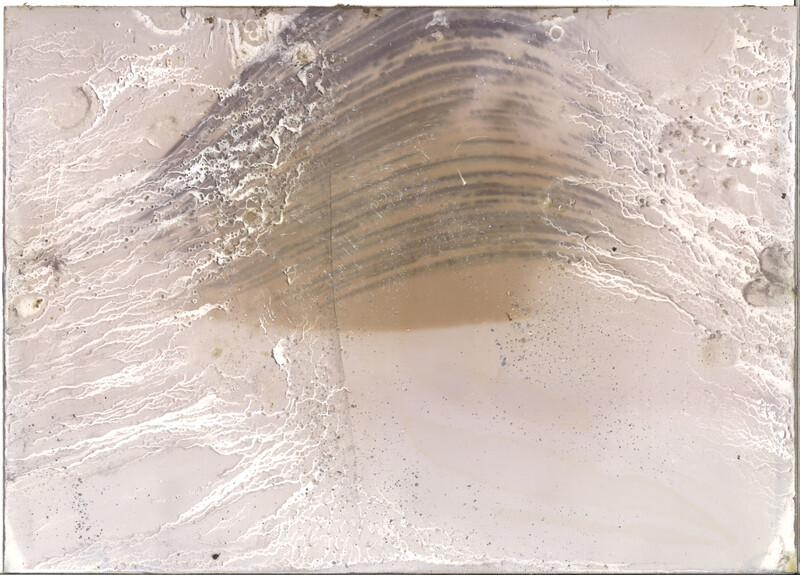
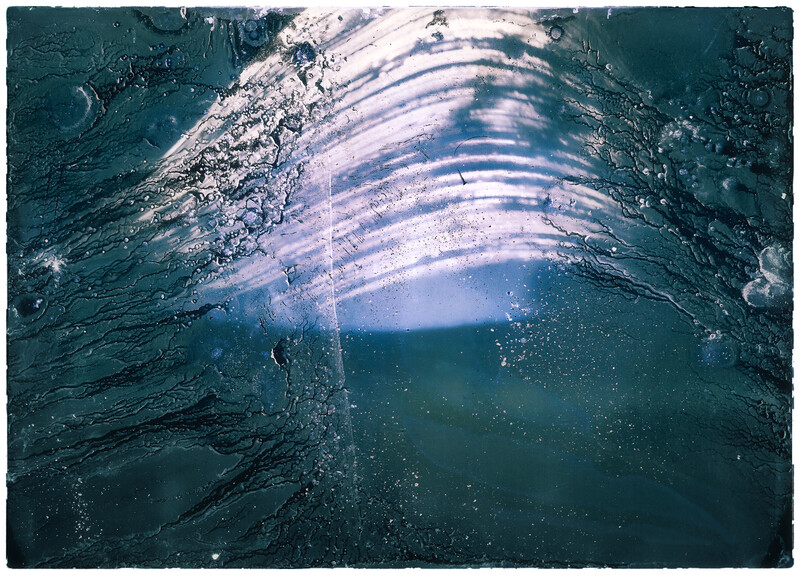
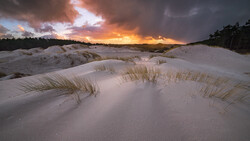
This low-tech alternative to digital photography can produce stunning art. Last year, I've recovered five out of ten “cameras." Some are found by others and stolen, others are simply blown off by a passing storm. Yet others are removed by bomb squads... I'm sharing these pictures with you, which are scanned negatives of black and white photographic paper. The brightest parts are the sun's streaks, burnt and etched in the paper - along with bubbles, rips and sand that texturize the images in bizarre ways.
These are in fact pinhole cameras; low tech analog cameras that are hung from whatever people can find, with the sole purpose of capturing the streaks of the passing sun in the sky, as we move closer and closer to the winter solstice. The images aren't “Photoshopped”. Instead, the colours are inverted (like colour negative film) and contrast enhanced. That's it. They're simply the result of what nature does to paper during the course of half a year.
Solargraphy is nothing more than imprinting the trail of the sun on photographic paper; a welcome break from any sort of pre-shot compositional rules. As she apparently moves along the sky, day by day for months on end, that trail gets burned in the paper over and over again. But then again, this low-tech alternative to digital photography can produce stunning art. Especially when you post-process the results after retrieving and scanning the grimy, burnt, and torn sheets when you recover them after the summer or winter solstice.
Solargraphy
Solar => Of the sun
Graph => Writing
That’s right, you’re writing the sun. Or more precisely, the trail of the sun.
The best results can be obtained when you leave the camera exposing the sky for a long period of time, say half a year. Here’s why.
Solstice
Our planet is tilted on its axis. The plane of rotation of the earth differs by xx degrees when you compare it with orbital plane around the sun. It’s the reason we have seasons. As the Earth orbits the sun over the course of the year, the sun appears to be higher in the sky in summer and lower on the horizon in winter. Appears to be? Yeah, it is actually our planet’s physical behavior that’s a result of our perception, not the sun’s.
Imagine there’s a point in the sky where the sun appears to be at its highest point. We call this the summer solstice. In the northern hemisphere, this point is reached at around the 21st of June. Consequently, the sun’s lowest point in the sky occurs in the southern hemisphere: The winter solstice. The two are switched around the 21st of December and both are great times to have your solargraphy cans ready.
Low-tech
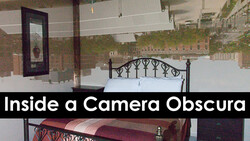
This "technique" works through the same principles as the camera obscura does. Take an enclosed box with photosensitive paper. Punch a tiny hole, opposite of the photosensitive side of the paper in the enclosed box. This hole acts as both the aperture (controlling depth-of-field and exposure) and the lens (controlling focus).
As an aperture closes up, it allows less light to pass through the lens. And due to refractive properties of light, it also stretches the depth-of-field. But since this aperture’s size is infinitesimal, it takes a lot of light to actually make a difference inside the enclosed box. Actually, it takes an astronomical amount of light; say, the sun on a clear day.
A clear sky will actually burn the chemicals in the photosensitive paper, right where the sun hits it. Thick clouds will obscure the path, while every day the arch of sunlight will change according to our planet’s position relative to the sun.
Photographic Paper
But enough astro-blabber. Time to tell you what materials I used to obtain the results you see here. I’ve used Ilford/Harman MG IV (multigrade) D 44M black and white paper black and white photosensitive paper. Black and white? Yes, the slightest variation of luminosity will actually come across as differences in colour with these "snapshots." Be aware that the paper’s colour will actually turn brown-red when exposed and black when over-exposed. You might want to invert the colours after you have scanned the paper. If you think of these as colour negatives that don’t need developing, you’re halfway there.
These negatives are in many cases a one time scan, since scanning them exposes the paper to bright light again. Each subsequent scan produces a less contrasty images with more artifacts. And here I am discussing quality. The fact is, these are just really cool alternatives to everyday digital photography and solargraphs are even less technical than film photography.
Making Your Own
Starting this DIY project, you might want to start looking where you can source this paper locally. I’ve used A5 size sheets of Ilford Multigrade IV, but you don’t have to use this. I’ve read some comparative reviews that this particular paper produces saturated images and great, cyan-like tones when inverted. But your results may vary, as shown above.
While you wait for your order to arrive, you can chug down huge quantities of beer. Or pea soup. Or hotdogs. Either way, you should remember to keep the cans as perfectly round as possible and make sure that the cans you choose to empty are about the height of your paper’s width. I’ve found 50cl "soda" cans to be a very successful match with A5 paper. With these, it’s a good idea to be extra careful when carving out the top.
Clean the inside of the can and dry it properly. Leave it overnight, letting any moisture evaporate. Then stick a piece of heavy duty gaffer tape along the inside of the can to avoid cutting yourself in the next steps.
Now take a thin needle and gently, but firmly puncture a hole in the middle of the can. Preferably in a position where it’s easy to find; for example, in the center of a logo or "O". And keep the can from crushing by holding the edges of the can.
The long edge
As the paper is sensitive to light (it’s how this works), it’s a good idea to load the sheets in a dark room. Not a darkroom per se, but a bedroom with proper blinds will do the trick. A low-wattage incandescent lightbulb should provide enough light to see what you’re doing while keeping the paper fresh. Unwrapping the paper, the photosensitive side will feel a little sticky. Put this end towards the center of the can. In the ideal 50cl can, the paper wraps around the opposite side of the hole you’ve punctured. You can feel the inside of the can to locate where it is exactly. You should have about 1cm on either side of the pinhole.
Bomb threat
Now put a plastic bag over the top and seal it up with black gaffer tape. Black works better than silver, because it’s less obvious when you leave it stuck to a tree or post for half a year… This reminds me, make absolutely sure that no-one will find your little camera. As far as appearances go, this can look a lot like a pipe bomb to the trained or untrained eye. There has been one case in particular where one was taped to the side of a bridge railing in downtown London. It didn’t take long before the actual bomb squad showed up with a robot and everything… Don’t do this. Just leave one on your own windowsill or in your backyard, attached to a tree. If you are not sure if anyone will find them, it’s best tape a tiny, waterproof note to the side saying:
SCIENTIFIC EXPERIMENT
Hi! Looks like you have found me. I’m a camera, pointed towards the sun. I need to be here until the 22nd of December to record a time-lapse of the sky. Please do not remove me, as this will destroy the experiment. Contact 555-8331641 for any questions or concerns.
Personally, I don’t like to use the word “bomb” on the note at all. And it’s a good idea to ask permission if you place it on private or public land. And be responsible. Tie-wrap the device. Don’t use nails on trees. Trees will bleed, get infected and can eventually die of a single nail.
Placement
Before you step out of the dark room, put a small piece of black tape over the pinhole. This acts as boh your lens cap and shutter. Try to angle the can upward just a little as you place it facing south in the northern hemisphere. It’s a good idea to do this mid-day, so you can easily see where the sun is at its zenith. Important: remove the piece of tape that covers the pinhole before you leave or this might happen:
The paper is well cooked and not exposed at all. I’ve found this can with the “shutter” closed, right before an epic display of face palming.
Recovery and scanning
It’s the 22nd of either June or December and you’ve set up one or two cans six months ago. Here’s what I do. I take a pair of scissors, a sharp knife and a trash bag that lines a backpack. I go to the tree I have put one in and make sure I leave the tree as I found it half a year earlier; taking all tie-wraps, tape, or crashed cans with me. Before moving the can, tape a piece of gaffer tape over the pinhole, effectively closing the shutter that was open for six months.
Open the cans in a dark room again and place the sheets inside a heavy, hardcover book that you’ve always thought of throwing out. Leave a couple of pages in between the sheets and leave the book overnight.
Make sure the scanner is ready to use the next morning. Carefully open the book and place one of the sheets inside. As for settings: A higher DPI scan will slow the scanning process. That’s not good as scanning them exposes the images again. The slower and more often you scan them, the less contrasty they become and the more scanning artifacts (light bands) you are going to introduce. Scan them at a meager 600x600 DPI for about the equivalent size of an 18MP digital camera’s resolution printed at 300 pixels per inch.
Open the image in Photoshop, invert the colours and bring up the contrast to taste. And there you go. Your very own half-a-year exposure!
Well, I hope I have inspired you to some welcome distractions the coming weeks, as the cans don’t have to be placed on the 21st of June exactly. The sooner you do it though, the more arcs of sunlight you’ll see as a result, so get cracking and “eat some pea soup.”

Join the Fstoppers community for free
-
Post comments and join in the discussions
-
Browse the site ad-free
-
Share your work and get featured in the community
-
Compete in the photo contests for fun and prizes
9 Comments
This is so interesting! The effects to the paper, the effects the wee cameras, love it!
Something im going to try for sure, thank you.
And it doesn't cost a dime! Have fun with you project. Glad you liked the read!
For the note I would just use the term "photography project". Scientific experiment can sound a little sinister to some as well prompting removal.
It would only sound sinister to those that are willfully uneducated, much like those that think GMO's are inherently bad.
"Photography project" sounds like it contains a camera, don't you think? I hope it doesn't get your cans removed! But whatever works for you. :)
Have you tried processing them in darkroom chemicals before scanning?
Hey Josh,
You can't do this with the type of paper used. You can with actual negative film, but I have not found succesful results with that anywhere on the web. You might be the first to attempt this, but I really doubt it. :D
Fixing the image before scanning would be very welcome indeed!
Thanks, Daniel
It seems like you are using standard black and white photo paper and therefor should be able to process these in a darkroom with normal chemicals. Unless I missed something this should work, but please let me know if i'm wrong about that.
Maybe I'll try it with a sheet of 4x5 film.
I'm looking forward to seeing your results, Josh! It seems that you are correct in reading that this paper can be used with developer. However:
"No chemicals are needed in making a solargraph. Solargraphs diverge from a conventional pinhole photograph: the exposure times are much longer than we are used to do. The short exposure time of the latent photograph in pinhole photogaphy will be visible as normal in developing it. But in solargraphy after a long exposure all the tracks of the Sun are already visible on the emulsion. Although there is a piece of black and white photosensitive paper inside the pinhole camera the result will be in colour."
-Solargraphy.com
Also: https://vimeo.com/94639765 :)