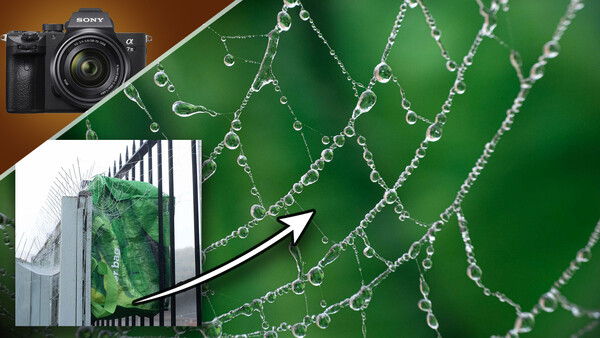
Clean up clutter backdrops in macro photographs by recycling the trash into a beautiful close-up DIY backdrop.
Macro photography is notoriously difficult to get right. The close-up focusing of macro lenses or extension tubes decreases the depth of field available to us. A high magnification means even the slightest breath of wind can throw off composition, and then there's keeping the macro subject lit without throwing a shadow over it if shooting in available light.
Once you've nailed the camera settings though the next biggest artistic hurdle to jump is getting a nice, clean backdrop on which to place your macro subject. More often than not when shooting outside you're not in control of where that subject is, whether it's an ant crawling in deep foliage, or a spider's web covered in dew clinging to a dull metal fence. So having as much control as possible over the background can help push attention on the main subject, giving a sleeker and more professional aesthetic. But what do you need to do this? Well, there are tiles, paper rolls, vinyl backdrops, and other accessories you can buy for that, but there really isn't any need.
In fact, not only do you not need to buy anything, that piece of garbage you're about to throw in the trash can be used to create the most beautiful, natural backdrops. Allow me to show you what I mean.
Avoid Busy Backgrounds
A busy background like this detracts from the intricate beauty of the main subject
In this image I've attempted an early morning macro shot of a spider's web covered in dew. What I love about this photograph is that the droplets of dew look like tiny diamonds clinging to the thin silk that the spider has spun. Unfortunately, the ivy is it spun around isn't so enticing. There are lots of different shades, highlights and shadows bouncing around in the background, with some upturned ivy leaves adding a stalky mess to the shot. It needs cleaning up.
Other Things Get in the Way
My background is now cleaner but the gate posts are now entering the frame from either side
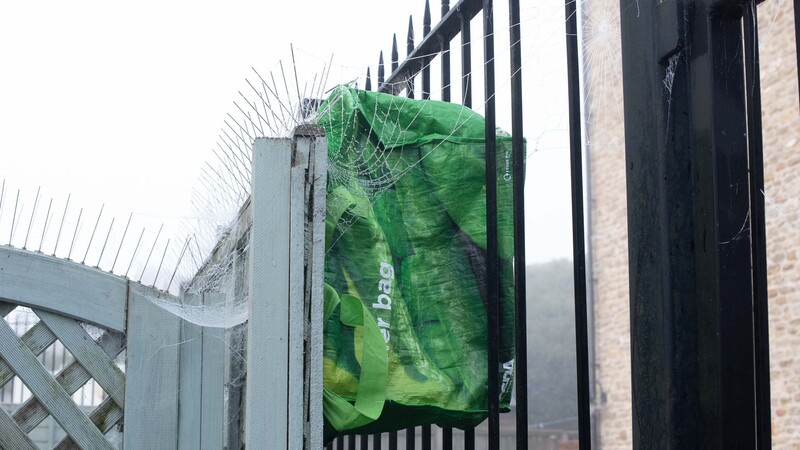
So, I've tried my best to find a spider's web that has similarly elegant dew droplets on it which also features a more simplistic backdrop. The stonework from the building behind, lit by the morning sun, adds a warm glow behind the web and is sufficiently far enough away to fall out of focus, thereby putting more attention on the sharp web in the foreground. However, I now have another problem. The fence posts that the web is attached to are in shot on either side of the frame. These black bars don't add anything to my photo and I couldn't focus any closer with my macro setup (a Nikon 50mm f/1.4G and a Raynox DCR-250 diopter) to remove them from the frame. Sure, I could just crop in, but ideally I want to keep all my pixels. That's where the trash comes in.
Use Your Trash
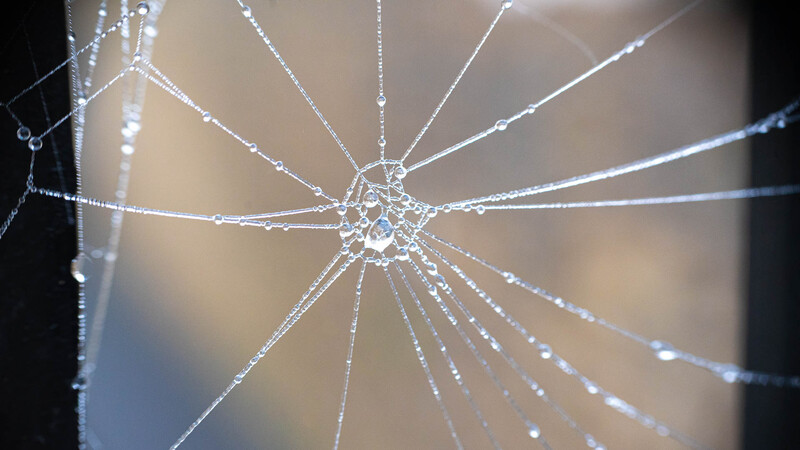
I positioned the trash behind my webby subject to hide the ugly fence posts and instead provide a clean, clutter-free backdrop
To get round the issue of busy backgrounds and cluttered edges in my macro shots, I decided to repurpose an old carrier bag that was destined for the trash can (it had a huge hole in it). I found one that had a nice even color that would provide me with a clean backdrop and then set about positioning it behind my spider's web. I chose to place it around 12 inches behind the web in order for the shallow depth of field from my lens to allow it to fall out of focus. This focus fall-off is important as it'll allow the backdrop to be blurred, while maintaining a sharp foreground subject.
Get It Nice and Sharp
Make sure the trash fills the frame behind your subject and then dial in the desired camera settings before snapping the shot
After some short focusing up by rocking back and forth in manual focus mode I made sure the aperture was sufficiently narrow to keep the web in focus but not so narrow that the background starts to become clear. For me, with my setup, this was around f/9. I also kept my shutter speed fast at 1/200 sec so that I could prevent any camera movement blur in the shot. In order to gain a good exposure with these settings though I had to ramp up my ISO to 2000. Alternatively, if you're not comfortable shooting ISO that high, you could always introduce a flashlight to compensate for the lack of light, but luckily my Nikon D750 didn't give me much of a problem.


No comments yet