
The process of culling is used in every type of photography and is used by professionals and amateurs alike. Culling is simply the process of selecting the best images from a shoot to be edited and delivered to a client. When photographers first start out in the editing world, this process can seem like a waste of time or hard to figure out a best practice. So I’m going to explain why we cull and some of the best ways to do it.
Why We Cull
-
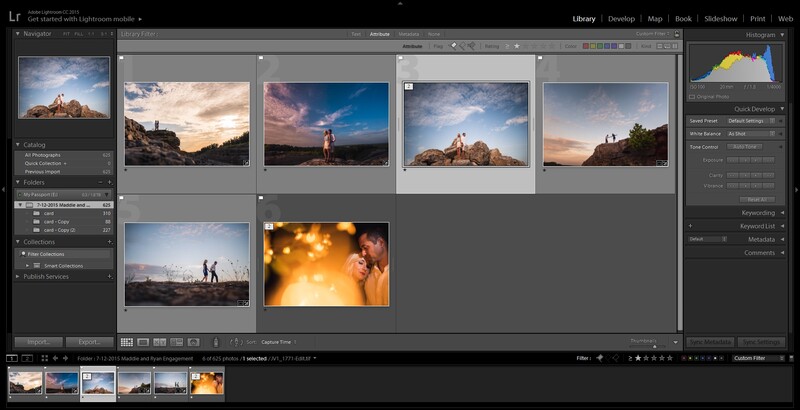
Weed Out Duplicates
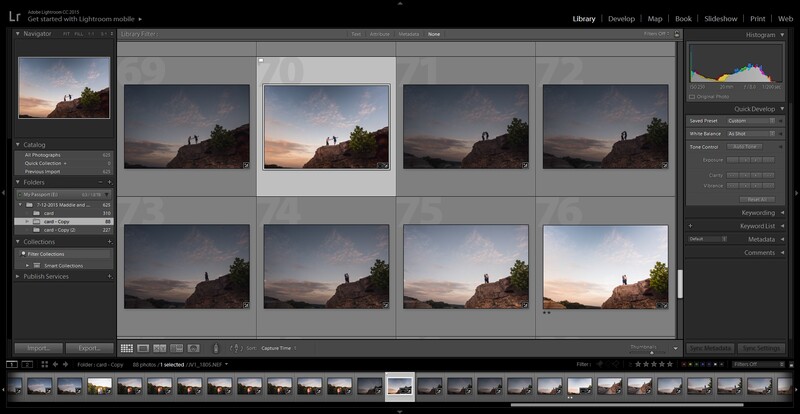
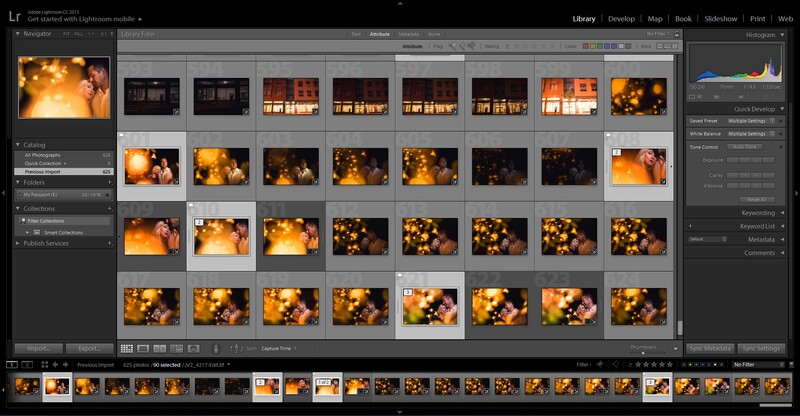
When shooting a pose, it's very common to have a handful of images that look almost identical. We don't need to edit or deliver all the images from every set. Instead, we select only the best couple images, or even a single image to be edited from each set of duplicates.
-
Remove Bad Shots
You are always going to have some bad images that don't need to be given a second look. Some examples of this are bad facial expressions, blinking, test exposures, and even that pose you thought might work but really doesn't. All of these images don't need to be edited and they definitely don't need to go to the client.
-
Saves Tons of Time Editing
Since we are removing all the duplicates and bad images, we now have a lot less photos to edit. Concentrating our efforts on the best images means that we are not wasting our time editing images that will never see the light of day. It also means we don't get burnt out on editing as soon since we are editing the images we like.
-
Saves Our Clients Time
Clients don't need to see the bad images. It makes them look bad and in return makes us look bad. Also, giving your clients every image from a shoot is overwhelming for them. If they have to choose their favorite image from a set of 10 photos that all look the same, they may just give up. It’s your job, as the photographer, to know what image looks best.
How to Cull
-
Cull, Then Edit
The key to culling is to do it all at once. When I first started out, I would start going through images till I found one I liked and then I would edit it. Then I would move on till I found another image and I would edit that one. The problem with this is that you find an image you like and edit it, not knowing that two images down there is a better image. You now wasted your time editing the first image. It also takes a lot of time to switch when you have to go back and forth from culling mode to edit mode. So instead, cull the entire shoot in one pass and then edit the selected images all at once.
-
Be Ruthless
I know every image you take is like your little child. You spent time on it and you crafted it into what it is. But now is the time to be strong and ruthless. You need to select the best of the best. I’m not saying every image needs to be portfolio worthy, but it does need to be the best image of a set. If it takes you more than a couple back and forths between images, then you are thinking too hard about it. If you the photographer cannot tell the difference, then your client won't be able to either. Pick one, ditch the other, and then move on.
-
Pick a System and Stick to It
When you first start this process it's going to take some getting used to, but the more you do it the faster it will flow and the easier it will become. But every time you change the way you do things, you start the learning curve all over again. I’m not saying never change, but definitely think about your culling system so that you don’t end up needing to change two weeks down the line.
The Different Systems of Culling (in Lightroom)
-
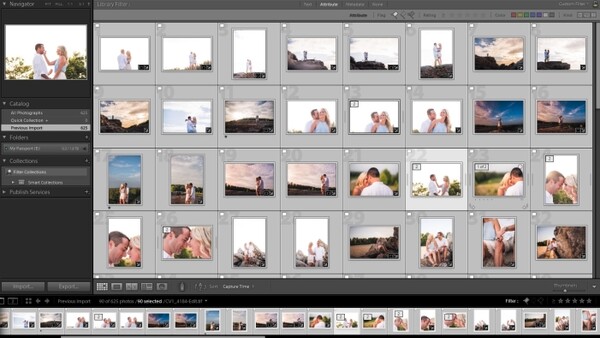
Flagging
For this system you assign a flag to each image. Every image starts off as “un-flagged” and you go through and either give it a “pick” flag or a “rejected” flag. Each flag has a keyboard shortcut to make the process faster. P for pick, U for un-flag, and X for rejected. This process is good if you are just looking to select images to edit and also if you want to physically delete the bad “rejected” images. Images with the rejected flag can be mass deleted.
-
Star Rating
In this process you are assigning a number of stars (0-5) to each photo. The keyboard shortcut for this is 1 for one star, 2 for two stars, and so on. It’s completely up to you as to what each star means. It could be one star is bad and five stars is good. I have also seen people do one star is for blog, three stars if for social media, and 5 stars is for portfolio. It’s really whatever you can think of.
-
Color label
The last option is using color labels. The options are red, yellow, green, and blue. These options are much like the star labeling system as they can be used for whatever you decide. Red for edit, blue for reject, etc. the shortcut for these labels is 6 for red, 7 for yellow, 8 for green, and 9 for blue.
My process
The process that I use is a combination of flags and stars. My trick to make things go a little faster with the flagging system is that I only flag images as a “pick”. I don’t use the reject flag because I don’t ever delete any images. So for me, an un-flagged image is the same as a rejected image. I’m going to edit all the picks and not touch anything else. The reason I don’t ever delete any images is because storage is cheap and I like to keep all the images I take as a “just in case”. Just in case I missed an important image the first time through or I accidently picked an image that has someone blinking. Since I keep all the images, I always have the option to go back through and select additional images to edit.
The way I use the stars is after I’m done culling and am in the process of editing. When I come across an image that has portfolio potential or is something I want to post to social media, then I will give it a star rating. That way I have an easy way to narrow down the images to only show my post worthy images.
The only time I will edit an image without culling first is for a day after sneak peek. For this instance, I will just go to an image in the catalog that I remember really liking from the shoot and I’ll edit that single image.
What process do you use to cull your images? What has been your biggest time saver when culling?
If you'd like to learn how to use Adobe Lightroom more efficiently on any device, make sure to check out our Mastering Adobe Lightroom course with Pye Jirsa. The content Pye covers will appeal to every level of photographer and will save you an incredible amount of time on your image editing. Save 15% by using "ARTICLE" at checkout.


Join the Fstoppers community for free
-
Post comments and join in the discussions
-
Browse the site ad-free
-
Share your work and get featured in the community
-
Compete in the photo contests for fun and prizes
31 Comments
Using Photo Mechanic for culling is probably what helped me the most in cutting down the time spent in front of my computer for wedding editing. Way faster than Lightroom or CaptureOne as it shows the JPG embed in the raw file instead of software generated preview JPG.
Other than that, my workflow is very similar to yours Jason :)
I normally import my images into lightroom with a standard thumbnail preview so its pretty fast going image to image. When you use photo mechanic, do you only import your selects? Or do you just use photo mechanic to flag and then import all the images? I have been meaning to try photo mechanic (as well as capture one...) but just haven't sat down to do it yet.
I plug my card reader (USB3) and flag images (keep or trash) while the files are still on the card. I then import only the keepers into CaptureOne to build previews and work on them.
This way, I don't keep useless images on my drives and don't lose time creating previews of files I will not use anyways.
Note that before trashing the files that I won't deliver, I always re-check them quickly to make sure I haven't forgotten anything and also try to critic my own work. I feel like it's important to analyze and see what I could've done differently to keep more files.
ah I keep every image I take from the day. Disk space is cheap and I wont risk permanently deleting a file I may want or need down the road. For example, in the past I had a client whose grandma died not to long after the wedding. So I went through and found every image I took of her and gave them to the couple. Not every image was great, but in that situation I don't think it matters. I also just found out a clients mom past away, so I'll be doing the same thing for them tonight.
This the reason why I actually delete the images I don't select… I once wanted to be kind and do the same thing you did. Then, the bride and groom started asking for more pictures of their uncle, and then of their cousins… and eventually asked to see all the raw files to make their own selection.
So to avoid this, I simply delete the raw files I don't give. I might keep a couple of them somewhere in case I might need them (formals or candids of specific people), but I never keep all the files I won't give to my clients But I guess that's another topic :P
I delete because it is no good, not needed, duplicate, or simply just because... I have not found a case ever of needing a deleted file after a shoot has been delivered in the past.
Affordable media space is not a reason for me to become lax in culling.
I flag the images with star-rating and deliver all edited images with one star or more.
After decent time, when blogpost is online, the images are delivered and my portfolio shots are selected, I delete all not rated images.
As Glen mentioned before, I did never find a reason to go back to a client wedding shoot and select other images then the previously selected and delivered ones.
Storage is cheap indeed but when I deliver 200-400 images from a wedding day there are 2000-3000 unused ones on my Drobo. Images I never touch again.
In my mind, all it takes is that one time you need to go back to make it worth keeping every image.
I'm with Quentin on this, I can do a shoot that is just 150 frames or one all day that results in a lot more. As such Photo Mechanic is my go to first stop for culling. It allows me to expeditiously cull my shoots or stage works, removing all unwanted results, star * of color flag relevant selections and also to do most of my meta tags to the general shoot, rename and then import into LR.
I'm one of those ruthless cullers too., my delete key is like home during the process.
I do my culling in multiple passes. The benefit is I can quickly do each of these steps in a few minutes and then go back and do the next step later. Culling thousands of images from a vacation or a long shoot, you start to burn out if you try to do too much at once. It sounds like more work than it really is. Culling for 100 photos might take 10-15 minutes.
- Photos imported into LR and added to a Collection
- First pass, every photo rated a 1 or 2 stars (pass/fail)
- Filter to show only 2 stars, make another pass, promoting (3) or demoting (1)
- Repeat as necessary until you have just the photos you need to edit rated. If I have 100 photos total from a shoot with 5 poses and 20 shots of each, I will go through until I have 1-2 of each pose that is my favorite before I start editing.
- basic editing, like cropping and fixing exposure or WB is done to all the top rated photos.
- A final culling happens if their are any duplicates to choose from still or some weak images.
- Any additional editing, spot removal, color processing etc happens.
- Final images are arranged in a separate collection so I can quickly drill down between all the photos, photos that need to be printed, photos to upload online etc.
- Everything I am keeping gets tagged, converted to DNG, and moved to an archive folder, the 1-star stuff gets deleted, the completed collection of images get moved to the correct Collection set by category.
That does sound like a lot of work... 10-15 minutes isn't bad when dealing with 100 images, The problem comes when you scale that up to dealing with 3000 images. Then you are talking almost 8 hours of culling. With my system I can cull an entire wedding in less then 4 hours.
http://theoatmeal.com/comics/sneak_peek
haha I literally looked at that as I was writing this and still made the mistake...
I use the reject flag and pick flags. If I reject I delete. I've never had the feeling or urge or afterthought that I wish I had that one deleted/rejected image. But before I reject I really make sure I'm set on my decision. If I am unsure, I go back to it after I've gone through the rest.
i just wrote a response to this topic a couple comment up.
As a mainly sports shooter, this topic comes to life with some regularity in my little circles and spreads out. Over the years I've used everything from ACDSee to Lightroom, and now.. Photo Mechanic.
Now I do this in PM for a lot of reasons. Some of those may or may not apply to you. The first is combining the Photo Mechanic with CodeReplacements dot com. TRULY speeding up work flow by 100% and making submission to the wire services a breeze. But after using this daily, it was silly to continue to use Bridge, Lr, or anything else.. It becomes SO fast in P M -- you can't go back.
Some of the best money I've ever spent of warze..
I think most all workflow style posts i see from sports and photojournalism people involves Photo mechanic so I'm officially convinced to give it a try.
I upload everything from my cards to a folder (prefixed with the date), then go through it first in Perfect Browse. It is SO fast. I used to use all the different star ratings but these days it's 4 for anything I give a client, 5 for anything I think could make a portfolio shot. Once i've gone through them all, I close Perfect Browse, and add from same location to Lightroom CC. It reads all the metadata so everything I did in Perfect Browse appears in Lr, then I filter 4 stars and above so I only see the images I need to edit, and off we go...
Maybe it's only on mac, but X is for rejecting photos and R is for cropping.
ah I had a brain fart... You're correct.
I've adopted the ranking system from Harrington's book. Import, render 1:1 previews (overnight for large shoots). 1st pass is either 1 star or reject+delete the obvious clunkers. Images get promoted on each successive pass.
1 star: technically sound
2 star: best of similars
3 star: best of shoot
4 star: portfolio grade
5 star: hall of fame
The 1:1 rendering really is a good idea if you are constantly zooming in to check focus and sharpness!
For your rating system are you saying you make 5 passes through your images?
More like 3 - by the time I'm at that stage, I have a good idea which images (if any) are 4 or 5 star worthy.
I might be bringing in 1000 frames, 1 starring 800, 2 starring 200, 3 starring 50, 4 starring 3, 5 starring none. Promote and filter with each pass.
If I can prevent distractions (guess what I'm supposed to be doing right now?) I can crank through 700-1000 images per hour, and never have to wade through everything again. The pre-rendering is key, my macbook hates my D810...
Preach it. The star ratings tend to be standardized meta-data that will follow your images even if you switch platforms. It's a great idea to be really consistent on what these mean.
If you want to flag things for blog vs social media vs whatever... you should use color labels. Color labels are a "low level" or "disposable" rating. Stars should represent something more permanent.
I hate to say it but I cull first on an iPad. Using the built in Photos app, now that my favorite app is broken (PhotoSmith).
I do this because I typically want to cull at the end of a day of shooting, and I don't travel with a bulky laptop any longer.
I import the JPG half of the RAW+JPG pair (no need for the RAW on the iPad) and back up the card to a portable drive, as well.
The problem is, I don't know when or if Photosmith will start working again, so syncing my picks back to Lightroom is a hassle.....
My current rating system for weddings;
1 - reject
2 - keeper
3 - blog post
4 - album
5 - portfolio
I also throw in a yellow color label for photos I am keeping, but need to edit in Photoshop, as 90-95% gets edited in Lightroom.
I import the whole card, back it all up and then cull from the imported RAW files using starsin LR
1 - first pass pick
2 - first pass pick that needs to go out to PS before client sees it (normally merge with another 2 star)
Then export the starred images to a separate folder so the others can be archived . Do LR adjustments on all the starts, PS adjustments on all the 2 stars.
The client proofs all the adjusted / edited starred images and chooses favourites
3 - client favourite
4 & 5 - client order
Then colours are used to sub-group images - all 5x7s so they can be filtered and printed using a batch print for example. Favourites to export to an album etc.
I only use 'reject' for technical issues (flash not fired etc)
I used to star things and take a few passes to choose between 3star and 4 star etc. Now I just flag the picks worthy of editing, and star when I want to distinguish the difference between a few similar shots or mark a 5 star for use somewhere else etc.
I also use the reject flag heavily; any missed focus or blurry shots are straight out, any bust pics with no redeeming difference from a pick will go as well. Space may be cheap, but if I pretty much have the photo elsewhere there's no point in keeping it. At the end I'll often review the un-flagged as well to see if I have loads of similar shots that can be further culled just to keep things manageable. I tend to shoot static subjects though, so a lot of the files can look pretty similar!
Jason, I use a process very similar to your's listed in this article. I import to LR and flag the keepers but I also reject any really bad photos. example, out of focus images, back focused, etc.
Then I process them in LR and if needed I use PS before completing them.
I make the exact same use of flags and stars. Sometimes I will use colors (while in the process of culling i see images that will have to go through PS for instance). Then I would create 2 subfolders, one called "keepers" and the second one labeled "rejected" to separate them clearly. I know I could show only the flagged images within the same folder, but I like to keep everything separated and organized. Then the rejected folder goes to a dedicated hard drive for at least one year (what's stated in my contract form) and is then being deleted if drive is full. I do this mostly for the case you mentioned when clients wants souvenirs of family or friends that passed away. I think this is nice to take this time to look out for pictures to give to the family, and then if like Quentin says they would want to see everything and make their own selection, I'd just refuse it and explain why, as silmple as that.
What are the possible options to cull your photos? I was using Lightroom & recently shifted to FilterPixel. It's a great product, and I am enjoying it so far. Though they save time & are great, I am curious to learn what everybody else is using & how it picks the photos.
I generally cull on bad focus, accidental blinks, awkward expressions, poor lighting & composition. Interestingly, this article also quotes the same: https://filterpixel.com/blog/posts/the-secret-behind-fastest-photo-cull…
Is everybody culling on the same criteria? What are your ways to cull your photos?