
I love color. Black and white photography holds a special place in my heart, but 90 percent of the time I gravitate toward color imagery in my own work. When I started shooting film again, I decided that I would most definitely learn to develop my own black and white film. From choosing your film stock to mixing super-secret developer cocktails guaranteed to make your images sing, there are tons of resources out there for the aspiring hobbyist. When it comes to color, however, I had always heard that the machines needed were expensive, the process complicated, and the chemicals harmful. Not so!
Cheap Kit, Expensive Setup
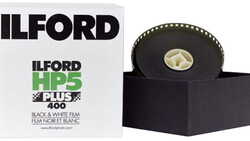
For the low price of $19.99, you can have your very own developing kit. Unicolor makes four part kits that you mix yourself, keeping down packaging weight and shipping costs. I got mine from Film Photography Project. There are four parts to each kit: developer, blix A, blix B, and stabilizer. The instructions are dead simple. But before we start mixing away, there are a few things you're going to need: A graduated cylinder, photography thermometer, mask, chemical bottles (3), changing bag (or changing tent), funnel, mixing spoon, and bucket. The initial outlay of cash for the equipment is a little daunting, but once you've made the investment, you're good. There are far more expensive areas of photography, and if you're not developing too much at home, I guarantee home developing is cheaper than taking it to the lab. Plus it's so much more satisfying! So, once you've got all of that you're ready to get mixing and develop some film.
Each part needs to be mixed in 110 degrees Fahrenheit water, so make sure you're not using your mom's garden hose.
The actual process for developing C-41 film at home is actually pretty similar to developing black and white film. There are tons of resources out there describing the techniques required, so I won't bore you with those here, but here is one of my favorite videos on YouTube explaining the techniques:
Definitely check out Ted Forbes' channel, The Art of Photography. It's a fantastic resource for photography in general, but there are tons of videos on all things film.
So yeah, ya got all that? Good!
The Developing Steps
Ready for the super complicated instructions? Here they go:
- Developer: 3.5 minutes
- Blix: 6.5 minutes
- Rinse: 3 minutes
- Stabilizer: 1/2 to 1 minute
- Hang to dry.
That's it! Not so bad, eh?
There are even times listed in the instructions for pushing the film up to two stops. Each one liter kit is rated for about eight rolls of 35mm film (36 exposure) or eight rolls of 120 film. Personally, I've gone way beyond those numbers and still gotten good results. Some have reported 20-plus rolls developed. Your mileage may vary.
Some Notes About the Process
If you've never developed film before, either black and white or color, I guarantee that the thing that's going to make you want to rip your hair out the most is getting the film on the reel in complete darkness. I highly recommend getting reels that have wide starting teeth. Samigon makes some that I highly recommend. They made my life a lot easier. The blix (bleach fix) is exothermic in its reaction and will put off a fair amount of gas, so be sure that you're releasing the pressure occasionally when you agitate. Nothing sucks quite like getting blix all over you. Speaking of which, an apron might not be such a bad idea. I should get one of those.
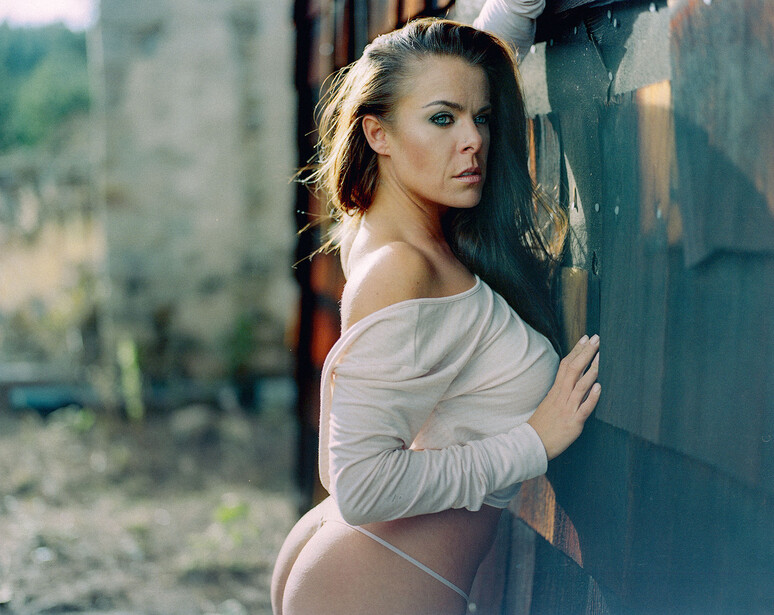
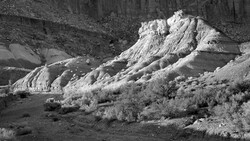
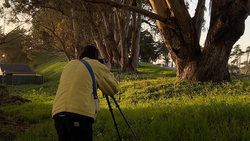
Below are some shots I've developed with the kits, and definitely take a look at the top video for more details with the actual mixing.


Any questions about the process? Sound off below!

Join the Fstoppers community for free
-
Post comments and join in the discussions
-
Browse the site ad-free
-
Share your work and get featured in the community
-
Compete in the photo contests for fun and prizes
19 Comments
Years ago Beseler used to have a simple 2-step C-41 process, which unfortunately is no longer available. Don't know what the archival quality of that was compared to standard C-41 processing. Positive processing was far more involved, and more temperature sensitive.
This is only half the process tho. If you want to really appreciate color negative film, you need to print on photo-chemical paper as well. Scanning negs merely brings you back into the digital domain, and you may as well just shoot digital for that. ;-)
I'm sure going completely analogue would give the most organic feel, but since it isn't an option for most, I'll just do my best with scanning. Granted, it's moving back to digital, but you're still getting more dynamic range (in the highlights anyway) than a digital camera.
"I'm sure going completely analogue would give the most organic feel, but since it isn't an option for most, I'll just do my best with scanning."
I was merely making the point, I wasn't trying to proclaim it as the holy grail. :-) You're correct that unfortunately analog printing resources are scarce.
Curious about this comment however:
"...but you're still getting more dynamic range (in the highlights anyway) than a digital camera."
Considering elsewhere you've mentioned you're using a flatbed scanner, I wonder just how much of it you're actually making use of. I commend you for the quality of the images you're getting from it, at least from what I see in the web res images you've shown here. I've never liked the image quality of scanned negs, and I have a dedicated film scanner. Too much noise. Transparency film has always yield higher quality images for me. You should consider a dedicated film scanner if you regularly work in film.
I must say tho I personally don't have any problems with the dynamic range of my digital cameras. Cameras from Nikon, Sony, and Pentax have great dynamic range, Canons tho are somewhat lacking. Don't know about Fuji's.
I've worked with most of the major players in camera manufacturers and there's no doubt that most of them have killer DR. The problem with them is that most of that is in the shadows. Where film has its strength for me (particularly while doing weddings) is in the highlights. You have to really work to blow the highlights on negative film.
I'd absolutely love to get a dedicated film scanner, but as of now, it's more of a side thing and I can't justify spending over a grand for a dedicated scanning machine. I haven't really shot slide film in ages. Perhaps I should give it a try! Could be good fodder for an article. Provia vs Portra?
Hmmm, can't say I've had issues with highlight data in my Nikon DSLRs. Interestingly enough I recently discovered I had to OVEREXPOSE an image in my Nikon J4, which has the most miserable 1-inch sensor one could imagine, in order to get both highlight AND shadow detail in the image below. I don't know how much you'll be able to make out at the posted resolution, but that the difference between the "straight" shot on top and the processed one below. :-)
Your developing technique is really good. Do you mind sharing how you scan?
E6 developing is also fun, and slightly less temperature sensitive than C41.
E6 is much more temp sensitive than c41, with a tolerance of 1/2 of a degree. It also is developed at a higher temp.
Yes, E6 is plus or minus 1/2 a degree, but isn't C41 plus or minus 1/4 degree? This chart is what I remember: http://www.garageglamour.com/tips/c41filmdev.php
(Granted, you can be "off" and still have satisfactory results, especially if you're scanning. Or maybe I'm *shivers* wrong, on the internet)
In my experience, C41 is more like plus minus 1 degree or so whereas e6 is inside a half degree.
I've been using an Epson v600. Experimenting now with a V700 and DSLR "scanning"
One more thing: you keep you solution at the 102 degree temp by floating them in a sink or bathtub full of water at or slightly above the correct temp. TBH I've never done C41 at home (still have a local minilab that does it well, and for not much $s), but E6 can be done at room temp by extending the time for each step.
Don't use squeegee. It leaves marks. Use water softener like Ilfotol http://www.bhphotovideo.com/c/product/25041-REG/Ilford_1905162_Ilfotol_…
Nice! I'll check it out. I haven't had much of an issue with marks on film, but ya can't be too careful
The best tool in the world for temp control is the Anova Sous Vide Precision Cooker. Much better than tap, fish tank heaters, pig blankets, etc. I use it for c41 and e6 and it keeps temps within a 1/10 of a degree or so. Iv'e always got good results from the Tetenal C-41 Press Kit too. It's some small bags that look like an MRE and is real easy to pack and develop on the road. +1 on art of photography site. Great article.
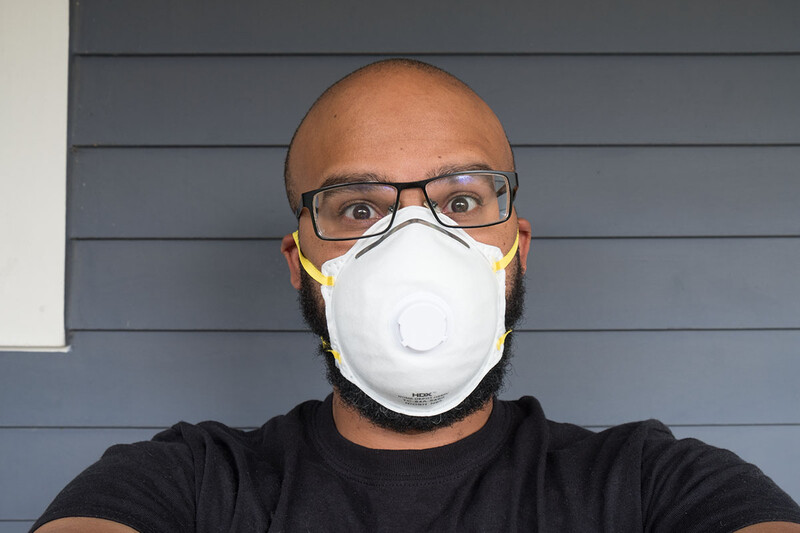
You should be using better mask than that - yours only protects from liquid particles, not vapors... Consult the MSDS sheet of your developer kit and follow the guidelines.
Some people are more sensitive than others, but this is still pretty nasty stuff. Anyone with asthma etc. should be more cautious.
I did some research and it seemed that the main issue from mixing was from dust and not vapors. The vapors, while certainly not good for you, weren't particularly harmful. I have no breathing issues and did the mixing outside
I am not trying to badger you, I think its really important to adopt best practices when dealing with chemicals. For your own safety and that of your readers.
I managed a university lab for several years with thousands of students and amateurs just like you using the facility. I've seen a big whiff of vapors from black and white fixative send a student who never had a problem before sent to the hospital with respiratory distress - and that stuff isn't "that bad".
Also a healthy respect for the less toxic chemicals is helpful when you venture into the cooler more complicated stuff like selenium toning and van dyke brown process where the chemicals literally can kill you.
On another note, your pictures in this article are gorgeous!!
On wearing an apron for protection of our clothes, how about Eye protection