
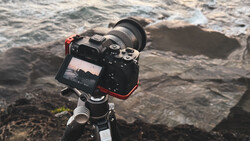
Most photographers are familiar with using a neutral density filter to create dreamy, long exposure photographs, but should you use a neutral density filter when shooting time-lapses too? In today's video, I explore why using a 10-stop ND filter might be perfect for more than just still photography.
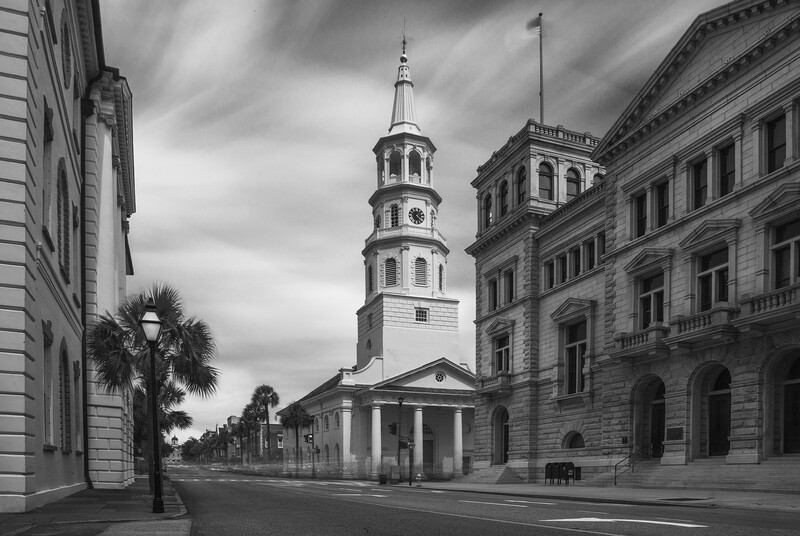
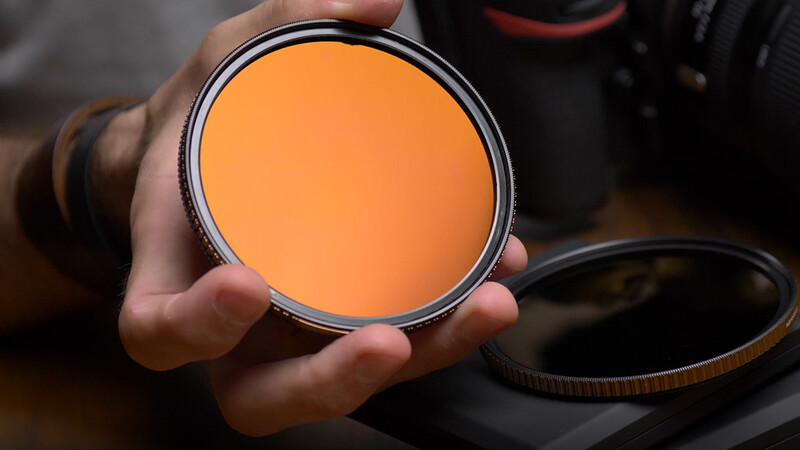
A week ago, I released a video on how to use a 15-stop neutral density filter to remove people from your scene and create dramatic moving clouds in your landscape photos. The filter I used was the ND100k filter by Polar Pro, which allowed me to capture the longest exposure I have ever taken at 16 minutes. The company also sent us a few other filters, including their ND1000PL, which is a 10-stop neutral density filter with a circular polarizer attached to it. While this 10-stop filter isn't nearly as extreme as the 15-stop filter I used to create the photograph of downtown Charleston, it might be more suitable for other applications like time-lapse photography.
If you've ever watched any of our Fstoppers tutorials with Mike Kelley, Elia Locardi, or Joey Wright, you know we like to take a lot of time-lapses for both our behind the scenes series and for the lessons themselves. There are a lot of ways to create time-lapses, with the easiest method being shooting video and speed-ramping it in Adobe Premiere. The problem with this method is when shooting video, you are forced to set your camera's shutter at 1/25th of a second or faster. This forces you to capture every frame of video nice and sharp with very little motion blur. However, if you create your timelapses with still photos, you can easily set your shutter between 1/2 a second all the way up to minutes to create very unique motion effects.
For us, the most ideal shutter length for time-lapse photography is right around 2 seconds. This is long enough to blur most people, water, and traffic while still keeping your total time-lapse capture time within a reasonable time of 30 minutes or less. With a strong 10 or 15-stop neutral density filter, you can easily create single exposures of 10 seconds up to a full minute for some dramatic effects, but if you want a final time-lapse that is at least 10 seconds, you are going to have to stand next to your tripod for 40 minutes if not hours.
If you want to know an easy way to figure out how long your camera needs to take photos in order to create a usable time-lapse when using longer shutter speeds, here is a simple equation to memorize.

(Shutter speed x 24 frames per second x total seconds of final time-lapse) / 60 seconds
This will tell you the total number of minutes your camera will need to take photos in order to get a final time-lapse at the desired length. Keep in mind, you may want to add a full second to your shutter speed to account for any blackout time when the shutter and mirror are flipping up. Also, make sure you do not add any extra intervals in-between each shot, because that will not only increase your overall shooting time, but it will also introduce large gaps in-between each frame, which will not play back as smoothly compared to if each shot was taken consecutively.
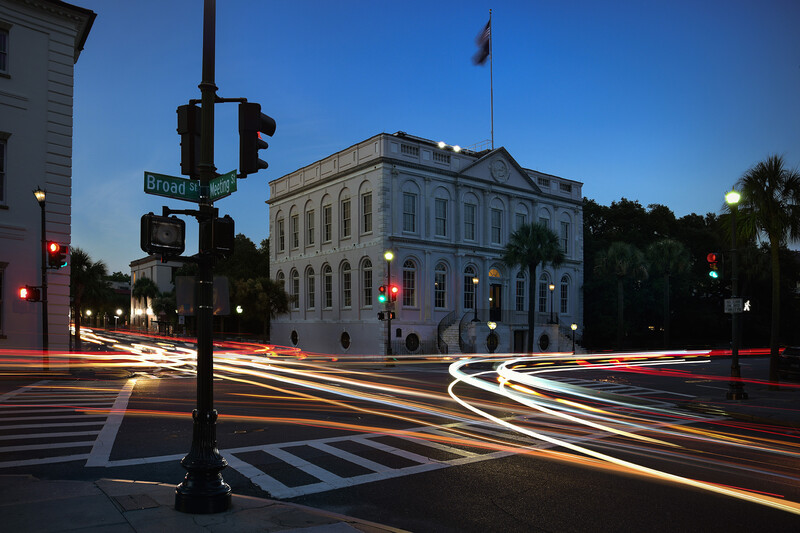
As you can see in the video above, the difference between using a fast shutter and a long shutter is pretty dramatic. Like all genres of photography, how you create your own time-lapses is an artistic choice, and there is no absolute right or wrong way to choose your settings, but personally I do like the longer shutter speeds, because they add a smoother motion to the final presentation. Keep in mind, you will probably only need a neutral density filter when shooting time-lapses during the day since dusk and night exposures will probably already require a longer shutter speed to capture the scene. Below is a final light trail photo I created using these filters after my daylight time-lapse was completed.
If you are interested in getting your own Polar Pro 15 or 10-stop neutral density filter, you might want to check out the Polar Pro Trade-In Program where you can save up to $40 on a new filter when you mail in your old filter. You can also find a variety of other filter densities and ring diameters over at B&H Photo if you need something a little less extreme for video or photography. One final tip, you might want to buy the largest filter you might ever need, like an 82mm filter, and then buy a few step-down adapters so you can use one single filter on a variety of lenses. Most of our professional DSLR lenses are 77mm and 82mm, but all of our Panasonic GH5 lenses are 58mm. Since we have only purchased 82mm filters, we can use one single filter on all of our lenses without having to buy multiple filters for every different filter ring size.


Join the Fstoppers community for free
-
Post comments and join in the discussions
-
Browse the site ad-free
-
Share your work and get featured in the community
-
Compete in the photo contests for fun and prizes
15 Comments
This is where you guys excel at, making original videos! Good work as always.
Thanks Felix, we try to do a mixture of different content and keep things well rounded. I appreciate your kind words!
It's not the first post made by Patrick Hall that I find very good: interesting, concise, practical. I think I know the topics but I always learn a bunch of things. For example I know all about the principle of this one, and I knew that 2s is the sweet spot, that's what I use. But I don't necessarily take the time to put that to the test, and test with 10, 15 stops ND. And that's where your posts are so useful. In a matter of minutes, you're putting this to the test and show the results. So convenient and interesting. Great work Patrick!
5DIV has a similar Timelapse Movie function, that I ditched because I had the sensation it would export a... movie, and not a series of RAW. Does that option on the Nikon exports RAW as well? I have to check what the 5DIV does. It seems to me that preventing the body to do thousands of mechanical tasks is a great way to extend its durability.
Awesome video!
Hey Patrick Hall question about the reason behind the flicker in the timelapse. Could you fool the 850 into thinking that you've got a manual lens attached by slightly twisting off the body?
Haven’t tried it but I can when I’m back in the studio. I wish the camera companies would just make this a programmable option instead of making people halfway twist their lenses off. Seems super sketchy if you are in more risky situations.
Couldn't agree more! I had to use an open bag filled with clothes under the camera while doing a night timelapse just in case the glass decided to fall off.
I posted the question on YouTube but I’ll ask here as well. It looked like you over exposed by about a stop according to the exposure meter on the back of the camera. I have no experience with this type of photography or Nikons so did I see that wrong or was there a reason for that?
I think the lighting and settings were just slightly different when we filmed that b roll for the lesson. I wouldn’t read too much into it.
Instead of changing the Still Image Default Duration and dragging the folder of photos in and then dragging them into the timeline, why not just go FILE >> IMPORT >> and check the 'Image Sequence' box? When you have all the photos selected and import that way it shows up in your project bin as one thing that's already put the photos in order set at one frame and you can alter it like a regular video clip right off the bat and less clutter in your project bin.
That def works. I just like manually importing them in so I can adjust the crop since rarely does the 2:3 ratio fit in the 16:9 video frame. Also if I need to adjust a single photo, I like being able to click on the timeline and see the exact file giving me trouble or the file I want to blend into my timelapses more. Maybe I’ll do a tutorial on some of the more advanced masking I do often with my timelapses. If you look at the final timelapse at the end of the video, I’ve blended in a bunch of lights and repaired a few lights that didn’t turn on on location. I agree though, my bins do get super cluttered and sometimes I even create a full timelapse project, get the clips perfect, and then export them super high res with no motion so I can import clean 4-6k clips into my final project (like many photographing the world projects).
Timelapse flicker (especially in skies) isn't always due to electronic aperture blades. Even with a manual aperture and a long shutter speed, you can still get flickering skies... even in a cloudless blue sky.
When I first started doing timelapses with still cameras, I used to run it through After Effects and use deflicker filters. This usually worked, but it was tedious and time-consuming.
The best solution is LRTimelapse, which works alongside Lightroom. I swear by it.
If everything is locked down into manual, and your skies are clear, why do you think you still get flicker? I’ve noticed I get flicker with changing light esp if my shutter is too long because you don’t have enough frames to have a smooth transition. LRTimelapse is a great too for sure if you wind up having lots of flicker.
Maybe subtle atmospheric changes that only affected the background, but not the foreground or vice versa.
Maybe the camera is too precise (no persistence of vision).
Maybe the shutter is on auto (doing a day/night or vice versa) and the metering got tripped up.
Maybe the polarity of the light was modulating and your polarizer is partially to blame.
Maybe there's a meteorological explanation, but that doesn't help you avoid it in the moment or help you fix it later.
That said, no other tool is as effective as LRTimelapse. I mean, you can keyframe just about every RAW setting. I mean, you can tweak a particularly bright color that only appears in a handful of frames when, say, a thin ray of sunlight poked through for a few minutes midway through your timelapse.
Under my experience the source of the flicker is the opening and closing of the aperture iris. On mechanic lenses like most of the nikons is not 100 % consistent. Try shooting with the lens wide open or with a stop down lens, and you will see not flicker at all. Same story with the IS that will introduce a kind of trembling to the TL if you forget to switch it off. I haven’t tried the newer electronic aperture lenses, so maybe these are better suited.
Hey! Quick note:
On premiere you can file-import as a sequence, instead of dragging the folder.
This way it will automatically interpret it as a single "file", at the default frames per second. If you want to change that, you can right click on the imported media item > Modify > interpret footage, and change to the desired FPS.
This makes it so that applying changes to scale, position, effects, etc can be done to one timeline item without copy pasting or nesting.