
Whether you are shooting film or have a large collection of negatives, chances are you will want to scan them one day. The process to digitize your analog pictures can be expensive and sometimes even disappointing regarding image quality. When I started playing with my Mamiya RB67, I wished there was a cheap and quick scanning method that would offer me a good amount of detail and decent colors. I found it using gear I already owned and that most of you actually also have at home. It even surpassed my expectations to the point that I decided to share the technique with you in this article.
Image Quality: Lab versus DIY
Before we dive into the how-to, I want to make a point and show you that the quality you can get out of this technique is as good as what many labs offer, if not better. This way you’ll know that I’m not wasting your time with a promising idea that doesn’t deliver. So here are two different scans of the very same negative. One of them was realized with my Nikon D810, a Sigma 105mm macro lens, two Elinchrom ELB flashes, and Capture One, while the second one was done by a lab. Can you guess which is which?
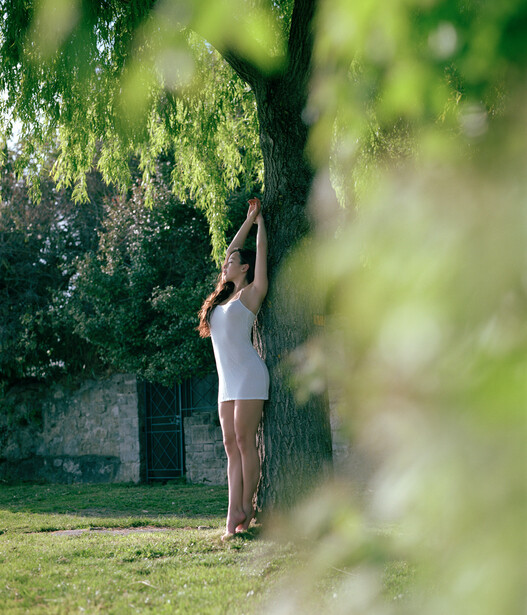
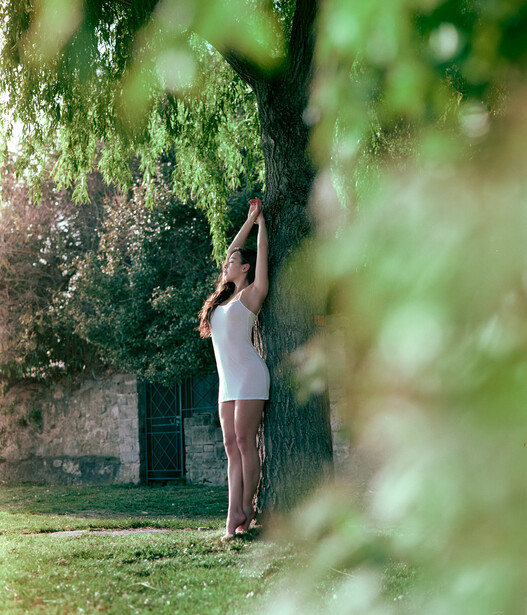


In both examples above, the lab scan is labeled "A" on the left (less magenta in the skin tones). While I don’t have the exact model of the scanner used by the lab, I know it was an Imacon. An expensive machine but not the best around either — not as good as a drum scanner. If you were to buy a second-hand Imacon, it would set you back $2,000.
So while my technique remains very basic, it will cost you less than $2,000 and will yield digital files that are comparable. Best of all, it should only take a few minutes to digitize a few rolls of film. Much fast than an Imacon or Epson scanner.
The Gear You Need to Scan Negatives
Before we go any further, here is a list of the required gear and accessories:
- Camera
- Macro lens
- Tripod
- Two pieces of glass that are at least the size of you negative
- Tablet, phone, or laptop, depending on the size of you negative.
I believe these are all things you already own. Some of you may be lacking the macro lens, but it can be replaced by a 50mm with extension tubes (just be careful with deformation and vignetting then). Also, if you have everything except the macro lens, it will still cost you less than a good Epson or Imacon scanner.
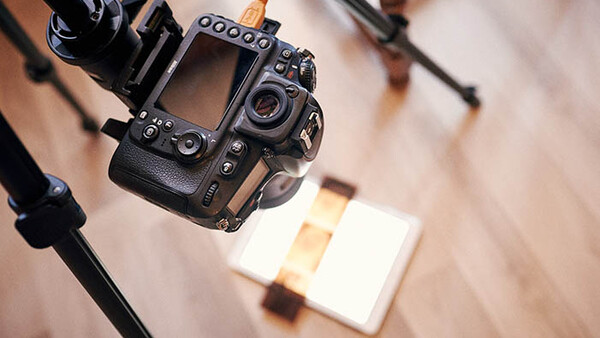
The Setup
Now that we are clear with what we need let’s set it all up. The goal here is to recreate a reprographic system with a light table. The initial idea actually came from seeing this video:
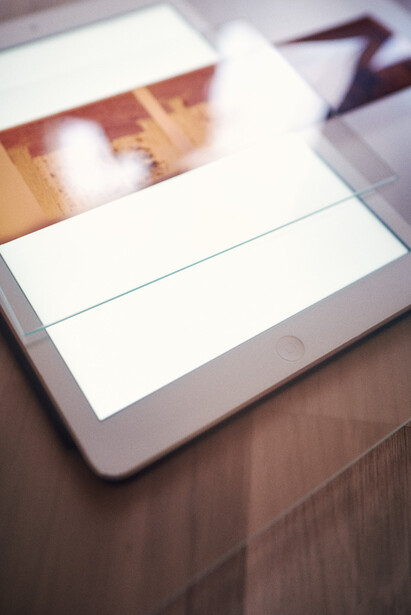
Place your tablet (or phone or laptop) on a table, install one of the two glasses on top of the screen, and have your camera on the tripod above it. The lens should be pointing straight down, and the focal plan must perfectly parallel to the glass surface, where your negative will be placed. To be honest with you, this is the hardest part. At this stage, your setup should look something like a poor man's reprographic system.
If you hadn’t understood yet, the tablet is meant to light our negative from underneath. So make sure to turn its brightness to the maximum, and have a pure-white image displayed in full-screen mode. The glass on top of it is here just to separate the negative from the screen and avoid having the pixels showing in our scan. Depending on the aperture you are using, you might have to raise the negative even more than just a few millimeters. Also, make sure both the glass, the negative, and the screen are pristine. An air blower will probably come in handy here.
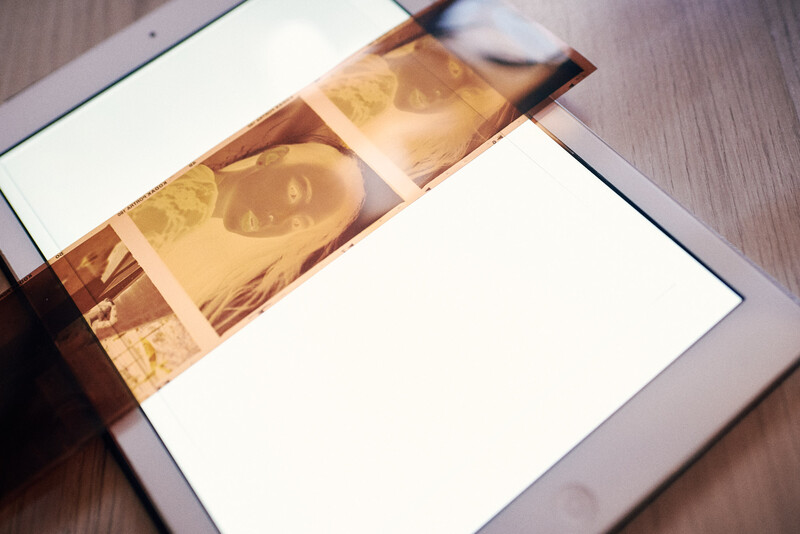
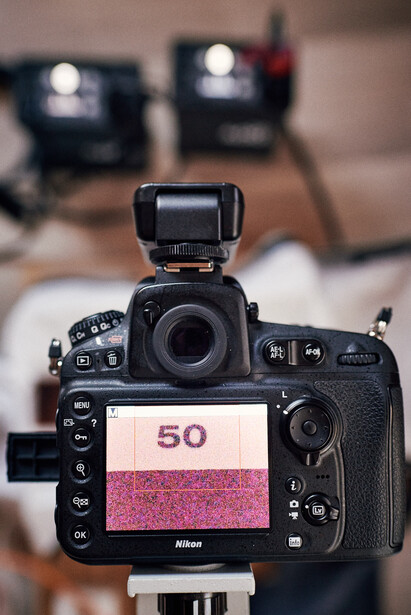
Once everything is cleaned, you can go ahead and snap a picture of your negative. Make sure to focus on the grain and not on the picture itself as it may have been out of focus in the first place. To do so, switch on the live view mode and zoom in all the way.
You now have you negative in digital form. All you have to do next is convert it to a positive image in Capture One, Lightroom, or Photoshop. If you don’t know how to do this, be sure to stay tuned. As you read these lines, I’m writing a second article that will detail this process for you.
Wait, you are wondering what that second piece of glass was for, right? Well, as we don’t use a carriage for our negatives, chances are they are not totally flat. If they aren’t, clean the second piece of glass, then put it down over your negative.
Improving the Setup
Let’s be honest, this scanning method is very basic and has its flaws. Since my first attempt, I actually improved the system above. I still wanted to share it in its most simple form as it’s also the cheapest one. But here are the few things I noticed so far that you can tweak to make it better.
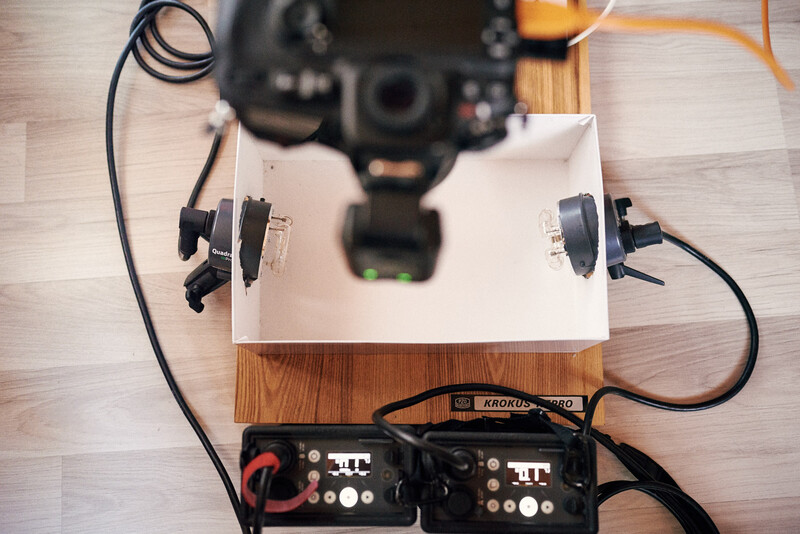
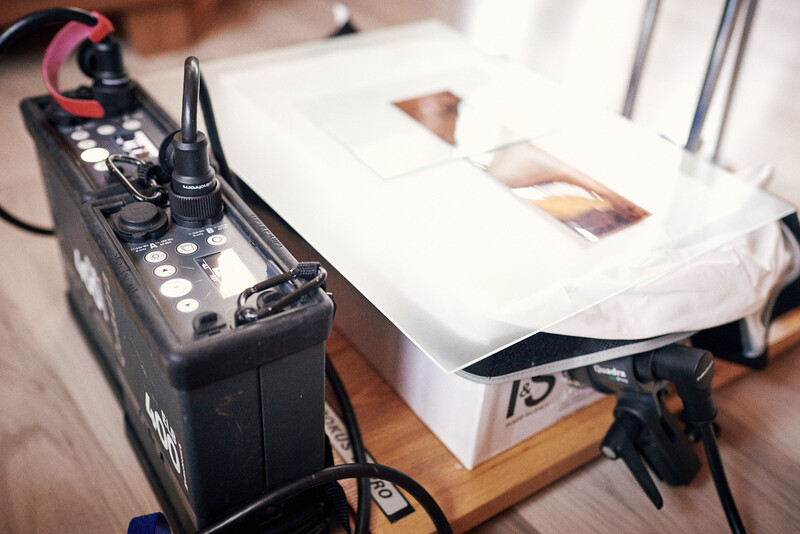
First of all, your iPad is most likely not bright enough to light your negative in any condition. You may have to do this in a dark room or wait until dusk. This can be overcome by using strobes instead of a tablet. I personally place two Elinchrom ELB 400 heads in a shoe box with a piece of glass on top. With this setup, I can digitize my film in any lighting condition and I can even adjust my strobes output in order to brighten or darken my scan.
Then comes the dust. You must do this process in an immaculate environment. Forget about doing it outdoors or with your windows open. Placing a bellow between the negative and the lens can also prevent having dust coming onto the negative or lens after you have cleaned them.
Thirdly, I could see people complain about colors. Perhaps you shoot film because you want those beautiful colors it can render that your digital camera cannot. Well, then this technique is probably not for you unless you have a digital medium format system like shown in the Digital Transition video.
Light flare may also bother you. Having the negative lit from behind, you may see some contrast issue or color orbs appearing. If that’s the case, cut a hole the size of your negative in a black piece of paper and lay it down over the negative.
Finally, you might find your pictures lacking details. But there is a simple fix for this potential issue. Below is another scan of the same negative as before, again using only my D810. Left is the one with my basic setup (iPad, D810, tripod), and the right one is my current setup (Elinchrom ELB 400, D810, old reprographic table).


The difference in terms of resolution between the two is very easy to explain. The first scan was done with the negative filling the D810 frame. Being that it was a 6x7 negative, I got a bit less than 36 megapixels. For the second one, I placed my camera at the closest distance I could focus my Sigma 105mm lens, and shot multiple images. All the pictures were then stitched together to create a 200-megapixel-plus digital negative. You may also notice a difference in terms of colors between the two and that seems to come from the iPad screen not being bright enough to shine through the negative. The rendering from the setup with the flashes yields a better dynamic range.
As you can see, if the development of the film is done properly, this technique yields perfectly acceptable results. At least, more than enough for you and your clients to post on the web or even print in small formats. The conversion in Capture One or Photoshop will also play an important role in the final digital image quality, so be sure to stay tuned and read my next article regarding that matter.


Join the Fstoppers community for free
-
Post comments and join in the discussions
-
Browse the site ad-free
-
Share your work and get featured in the community
-
Compete in the photo contests for fun and prizes
25 Comments
Nice! I was thinking of doing a similar article, but I'm glad you got to it first. I look forward to the next article, as although black and white has been easy for me using the above, color correction has been a nightmare with C-41. Well done!
nice read! i like the use of the ipad.
ive built a contraption thats very easy to use with similar results. Check it out here:
http://www.austinpaz.com/blog/2015/6/16/35mm-film-scanner
I've tried that once before buying V750. I don't shoot macro often so I used extension tube. Fun experiment but it was a pain to set focal plain parallel to the film.
setup
https://www.instagram.com/p/MKnTwRFcgo/
picture
https://www.flickr.com/photos/roomak_pl/7418291648/
A cold shoe three axis bubble spirit level will make it much easier (https://www.amazon.com/HDE-Three-Bubble-Spirit-Cameras/dp/B00AG3GZBE) :)
Wouldn't work for me. Click on the link to see my "pro" setup ;) The actual problem was with adjustments. I used live view to check focus, but applying corrections was almost impossible. Your setup is much better.
Film Toaster at www.filmtoster.photography is about $ 2,000 and you supply the camera and macro lens.
I have tried this method with a small flash and macro lens. I still need to build a white box with glass.
Good article.
I have thousands of film negatives some 4x5" and most 35mm that I have wanted to scan but the cost would be far too high. This method is a must try for me. Thank you for sharing.
For the amount of negatives and the various sizes you are better off getting the Epson V800/850 with the wet plate carrier for 4x5's and holders for the rest of your negatives. Using your Camera to digitize would make sense if you only have to do some once in a while.
So a V800/V850 would be faster and offer a better quality than that of DSLR in your opinion? I'm not so sure about it… The technique shown in the article takes only a few seconds to digitize a negative, and I doubt a V850 produces better results than what you can get out of an Imacon – which doesn't seem to be much better than digitizing with a Nikon D810 as you can see in the examples.
Please reread what I said. "For the amount of negatives and various sizes"......
I was not speaking to the quality of one over the other, just simply the amount of work he stated he had for scanning MOSTLY 35mm and some various 4x5s. For Volume scanning, you could get more done with the V850/800
"The technique shown in the article takes only a few seconds to digitize a negative"
Seconds if you don't count import, manual inversion and orange masking and of course the setup and tear down of your strobes, tripod etc.
Besides the easier scanning process with a scanner you can get much larger files than 39mp. My 6x6 scans are typically over 100mp at ~5000DPI
Nothing wrong with your setup, but nothing wrong with just buying a decent scanner to make life easier.
But the article was how to use your DSLR , not how to use a scanner.
Op stated " I wished there was a cheap and quick scanning method that would offer me a good amount of detail and decent colors." At which point, I remarked that an epson scanner would probably be better for quick and easy if you have LARGE amounts of stuff to scan. If you only need to do some "here and there" scanning, the op's method would work.
Bill, I don't intend to scan every negative I have. That would be a full time job in itself. There are select images I would like to scan or try the above technique to digitize.
Using this method for 35mm is far far too time consuming as is the use of an Epson flatbed. If you are looking for speed and can live with the relatively low resolution, try to find a PAKON F135+. It can scan an entire roll of 35mm uncut in under 4 minutes. I use mine along side a Nikon Coolscan 9000ED a £2000 top of the range negative scanner and often I prefer the results from my Pakon. The colours come out looking perfect. Attached is a file that shows what this scanner is capable of, this apart from slight sharpening in LR is straight out of the scanner.
I am scanning my negatives more or less with the same technique, but I use an LED light-box. Moreover using Nikon Picture Control Utility, I defined a mode to convert negative into positive that I uploaded on camera, so I can see the result right away and change exposure if necessary. I have to say it works well for Black-n-White, not for colour film that I convert in photoshop.
I have been doing this for a while. I now have a dedicated set-up, thanks to an copy-stand (salvaged from an old enlarger), a light box and a 35mm and 120 (6x6) mask from a Fuji commercial print machine. To provide light, I use a pair of Nikon SB-700 flash units, both operating on a manual power setting of about 1/4 power. One flash is connected to the camera (a Nikon D810 with a Nikon 105 Micro attached) using a sync cord, the other flash is triggered using the slave setting.
To initially get the project going, I used a tripod in this configuration described here, but I set up the flashes in a show box (one that had a white interior). A small rectangular hole of about 25mm x 37mm was cut in the middle of the lid above which I placed the negative to be copied.
Exposure was 1/250th of a second (so no concern about camera movement) at about f16 at 64 ISO. The results are great and because you are working with a RAW file, you have more latitude than you ever get from a conventional film scanner.
For converting negatives, I have found the easiest way to manage them is to open the image of the negative in Camera Raw, and then go straight to the Curves panel and start inverting each channel (Red, then Green, then Blue)... simple make the low end high, and the high end low. This will convert the negative to positive, then start going back through Red, Green and Blue shifting the end points until you start getting the colour and contrast you want in the file.
I'm surprised you haven't gotten Newton Rings from this technique. It may depend on how dry the atmosphere is where you live. Anti-Newtonian glass is highly recommended.
Shooting greater than 1:1 and stitching is really the way to go with this. The big problem is parallax. I literally placed the macro on top on the film, which was resting on a Gagne Porta-Trace daylight light box, to maintain proper parallax. While the results are spectacular, this particular approach can scratch the film if you're not careful.
Flatbed scanners, and even modern dedicated film scanners, aren't as good because they have no focusing mechanisms (they are "pre-focused"), and rely on unsharp masking to compensate for it(!). They also have no glass carriers and some area of your scanned film will always be out of focus.
You absolutely need to place black paper around the edges to keep the flare from ruining your shots.
If medium format is the largest film size you will be dealing with, finding the now discontinued and insanely expensive Nikon Super Coolscan 9000 with it glass film carrier will yield the greatest results, because the scanner has a great dynamic range, has a glass carried with Anti-Newton glass to keep the the film flat from edge to edge, and is capable of focusing on the film plane. Arguably one of the greatest scanners ever made, better even than the photomultiplier tube Heidelberg Tango I used to deal with at an ad agency. If you have LOTs of medium format film to scan, this is the unit to get. It will cost you, however.
Nice write- up here, Quentin!
As an additional afterthought, since some of the negatives have a much higher dynamic range than a DSLR, is to shoot an HDR image.
Not for case studies of eye cancer research, but to have the whole tonal range of the original negative to play with in Lightroom or the RAW editor of your choice.
This is an awesome idea. Thanks for posting. I have one question - would this work on slides?
It should work just as well :) The only difference will be the post-processing part.
I've done a video going over the post processing of DSLR scanned negatives in Lightroom and Photoshop if anyone is interested. This should help to get better colors our of your scans.
https://www.youtube.com/watch?v=s_i4j-cwi5k
Here is my result from similar setup - Nikon D800 + Nikkor 60mm macro). Processed manually in Camera RAW + Photoshop 2015.5
Used speed light under the glass.
Even easier on 35mm, especially if you shoot Nikon. You can pick up a bellows, slide copy adapter, and enlarging lens for about $250. I just use the little light table you are using in your article, but you could use a strobe if you wish.
Last year, Pentax came out with this amazing version of that Nikon rig designed to handle medium format as well... but it's over $1000. http://www.ricoh-imaging.co.uk/en/product/30100/body/overview/duplicato…
The problem with buying older machines is just that. Parts? Service? Support? Is it going crap the bed soon?
A friend and I worked up some contraptions to take advantage of the ever increasing potential of DSLR 'scanning'. Responding to a comment above, I can tell you that with a D800E and slide film, there is a challenge still in terms of Dmax, dynamic range of the sensor. Those deep dark colors are hard to hold on to with current top shelf sensors. That will change for the better in time. So those who hold great machines now are waiting for the end of life for them. Using a DSLR for scanning, we're waiting for more and more life.
A video of my prototype in action:
https://www.youtube.com/watch?v=PXy7RJwIBAo
Tolerance test:
https://www.youtube.com/watch?v=InL8_dz17fs
Build pics:
https://www.flickr.com/photos/35334802@N04/
The Arduino program is freely available. I never made a proper set of plans as it changed so much over the course of a year. At last check I measured 5160 SPI. Pretty happy not going for more magnification from medium or large format film as it's usually just not there to record. Downsampling would be one benefit I suppose of going more than 1:1 mag. I'd like to see what a foveon sensor could do as well. Let's keep at it guys.