Chasing that painted look usually breaks down in post or gets derailed by gimmicks, especially when you’re trying to balance mood with detail in Lightroom and Photoshop. The video focuses on a handful of choices that change the feel fast, without wrecking the file or turning everything into mush.
Coming to you from Max Kent, this practical video walks through what “painterly” actually tends to mean in photos: softness, texture, and a hint of unreality without looking like a filter preset. Kent starts at capture, not sliders, and that’s the point. If you only attack this in editing, you’ll fight your own lighting and end up overcorrecting. He also gives film its due, mainly for grain and the way texture shows up at higher sensitivity, but he’s clear that a digital camera can still get you there. The useful part is how he frames film as a helper, not a requirement, then moves on before it becomes a format debate.
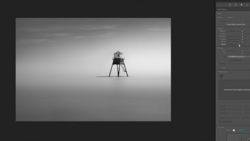
The strongest section is about when to shoot, because it’s a decision you can make before you touch a curve. Kent leans on blue hour and golden hour for a reason: soft light and gentle contrast are hard to fake convincingly, and you can spot a forced look right away. He also calls out a common mistake: treating those hours as a sky-only assignment instead of photographing subjects lit by the sky. That shift changes your results immediately, especially if you stop chasing sunsets and start watching how the light wraps buildings, faces, and streets. Then he throws in fog and mist as a “cheat code,” not as a romantic idea, but as a practical way to get diffusion and depth without dragging lights and modifiers around. If you’ve ever looked at a scene and thought it felt flat, mist can turn it into layers while you’re still standing there.
Then he pivots to motion, and this is where a lot of people get uncomfortable. If your reflex is to live at 1/250 s and faster, you’re training yourself to avoid the exact texture that makes paintings feel alive. Kent’s range is more specific than the usual “try long exposure” advice: roughly 1 s to 1/30 s, enough to show movement while keeping the subject readable. He talks about a few ways to do it, like holding a steady frame while something moves through it, shooting from a moving vehicle so the background smears, or nudging the camera during the exposure for controlled blur. He also mentions panning, but he doesn’t turn it into a sports-technique lecture, and that restraint is helpful when you’re trying to apply the idea on a normal walk.
Editing comes last, and he keeps it focused instead of turning it into a tour of every panel. In Lightroom, he points to clarity reduction as an easy lever, but the more interesting move happens in Photoshop: a duplicated layer with Gaussian Blur, then dialing the opacity until it lands where it should. He even calls out the trap most people fall into, which is pushing blur too far and wondering why the image suddenly looks cheap, especially with close-up subjects. He suggests staying in a modest pixel range and adjusting based on the light in the scene, then experimenting with a Lighten blend mode, which behaves differently than you’d expect if you’ve only ever used blur for backgrounds. He also drops a free PDF guide in the description, and the way he describes it hints there’s more structure to the method than he spells out step by step. Check out the video above for the full rundown from Kent.


Join the Fstoppers community for free
-
Post comments and join in the discussions
-
Browse the site ad-free
-
Share your work and get featured in the community
-
Compete in the photo contests for fun and prizes
2 Comments
Got to try it. I'm a bit over chasing every pixel anyway.
Manufactured reality. May as well AI it. Or, try #RealWorldPhotography: No models. No staging. No presets. No GenAI—#RealWorldPhotography, Pure and Natural.