
Landscape photography and wide-angle zoom lenses often go hand in hand. If you have ever used one of these lenses, you know there is a bit of the learning curve.
In my latest video, I share six tips I have learned over the years. I try to go beyond the regular wide-angle tips and come up with something new to help you improve your creativity. The video is full of examples I cannot show in article form, so be sure to check it out whenever you have the time.
Tip 1: Widening Your Field of View
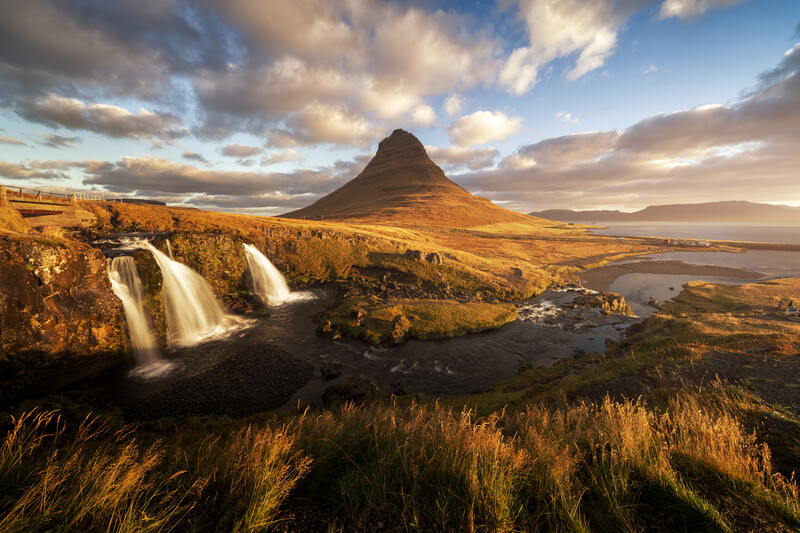
The first tip is to understand what a wide-angle zoom actually does. Relative to the focal lengths it covers it transforms a certain angle of view of the spherical 3D world around us into a 2D photo. Because it is a wide-angle lens, this angle of view is broader than the “normal” human vision, which is about 60 degrees, or in focal length terms about 45mm (it differs a little but consensus is between 40mm and 50mm). Compare that to the diagonal 107 degrees of a 16mm focal length. These 107 degrees is a huge chunk of the world around us and squeezing that into a 2D photo, relative large objects in our field of view suddenly becomes fairly small in the photo. That is because they are seen and measured in relation to all this extra space we squeeze into the 2D world of the photo. This is why Kirkjufell in Iceland seems much bigger in reality than when we compare it to a wide-angle photo. It is all this extra space we have to control and in doing so can make some powerful photos with lots of depth.
Tip 2: When, Where, and What Wide-Angle Lens?
An important tip is to know when, where and what wide-angle lens to use. Even though a wide-angle is often our go-to lens, it might not be the optimal lens for a given location. What focal length to use is utterly dependent on the scene and story you want to show and tell. For some random reason I find that the wide-angle lens works with many locations in Iceland, however, for the Alps my go-to lens would be the 24-105.
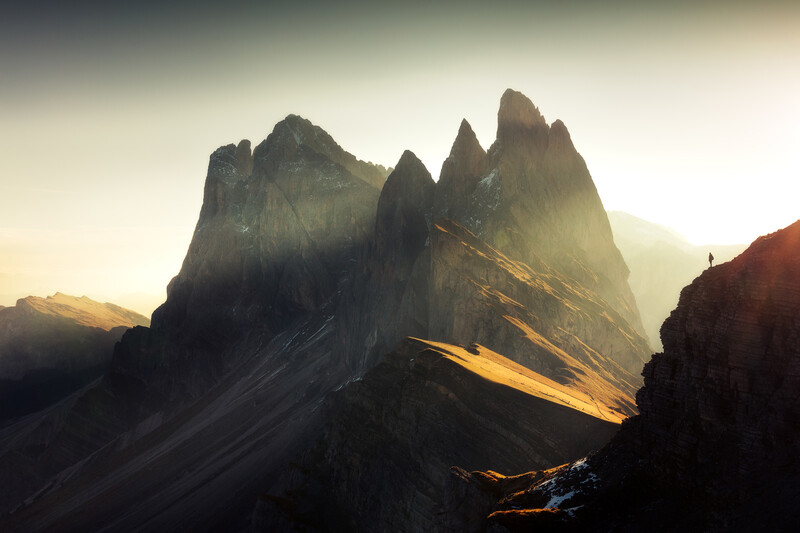
In this example from Seceda in the Dolomites, I tried getting a photo with my 16-35mm and force a foreground, but in the end, I really found this 46mm composition to work the best.
The 16-35mm lens might be the go-to lens for landscape photography, but it is important to understand why it is and why you choose that over a standard zoom lens.
Tip 3: Making the Viewer a Part of the Scene
With a dramatic depth that comes with wide-angle photos, you emphasize the difference between the foreground and the background. This is the opposite of the optical illusion of compression, which is very pronounced with tele-zoom lenses. The effect of this is an increased sense of depth, which supposedly should invite the viewer into the photo or make the viewer feel part of the photo.
In this example from Scaleber Force Waterfall in England all, the emphasis is in the foreground as the camera is only about half a meter above the water. It almost feels as if the water is coming out of the frame engaging the viewer in the photo or the viewer is standing in the water. At the same time, the water leads you up the plateaus and into the background. Since the stream becomes smaller and smaller it kind of vanishes into the background, which can raise a few questions and make the viewer wonder: What’s up there? Where does the water come from?

Tip 4: Losing the Sense of Scale Intentionally
The epic perspectives you can catch with the wide-angle lens, comes with the trade-off of easily losing the sense of scale in the scene. This effect can be used intentionally though.
One way to lose the sense of scale intentionally is to make a subject or object in the foreground your point of interest. Compositionally this is not something I do a whole lot, as I usually prefer to photograph big things such a mountains and waterfalls, which because of their size must be placed in the background of the photo.
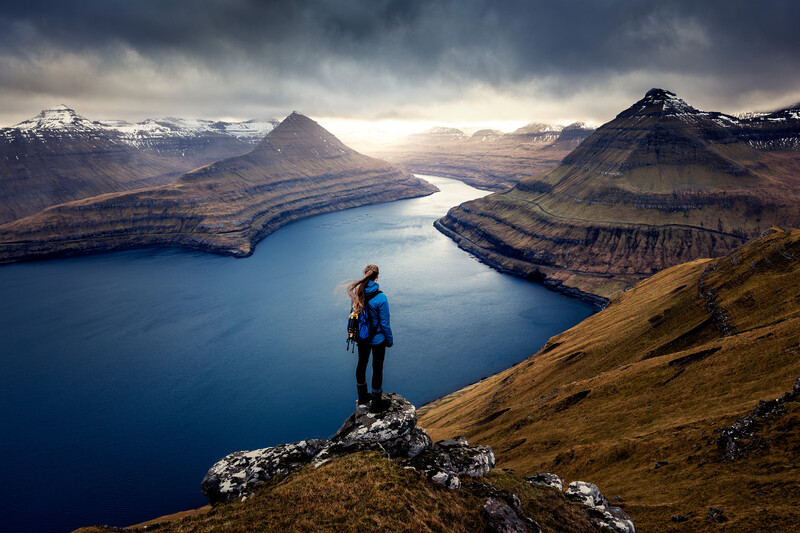
The scale of this epic location in the Faroes is lost because the girl is close to the camera. This is intentional, as I wanted it to be a classic hero shot where emphasis is on the person. It is about the person in the landscape. Compare that to the other photo where we have a person further away from the camera. Here the person is there to give a sense of scale of the landscape. The intention of the two photos are different even though it is taken at the same location.
Tip 5: Getting Closer Than the Tourists
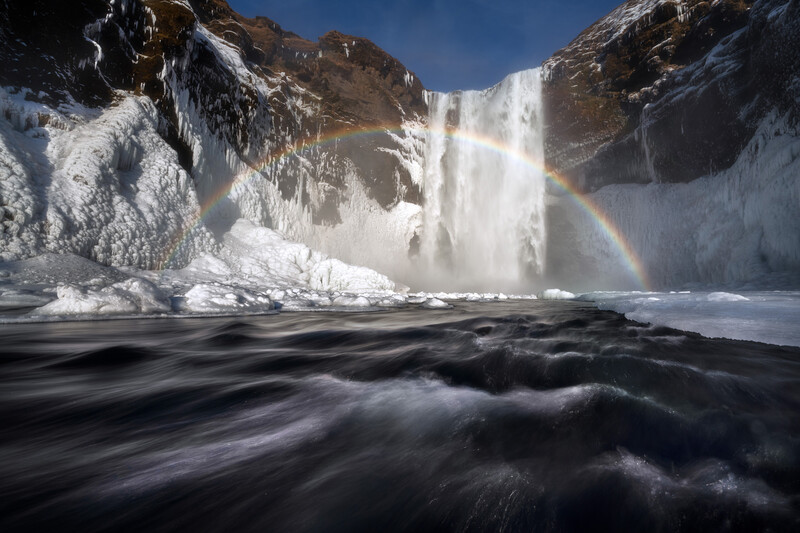
This might a bit of a weird tip, but with a wide-angle lens you can get closer to whatever you are taking a photo of than the tourists. Obviously, I do not encourage you to stand in the frame of other people, but at highly touristy locations such as Skogafoss in Iceland, it is very beneficial to be able to get in front of the crowds. As non-photographer-tourists are stuck with their cellphone camera a bit further back because of the narrower focal length, you can get the tourists out of the frame by moving closer. This is the simple reason why I never get tourists within the frame at highly touristy locations.
Tip 6: The Purpose of Impactful Photos
The last tip is to think about the end goal of a certain photo. As already explained you can create a very impactful and powerful photo with the wide-angle lens. One of those where the photo is almost puking the landscape out into the face of the viewer. If you print and hang a photo like this in a living room the photo might end up taking the attention of the entire room. Is this something people would want or would they prefer something more calm and minimalist? In my experience, my calmer photos sell better as prints than my “in-your-face” photos. However, because the impactful photos drag attention they are often most popular on the social media and in advertisement. These two examples are only focused on the business side of photography and there is of course many other end goals. What is the end goal of your photos?
These were the six tips I wanted to share. Check out the video above for more details, more examples and more photos. If you have any wide-angle tips to share, I would love to hear them down in the description.


Join the Fstoppers community for free
-
Post comments and join in the discussions
-
Browse the site ad-free
-
Share your work and get featured in the community
-
Compete in the photo contests for fun and prizes
12 Comments
Top notch guide my friend! Enjoy your holiday!
Thanks a lot, Mikkel! I will :)
A wide-edge focal point is viewed as a fundamental bit of apparatus for any scene picture taker since it gives you a viewpoint that you can't accomplish with some other focal point. You'll not exclusively have the option to photo fabulous vistas, however, you'll see lines in an alternate manner, and underline subjects by getting very close. I will share this blog on my website https://childrenbooksillustrator.com/
That's very correct, yes :)
Gave me a smile to read a wide angle lens is also a tool for tourist elimination skills;)
Hehe yes! And it's very effective at it ;)
Straight to the point as we like it :)
Thanks a lot, Hans! :)
!!!
I loved this video and you can get https://childrensbookillustrators.net/ so much of it, despite the ugly photos. All the photos are photographers but artists?
Excellent video. I especially appreciated the expansion of how the relative scale and composition tends to affect the viewers experience.
Wow! Beautiful pictures, educative article. I have always loved photography from the genesis. I think is a passion I need to develop. I'm sure with your guide from these articles I can get to satisfy my hunger for this passion. What type of camera do you recommend for a beginner please? Thank you for this wonderful knowledge by the way.