
Do you want powerful black and white images that really create the mood you're looking for, but haven't quite found the best way to get them yet? In this tutorial I'll show you three ways you might not have seen before and the best thing is, they're simple, fast, and effective.
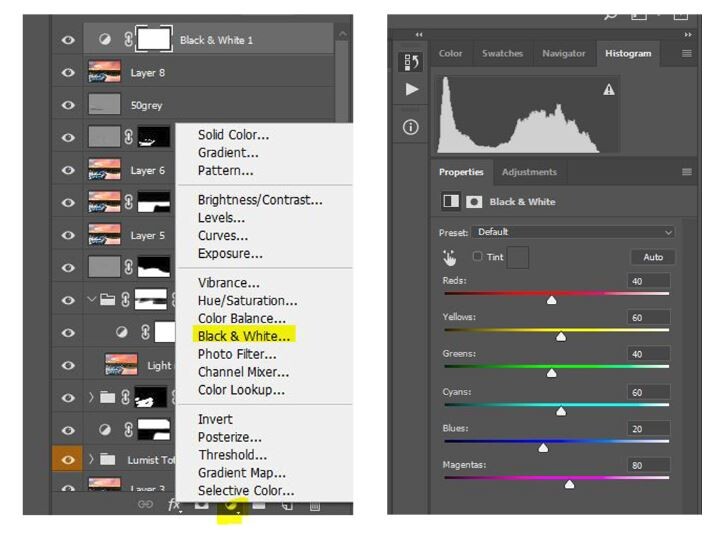
Since I started using Photoshop many years ago, my default method for creating black and white images was almost always via a Black and White adjustment layer. This allows you to play around with the colors of the original photo via sliders and even gives you 12 preset options you can use to tweak your images. But being the curious soul I am, I always like to find new ways to do things that allow greater choice, flexibility, and efficacy in getting the final result I'm seeking.
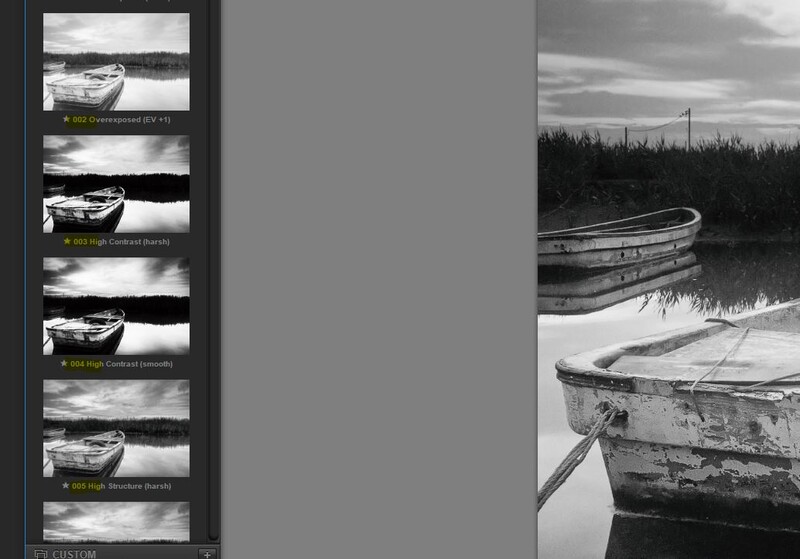
Method 1: Using Calculations
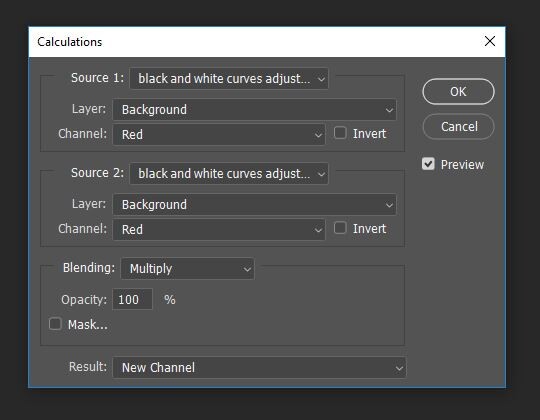
In Photoshop, start with the color image you want to convert. I always just duplicate my background layer and go from there. Then go to the Image tab and select Image > Calculations. This will convert your image to black and white and give you a dialog box you can play with. You have options to adjust the channels between red, blue and green, as well as the Blending Modes. You can see what I'm talking about in the image below. Make the adjustments you like the most and ensure that New Channel is selected in the Results drop down menu. Then click OK.
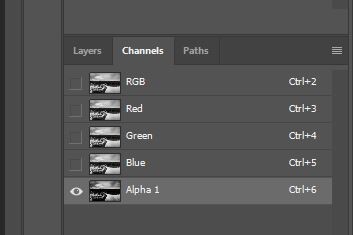
By selecting New Channel this will create a new "Alpha 1" layer in your Channel palette (the one next to Layers). You can see what I mean in the image below.
Make sure the Alpha 1 channel is selected, then click Control and A (Windows) or Command and A (Mac) to select the entire image. Then click ctrl/cmd C to copy it, then return to your layers palette. Click ctrl/cmd V to paste and you will have a new black and white layer above your original color version. From there, you can edit as normal and even create a Curves adjustment layer to add more contrast and punch to your new black and white layer.
It seems complicated if you've never done it before or worked with channels, but it really is simple. It only takes a few minutes to do and then you can dodge and burn or play with highlights and shadows to get the look you're after. I find having the ability to play with blending modes and channels in the Calculations dialog box really gives you so many options to find the exact look you want.
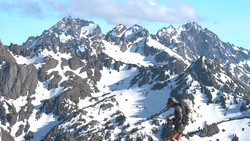
Here's how my image turned out using this method. It took the full 10 minutes to get this result and you can see my horizon isn't straight because the buzzer beat me! Sure, it only takes a minute or so to make the adjustment but I gave myself a strict 10 minute limit. If you'd like to see a quick video on how use this technique you can see the guys over at PiXimperfect demonstrate it.

Method 2: Using Channel Mixers and Gradient Maps
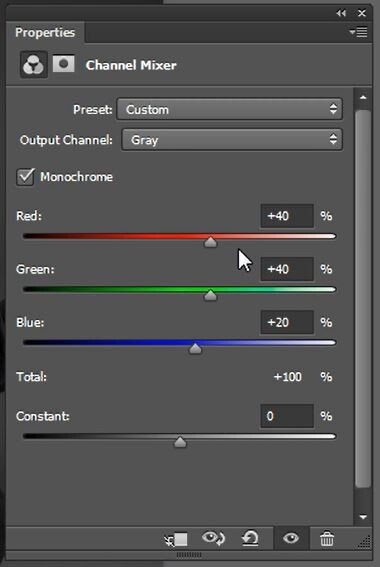
Again, start with the color picture you want to adjust as the background layer. I always duplicate that layer (ctrl/cmd J) but you don't have to). Then go to the Layer tab and click Layer > New Adjustment Layer > Channel Mixer. See the image below for a visual guide..

This will create a new Channel Mixer layer for you and also bring up the Channel Mixer properties panel. Firstly, make sure Monochrome is checked. You can then play around with the RGB sliders but I tend not to, though I do usually add a tiny bit of "Constant",' only 5% or so. You can see what I mean in the graphic below.
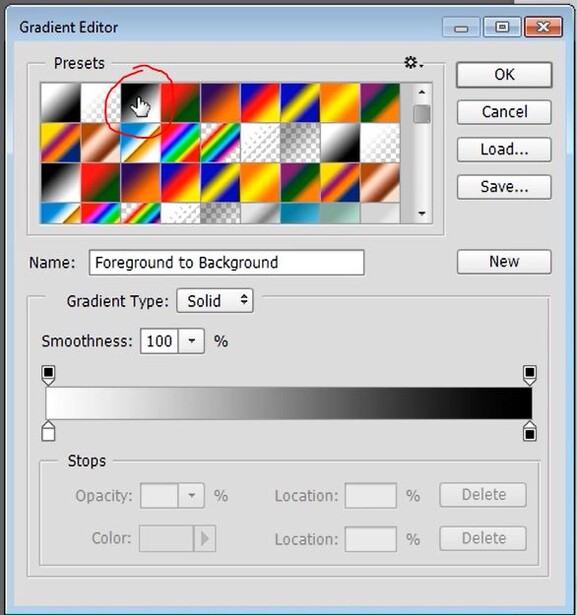
You can leave that Channel Mixer panel floating and then create a new Gradient Map layer by going Layer > New Adjustment Layer > Gradient Map. This will create a new Gradient Map layer and likely turn your image a crazy psychedelic inverted fluorescent white. Don't worry about that. Just select the black to white gradient (rather than the default white to black) and you'll be good to go. See the image below for a visual guide.
Once you've selected black to white leave the panel open. In order to add contrast and really give you that striking black and white you can then play with the sliders at the bottom of the panel. I tend to move the blacks in a little from left to right, and the whites in a little from right to left, as in the image below. Always look at your image to see that you're not overdoing things. Once you're happy with what you see, click OK.

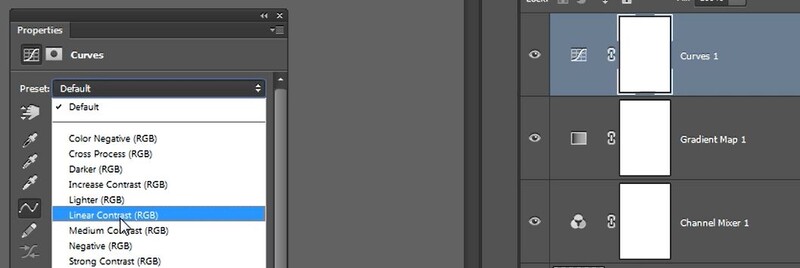
From there, you can add a Curves adjustment layer and add even more pop and contrast to your blacks and whites. At this time you should have 3 new layers, as in the graphic below. If you're not confident using curves, you can use one of the presets available. Try them all out and see which one you like the most.
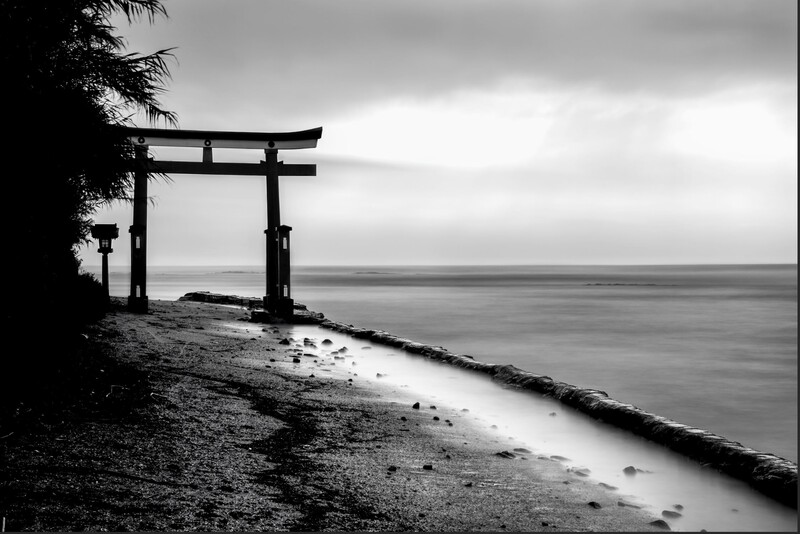
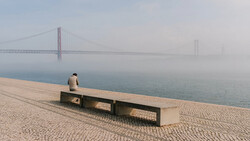
This method took the longest for me and didn't give me a lot of time to dodge and burn or make too many other adjustments. However, it did take only 10 minutes although I probably would have liked a couple of minutes more to put some finishing touches on my picture. The final result using this method is below.
Method 3: Nik Collection Presets
The final method was the fastest because I used some presets from Nik Collection. The problem for most with this method is that the Nik Collection of presets isn't free. It's $69 for the whole collection, including the Silver Efex Pro black and white set of presets. You can get a 30 day free trial to test them all out and make your choice from there. I love them and use them in all my editing but of course, free is always best. I do want to make it very clear that I have no financial affiliation with Nik Collection nor am I promoting them in any way for financial gain. I simply use them because I really, really like them.
If you have the Nik Collection presets installed in Photoshop you just open your color image you want to edit and go to Filter > Nik Collection > Silver Efex Pro. Once there you have a choice of 36 black and white presets you can choose from. Each preset gives you a little box preview so you can get an initial idea of the type of image you'll get with each preset. You can see what I mean from the image below.
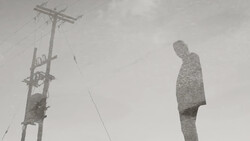
Once you've chosen the preset you want to use, Nik Collection will automatically make a new layer for you in Photoshop with the black and white preset adjustments applied. From there, you can edit as normal. The advantage with using these presets (or any others for that matter) is that changes are made for you automatically. Granted, you don't have total control over those changes but with 36 choices in the black and white Nik Collection, you've got a pretty good chance of getting the look you like. Then you have time to make local adjustments. You can see the result I got using the Nik Collection presets below.
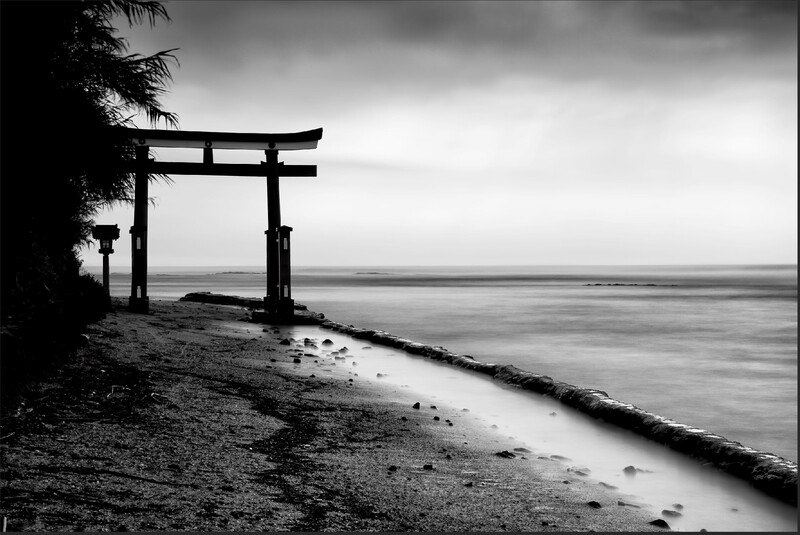
If you compare it with the other two results, you can see here that there's more detail in the sky and far more detail in the water. That's simply because I had more time. Remember, I gave myself a 10 minute time limit for each edit and by using the presets I had about 8 minutes spare to make local adjustments.
Conclusion
There are many ways you can get great black and white photos. Some are faster than others and some are more effective than others depending on the look you like. Of course, some are free while others cost. These are three methods that you might not have come across before and it's up to you to decide which one might be best for you in getting you the look you're trying to achieve.
The thing I like about each method used here is that they all gave me pretty good results within 10 minutes. Do you have any other methods of getting good black and whites that are just as fast and effective? I'd love to hear about them in the comments below.

Join the Fstoppers community for free
-
Post comments and join in the discussions
-
Browse the site ad-free
-
Share your work and get featured in the community
-
Compete in the photo contests for fun and prizes
15 Comments
The Nik collection is indeed still free if you look for it.
I wish I knew that! But it’s been money well spent for me so I can’t complain (too much)
I don't understand the need for presets. I use Nik since the first beta version (and payed for it) and when I did a good edit of a special image type, for example my IR converted camera and a special lens, I save it for the next use. These personal presets represent exactly, what I usually try to reach with my pictures.
I think it’s all about speed in your workflow. But if you do the same type of edit often enough you should definitely create your own presets and actions
I don't wish to be picky, but you can't have three alternatives. By definition, you can only alternate between two choices/items. The famous UK April Fool's spoof documentary in the 70s was rumbled by its title: The 3rd Alternative.
Recheck your dictionary. Alternative - noun - one of two or more available possibilities.
Thanks
As Robert said, my dictionary definition says “one or more things available as other options.” Thanks though, sometimes I can miss things when I try to get things out before deadline :)
Oxford English Dictionary (THE definitive dictionary): Stating or offering either of two things; of two things; such that one or the other may be chosen; the choice of either involving the rejection of the other; the other of the two; either of two courses open to choose between.
I've been using Silver Efex Pro 2 for my B&W conversions. It's quick and has a wide range of options to get that perfect "Kodak Minute". :-)
Glad you like them. I’m all for working things out yourself but sometimes a little acceleration in the process doesn’t hurt!
i am still using the free Nik Software Collection despite it now costing about 69 USD, a while back there were issues using it if you had say High Sierra for the Mac OSX,any way its a really good piece of software
Yeah you’re the 2nd person to say it is/has been/still is free. I paid $69 but I’m happy with it, even though I wish I saved the $69. Incidentally, how did you get it free?
hi Iain when DxO bought or took on in hopefully keeping the Nik Collection going either as a free download or subscription based.I managed to get mine free simply by providing DXO with an email address.$69.00 is not bad as when the Nik Software Collection was first introduced it was about $500 then towards 2016 the price was dropped to about $150 with the long intentions of the software becoming free
Thanks for that. Would make an interesting follow up - what software is worth paying for....and how much is fair?