When editing video in Premiere Pro, many people confuse Source Patching with Track Targeting. While both are located in the same location of the Timeline and look very similar, the two are, in fact, quite different. Each performs its own distinct function, and trying to understand what exactly that is can prove to be daunting for new users of Premiere. Even after playing around with the program for several years, I still didn't fully understand the ins and out of these two important features of the Timeline panel. Let's have a closer look and learn the specific differences between Source Patching and Track Targeting.
Source Patching
As the name implies, Source Patching instructs Premiere where to "patch" your source. They control the track location of Insert and Overwrite edits on the Timeline. There is one Source Patch button for the video track and one for the audio track. The buttons become active only when you have a source selected. This can be a clip selected in the project panel or a clip loaded in the Source Monitor. Source buttons are located just to the left of the Track Targeting buttons in the Timeline panel. This is most likely where all of the confusion ensues, since both buttons look very similar, with the ability to turn on and off with a click. However, the Source Patch indicators have three different modes; on, off, and silent.
Track Targeting
Track Targeting controls several things, including Copy/Paste, Match Frame, and Navigation commands. When you copy an asset on the Timeline and then decide to paste, your content will paste on the lowest track targeted based on layer order. For example, if you have video tracks two and four targeted, your content will paste to track two. For the Match Frame command (keyboard shortcut F), Premiere will match the frame of the clip on the highest track targeted. Again, this is based on layer order. So if you have clips on video tracks one, two, and four, and only track two is targeted, Premiere will Match Frame the clip on track two. Last but not least, you can use navigation shortcut keys with targeted tracks. The Up and Down arrow keys will quickly jump your playhead to head and tail edits of clips in targeted tracks.
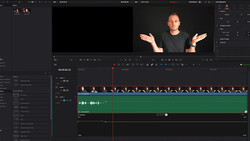
Check out the tutorial for more details.


Join the Fstoppers community for free
-
Post comments and join in the discussions
-
Browse the site ad-free
-
Share your work and get featured in the community
-
Compete in the photo contests for fun and prizes
No comments yet