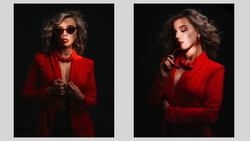
What is your workflow when you have to give the same color toning on a set of images? I guess like me you open an image, make your changes, then copy all those layers one by one to the other files. This sounds a logical and easy way, until you watch this video from Steven Spaulding.
Spaulding demonstrates step by step how he uses the Libraries to achieve fast results. After working on one image he groups the color grading layers and drags them to the Creative Cloud Libraries window to save. Afterwards it can be easily applied to other images of the set and you won't have to reopen the initial image again and again.
When you have just a couple of images to work on, then surely you may opt for the old drag and drop layers option, but when it comes to a set of many photos, I believe this is a brilliant solution.
This is going to be an inseparable part of my workflow from now on. What about you? Do you have any other methods worth sharing with us?
If you'd like to follow Steven Spaulding, find him on his website, Instagram, and Facebook.
[via Retouchist]


Join the Fstoppers community for free
-
Post comments and join in the discussions
-
Browse the site ad-free
-
Share your work and get featured in the community
-
Compete in the photo contests for fun and prizes
9 Comments
thanks guys for sharing this, happy to be able to contribute to the community.
thanks for the super fast video !
as you can tell i don't do video's very often. going to be looking into doing more in the future so i can get better at them.
you should! I hope I can push myself to make videos as well ) at the moment writing seems a better option for me
im already thinking of a follow up to this one lol. i was never any good at writing. so i will leave that to the professionals
thank you! very useful
This is pretty rad! I use the Libraries panel for a lot of other things, but I had no idea that you could use them to save adjustment layers that you could then re-apply to other photos. Awesome
Excellent advice, thank for this. My partner and I (she's the photographer and I do the retouching) often reuse colour grading layers and tend to just put them all in a folder and drag and drop but this method sounds great for those larger campaign shoots.
most welcome! thanks to the author of the video, who is also part of our Fstoppers community. I used to folder-drag and drop as well. Simple but so effective this way!