
Nebulous cities, misty forests, and magic sunrays make a perfect subject for photography in the cold winter. Here, I share some tips and ideas for shooting mist and fog.
Sometimes, it’s enough to wake up and be lucky to find the whole world covered in a dense cloud. Vague silhouettes, isolated subjects, and a lot of mysterious and moody flair is waiting for you. In my last week’s article, I described how fog evolves and when it’s most likely to be found. This week, we’ll take a look at a few things we have to consider when shooting photographs in the fog.
1. Be Prepared, Be Quick

As soon as you found out that there is a good chance to witness a foggy morning, you should get your equipment ready. Personally, whenever I don’t prepare my gear the day before I shoot landscapes, I will forget some filters, leave with half-empty batteries, or simply have my SD cards still sticking in my laptop. Too often, it results in frustration on location which will only disappear after over-editing the photographs. Getting up early to hike to a scouted vista, your favorite tree, or the local lake also means that you might not be able to focus on your gear bag in the morning. You might even leave in a rush, because you hit the sleep timer of your alarm too often.
Especially for shooting foggy landscapes, it’s important to be on time. As fog is dependent on temperature, it’ll leave as soon as the air heats up. In many cases, it’s best to reach a photography location before sunrise. This way, you will be able to capture the first golden light (if there is any) while the fog is still as dense as possible.
2. Consider the Differences Between Fog and Mist

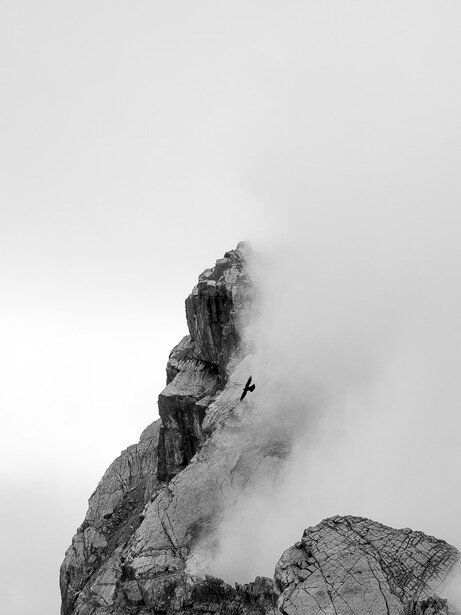
Dense fog and light mist both help you create moody landscapes. Yet, they are very different to handle. The denser the fog, the narrower will be your view. Thick fog doesn’t allow you to shoot wide vistas and panoramic views. You need to find lone subjects and use the fog to isolate them.
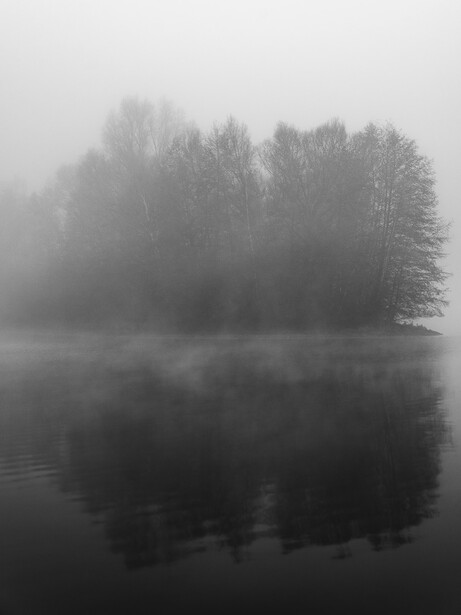
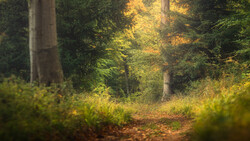
Mist, on the other hand, is perfect to add to a wider landscape. It makes forests and lakes appear a little spooky and magical. Even though wide views are possible, you have to consider the negative characteristic of any form of humidity in the air. Small water droplets reflect and diffuse light. When you photograph subjects in long-distance, your pictures will tend to look flat. Contrast and sharpness get lost on the way through the air. Editing helps, but can’t recover everything.
3. Choose the Right Focal Length
According to the present visibility, you should choose a suitable lens for your moody landscape session. Changing lenses in the fog isn’t fun. When water condensates on your rear element while switching lenses, you invite humidity into your camera. It doesn’t immediately kill your camera, I just think it should be avoided.
To me, a standard lens between a focal length of 35mm and 50mm works best, when dealing with dense fog. Wider lenses include too much of the already obscured environment when you are far away from the subject. Tele lenses are generally a bad choice here. You don’t need to isolate your subject, compression doesn’t work without a visible background, and the long-distance between you and your subject will make it appear flat.
When the fog becomes less dense, however, your option for focal length unfolds.
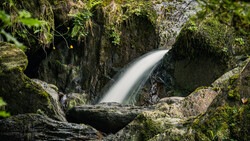
4. Look for Minimalist Subjects
Minimalism is totally en vogue and always gives an artsy feeling to your photographs. Fog is an easy way to isolate subjects and let them disappear into negative space. It works great with sharp shapes and patterns that disappear into the fog, but also with silhouettes and blurred subjects. Fog helps you to let every subject appear a little bit (or even very) lonely.
5. Don’t Be Afraid To Blow Out, but Watch Your Contrast
Even moody pictures need some drama. As there is not much going on in dense fog, you are free to blow some parts of the image out. If it was all white and blurred, there is no need to leave some space to recreate details in the highlight. A 50 percent gray backdrop will not catch a lot of attention. Often, you won’t see the real exposure on your display on location. Take a look at the histogram and make sure, that there is a lot of information on the right third of it.
Contrast doesn’t only consist of highlights, though. Especially when your subject is covered by a good amount of fog, you run the risk of having no dark spots in your photograph. Try to include a little foreground into your image. As there is only a little fog between you and the foreground, it’ll appear darker and give your image some depth.
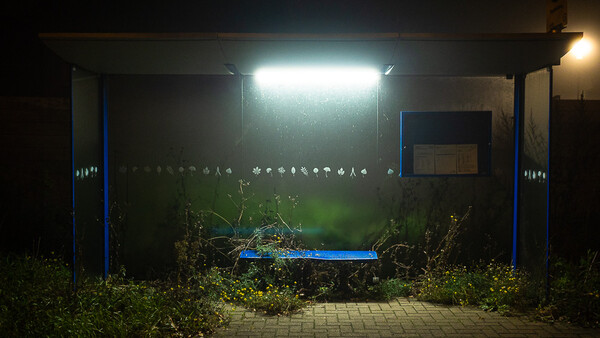
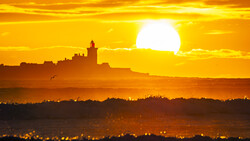
6. Include Light Sources

Something really special about fog is that it makes light rays appear visible. Sunbeams, as well as traffic or street lights, are a great way to play around with silhouettes and light. Shooting right into the light source and exposing for the highlights will make light the subject of your photographs.
7. Edit Your Photographs

In most cases, your photographs of foggy landscapes will not look like you witnessed them with your naked eye. Our eyes and brain are incredible when dealing with different light situations, but our cameras can’t compete. Especially when shooting subjects a little further away, they will always appear a little dull and flat. Luckily, there are a few tricks to get decent results.
In Lightroom, you can try the Dehaze slider in your Basic panel. It’s always a dance with the devil. If you overuse this tool, your photograph will quickly look overcooked. But if you push it just a little bit, you will be able to recover some detail and contrast in the fog. Clarity and Texture can also support this effect to some extent.
Adding contrast with your Contrast slider and pushing the Whites to the right and the Blacks to the left also helps to (re-)create a little bit of depth in your image. Coming to talk about blacks and whites: Many photographs in dense fog look great in black and white. Misty landscapes on the other hand can profit from golden sun rays and warm colors.
Do you have any more tips to add? Feel free to share them in the comments. I'm still waiting for a good chance to capture cloud inversions or "clouds" of fog slowly floating over the hills.


Join the Fstoppers community for free
-
Post comments and join in the discussions
-
Browse the site ad-free
-
Share your work and get featured in the community
-
Compete in the photo contests for fun and prizes
No comments yet