
Photographing the landscape can be hard work—at times, very hard work. It entails rising well before daylight, in most cases, and working in sometimes very harsh conditions. Most of the time, you will be out in the woods until well past dark, waiting for just the right moment, which may not come—even after your most valiant efforts. It makes sense, then, to do everything you can to stack the odds in your favor. Here are some thoughts on that.
1. Be There!
There is no substitute for being on location when the light is right, and all the atmospherics are working. There is an old saying by a photographer from the forties and fifties, “f/22 and be there.” Scout your locations well. I typically come back to favorite locations many times, in different seasons of the year, until I know the place well. I know its secrets—where things are and how the light will fall at different times of the day and in different seasons of the year.
2. Light Is Everything
Watch the light—what it is, what it does, how it reveals form, and how it hides unwanted details. Having said that, there are several things about light that we should be aware of.
First is quantity. How much light is ambient to the scene? The photographer must have an understanding of their camera and its functions to make the adjustments needed to ensure that the amount of light entering the lens and passing through to the film or sensor is the amount needed for the best exposure. If a photographer is working with black-and-white film, which is my preference, it is essential to get enough light into the darkest shadow areas to create a printable image. When working digitally, the photographer must pay close attention to the shadows so that detail is retained in those areas. If black clipping occurs, the exposure will be insufficient to show shadow detail, even when using camera raw. We have to be aware of the amount of light we allow to pass through the camera to the medium that records the image.


At the other end of the spectrum, care must be taken to ensure that there is adequate separation of tones so that detail can be printed into the highlights. If “white clipping” occurs, as shown in the histogram illustration here, there will be large areas of the image with no detail. It’s better to have detail and not use it than to have no detail and need it. In my world, getting a good exposure is everything.
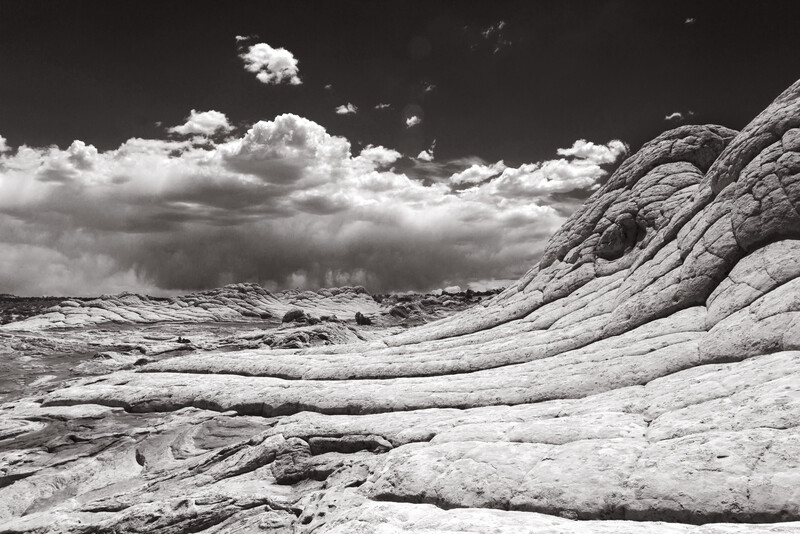
Next is light quality. There are two different qualities of light: spectral and diffuse. Spectral light comes from a small or very small light source. The smaller the light source, the more spectral it becomes. It’s known for casting shadows with hard edges between shadow and highlight areas. In my experience, working with spectral light can give very dramatic and expressive images. It can also be difficult to work with since careful attention must be paid to how deep the shadows are versus how brilliant the highlights are. Examples of spectral light include situations where the sun is directly overhead and there are no clouds or atmospheric interference. When the sky is clear with no cloud cover, the light will be very spectral, and it can be a challenge to make a great landscape photograph.
Diffuse light comes from a larger light source. The larger the light source, the more diffuse the quality of light will be. Usually, it’s much easier to make pleasing photographs when the light source is diffuse. That’s because light is more evenly distributed across the scene, and when that happens, the shadows are filled, and the highlights are more evenly illuminated. When the sun is at, near, or below the horizon, the light source becomes not the sun but the entire open sky opposite the area of the sun’s setting or rising. There are thousands of different scenarios that could be described; however, the best solution is simply to watch the effect light has on the subject.
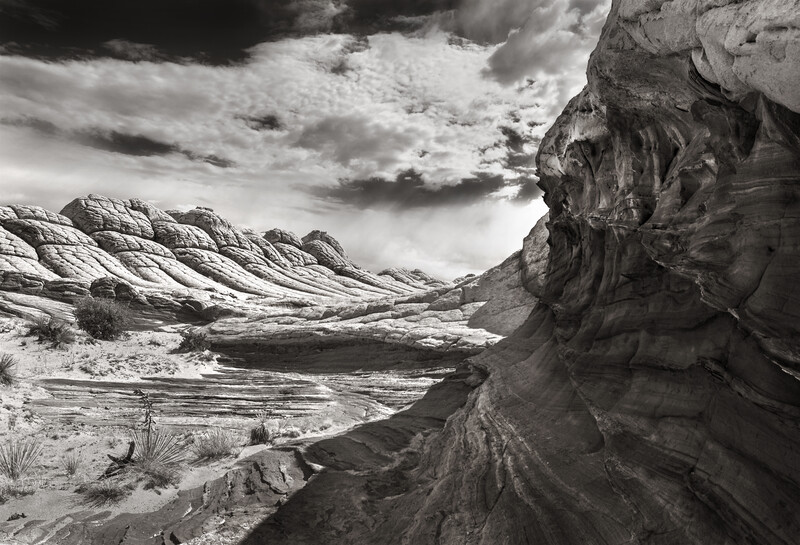
A favorite technique of mine is to combine direct sunlight with diffuse light. Here is another image where I combined direct sunlight illuminating the white sandstone in the distance with red sandstone in the shelter of a cliff. The image reminded me of the way rollers break on a beach and then flow back out.
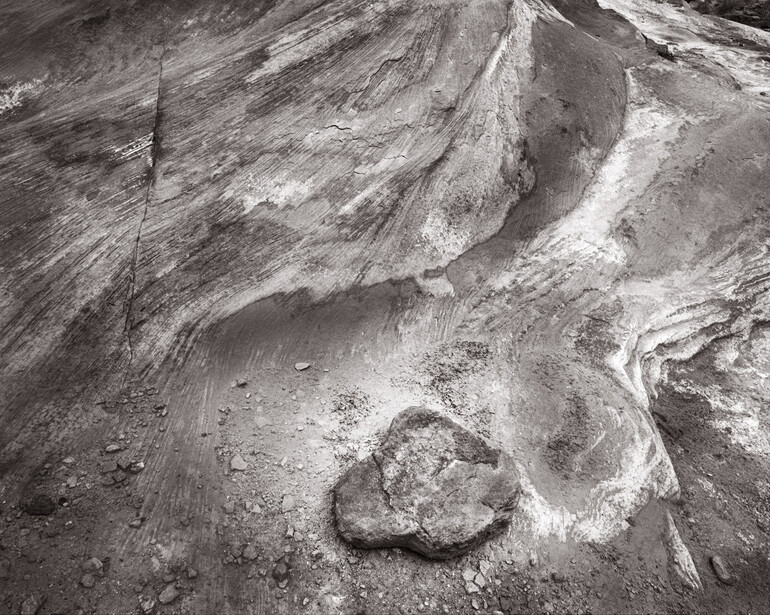
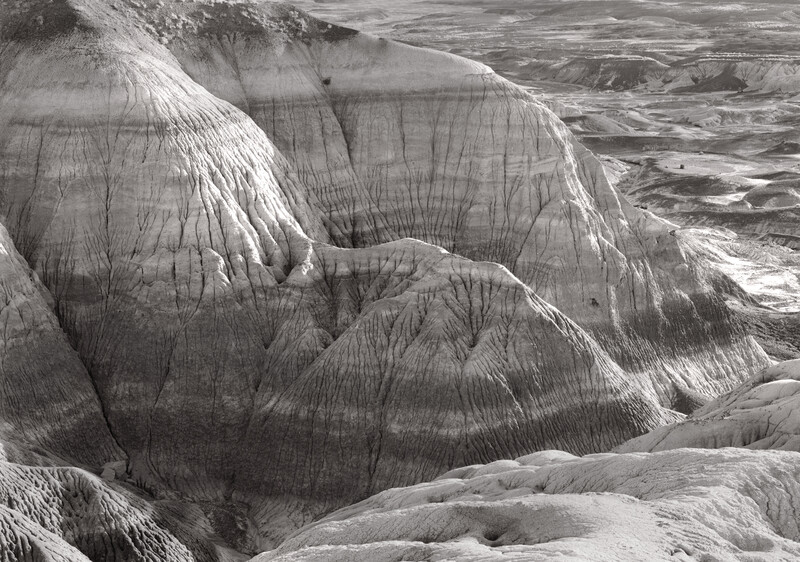
Light direction is also an important factor to consider. The direction of the light reveals the shape and texture of the subject, so the photographer must pay close attention to it. Ask yourself: “Does this light direction say what I want to say about this material? Will it be better at a different time of day, or maybe in a different season?” That question is one reason we often come back to an area. There are numerous ways to see any particular place, and your choice of how you see things will help define your personal style. This image, Blue Mesa Overlook, Arizona, was done in late afternoon light, maybe an hour before the sun touched the horizon. Light from that direction created a kind of rim lighting that I really enjoy.
3. Depth of Field
Depth of field refers to what is acceptably sharp, as well as having an interesting foreground, midground, and background. I like to have information in each zone of interest in my photographs.
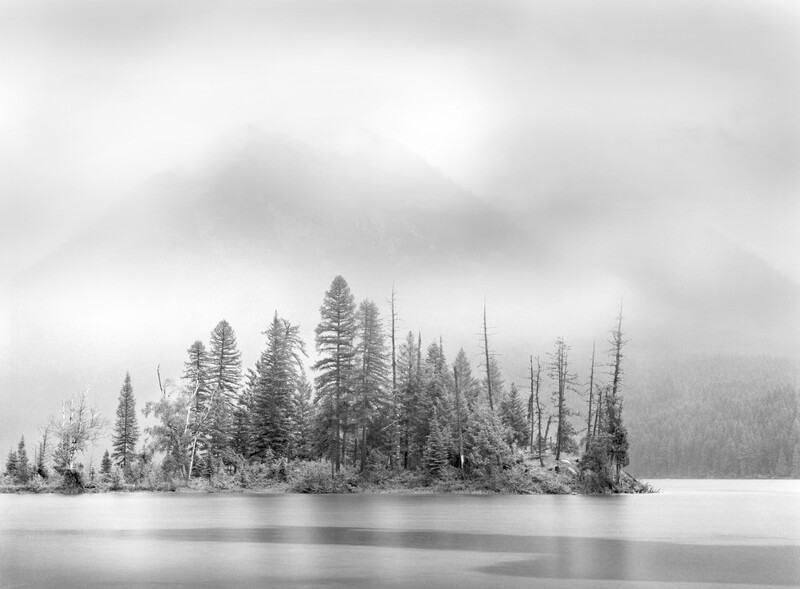
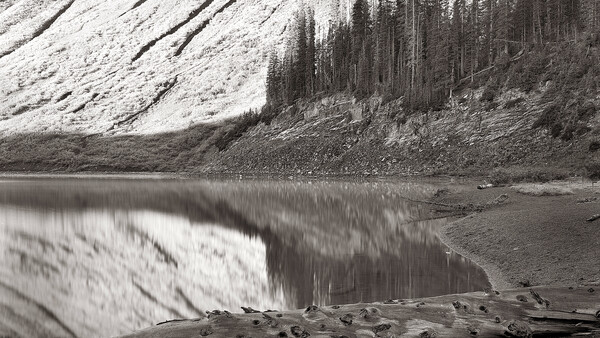
I was hiking around the edge of this large lake in northern Montana when it began to rain, and I took shelter under a very large tree. I was thinking it would be very cool if a cloud bank lowered and gave me good separation between the isthmus of land with the pine trees and the mountain behind it, since they all blended together into an ugly mass. About that time, a cloud did start moving down, and a slick spot on the lake’s surface formed, giving interesting textural detail to the foreground. So I ended up with detail in the foreground, midground, and background. The slicks on these very large lakes are caused by warmer water below the surface moving up as cooler rainwater begins descending. Nature is fascinating.
4. Ignore Rules of Composition
I have seen too many people restrict all of their photography to strict adherence to the “rule of thirds,” when they would be much better off photographing from the heart and making an emotional statement rather than following arcane rules they don’t understand.
5. Be Aware of the Works of Great Masters
As much as I admire the work of Ansel Adams, there are other masterful landscape photographers whose work I greatly admire. Become a student of those photographers until you are an expert in their work—not to imitate them but to stand on their shoulders and go beyond what they did.
6. Be Patient
Landscape photography requires either enormous strokes of good luck, a lot of planning and intimacy with the area where you’re working, or a large amount of patience—or all of the above.
7. Weather Is Your Friend
In many cases, the fouler the weather, the more you should be out in it—within reason, of course. I would never suggest standing in the path of an EF5 tornado, or any tornado for that matter. Nor would I suggest going out in the middle of a hurricane. However, there are great landscape photographs to be made as storms approach or move away. Safety always comes first, though.
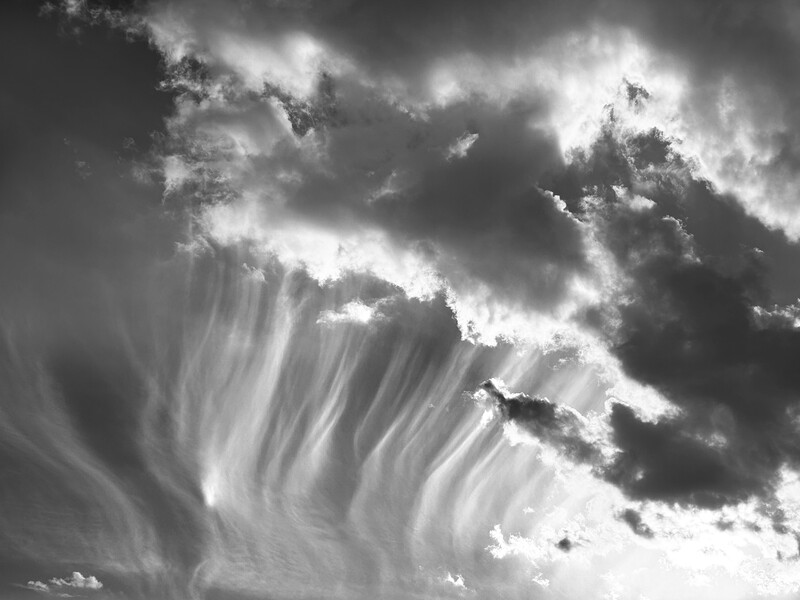
I particularly enjoy cloud structures and photograph them often—not as elements to add to a photograph, though I have done that for years, even before we had the convenience of Photoshop, but simply as elements of beauty unto themselves.
A Final Thought
I have learned over many years that no one sees things quite like you do. Avoid overly critical critiques. If the only thing someone has to say is negative and nasty, they aren’t worth your time. Be who you are. Photograph what you like, and tell the critics to mind themselves—you haven’t the time. Take advice when it’s warranted; doing so will move you along quickly. You won’t live long enough to make all the mistakes, so paying attention to teachers and mentors is wise. However, a good critique will always discuss both positives and negatives and will frame the negatives in a way that encourages you and helps you grow. Be yourself, photograph what moves you, and stop trying to be someone you aren’t.


Join the Fstoppers community for free
-
Post comments and join in the discussions
-
Browse the site ad-free
-
Share your work and get featured in the community
-
Compete in the photo contests for fun and prizes
1 Comment
Beautiful shots here. And the photographer obviously did the legwork to get them.