The fact that the focal plane of a picture must always be parallel to the sensor plane is so obvious to most photographers that they don't even bother questioning that fact. Here's what happens when you do question it and how modern mirrorless cameras can help you do it.
My personal adventure with twisting and bending the focal plane around began nine years ago when I had the chance to play with the Nikon Nikkor PC-E Micro 45 mm f/2.8D ED. It was 2012, and I borrowed it out of curiosity while testing the Nikon D4 video mode. Using it while filming took a while to understand, but once I did, I fell in love with the creative abilities the lens provided. I didn't know much about color grading back then and had no ND filter with me, but that nine-year-old video still makes a good intro to the rest of the freelensing story I'm about to present here.
As professional tilt-shift lenses tend to be expensive, and back then, I couldn't afford to get one just for the creative fun, so I forgot about the concept for a couple of years. It came back when I moved over from a Canon DSLR to a Sony mirrorless camera. I still couldn't afford a tilt-shift lens just for fun, but with the EVF technology, focus peaking, and other features mirrorless cameras introduced, I again became determined to do something about it. That's when freelensing came in.
The definition of freelensing is pretty simple: it's a technique of taking pictures with the lens not attached to the camera but held loosely instead. It allows the photographer to freely move around and tilt the focal plane.
Putting it into practice is a bit more complicated, and a number of issues have to be addressed. Let's discuss them, starting with picking the right lens.
Flange Focal Distance
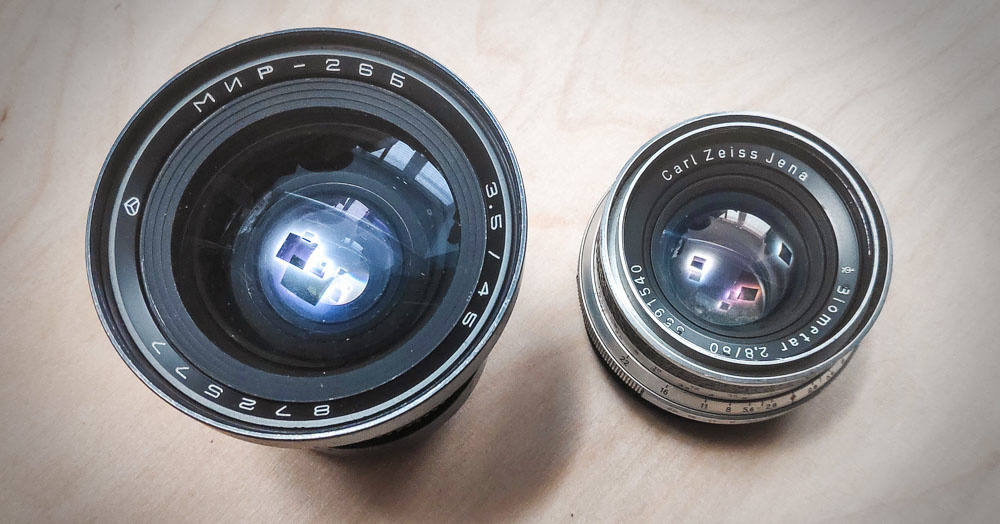
Flange focal distance is the distance between the lens mount and the sensor in a given camera system. In DSLR systems, it usually varies between around 42 and 47 mm, and for mirrorless, it's usually between 16 and 25 mm (the lens can be closer to the sensor because there's no mirror in the way). For freelensing, it's best to choose lenses from systems that have larger flange focal distance than your camera, as this leaves the necessary space to tilt and/or shift the lens while maintaining the ability to focus on infinity. I personally went for vintage Pentacon Six medium format lenses, which are easily available and fairly cheap in Poland, where I live. I own a Carl Zeiss Jena Biometar 80 mm f/2.8 and a Mir 26B 45 mm f/3.5.

The vintage Pentacon Six lenses I use for freelensing. They offer a huge flange focal distance and an equally huge image circle
Image Circle
The next thing to consider when picking up lenses for freelensing is the image circle or, to put it simply, for what sensor size the lens was designed. It's best to use lenses designed for larger sensors than your camera has: full frame lenses on APS-C cameras, medium format lenses on full frame cameras, etc. This, again, leaves some extra space for tilting and shifting without the risk of having half of your frame black due to lack of lens coverage.
Focal Length
The focal length is of course a creative choice of the photographer, so I won't be giving you any strict recommendations. What is worth considering, though, is the purpose of using freelensing. Usually, this technique is used to play with bokeh and out-of-focus areas (which are often going to be 90% of your frame). So, the best choice would be lenses that allow for shallower depth of field. On the other hand, focusing becomes exponentially harder with too wide apertures or too long focal lengths. From my experience, focal length equivalents between 35mm and 100mm are optimal, and an f/2.8 aperture is really enough.
Light Leaks
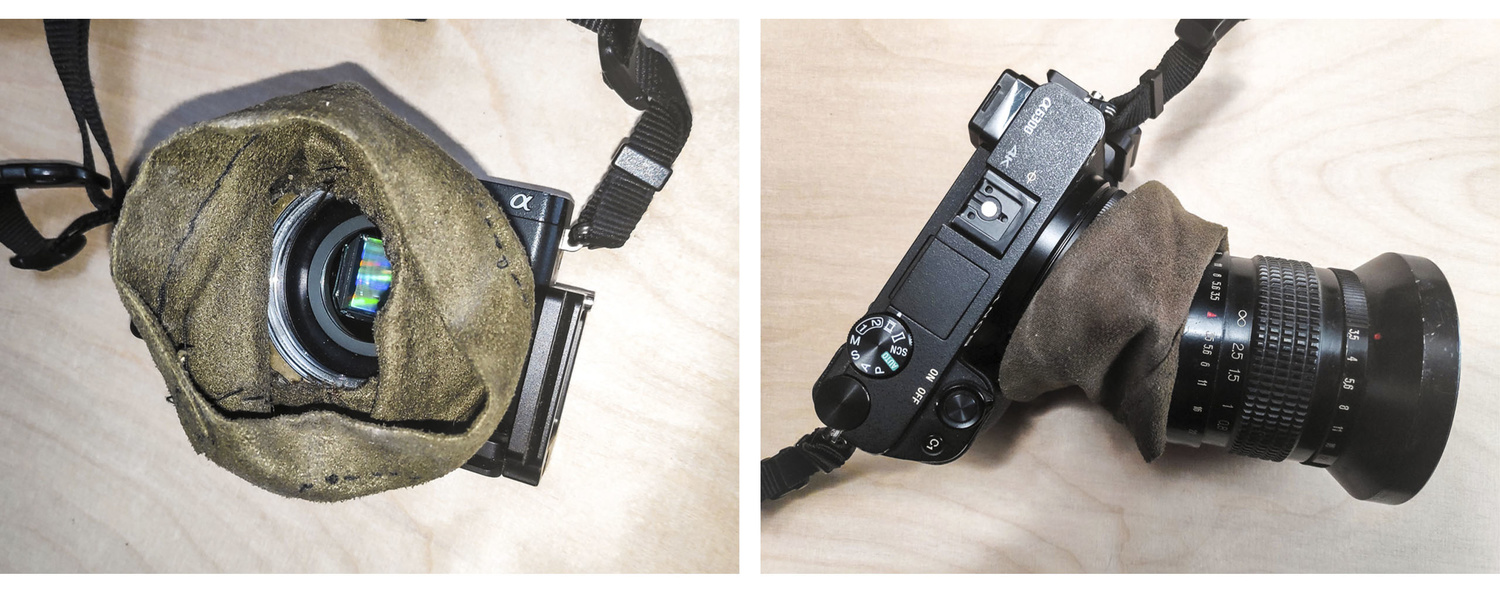
When you hold a lens at a certain distance from the camera, there is lots of stray light hitting the sensor from the sides. It takes some time to learn how to hold the lens properly. Any homemade devices to provide extra shade are also welcome. To make things less difficult in the beginning, it's best to avoid direct sunlight and try more shaded locations for shooting.

A simple homemade accessory to stop the light leaks when shooting on sunny days.
Dust
Another problem is the fact that when taking freelensing photographs, the camera sensor is exposed for a long period of time. This usually means it will not only need cleaning after the photo shoot but even in the middle of it. There are many ways to do something about it, the simplest being taping an old UV filter to the lens mount. I personally chose a more complex approach. As the camera I own is an APS-C Sony model, I use a Mitakon Lens Turbo II adapter (a cheaper Metabones Speedbooster clone) and keep it on the camera while shooting. It does two things. First is protecting the sensor from dust, as it is mounted tightly in place and contains glass elements. The second one is effectively making the camera full frame, which makes it easier to achieve shallow depth of field and play with bokeh.

With the Mitakon Lens Turbo II adapter, the sensor is protected from dust.
Strobes and Shutter
When I started taking freelensing photos with a mirrorless camera, I could occasionally spot banding in the pictures. They were taken in good lighting conditions at a low ISO, so it couldn't have been noise. It took forever to figure out, and the problem turned out to be the electronic first curtain. Freelensing involves a lot of chaos that also means constantly varying exposure levels and stray light leaks. It turned out that this can sometimes cause the banding. Some traces of it also showed up when using a strobe light during the photo shoot. The problem disappeared after I switched my camera to a fully mechanical shutter, but it came at a price: without the electronic first curtain, the shutter lag is often big enough to lose the carefully acquired focus of your picture. It takes time and practice to get it right.
Focusing
This is, at least at first, the most difficult part, as it's hard to get your head around the correlation between moving or tilting the lens and what happens with the focal plane in the picture. This usually means that the first attempts at freelensing tend to be chaotic. There's nothing wrong with that, as sometimes, interesting things emerge from the chaos. After a while, it becomes more and more easy and intuitive, which eventually leads to full control of how the focal plane is placed in the frame. Well, almost full; the element of chaos and unpredictability always remains, and those who don't want it need to get one of those scientifically precise and expensive tilt-shift lenses.

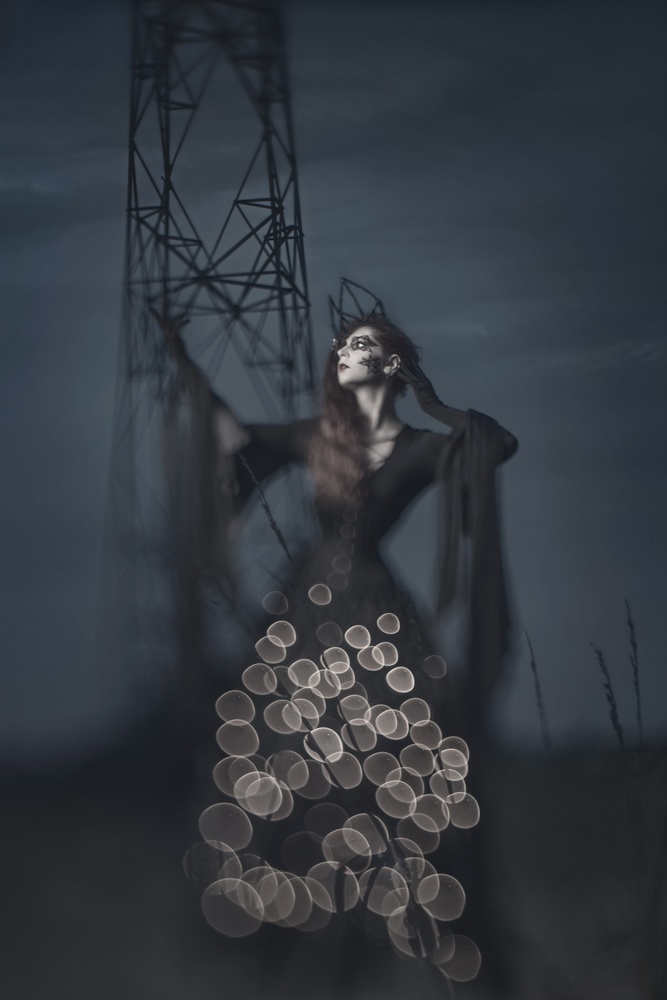
This image is actually combined from two in Photoshop, as I wasn't able to get both eyes in focus at the same time.
Focusing is also the part where mirrorless cameras really can do more than DSLRs. There are several reasons for that, most important being with a tilt-shift or a freelensed lens, you cannot focus and recompose, because with a tilted focal plane, recomposing means totally destroying the focus itself. The other reason is stability. It's really hard to hold a lens and a camera together in a certain position, so it's best to use the viewfinder, which additionally supports the camera against your head. And electronic viewfinders are way easier to use in such situations, as they offer focus peaking, punch-in zoom, and other features that make freelensing focusing possible. It still isn't easy, though, so don't be discouraged at first.

Sony a6300, Mitakon Lens Turbo II, Carl Zeiss Jena Biometar 80mm f/2.8, continuous light (LED with octodome) placed right of the model.


lensbaby
Yea. A bit too close to the similar phrase for a guy not wearing underwear. For anybody that doesn't get it, no, not going commando, think the Tom Petty song "Free falling."
Freelensing seems like a really interesting way of shooting. I would like to use it for the type of wildlife photography I do, but I think there may be some issues that could cause it to not work for that type of image-making.
I need the subject itself to be absolutely tack sharp, with every tiny little hair and feather segment highly resolved, so that it is rendered clearly and distinctly from the hair next to it. From the examples you posted here, I am not sure that the "sharp" part of the photo would be sharp enough for my needs. I want the soft parts of the image to be extremely soft, like you show here, but not at the expense of the sharp parts losing any of their sharpness.
Also, I wonder how this would work with my huge lens, the Sigma 300-800mm. This lens is 24 inches long and weighs 13 pounds. Logistically, it could be difficult to hold it up to the camera if not attached securely.
Yet despite the potential difficulties, this practice intrigues me. Maybe there is a way to make it work for the type of extreme supertelephoto wildlife and bird photography that I do?
I don't know much about wildlife photograpy, but my guess is that with a huge telephoto lens, you'd want to keep the lens on the tripod and try moving the camera around instead.
It will be hard to keep the entire subject in focus and keep a tack sharpness on it though
Hard? Yes. But it may just be worth giving it a try, if I can get some tilt/shift-like effects with the big glass.
Send me a sample, once you try it, I'm very curious about the results :)
I may have a chance to try some test shot in my yard this afternoon, if I'm able to get back home before nightfall. If I am able to do so, I will download the images with the 300-800mm and show you how they turned out.
I cannot get it to work. At 800mm, the depth of field is so extremely shallow ..... and the "freelensing" technique does not allow me to maintain the extreme precision that is needed to get absolutely perfect sharpness that is necessary to have the feathers tack sharp.
I think this freelensing technique may be great for some things, like more 'artistic' or abstract photography ..... but for super-realistic images with extremely sharp tiny details, it does not work ..... at least not with supertelephoto focal lengths.
And this is a bummer, because I was really hoping it could be like having an 800mm tilt/shift lens!