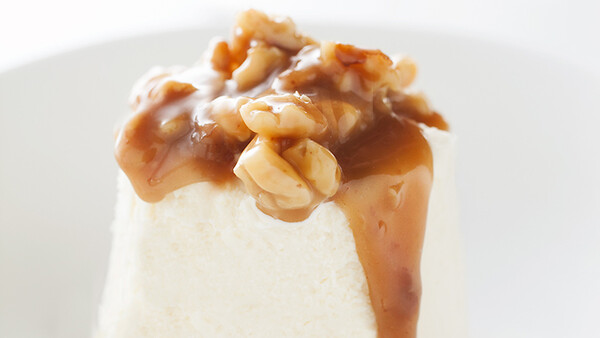
I scream, you scream, we all scream for ice cream! Photographers may scream when they hear that ice cream is what the client wants. Ice cream is not easy to work with. Once it starts melting, it is done and you need to move on to the next dish. Unless you are shooting in a freezer, the working window for ice cream isn't very long. There are many different ways photographers and food stylists will approach ice cream. For this series of pint-sized sundaes, I let the ice cream's container be the guide for the styling.
I was working with a recipe developer who had a series of ice cream sundae toppings that she wanted photographed. For this series, the ice cream was secondary to the sundae sauce topping. I wanted the focus of the shot to be on the topping and have the ice cream more as a canvas for the topping to be applied to. We came up with the idea of calling them "pint-sized sundaes" These sundaes are perfect to share with a group of people.
When shooting ice cream, you need to work quickly and have everything planned out in advance. Working with a stand-in is a must.
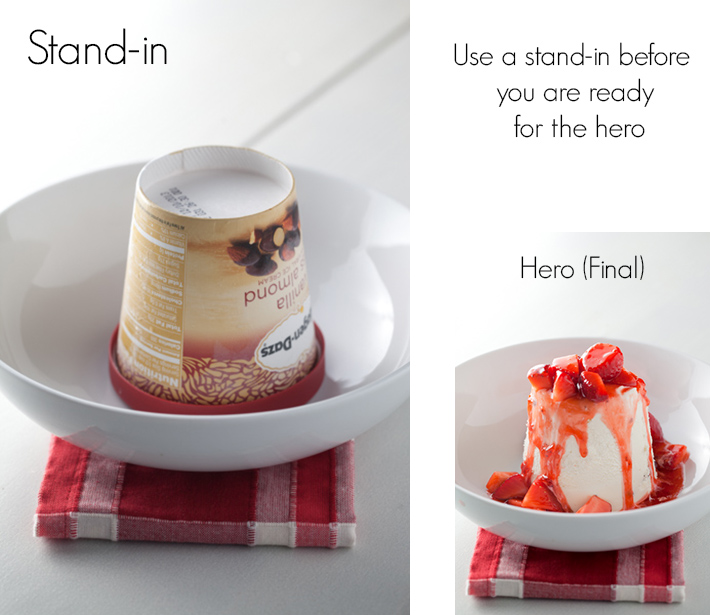
In food photography, their are two types of dishes: the stand-in and the hero. The stand-in is usually the same food as the hero, but not the perfectly styled version. Heroes are the picture perfect examples of the dish that you will use in the final shot. Once the lighting and exposure are figured out using the stand-in, the hero will move in. If you are shooting cookies, the stand-in could be the cookies that don't have the perfect round shape or the chocolate chips in the right place. The hero cookies are those with perfect chocolate chip placement and the ideal shape.
For this ice cream example, I am using the pint-sized carton of ice cream as the stand in. I cut the back of container to remove the ice cream. The ice cream is then centered in an identical bowl and placed in the freezer until it is time for the hero to makes its appearance. The container stand-in is very close to the size and shape of the pint that was inside. The container isn't the same color as the white ice cream inside, but the white bowl and white background allow me to find an exposure that will work for the ice cream. I keep the stand-in there until I have everything set to swap in the hero and quickly shoot the sauce.
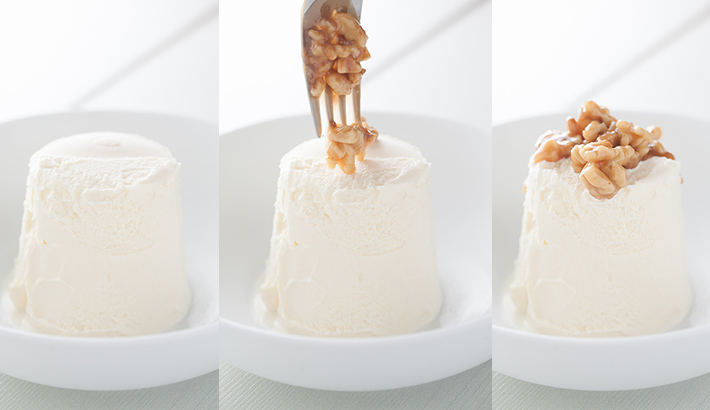
On the left is the hero block of ice cream. The final shot will be a composite, so I am shooting on a very sturdy tripod with a remote trigger. My flash is at 1/4 power so that it will recycle faster and allow for me to take shots of the moving sauce quicker. This sundae is topped with a bourbon walnut sauce. For sauces that have large nuts or pieces of fruit in them, I like to place the large pieces of topping on top of the ice cream first. This allows me to position the large pieces how I like before the sauce flows down the sides. Once the large pieces are placed, I add the sauce.
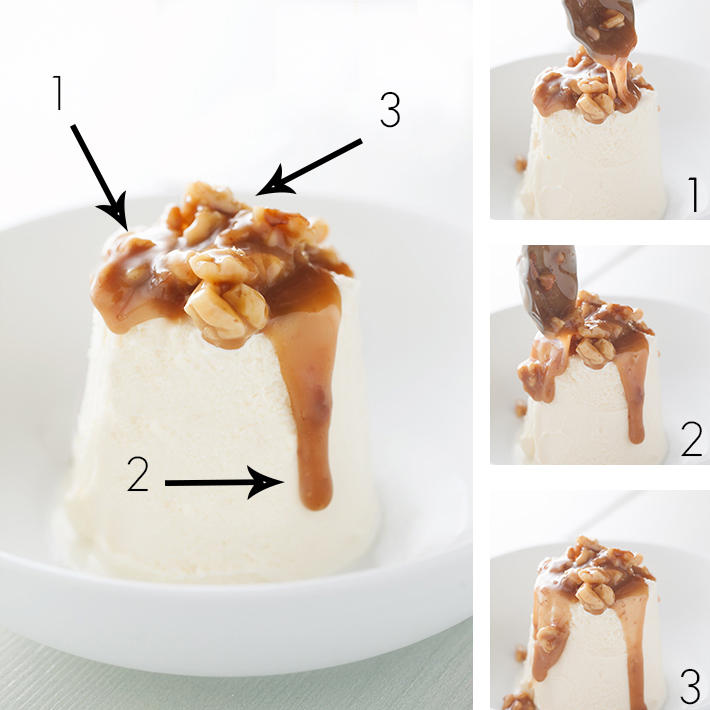
Images 1,2, and 3 are the sauce pouring pictures that I liked the best. The larger picture on the left is the final composite of images 1,2, and 3. Can you tell what parts I took from each shot?
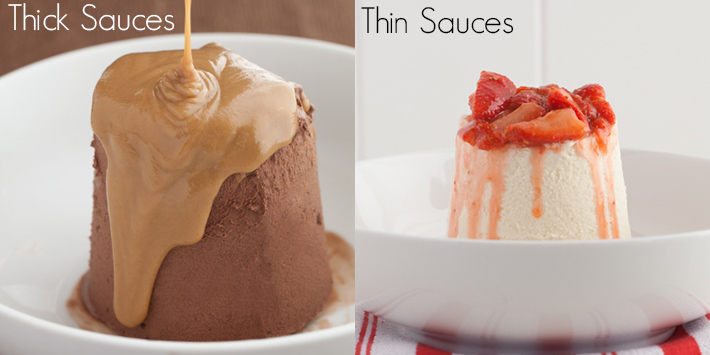
Not all sauces will flow the same. A thick peanut butter, caramel, or chocolate sauce will behave different than a thin syrupy fruit sauce. Keep this in mind when you pour the sauce over the ice cream.
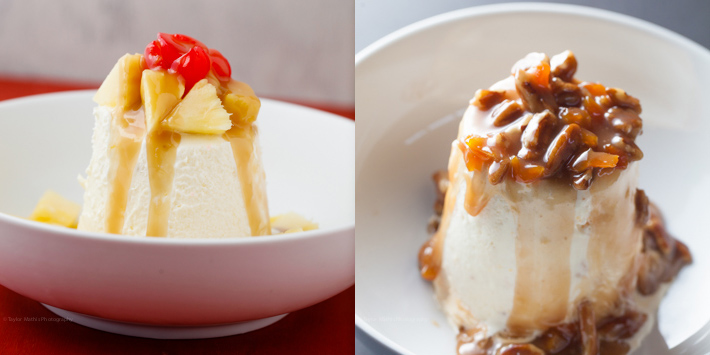
Here are a few other variations on this "pint-sized sundae" concept.
The pint-sized approach is only one of the many ways that you can approach shooting ice cream. If you have a sauce or topping that you want to focus on it is a great way to go. For whatever approach that you take to shooting ice cream, using a stand- in and hero will increase the chances that you capture the shot you desire!
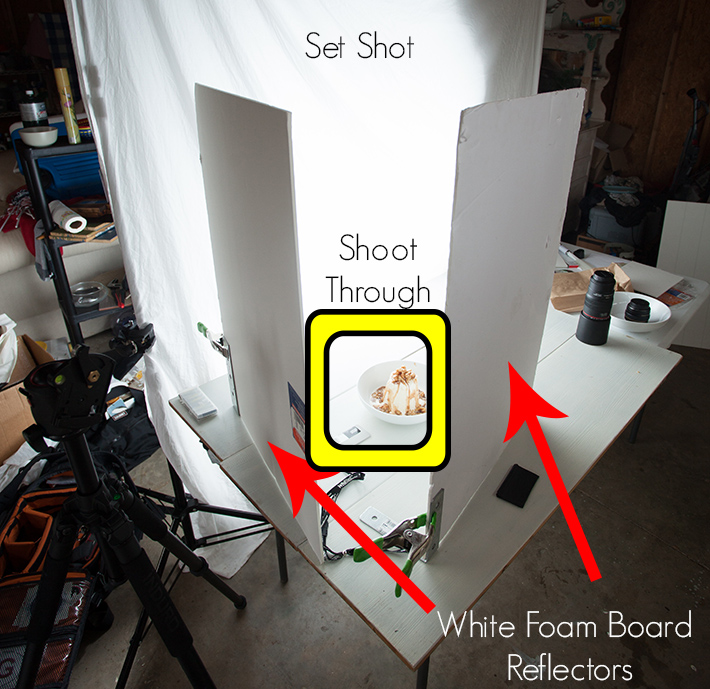
Here is a set shot of the lighting set-up for the bourbon walnut sundae.
For more food photography tutorials like this, check out issues 1-4 of photographing FOOD


Join the Fstoppers community for free
-
Post comments and join in the discussions
-
Browse the site ad-free
-
Share your work and get featured in the community
-
Compete in the photo contests for fun and prizes
9 Comments
Great work with simple effective tools. Many thanks for the shared info.
I'm gonna have to try this
I want Ice Cream now...
People need to use white foam boards more often, they are awesome for so many things and are under-rated.
Agreed. Huge player in my lighting setups.
i used to work with a food stylist. she used mashed potatoes as a stand in for ice cream. from a box i think. when they are scooped they have the same ridged texture as ice cream.
that is how ice cream shots are taken! this is a no option way.
The only problem with this method is that it is distinctly less delicious once the shoot is over.
As an amateur photographer, I really appreciate all those tips. Especially the one with the foam boards, which frankly I have never heard about it before. I have an assignment first week of January for an ice cream photo shoot and I would definitely try it.
Do you have any suggestion about the background. I have read Jon Raho's blog on food photography and he suggest some useful background tips for ice cream shots.
http://www.jonathanraho.com/cookbook-shoot-ice-creams/
Do you think this white background will actually work?