You don't need to have the most expensive gear to make the best pictures. It is very easy to get swept up in the attitude of " if I only had this I could take better pictures." You do not need $10,000, or $1,000, or even $100 worth of lighting gear to make a great picture using artificial light. What if I told you that you could take a beautiful picture of food with a $10 light, a picture frame, a T-shirt, velcro, and cut up foam board?
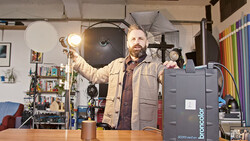
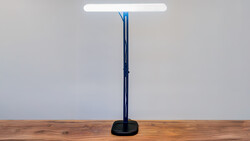
Say hello to my picture frame diffuser!

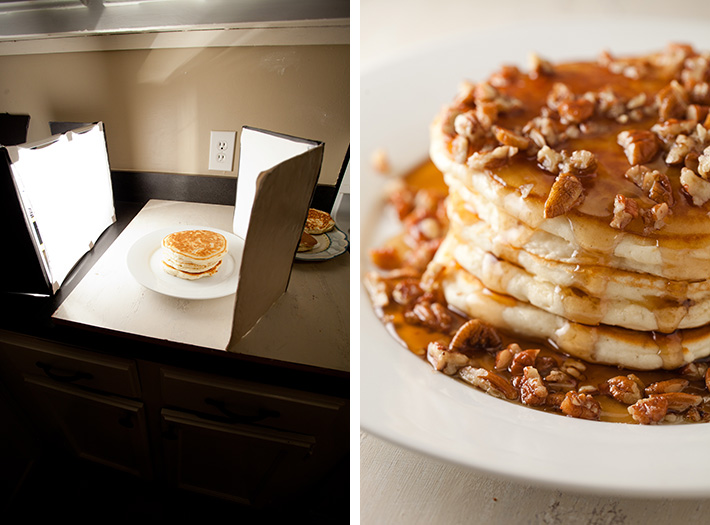
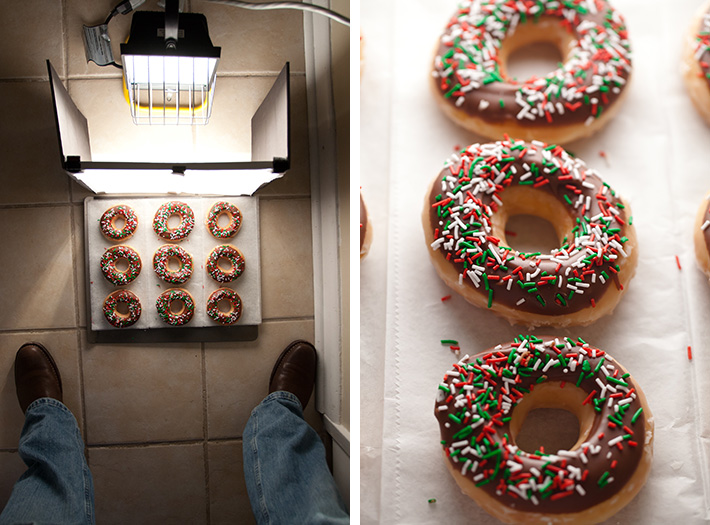
To make the diffuser, cut an old white undershirt to the size of a picture frame. Velcro® the shirt to the frame. Velcro® two pieces of foam board to the side of the frame to create a stand. You now have a diffuser that is perfect for a 500 watt halogen work light that will cost around $10. You can find this light at your local hardware store.
A word of caution, this light will reach high temperatures very quickly. Be careful when touching and keep away from any flammable objects and small children.
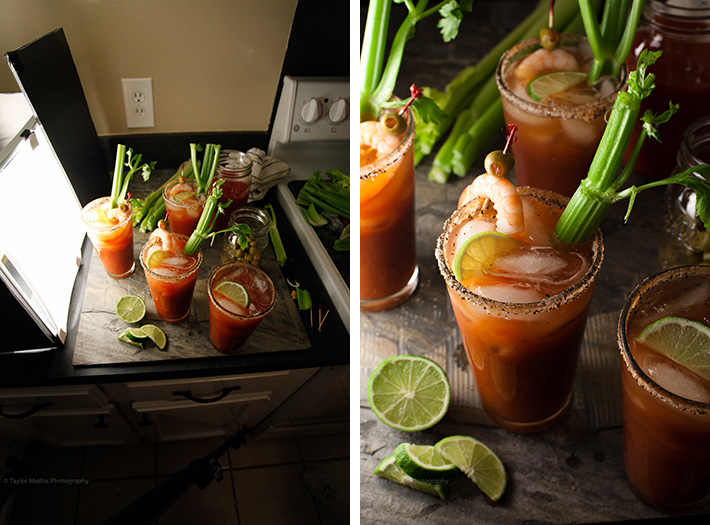
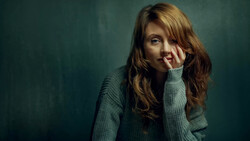
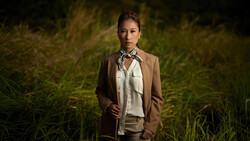
This set up is small enough to fit in a hallway or on a kitchen counter. Here are a few pictures showing its capabilities.
Yes, you can take similar pictures with more expensive gear. Yes, this set up may be impractical if you are traveling or shooting large sets. If you are wanting to explore the world of food photography and don't own a flash or any other lighting gear don't let that stop you. With this set up you can start practicing. The worst thing a beginning photographer can do is lose track of what they need versus what they want. As you are beginning and climbing the learning curve, start with what fits in with your budget. For $10 and objects you probably have lying around your house, this is a great way to start on even the smallest of budgets!
For more information on the picture frame diffuser and other food photography tutorials visit photographing FOOD.
Join the Fstoppers community for free
-
Post comments and join in the discussions
-
Browse the site ad-free
-
Share your work and get featured in the community
-
Compete in the photo contests for fun and prizes
27 Comments
Really well done. Taking 'doing what you can with what you have' to a whole new level here. Thanks for the post and BTS on your method. That little lightbox setup with the t-shirt and industrial light is really nice and I am now curious if you can make that sucker mobile. Haha Here I go!
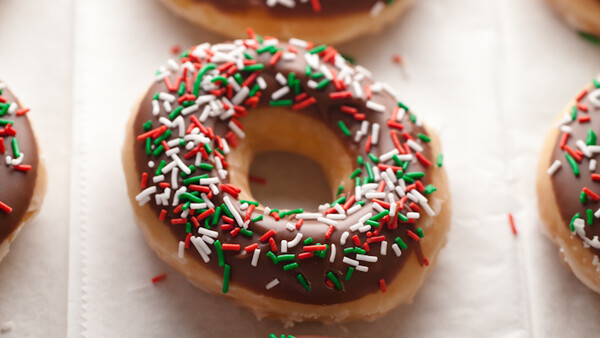
The pancakes and donuts look outrageous. I'm pretty jazzed on this method.
I want to eat those pancakes right now.
Really nice and easy setup. And the pancakes are great :))
Should impress the clients when they walk in on the shoot!
I want that bloody mary
This is really nice and simple...but on another note i have noticed that the authors here all use a new buzz word in their titles and it goes in waves. The new word this week seems to be "perfect".
Why on earth would you want to use a hot light in this day and age? That's ridiculous. You can pick up a 150-watt 5k or 3.2k fluorescent light with an equivalent output to a 600 watt hot light for around $35. The bulb screws into a standard light socket, and off you go. Worth the extra $25 if you ask me.
Yes you can spend whatever you want to get whatever you want, but I believe the message here is "this is how cheaply it's possible to do it."
Great job Taylor!
the work light is $6.88 @ http://www.homedepot.com/h_d1/N-5yc1v/R-203082160/h_d2/ProductDisplay?c…
it's a nice idea but those suckers put out some heat and i'd be worried about the T shirt catching fire, as Spy Black said i would rather spend the extra $$ and go for the fluorescent
To everyone that's worried about fires etc... This isn't the ideal setup, it's not something I'd actually ever use in front of clients either because when they're paying you and you show up with cardboard, a ripped tshirt and a 7$ home depot light, they're going to start having doubts in you and wonder who they just hired.
What this article does do, is show us a quick study of light. So that one day, if you're in a bind and don't have the gear you need, maybe you'll remember this article and get creative with what you have on hand (now knowing that you've seen a light bounce through a tshirt and how it reacts). Likewise this can be done on a bigger scale with a bedsheet and a few of those bigger workman lights. In a pinch, parchment paper can also diffusion light, it's not flammable (easily) but it doesn't spread the light as softly as proper diffusion filters.
people seem to think he is recommending the hot light. He's just demonstrating a lighting setup. Get over yourselves. if you want to use your Arri T1, Kinoflow, or profoto, go for it.
People need to chill out. This is more of a demonstration and a proof of concept than a serious tutorial on how to use your work light for photography.
agreed. The article shows that this method COULD be done with the most meager of equipment, but it is EASY to extrapolate this into a more professional level build. You could staple the fabric all around the frame instead of using velcro, then add a cheap spigot or 1/4-20 nut to one side for easy positioning with a light stand or c-stand (essentially making a small scrim or flyswatter). Add an LED panel, a hot-shoe flash on its supplied stand, or any other light source of your choosing, and it immediately looks more professional.
or at the very least, make it out of foam core and cover it in black gaff tape/flat black spray paint.
I'd recommend one of the new 300 LED lights from Yongnuo rather than the worklight. No heat for a longer shoot time and for safety. Your cost goes from 10 dollars to 65 but after the first burn, it will be worth it :)
Can´t see the value of this post, bad lighting with harsh shadows, it seams that any BTS clip is valid for FStopper nowaday? Pls have some quality control
Interesting, since there is no video here and this is an extremely good example of food photography done right.
Clip or shots,,whatever,,,you like to pick on people don´t you
So you say that the bagels shot is great food photography regarding the light and composition and adding the lame background,,,OK thats up to you, but dont pick on my opinion, I think its crap and entitled to say so
I am really loving the lighting setup tutorials you guys are posting :) Thank you!
WOW!!!! BADAMN!!!! THAT IS SCHWEET!!!!!!!!!
I would substitute the Tshirt for some parchment paper it will diffuse better, and no heat issues
http://goo.gl/WpVBX
,Taylor was able to do this because he knew what he was doing. To then post this so it c.an be slavishly copied gives no value to either originator or copier.
Maybe readers should be encouraged to think and create for themselves.
Unbelievable how many people feel the need to chirp in with their little snarky criticisms, while completely missing the point of the post, which is to show how inexpensively something can be done if needed.
Everyone knows there are better ways to light a donut. You're not saying anything new. All you're saying is "Look at me, I'm an expert photog with an incredible knowledge base vastly superior to the author's, and it's just unbelievable that nobody will hire me. I should be writing for FS instead of you if I could only write something non-sarcastic for once."
Taylor: please don't be put off by these idiots. Your posts are useful and well-written, and your images are fantastic. I look forward to reading more.
Sorry, but there is a point of diminishing returns here. If you're going to do a lighting tutorial, then do it right, with modern, safe lighting gear.
Primarily, he's not showing the lighting, that's secondary, actually. He's showing how cheaply you can do it. This is a bad example, period. Just think how many newbies will take it face value. They may very well be doing it in the apartment next to yours when the fire commences. You enjoy that, won't you?
This is great for food bloggers and people taking photos for fun. Thanks for sharing!
I love it!