There is one lighting modifier that I never leave home without. Its compact size and light-weight build has earned it a permanent place in the outside pocket of my gear bag. I made this modifier about 4 years ago and have brought it to every food shoot since. If you are shooting food, it is a must have and it won't break the bank to make it. What is it you wonder? It is a collapsible Tabletop V Reflector. Let me show you how easy it is to make!
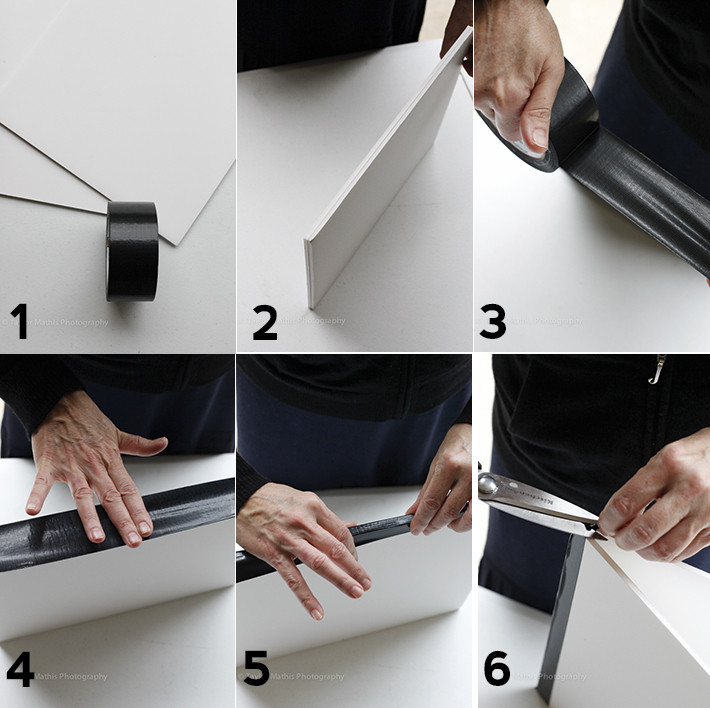
For your Tabletop V Reflector you will need two pieces of foam board cut to an equal size. To create a perfect fit in your travel bag, measure the pocket that you plan on storing the reflector in and use those dimensions as your guide. You will also need some duct tape. That's it! Here is how you assemble the reflector.

Step 1: Have your two equally sized pieces of white foam board and duct tape ready.
Step 2: Line up the two pieces of foam board and stand them on their sides. The side that is facing upwards will be the side that will be taped together to create a hinge.
Step 3: Tear off a piece of duct tape slightly longer than the length of the designated hinged side. A piece that is slightly longer will allow you more flexibility when placing the tape.
Step 4: Run your finger along the tape so that it adheres to the two pieces.
Step 5: Fold the remaining tape over the sides, sealing the tape into place.
Step 6: Trim away any excess tape.
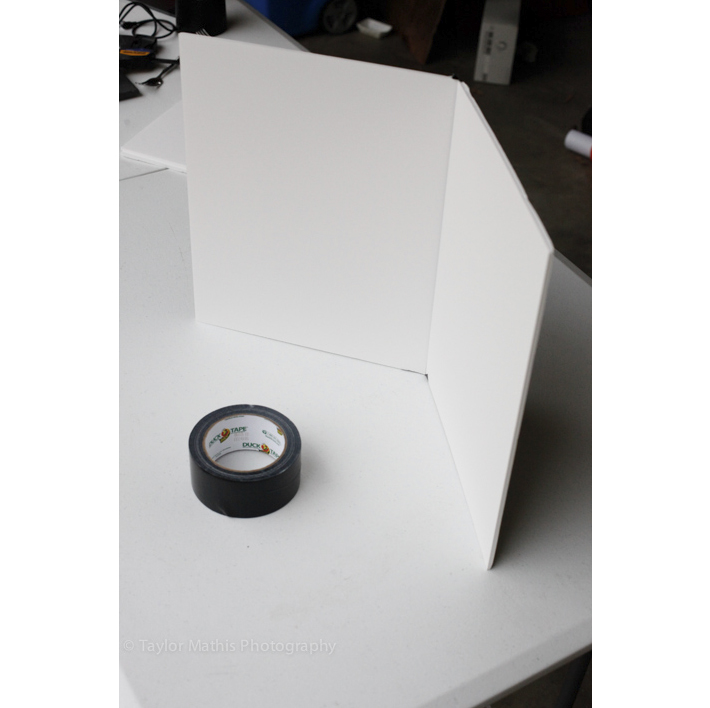
Here is the final product!

Taping the two sides together creates a hinged joint. When the reflector is positioned into a "V" shape it will be able to stand up on its own! This is great for those of you who are shooting without an assistant.
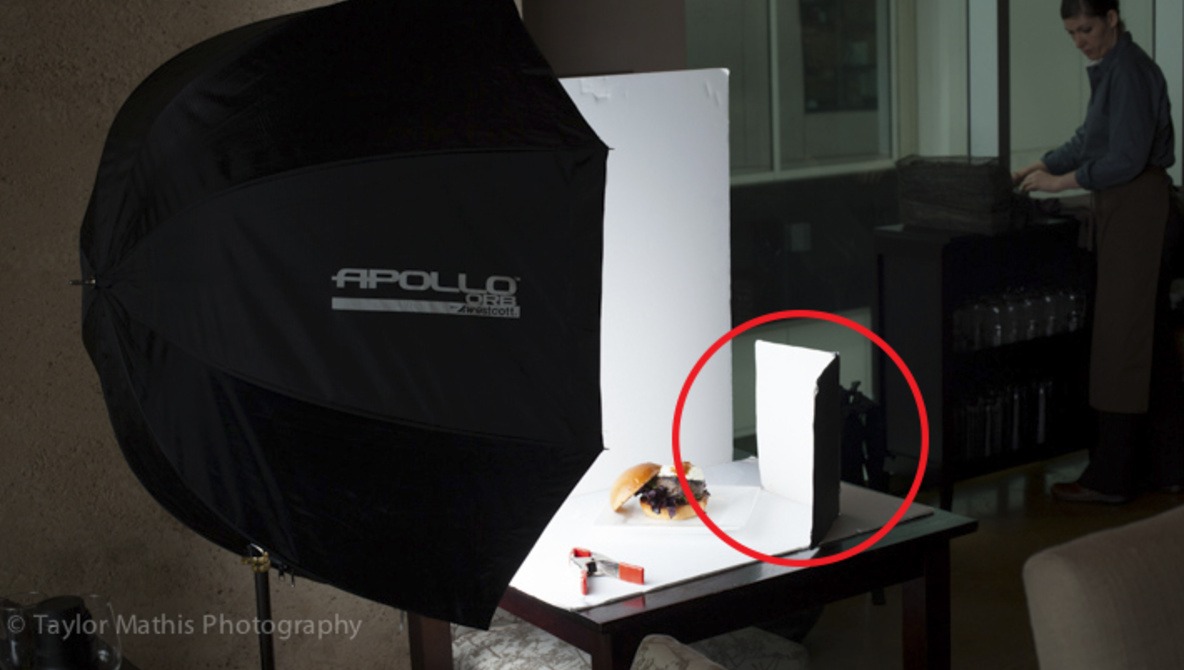
For extra durability, you can cover the exterior of your reflector in gaffers tape. When placed on the opposite side of your light source, you have a great way to fill in the shadows and control the contrast on your subject. Here are a few shots showing this reflector in action.


The white foam board material provides a soft fill for your subjects. If you would like a fill that is slightly harsher in quality, try lining the inside of your reflector with silver reflective tape! You can find this tape at your hardware store!

For more food photography tips and tricks, check out Issues 1-8 of photographing FOOD.


Or just cut the board so you don't cut through both of the cardboard surfaces...same result.
... Or...
Find a book
Open it up
Place near subject for fill...
BOOM! ... Done!
Great tools and tips for great light is always appreciated. Especially useful when doing wedding rings.
Easy as A, B,C - but yet powerful and useful :)
Thanks for sharing!
Or, just go to Wal-Mart and buy a tri-fold poster board. Sturdy, good sized, cheap, and works really well. Don't have to make anything at all.
typically, that would be too large if you are shooting food.
Cut it with scissors. Then you can make several boards, which can be converted into different types, and they're very sturdy and attached with something better than duct tape.
Also, in my experience it's not too large. Because of it's size you can move it farther away from the food and still get the equivalent amount of bounce as the smaller counterpart, which gives you more shooting space.
or ask for a dessert menu, and drape your napkin over it
grreat !
i don't understand why you needed to give step by step instructions on how to tape two pieces of foam board together...
If you don't understand why he did it step by step why did you read it?
or or or or or or
You all have such great ideas. Why don't you write an article that can be helpful to others instead of writing a critique of what someone else wrote?
or... it can even be done with three panels: white, silver and gold. ;)
...best friend to a food photographer!
These ridiculous critiques and alternatives offered discount the fact that this article not only teaches how to make the modifier but emphasizes the application and usefulness of it as well.
Great!Very useful. I'm gonna make myself one. Thanks for sharing.