
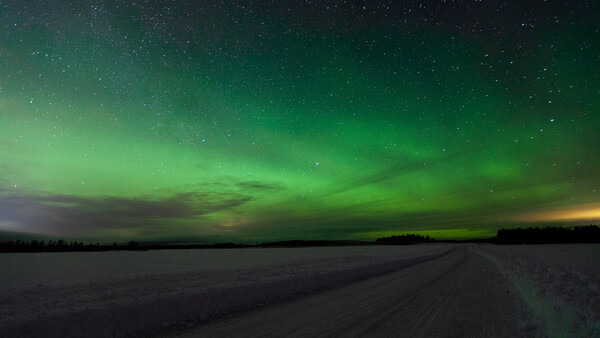
Photographing in low light is one of the most challenging tasks you can encounter. This is a scenario where your setup truly matters. Not only should you know what to do with your camera, but also keep in mind which camera to bring for low-light photography. In this article, I will go over the essential gear for such work.
Camera Body
When shooting in low light, there's only so much you can do with your camera. Usually, the first step is to increase the ISO. While all digital cameras perform well at their native ISO, their performance starts to deteriorate as you push that number up. Some sensors handle this better than others. If you primarily work in low-light conditions, you will need a camera that excels at high ISO. Sure, grain is inevitable, but if you compare my Canon 5D Mark IV at ISO 6,400 to my Canon 5DS at the same ISO, you will see a significant difference in image cleanliness.
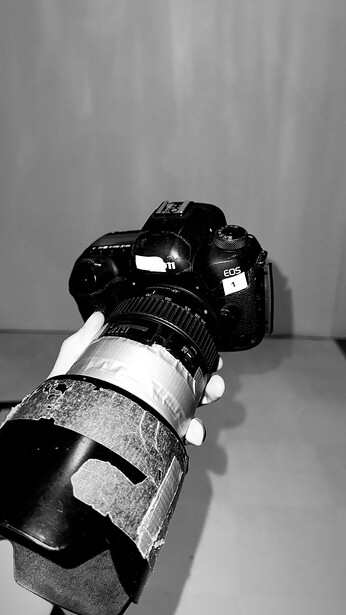
The more modern the camera, the better its low-light performance will be. As much as I love the Canon 5D Mark II, I would not recommend it for low-light work. Something like the 5D Mark IV or, better still, an EOS R would be much better. While I am not fully aware of the lineups from other manufacturers, I hear that Sony is incredibly well-suited for low-light work. The Sony a7 III is a great camera for such work, for example.
Another factor to consider in a low-light camera is focusing. DSLRs generally perform much worse at focusing in low light than mirrorless cameras. If you prefer using the viewfinder for taking your images, opt for a mirrorless body. You can switch to live view on your DSLR to mimic a mirrorless camera, but this disables the viewfinder.
Lenses
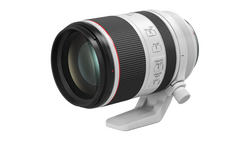
When it comes to lenses, you want to make sure that there is as much light being let into the camera as you can possibly get. Kit lenses would not be your best bet. Their “slow” apertures will often mean that you will have to be cranking up the ISO to uncomfortable values, as after all, the higher the ISO, the worse your image quality gets. This is why I recommend fast lenses. If you want versatility in your composition, go for a fast f/2.8 zoom lens. However, if you are willing to sacrifice zoom for an even faster aperture, there are plenty of much faster prime lenses available. They usually tend to be more lightweight than fast zooms as well, making them a very good option to consider.
When I was shooting a lot in low light, before the fashion days, I had a trio of fast zooms. I still do. Here they are: Canon EF 16-35mm f/2.8, Canon EF 24-70mm f/2.8, Canon EF 70-200mm f/2.8. These days, I rarely use the first or the third lens, as I mostly shoot in the studio. Recently, I have begun to fall out of love with the 24-70mm f/2.8 as well, as I have gotten my hands on an EF 50mm f/1.4 and have begun to love it for how lightweight it is.
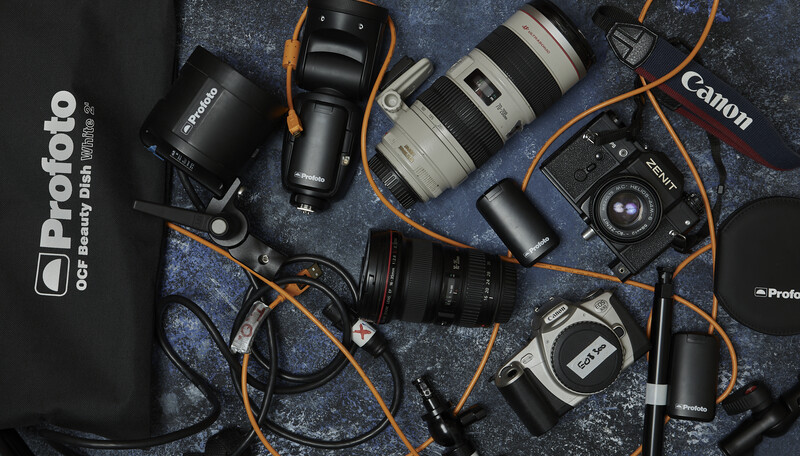
If I were shooting in low light nowadays, I would arm myself with some fast primes. My kit bag would definitely have the 50mm f/1.4, 35mm f/1.4, and the 135 f/2.0. These lenses would allow me to get a variety of different composition angles, all the while being superfast and perfectly suited for low light.
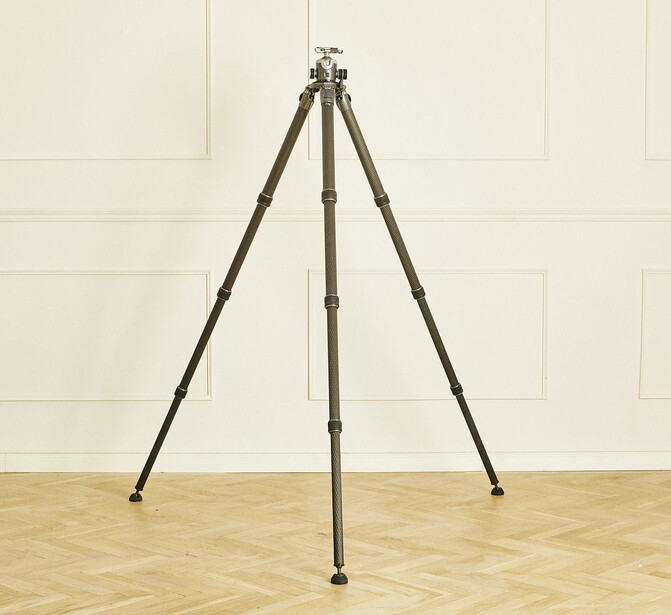
Tripod
If you will be shooting in low light, a tripod is a must-have for your kit. There are a bunch of different tripod companies to pick from. I tend to go with slightly heavier and more stable options. Essentially, the logic with tripods is that if you will be putting your expensive cameras and lenses on something, you better make sure it won't fall over. I see far too many people use the cheapest tripod or stand with the most expensive piece of equipment. Having tried a few tripods in the past, I am most willing to trust Gitzo tripods as well as Manfrotto. The difference between the two is the price, of course. Better be safe than sorry, which is why I have a Gitzo Systematic Kit Series 5. It is overkill for a full frame camera, but is just right for anything larger, which I plan on having. It is rated for 30 kg; however, it can take 70 kg of my own mass.
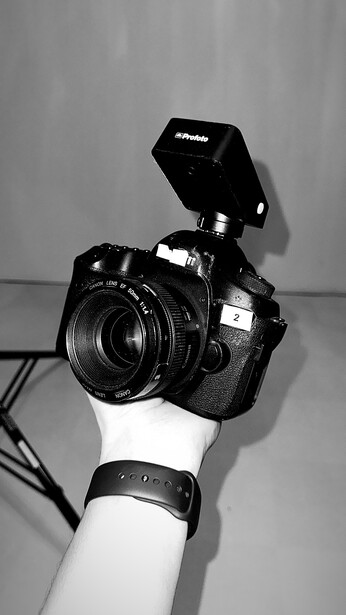
Off-Camera Flash
Another great addition to your low-light photography kit is an off-camera flash. Typically, you can go with a speedlight; however, why should you if there are better options available? You see, speedlights made by camera manufacturers are usually overpriced and have rubbish functionality. However, speedlights made by flash companies are perfect ways to not only have a better lighting solution but also start your off-camera-flash journey. As such, my recommendation would be the Profoto A1 series light. It has everything that your typical speedlight won’t. First of all, it is easy to use, unlike a normal speedlight. Another benefit is that it is powered by rechargeable batteries that last forever. Moreover, it also functions as an Air remote, meaning that if you want to grow your kit and add extra flashes, the A1 can be your trigger. Lastly, there are plenty of incredible accessories for this flash available.
Tips
Buying equipment that I just listed will not be cheap. That’s only if you buy it new. I often say that buying new equipment is like burning money. This is because once you open that box, you will lose around 50% of the value of the gear that you bought. If you are looking to save some money and get a good deal, check out MPB.com, which has tons of used gear I mentioned for sale. Buying from MPB as opposed to the Facebook Marketplace is much safer, as MPB checks everything they sell to you. In case something isn’t as described, their return policy makes it easy to send items back. Lastly, if you have some gear you want to get rid of, MPB is more than happy to buy it from you.

Join the Fstoppers community for free
-
Post comments and join in the discussions
-
Browse the site ad-free
-
Share your work and get featured in the community
-
Compete in the photo contests for fun and prizes
16 Comments
I do not believe this person has ever been allowed out in the dark of night! First any and all cameras will work in the dark rather well just some better that others. No real need for low pixel count My old Canon T2i captured the Milky Way before I knew what it was '11. The unknown and not shared is the more pixels the faster the shutter speed as well as the faster the glass the faster the SS, find out with PhotoPills app and learn on their site. The A7s was talked about as the perfect Astrol Milky Way camera when it came out but today all A7 models upto and including the A7RV will do wonders as well as other camera makers. As far as lenses no need to get anything wider than f/4 and the difference between it and a f/1.4 or 1.8 is SS has to be faster for the wide 1.4 say 8s and a f/4 25s but 30s will do, I used to wait you can too I bet. Something on line is false and that is to keep NR off, yes it is another 30s with it on - so what again you can wait a minute, this way less noise reduction in post.
Next is the tripod, yes lightweight and fiber is great and easy to haul but there something to be said about solid and sturdy when out in the middle of the morning all dark with a headlamp on (use green, red is real hard to clone out! pass the word.). Some info if on a Atlantic Coast beach or any beach - get tennis balls (Tennis court free) and cut a slice in each put on legs keeps it from sinking in the sand. A head with bubble level or two, the camera level is last and best. The Milky Way and Galactic center will be to the SE but put it to the near right corner, a 16-35mm f/4 will do just fine you will have a stream of stars going left like a path right to left. Put camera on AWB to get a light blueish sky and for the Milky Way center there will be a horse/smile feathers in magenta on the horses feathers and a bluer horse, the horse and sky will be different blue, The horse is Pegasus and the magenta/blue are the symbols of the chinese yin and yang. The Galactic Center will be blow across the path of Pegasus and will be very white, use your color pick to get the right colors at night. The path will also be a different color blue a deeper blue the the full sky.
One thing to learn first is in the northern hemisphere the MW first appears in Feb. new moon and will be almost level and across the sky and at 5am or so. March to May it shows earlier say 4am then 2am then midnight but will stay out all night note if bad weather you can go to your picked spot 5 days before and after so weather app is needed even slightly cloudy is fine. Jul to Oct you will get a vertical MW to the south then southwest. It disappears behind the sun in Nov, Dec and Jan. BUT BUT there is the Winter path to the west mainly all night.
To save $ get a $125 Panorama rig on Amazon Neewer Gimbal Head Panoramic Head Camera Tripod Head - the best it has the most important thing a stepper that lets you click to next step by feel and hearing goto next step during NR blackout, save money getting a lot of lenses by doing two or three steps and combining a 16mm will get that high overhead rainbow arc or get a close up pano at 24mm or 35mm
Two apps: PhotoPills spot stars for SS and planner to see it and where and if on a beach Planit pro for the tides in a sine wave not a chart.
ground light will light your foreground with a dark sky above!
Thanks for the info in your comment, Edwin. Really interesting.
But because of my bad english I can't understand why do you recommend the gimbal.
Not a gimbal. A pano rig where you attach the camera to an L shaped device with camera in portrait view. The base attaches to the tripod head.
The point of using a f/1.4 lens is that you can stop down to f/2 or 2.8 and gain the sharpness benefit of a smaller aperture. An f/2.8 lens wide open isn't quite as sharp, especially in the corners as an f/1.4 stopped down. My Fuji cameras produce great results at f/2 or 2.8 while never exceeding 13-second exposures.
Sorry, but using a touch pad in Florida Sun won't work for Wildlife or Birds in flight as well as the Shutter Button does!
Correct,
I thought this article was about night shooting, not daylight.
Tripods.. I have two beasts, both found at Estate sales. Very little money. These guys were meant for big cameras of days gone by. well built and precision. It does take some hunting.
Yes, I still use my Manfrotto 190L modified with a half cup leveling base and a fluid head with several arca swiss slider plates. Heavy as heck but very sturdy but needs the tennis balls on legs due to sinking in sand.
I have used many cameras for low light/astrophotography over my 60 years of photography. Any camera can be put to this purpose with a bit of trial and error, and acquired expertise.
At present I use a Sony A7S, A7 III and A7R V; all work very well.
A gold mine collection the exact direction I went, I went also to the A7SM2 with all the bragging and use online by other astro photographers. Yes you have to be sure to turn off IBIS. For the difference in colors between A7SM2 and A7SM3 I went A7SM3 and still believe the A7S AWB is the best as well as Detail/Sharpness of Pegasus wings and legs and will capture sharp even in the haze in night along coastal waters or farmland dewy air.
1st A7S. 2nd A7SM3 3rd A7RV
I had my A7S modded to full spectrum for astro-imaging and IR photography. It is still going strong after years of use. My only complaint is battery life on cold Canadian winter nights.
I used my A7S mainly from 2014 to 2017 but still carry into the night, just awesome. But also use the Sony APS-C E 10-18mm in Full Frame at 12mm so much lighter than the 12-24mm out in the dark!
Something else, perhaps much more important than the camera: modern noise reduction software. Products from DXO, Topax, On1 and even the AI NR in Lightroom are miraculous at removing high-ISO noise. If you've never used one of these tools, you don't know what you're missing. It really minimizes the difference in high ISO shooting on 35mm format sensors and small sensors like micro 4/3rd.
As far as astro photography I believe Canon makes or made a couple of cameras specifically for astro photography with their in house made special sensors.
Just to share with you another scenario than astrophotography for low light, it’s wildlife in Borneo. I was there a month ago and I was surprised with the most challenging scenario of my life: animals were far away (you need the longest telephoto possible), in sunset or sunrise (or night), no chance of using a tripod and physically hard… and I was also surprised for the results at ISO 25.600 of my Olympus gear (with a Sony back illuminated sensor) as about 70% of my photos were at that ISO over 12.800.
Attached some samples of the results, processed with DxO, Lightroom and Topaz.