
In this series of articles, I'll be comparing Capture One to Lightroom to see which one is the better choice. The articles will focus predominantly on color; however, other points such as contrast and dynamic range will also be covered too.
There is a common argument circulating that Capture One will produce better-looking files compared to Lightroom. As great as Lightroom can be when it comes to bulk editing, Capture One is described as being the better choice if you want to get the most out of your raw files. For this reason, I'll be comparing both pieces of software with a wide range of camera manufacturers to determine which of the two is, in fact, the better option.
In this first of the series, we will be looking at Canon cameras, focusing primarily on an image taken with the Canon EOS R6 and the RF 50mm f/1.2 lens. We will take a look at some of the other models from Canon too; however, in order to accomplish a deeper dive, a single image should suffice.
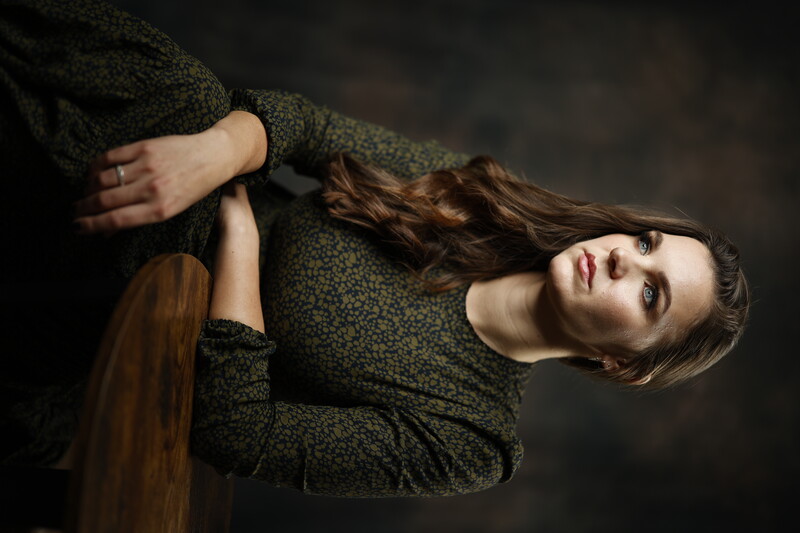
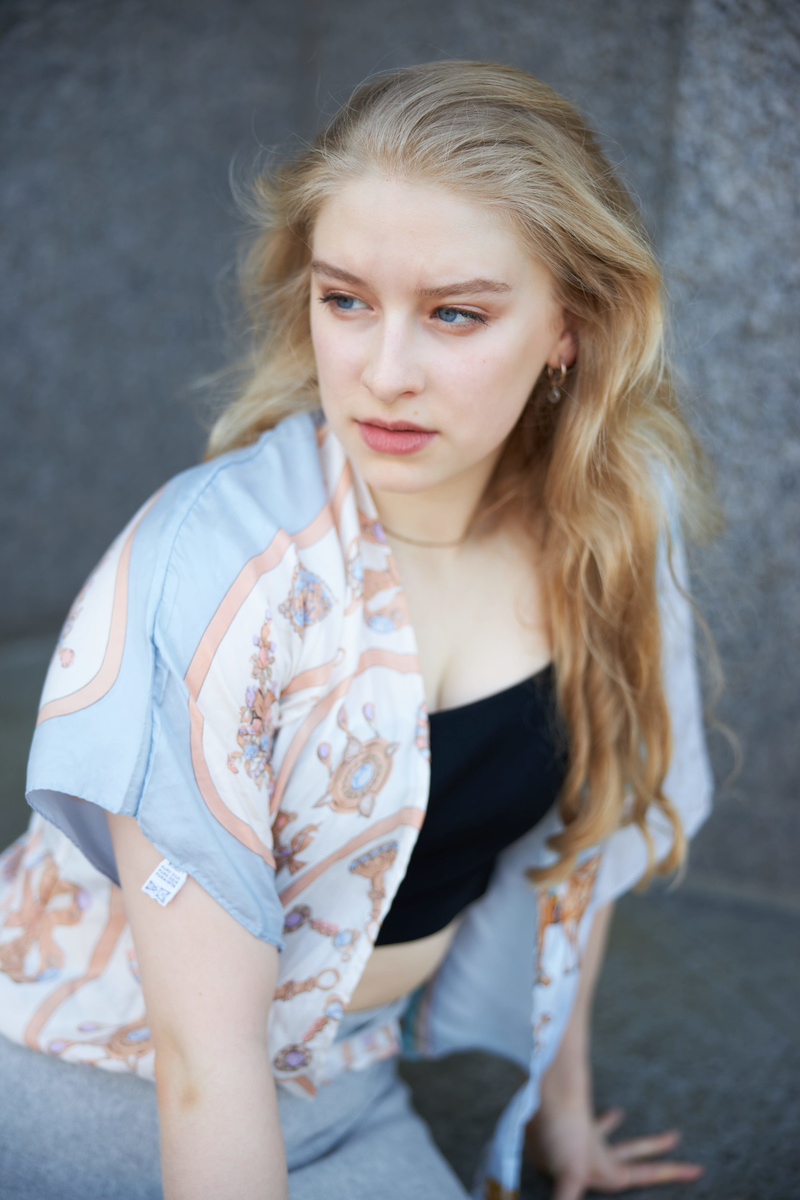
This first image that we're looking at is a JPEG file straight out of the Canon EOS R6. No adjustments have been made to this image. This is not a benchmark by any means, although it can serve as a point of reference to some degree. Below we have the first comparison that we can take a look at.
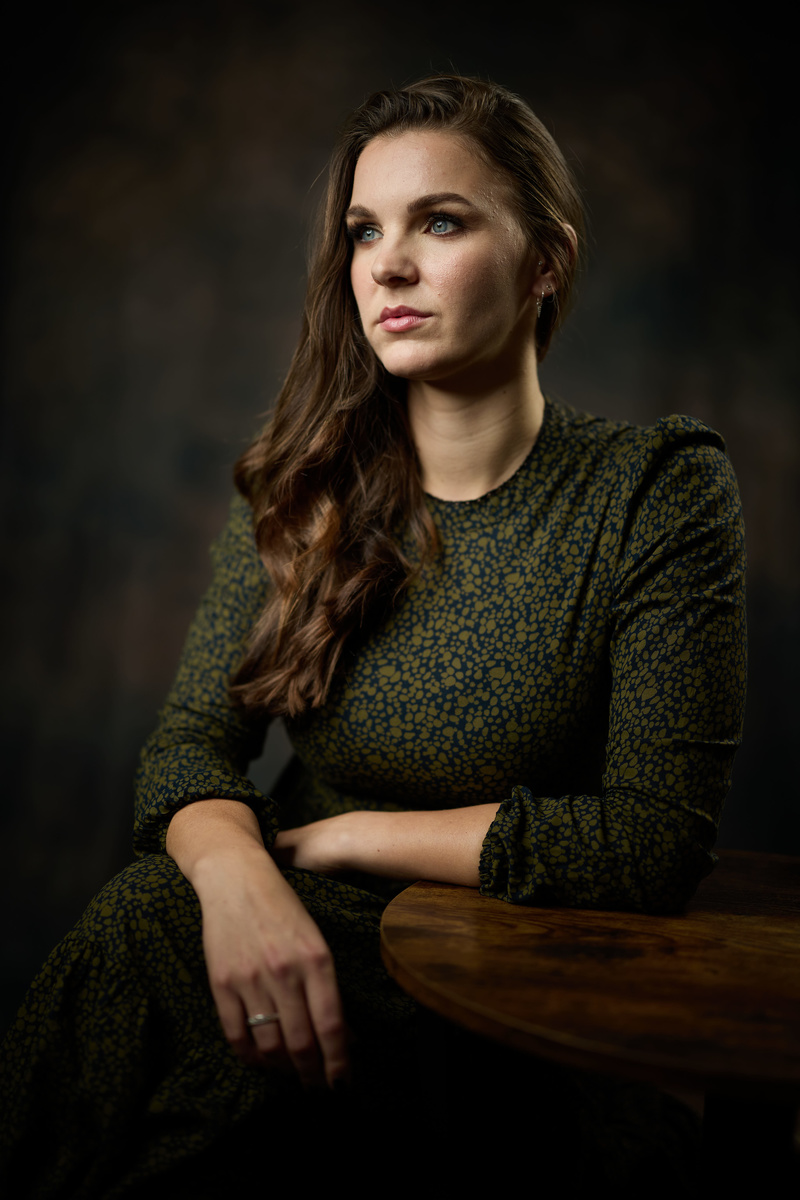
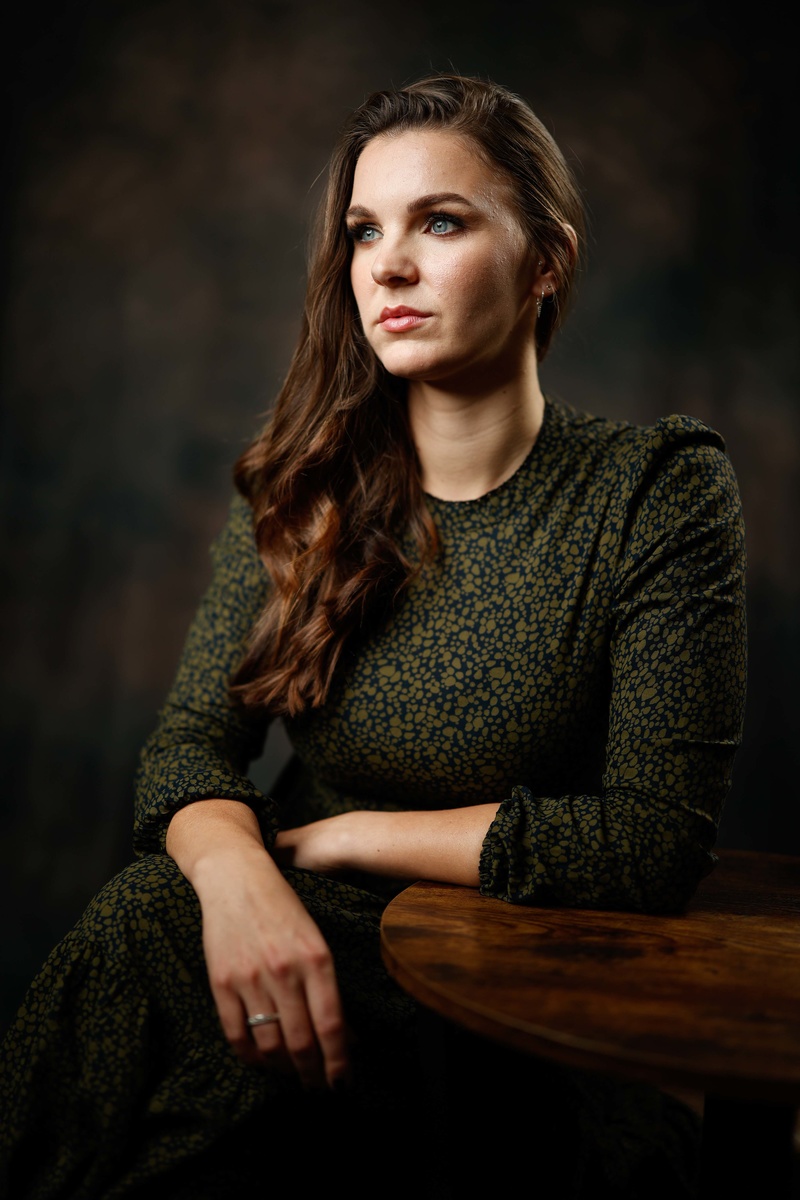

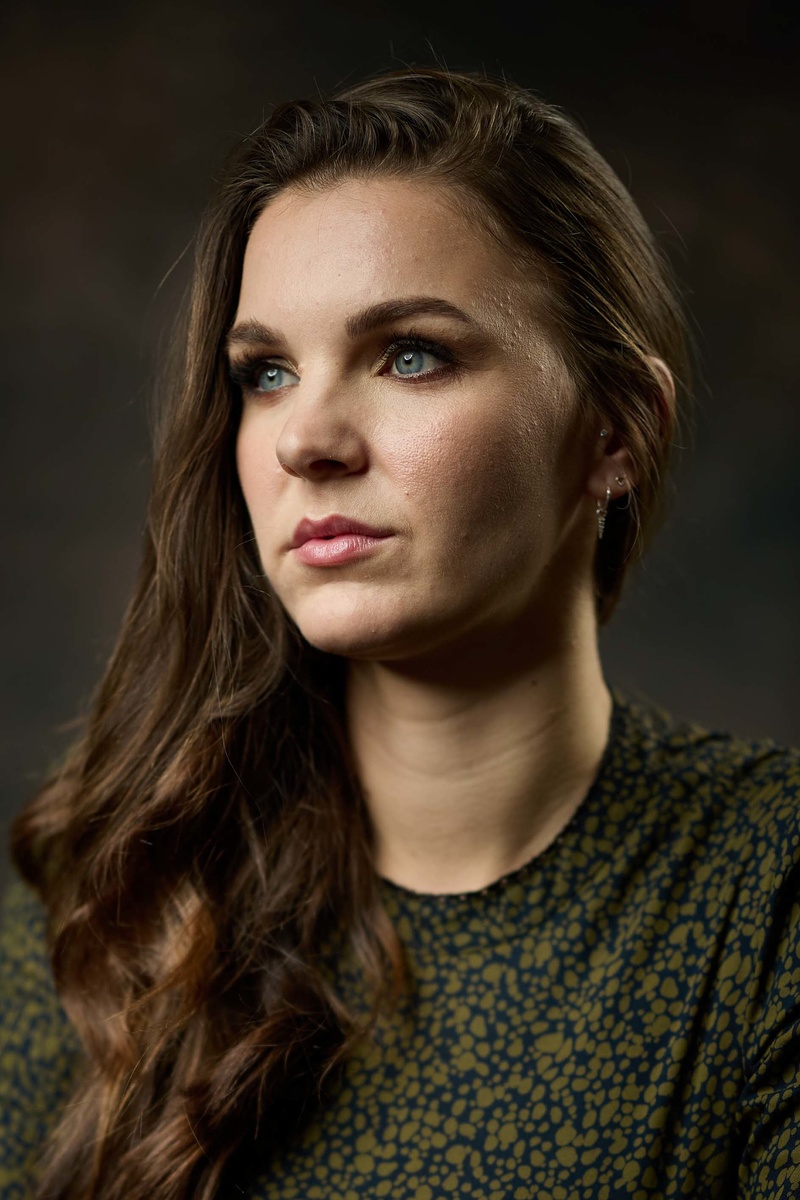

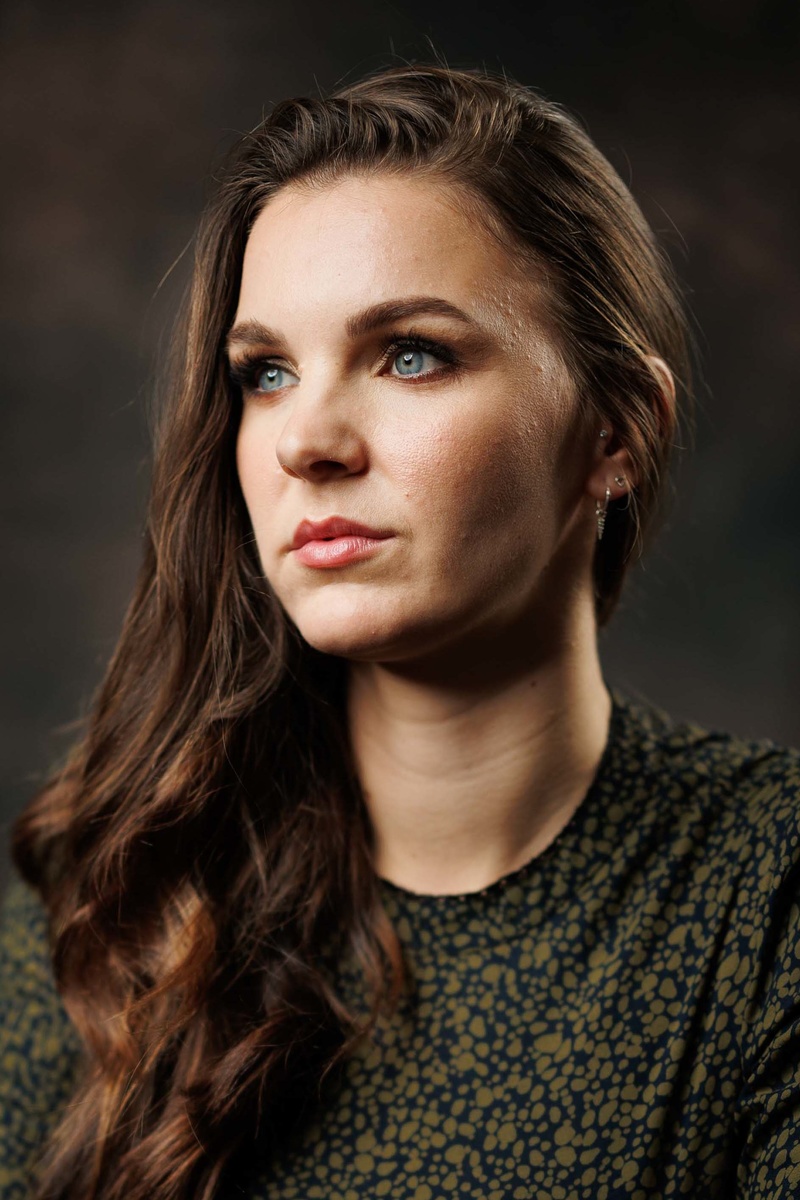
When you export images from Capture One or Lightroom, each software will apply its own interpretations. Even if no adjustments are made to a file, images exported from different software will look distinctly different. For instance, the Capture One exported file appears less saturated and leans more into the earthy tones.
On the other hand, both the Lightroom and Canon JPEG lean a little more in the orange and magenta tones. This can be useful if you prefer to have a little more punch in the skin tones. However, personally, I find the processing from Capture One to be more appealing. It works for my particular style.
Having said that, one could argue that Lightroom does a better job at remaining true to what Canon is aiming to produce with its cameras. Lightroom also does not apply as much sharpening compared to Capture One. I find that Capture One is a little too aggressive with how much sharpening it applies.
The other major difference between the files is how the lighting looks. In my mind, Capture One does a better job at representing the lighting and skin tones. The file doesn't look harsh and has a more pleasing look. The other two files seem to have a harsher look to them, and the lighting around the face seems less controlled. Once again, however, Lightroom seems to be leaning more towards how the original JPEGs look from Canon.
The reason why this could be beneficial to many is that the look of the images when using Lightroom remains consistent. What you see on the back of the camera is going to be really close to what you see in Lightroom.
Highlight Recovery
Recovering highlights in an image is obviously quite important. Almost every kind of photography benefits from this. Each software seems to manage highlight recovery a little differently. In the image comparison above, the highlights have been fully recovered in each program. Essentially, the maximum setting on the sliders in each application has been used.
The effect in Lightroom is significant. In most cases, I tend not to recover highlights anywhere near this degree. These examples are just here to demonstrate the extent to which each software allows when it comes to recovering highlights.
In my experience, I find highlight recovery in Capture One to be less useful in most circumstances. This is because Capture One is a little too reserved in how much of the overall spectrum it recovers. Lightroom is far more generous in this regard, and for many kinds of work, it proves to be the more useful option.
Having said that, Capture One offers a greater deal of precision when it comes to highlight recovery. The software targets the highest points in an image without affecting the rest of the image. Recovering highlights in Lightroom will likely affect a larger part of any given image.
Shadow Recovery
When it comes to recovering shadows, Capture One feels less sophisticated. With the shadow sliders pushed to the maximum setting on each, Lightroom is far more reserved and precise in comparison. The shadow slider in Capture One alters far too much in an image for my liking. In fact, I have yet to come across a situation where the shadows slider has been useful.
In most cases, if I need to lift the shadows, I tend to use the "Film Extra Shadow" profile instead. Unfortunately, the shadow slider in Capture One is too aggressive.
With Lightroom, however, the shadow slider does a better job across a wider range of photography genres. The slider will lift the shadows without impacting too much of the rest of the image. Despite the overall tone of the image I'm using in this article, Lightroom still manages to separate the shadow areas more effectively.
In essence, I find Capture One to be more useful when it comes to managing highlights and Lightroom for managing shadows.
Contrast Slider

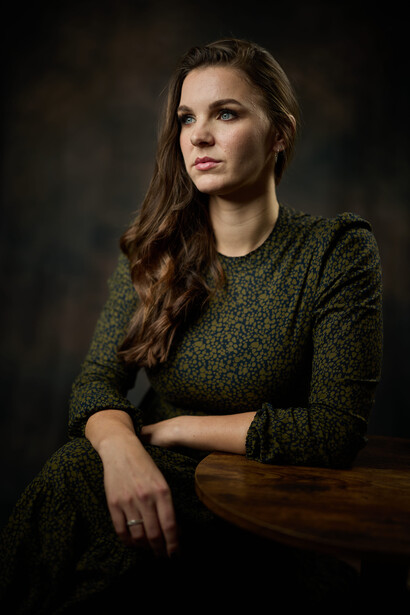
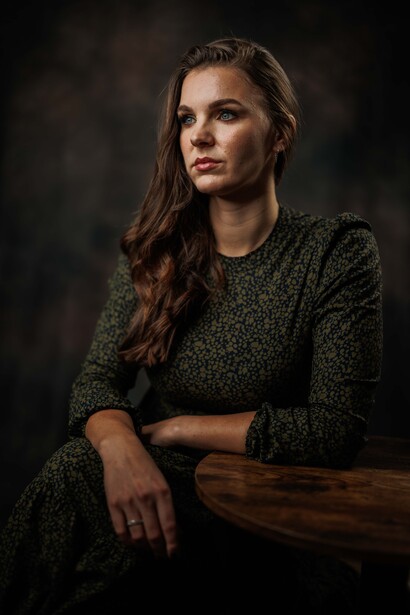
Finally, we have the contrast slider and both programs seem to do a great job; however, the results are different. The slider was only pushed to 50% on each, which equates to +25 in Capture One and +100 in Lightroom.
The fact that Lightroom goes to +100 and -100 seems to allow for a wider range on the contrast slider. This helps you manage your contrast with a greater deal of precision. With Capture One, the contrast slider only manages half that range, and it does feel like a shorter range.
However, the major benefit of Capture One is that the contrast slider does not seem to affect colors in the same way that Lightroom down. When you add or remove contrast in Capture One, it only affects the lighting in the image and not the colors. This is probably the most beneficial difference between the two apps. And it's actually most useful when removing contrast from an image.

In the comparison above, you'll notice how the Lightroom image is far less saturated than the Capture One file. Unfortunately, the Lightroom contrast slider will affect colors as well as the lighting in an image, and this makes it a less precise feature. Capture One, however, offers a far more useful contrast slider purely because of how precise it is with its effect on lighting.
Gallery Comparison of Various Canon Cameras

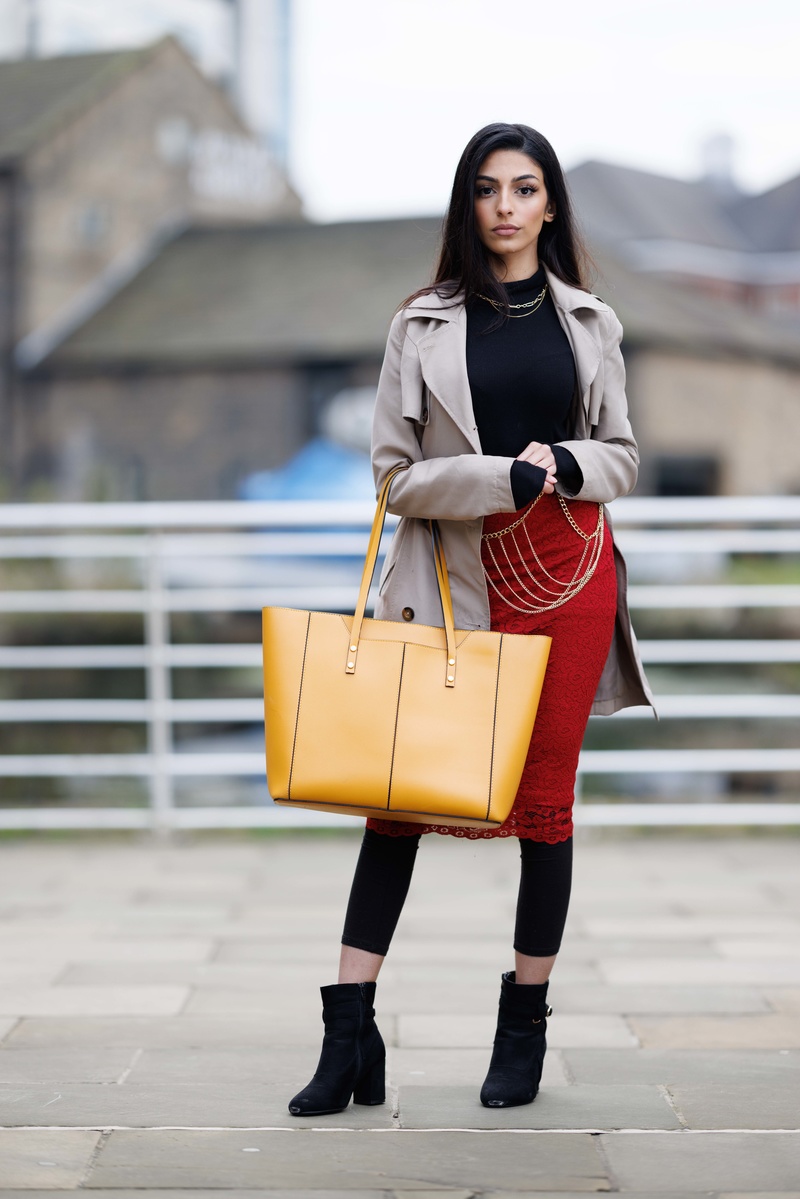
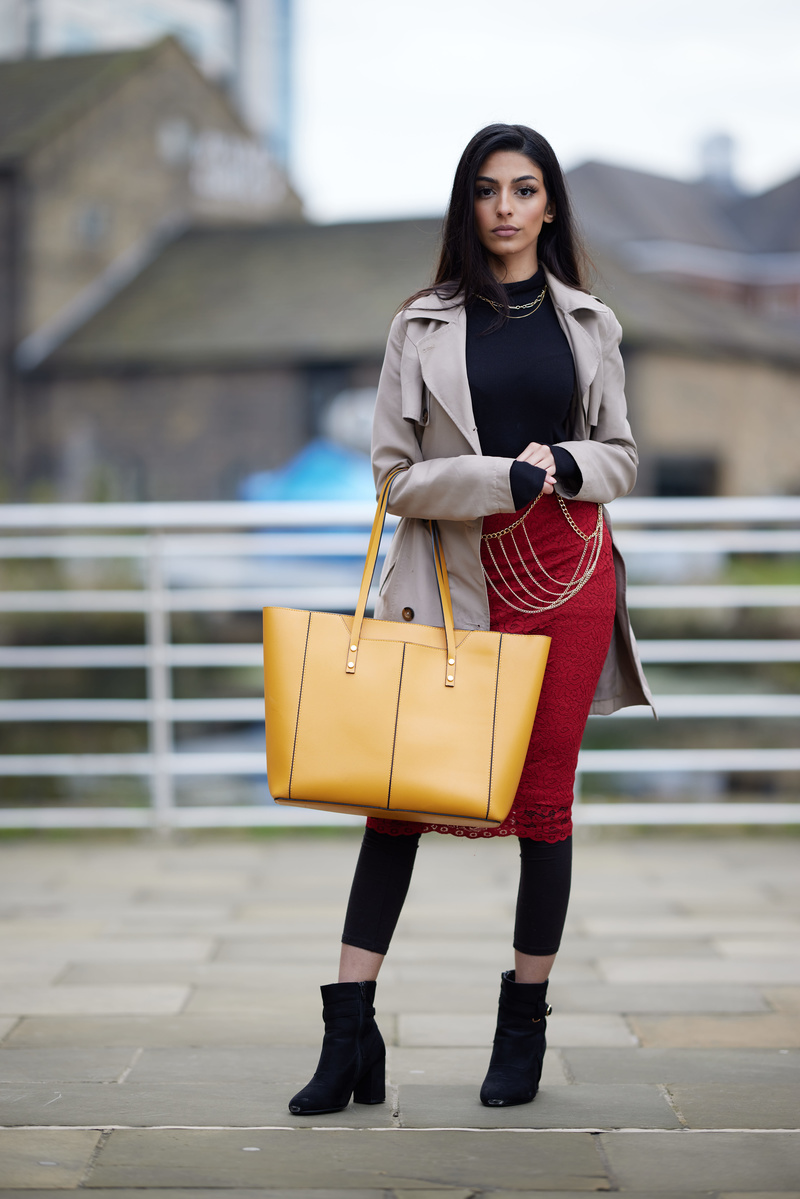
In the comparison above, the cameras I used were the Canon EOS R5, the Canon 5DS R, the Canon EOS R, and the Canon 5D Mark IV. Each software seems to manage files from each camera in a slightly different way. For the Canon EOS R5, for example, the skirt appears as a more accurate red tone in the Lightroom file than it does in the Capture One file. However, in the Canon 5DS R image, Capture One produces a more natural look, with skin tones appearing less saturated in comparison to what Lightroom produced.
Final Thoughts
It's difficult to say that one program is clearly better than the other, especially when you start doing more complex side-by-side comparisons. There are areas where one software will best the otherl however, from an overall perspective, each of the two offers some extremely useful benefits.
For example, Lightroom will remain far closer to what you see on the back of the camera. This is extremely useful because you're not going to end up with some weird surprises when you transfer files and start the editing process. Unfortunately, Capture One isn't as consistent in that regard.
Despite that fact, I personally do enjoy the look that Capture One produces, and I'll pick it over Lightroom for most meaningful projects. In my experience, Capture One leans more towards accuracy, whereas Lightroom leans more towards the manufacturer's camera profile. As long as you don't use any of the Adobe profiles in Lightroom, the results it produces are brilliant. The biggest issue with Lightroom is how it manages contrast. Other than that, there is no clear winner.
When it comes to Canon raw files, either software will produce fantastic results.
If you'd like to learn how to use Adobe Lightroom more efficiently on any device, make sure to check out our Mastering Adobe Lightroom course with Pye Jirsa. We also have the Complete Capture One Editing Guide if you prefer Capture One over Lightroom. Save 15% by using "ARTICLE" at checkout.


28 Comments
Thanks for the comparison! Any thoughts on the responsiveness of each program when moving a slider and then waiting for an adjustment to be applied? Also, what about the times to import and export a large number of photos? Maybe another test down the road?!
I will be perfoming those tests too just not in the image comparisons for the different manufacturers.
C1 states that the catalogue should be on the fastest drive possible - normally your computers main drive. That said, I use C1 on an external "slow" drive (7200 rpm, USB 3.1). It is sometimes necessary to endure that the external drive is spinning before opening C1 because if it is idle at the time of opening C1, the program will struggle a bit. That said, once you move the files to fast drive and the catalogue to a fast drive (ssd perhaps?) it smokes. And while I don't have a new M1 chip Mac, it is said that the program is blazing fast. This is to be confirmed.
I currently use C1, but, I have to admit, Lightroom does look pretty good in these examples. When I left LR back in 2014, there was a night and day difference between the two in favor of C1.
I think LR has improved and the newer Canon sensors did too.
With my vintage 5Dmk2 files C1 is waaaaay better with highlights and shadow recovery than LR or ACR. The Sony raw files seem to like C1 more than LR pr PS
IMO the before/after samples are a bit heavy handed and not all that applicable in real life.
Not sure what the author means about the shadow recovery being too aggressive in C1...it's a slider.
I suggest it depends on how much experience a user has in either one.
For such a simple comparison, I don't see why other RAW processing apps weren't included. IMHO, DxO PhotoLab 5 Elite is one of the Top 3, particularly in terms of image quality.
In the 11 years ive been working on photography sets with photographers from all over the world, ive only seen Lightroom twice. Fashion brands, advertising jobs, you name it, its always Capture, the industry standard.
Granted if youre shooting weddings then youre usually not dealing with a team of industry pros, instead youre usually a one man show, maybe with a second shooter, both shooting to card and some day after, you'll be uploading to computer and editing at home. This is where Lightroom shines.
However if youre shooting for a commercial client and theyre on set with you as they always are and need to see photos come up on screen shot after shot, you're using Capture One. One of the many reasons is that the image you see rendered in Capture is the image Canon wants you to see. They use the native engine from the manufacturer to process the raw file. Lightroom uses its own adobe engine to determine what it thinks that image should look like. If you want the most accurate Canon/Nikon/Sony/Fuji color and contrast renditions, stick with Capture.
That, and you have to use Profoto for lights. I tend to disagree with both.
There is nothing wrong with either, but I feel that in the advertising industry brands are selected to personally "fit in" rather than anything else. I also don't know why someone would dictate a specific processing software when they have no clue if the photographer they use has anything calibrated screen wise. Even if it is you have to use the same profiles. Same with lights, I've asked the question many times when people tell me they are used to Profoto and it's the "industry trend" but they can't tell me why. I know it's the most common brand to rent, but in most cases today, there is no telling what brand of lights one uses when they work alone.
I have tried C1 many times since the very first beta, before it was officially out and I just can't, not for me. I tried the current one recently, still, not for me. I don't even use LR, just PS. I think that most differences between Adobe and C1 are lost at image level. The most important is still to know what the images will be used for, as in srgb, rgb or cmyk. Processing in C1 and working in PS is fine to me, but as soon as a curve or any adjustment is made then the tiny margin of difference between LR and C1 is most likely degraded, possibly gone.
DPP is Canon’s own RAW processing software, I don’t know that C1 produces the same images.
Industry standards change. When I was assisting, it was Hasselblad then it was RZ67.
In the midwest Speedotrons/Normans were king with a few using Profoto.
Now it seems Profoto is the last big brand left (or Hensel?) and the new wave of Godox and Flashpoint.
C1 has a steep learning curve to be sure, and I still use PS for retouching but there are different way to control color with C1 that I like. But it looks like PS and LR are adding some of those to new versions.
I have only hired a digitech a few times but that's what they use, maybe because it handles different camera brand files better?
I tried DPP about 3 times since my D60 and found it slow, buggy and not for me.
DPP is rough to say the least. I use it to check what I have in my folders and subfolders. It does not organize for you automatically as far as I know, but I drag from it the files I want to open directly in PhotoShop.
Now that standard when you want to show the brands that you are top of the top is Broncolor. Profoto is way back on the second place.
I'm confused, you downloaded and compared jpgs ? Who shoots jpgs and uses C1 ?
No they were raw files :). Only one jpeg was used but that was a SOOC only to serve as reference point and nothing more. .
While this article is specific to Canon, for other camera brands I would say that C1 is the winner. Nikon files in C1 are brilliant. Moreover, C1 isn't the bloatware that Adobe is.
What exactly is bloated in Lightroom alone?
Web gallery and print tabs? Hmmm maybe.. but other than that it’s pretty much 1:1 on functions or maybe even less for Lr.
Is it just me or does every single image (JPEG!!) look horrible?
He's using the sliders at extreme values so you can see what it looks like at those settings.
I thought that this was about raw file processing?????
For those of you confused: Re-read the 2nd and 4th paragraphs.
"Capture One" refers to the RAW file exported from Capture One.
"Lightroom" refers to the RAW file exported from Lightroom.
"JPG" refers to the SOOC file. He's using as a point of reference.
As far as the highlight and shadow sliders go, they're meant to be used in concert with other controls as well. Important note, quality shadow recovery goes hand in hand with noise reduction and I must say that the noise reduction on both is poor to say the least. DxO by far far far has the best noise reduction, it's freakish how good it is. DxO will save your but when you screw up on a job in way that the other two just can't.
Question; which software yields a higher resolution raw conversion with fewer artifacts like mazes? This is really important. You can talk about sensors and lenses all you want to but if the actual raw conversion isn't good it's all for naught because the raw conversion has the final say on the resolution. Also the automatic lens distortion correction in Capture One is terrible. When you're shooting people on an event job with a wide angle zoom this is a huge deal. All those people's heads have to be the right shape. DxO is again amazing in this area as well, one click and you're perfect. Lightroom is okay here as well i believe. Thanks for the article. Cheers everyone and happy holidays.
Surely depends on the image and the part of it that you want to fix I guess? I can't say I liked the highlight recovery performed by LR, the result makes me wanna run Photoworks to remove this glare from the model's forehead. But when I looked at the shadow recovery example then Capture one definitely loses it.
This is a slight odd test as nobody will every max out shadow recovery on a studio lit portrait?
With regards to highlight recovery. Both applications also have a "Whites" slider which was missed here.
A better comparison would be "How did I find the editing process on an identical photo, and what outcome did I prefer with the tools available to me?"
Agreed. C1 is great and far superior in many ways however over the last versions the software has bogged down especially on Mac 5k screens, no matter how fast the drives or other tweaks. Its a known issue, just google it and C1 support is usless. Once loaded LR had no such issues so for many its the winner by default. Some folks say C1 has tweaked the software for the M1 chip just not the intel mac . c1 never acknowledged a problem so who knows
I can't speak specifically for Mac 5K, but, my M1 MBA, Intel Macbook (former), and PC haven't had any performance issues with the last couple of versions and the newest version. With that said, none of my machines have dual GPU, which almost sounds like could be the culprit. Just from what I read briefly on the support forums, their Macs are using the internal GPU instead of the discrete GPU when running C1. One suggested solution is to turn off Automatic Graphics Switching.
The guy that does the Capture One tutorial videos livestreams on a Mac while doing edits and he has no issues.
Just to put in my two cents =)
Why people needs to define "what is better than" or "what is the best"?
There will never be an correct or absolute response to it :
1) First of all, Capture One and Camera Raw (Lightroom & Photoshop) are working with a completely different method/engine/profilesystem. CameraRaw works with DNG profile, C1 with ICC. Same as compair diesel or petrol car. Quiet difficult for direct comparison.
2) As other members mentioned there are ton's of rawconverters so from the camera manufacture, as third parties software houses.
3) How to choose or evalutate whitch software is my need? let me list a few details that can help you to determinate youre choice:
- WHAT CAMERA OR SENSOR has created my raw file ? Can be, that a Canon DX or a Canon R5 sensor developes completely different in the same converter. And more differences of course between different camera brands and sensor sizes.
- WHAT IS MY SUBJECT : portrait, productshot,landscape, sports, reportage etc. etc.
- WHAT IS THE LIGHT/CONTRAST : low-key, high-key, contrasted or soft light ? Flash or continous light etc. etc.
- HOW MUCH IS MY EXTREME RECOVERY IN DR : dinamic range of our cameras can be nice and useful, but how much we need to push our pictures ? If I have controll over the light, I will never consider to make wrong exposures with the need to recover after. If I make a reportage, I need to take what I get.
- WHAT IS MY PERSONAL TASTE: as in the time of using analog cameras, there where people who swore allegiance to Kodak, others to Fuji or Agfa or, or, or ..... but no film was wrong, just a personal taste.
Same as Raw-converters are not working wrong or right, but different.
----------
CONCLUSION: take your time, download at least 4 different Rawconverter softwares (all are available for free download for an evalutation, some time limited, some with wathermark), test them with your pictures of your camera, and you will be surprised to discover a new world
----------
Personally I change the used RAW-concerter software related to the mentioned points.
Of course I confirm, as others wrote, C1 is considered the actual Pro-standard, and I use it for about 75% of my postproduction. But with some camera-sensors the colorcast on C1 becomes a disaster, when CameraRaw or Aurora or Silverfast, or, or makes a calibrated result.
Just to my person:
I'm professional photographer since beginning 90's in Milano and grow up with analogue photography and created my own postproduction studio at the time of Photoshop 2.5, lifepicture and X-res.
I'm working since RAW file are existing: at the time the raw converter from Adobe was seperate CD to buy for more than 200usd in addition to Photoshop or any digital back had his own converter.
I'm teaching in University digital graphics and digital shooting/workflow now for more than 20 years.
There is my experience coming from.
Ciao, have a nice X-mas, Thomas
PS.: if there is some not very well written english, please excuse me, it's not my native language
The best solution is to buy Calibrate( ex Xrite) color passport and calibrate the camera sensor. Yet with linear profile in photoshop camera Raw or LR the dynamic range is bit better as Adobe profiles are not as good and tend to blow up highlights... I like C1, but Adobe has lot more to offer for the money you pay for C1... I have €37/month all apps deal.. C1 can't match that.