
Fujifilm cameras have long been praised for the colors they produce. Lightroom has often been criticized for being incapable of processing Fujifilm raw files effectively. Capture One is generally recommended. Therefore, in this article, we will be comparing Lightroom and Capture One to see which is best for Fujifilm raw files.
Fujifilm cameras predominantly use two types of sensors. The first kind of sensor is used in Fujifilm GF mount medium format cameras, a Bayer color filter array. The second kind is mostly used in Fujifilm X-mount APS-C cameras, an X-Trans color filter array. In short, each sensor uses a different mosaic pattern for how the red, blue, and green pixels are arranged on the sensor.
There's no clear answer as to which pattern is better between the two. However, there has been a lot of discussion about whether Lightroom is capable of managing images taken with X-Trans sensors. For this reason, in this third installment of the series, we will be focusing predominantly on Fujifilm APS-C cameras. We will also briefly touch upon Fujifilm medium format cameras too.
In the gallery above, you'll see images shot on the Fujifilm GFX 50S, the Fujifilm X-T4, and the Fujifilm GFX 100. The profile used was Provia Standard, and at a glance, there's no real difference. This is something I noticed with every Fujifilm film simulation profile. In most cases, there is very little difference in how the profiles are rendered in each software.
This is especially the case with Fujifilm medium format cameras. There is virtually no difference in how each of the film simulations are rendered. There is some back and forth between how Lightroom and Capture One work, however, for the most part, there's no clear winner. You can watch the full comparison for Fujifilm medium format cameras in the video linked above.
On the other hand, it's quite a different story when it comes to Fujifilm APS-C cameras. Lightroom seems to have some problems with X-Trans sensors. Also, there are subtle differences in how the film profiles are rendered too.
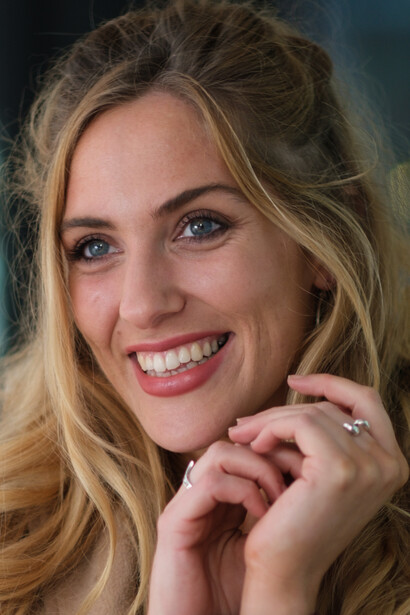
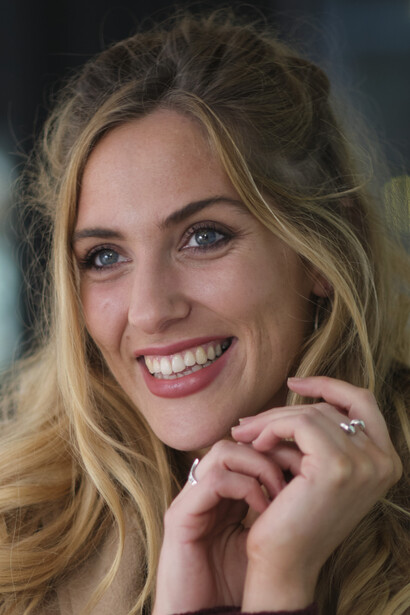
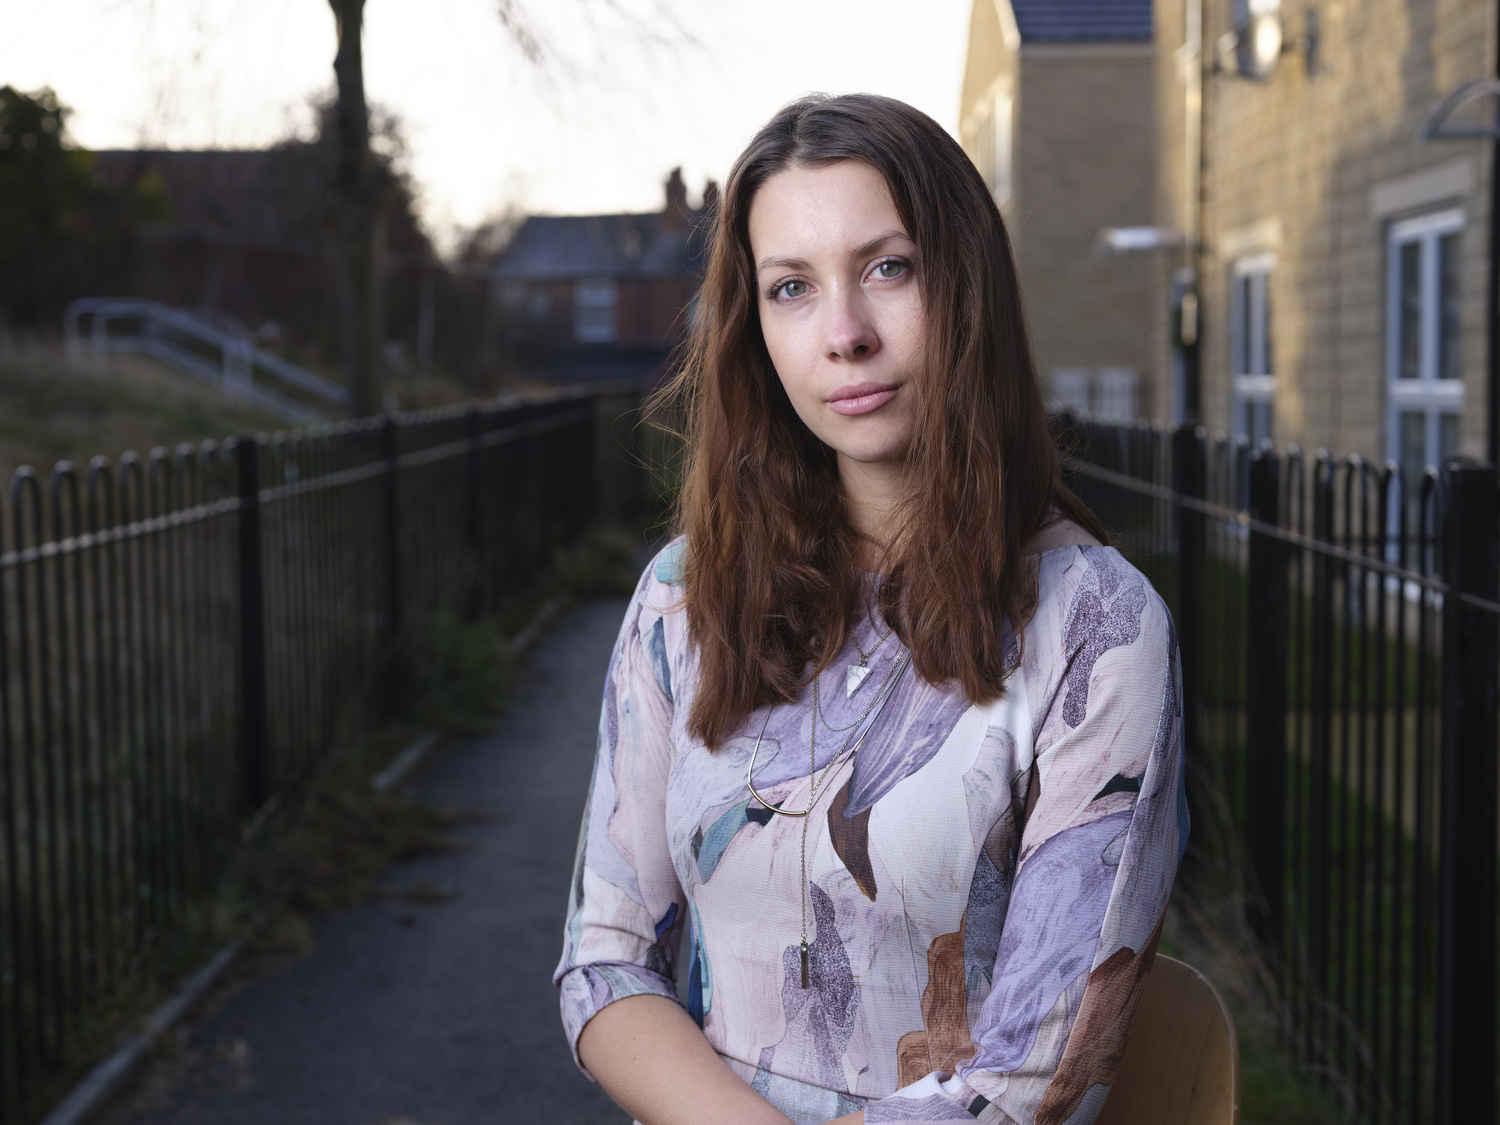
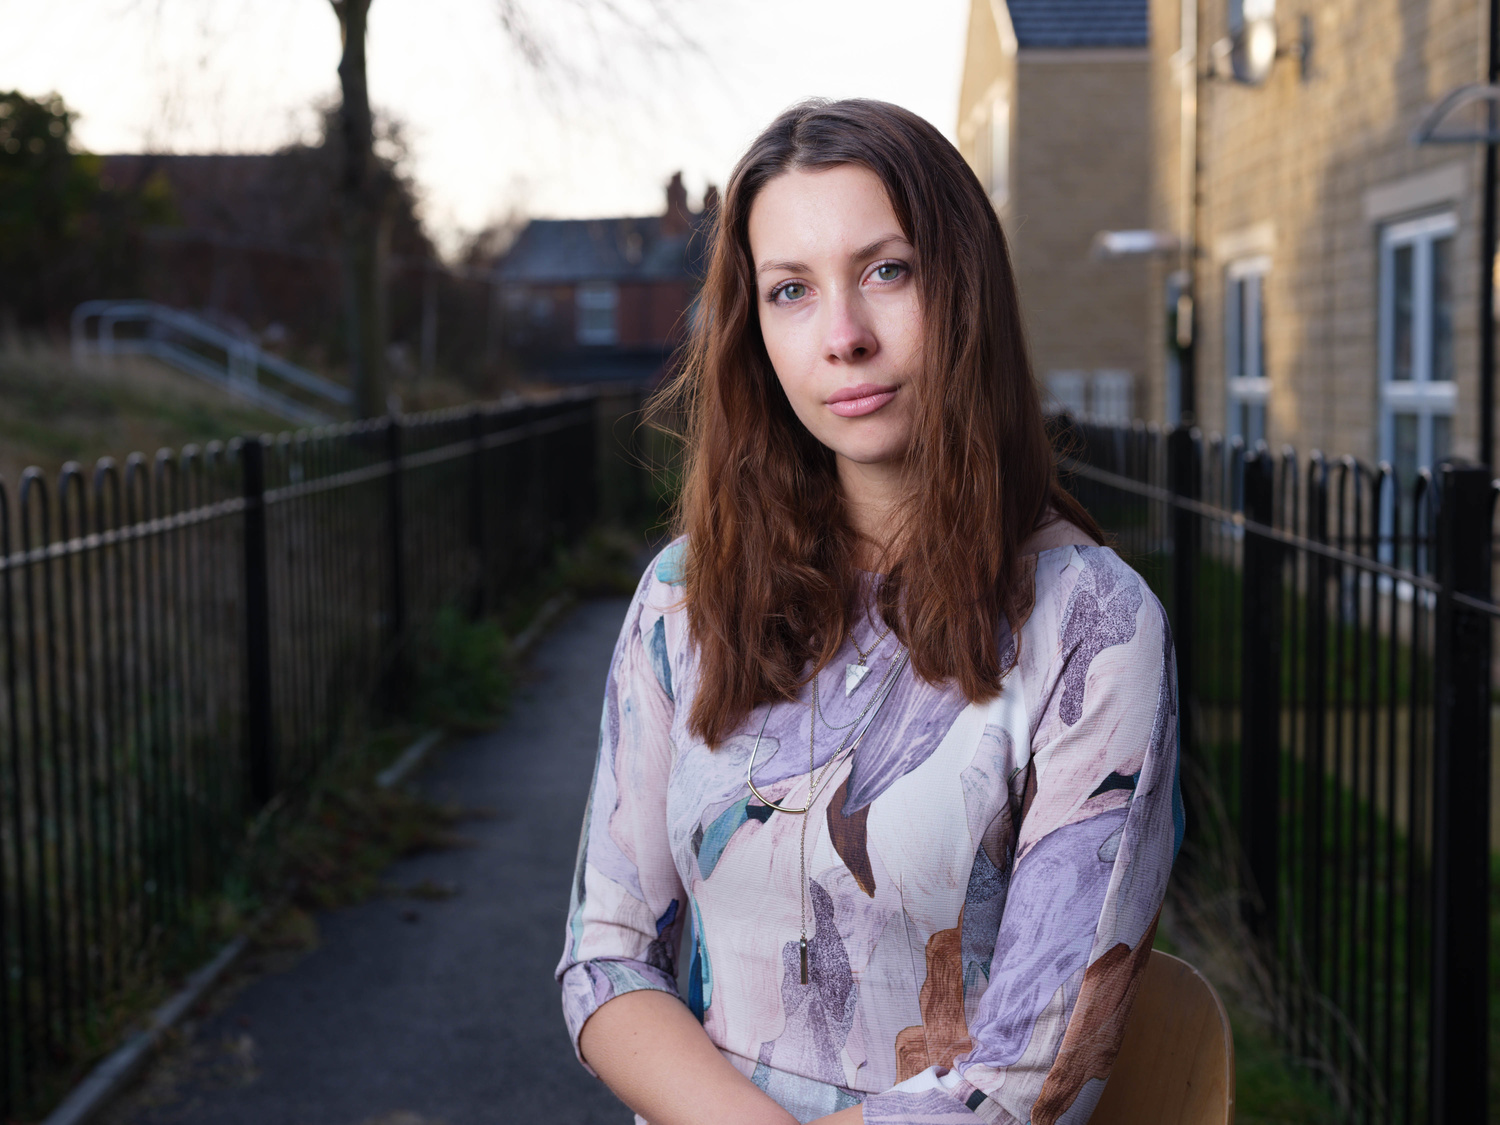
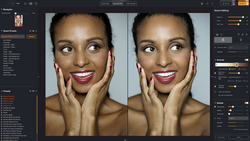
In the comparison above, you may notice that the image exported from Capture One has slightly more saturated red tones in the skin. This appears more pleasing in comparison to the Lightroom file, which leans more into the yellows tones. This is, of course, a matter of preference; however, the point is that for Fujifilm X-Trans cameras, there is a difference in how the film profiles are rendered.

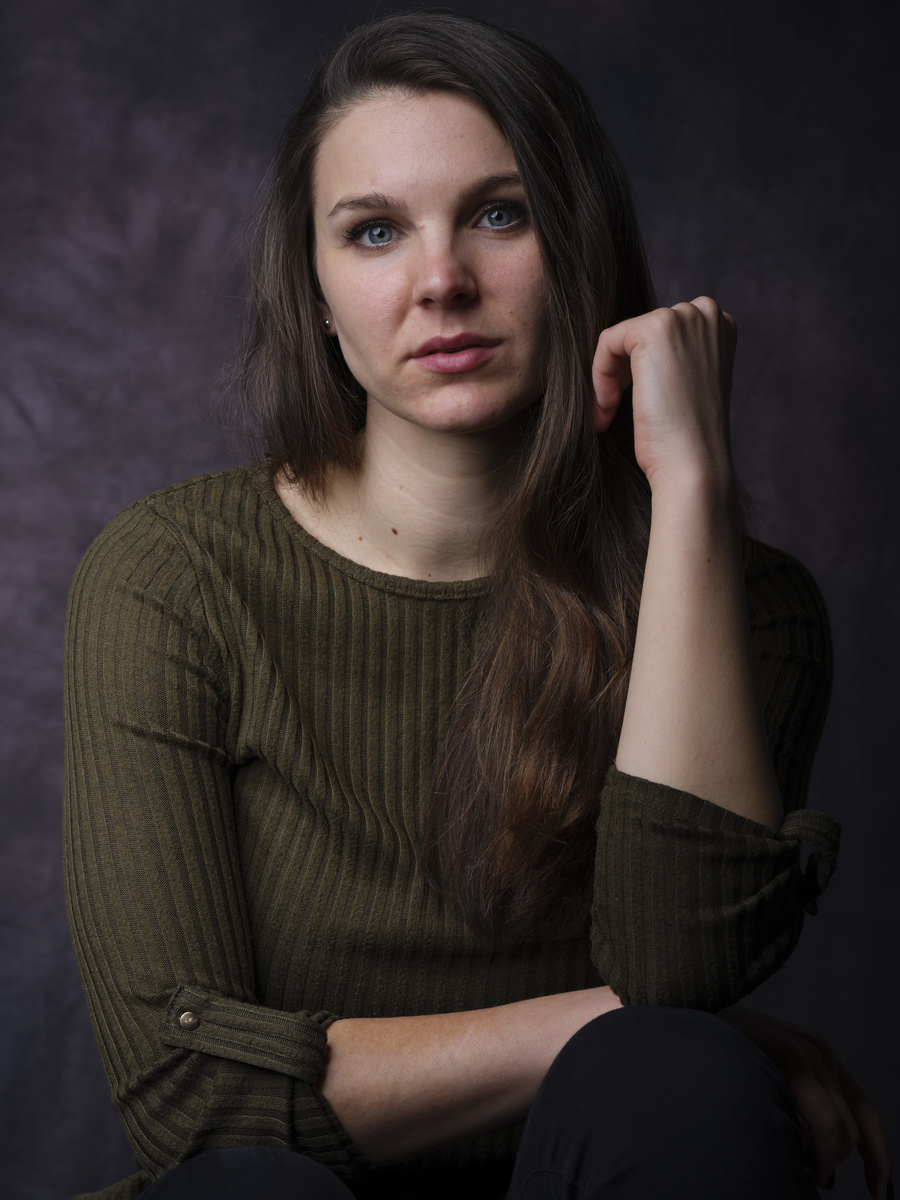
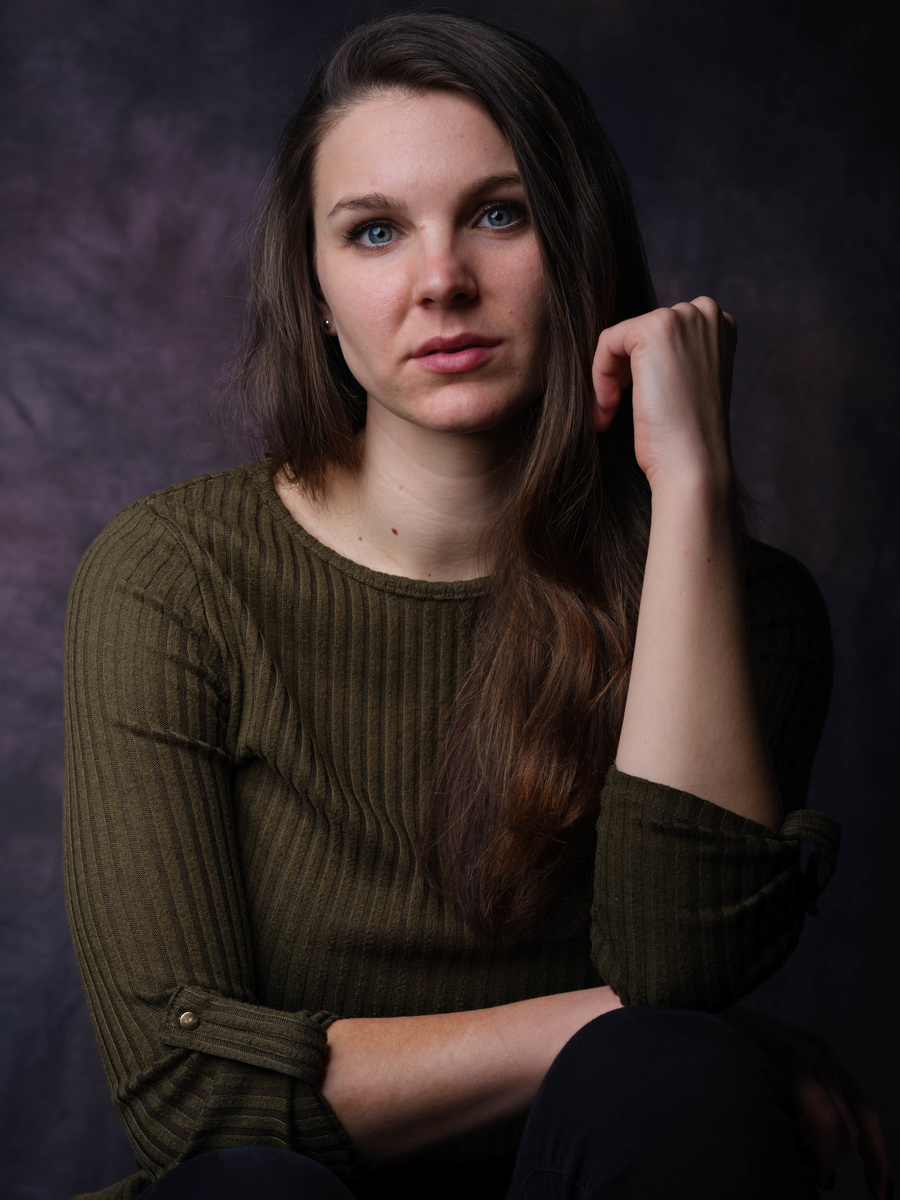
The other noticeable difference between Capture One and Lightroom is how each manages the lens profiles. Lightroom seems to do a better job at mitigating the vignette cast by the lens. Although Capture One does have the lens profile features built into the software, it's not quite as impactful.
You may notice in the comparison above that the Capture One file is much darker on the top and bottom of the image. This could be used creatively; however, it seems that Lightroom does a better job at preventing optical issues through the use of lens profiles.
Aside from this, the overall look from both images is relatively close when it comes to the colors. The blue and yellow tones are represented well between the two images, and there aren't any unsightly issues appearing in the files. Unfortunately, this isn't always the case, because in some files, a strange, noise-like texture appears in the images that have been processed in Lightroom.

Before we get into the noise-like issues, we can take a look at the full images in the comparison above. The first thing to notice is that the Capture One image appears to have more contrast and vibrance. Due to these subtle differences, most people may likely prefer the results from Capture One. Also, Lightroom does do a better job at managing the vignette, but once again, some may prefer the darker corners.
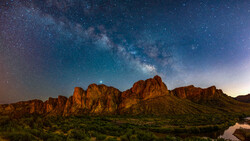
Additionally, Lightroom seems to have a problem when it comes to rendering green tones from an X-Trans sensor. In the previous image, the blue and yellow tones were perfectly fine in how Lightroom rendered them; however, green seems to cause a lot of problems.
The image exported from Lightroom has this strange noise appearing in the file. This anomaly is also referred to as X-Trans worming and doesn't seem to occur in any other raw processor. Even though it's only properly visible when you zoom into the image by at least 100%, it still affects the overall feel of the image. The file has a "rough" look to it even from a reasonable distance.


A closer look
From the images that have been tested over the last month, it seems Lightroom mostly struggles with the color green. All of the other images tested did not demonstrate any issues. Effectively, this worming issue is going to be a problem if what you photograph contains a lot of green tones, for example, landscape photography,
If you're a landscape photographer, you will likely come across this issue in your images. If you're creating content for social media, then this may be a forgivable issue. If you're a professional photographer, it may be wise to avoid Lightroom and use Capture One instead.
Final Thoughts
In this series of articles, we covered Canon, Sony, and now Fujifilm. With Canon and Sony, the choice between Lightroom and Capture One was entirely down to personal preference. There was no clear way to determine a winner because both programs produced great results. With Fujifilm, there are objective differences that cannot be ignored.
The worming issue creates an unwanted variable for which there doesn't seem to be any reasonable fix. Essentially, it makes images look like they have high ISO noise, regardless of what ISO they were shot at.
If you shoot with medium format cameras such as the GFX 100S and the new GFX 50S II, then the differences are negligible. Capture One and Lightroom perform admirably with Fujifilm medium format cameras. This may also be the case with some Fujifilm APS-C cameras that use a Bayer sensor. However, with Fujifilm X-Trans cameras, it's clear that Capture One is the better choice.
If you'd like to learn how to use Adobe Lightroom more efficiently on any device, make sure to check out our Mastering Adobe Lightroom course with Pye Jirsa. The content Pye covers will appeal to every level of photographer and will save you an incredible amount of time on your image editing. If you purchase it now, or any of our other tutorials, you can save a 15% by using "ARTICLE" at checkout.

Join the Fstoppers community for free
-
Post comments and join in the discussions
-
Browse the site ad-free
-
Share your work and get featured in the community
-
Compete in the photo contests for fun and prizes
29 Comments
Doesn't the enhance details ( in lightroom) resolve this issue with Fuji files ? (Worming effect )
It didn't on this image and a couple others I tried. Is it supposed to improve Fuji files in that way?
If I recall correctly it did resolve the worming, but it took some time to process and it create a new bigger file, maybe it depends on the camera to ( xe1 files in my case)
As far as I recall reading, it creates a DNG file and while some say the worming was "fixed", others say it was just simply improved a little. I haven't tested myself, however.
Enhanced Details, although slow, produces much more detailed results in foliage than C1 or the Fuji jpeg. Night and day difference. The worming has more to do with thecorrect Mask setting in the Detail pannel of Lightroom.
I bought a X100V a couple of weeks ago and have been testing both Lightroom and C1 extensively. In my experience so far there's little difference in color rendition, but sharpening and denoising looks much better in C1. In low ISO it's hard to tell, but in high ISO it's very noticeable. LR enhance feature does help and only takes a second in the M1 Mac, but the dng files are at least double the size of the RAF files. In the image below you can see C1 vs. LR + Enhance. Colors won't match exactly because I had to recover shadows as this image was underexposed.
I don't think you can go wrong with either of them, but I find myself moving much less sliders to get where I want in C1, especially when working with Fuji files.
The Highlight and Shadow recovery comparison is flawed. You don't have to use 100%. You can't assume their 100% should be like for like. No doubt, they are on a different scaling. In Lightroom, if the Highlight recovery of 100% is too much, use 80%, 70%, 30%, etc, etc. In Capture one, if the Shadow recovery of 100% is too much, use 80%, 70%, 30%, etc, etc. I typically don't go over 40.
Same thing with Sharpness. LR has a range of 0 to 150, while C1 0 to 1000. So, you can't use their absolute values to compare with each other. LR has a hard default of 40, 27% of it's scailing. C1 default ranges from 120 to 185, so up to19% of it's scaling. Even though C1 has a smaller percentage, it is quite aggressive. I have mine default to 100 and adjust as needed, which I hardly do.
That’s why I compared sharpness at zero.
Also for highlights and shadows, the point was to show how precise each slider was not how much you should use.
Considering how both were bad at one of them in a very similar way, demonstrates that the scaling was reasonably close.
--- "Also for highlights and shadows, the point was to show how precise each slider was not how much you should use."
Using 100% <> precise. What makes adjustments precise is the ability to adjust as needed.
--- "Considering how both were bad at one of them in a very similar way, demonstrates that the scaling was reasonably close."
No, because they were different sliders that do different things.
I did the same with Canon and Sony too. If I remember correctly you agreed with me in the Canon article.
That's because on the Canon article, you made this disclaimer: "I tend not to recover highlights anywhere near this degree. These examples are just here to demonstrate the extent to which each software allows when it comes to recovering highlights."
Still holds, this is all part of the same series.
Riiiight. Like people are going to remember what you said 2 months ago and apply that to today. smh
If you are going to crank a slider all the way to max, then, have a reaction, "eeww...that looks nasty", at least be transparent about it like you did with the Canon article. There are new folks on all time or ones on the fence that's going to think those software suck with those sliders when in reality, they don't. They are both fine.
I just didn't expect it from you, individually. You seemed to get it the last time I thought it was reasonable to assume you'd get it this time too.
I've already explained that:
You can also try using Iridient X-Transformer to process/de-mosaic you x-trans RAW file or you can also try DXO Pure Raw or the more feature rich DXO Photolab 5.
Isn’t this video about 5yrs too late seeing as there are tonnes of pros out there who shoot with x-trans and edit in Adobe?
I thought this worming thing had long since been put to bed?
I say Rawtherapee does really great job as well Fujis Rawfile converter
I’ve spent considerable time comparing both C1 and LR for Fuji files. Concluding that C1 produced more natural film like images, it’s noise correction and sharpening algorithms are substantially better than LR, though at normal viewing distances it’s not too noticeable. I haven’t noticed the vignette issue mentioned in this article, however C1 light falloff slider does default to 0, push this up to 100% and in most cases it matches LR’s Lens correction, sometimes I’ve found 80% optimal. LR worm issues seem to been caused by the detail slider under sharpening settings, put this to 0 and increase sharpening amount instead seems to fix this, I can even reproduce the worms in my Nikon raw files if I push that slider too far. I’ve generally found keeping luma noise correction at 0 in LR works best for low ISO images and prefer the noise to the poor correction that LR applies. C1 is much better here and I have no problem with noise correction, great detail is retained and out of focus areas result in a nice smooth Bokeh. LR enhance details works well when needed but results in ridiculous file sizes of around 150 MB. I also found Lightroom applied a slight red tint on the floor of some of my woodland shots which C1 made look more natural. Finally, highlights in C1 seem better handled, resulting in more natural tonal graduations at the top end where LR would produce a more harsh output. I much prefer C1’s output, but do miss LR’s ability to cull and sort my photoshoots via my iPad and iPhone.
Used to programs to cull, process and publish books or print images albeit always taking final images into. PS. C1’s definitely more work to fuss around with the images, then exporting them to another directory as LR does it internally in a better way. In the end I can get the same results with either but not without using other software for final edits regardless.
C1 superior for one simple reason: LR is difficult to remove if you ever want to ditch it. It takes some effort to get LR/PS off your computer, and to do it with any success, you have to use the Adobe removal program which doesn't fully remove some files anyway.
On the down side, C1 is more expensive. I've never used LR support, but I've found C1 support to be helpful and fairly responsive. In the end I prefer C1 because of its RAW conversion, catalogue system and overall image quality.
Your mileage may differ.
I've had the same positive experience with C1 support. A while back, I was having some masking issues so I sent them the log file and a video of what was happening. On the next minor release 2 months later, they've done the fix. If I remember correctly, they even worded the release notes almost exactly how I described it. Yeah, I felt a little special. :D
Apart from handling X-Trans files better than in LR, C1 has some other major advantages, though I recognize mostly for professional users:
- working in sessions, rather than catalogues;
- a much better color editor;
- an industry-leading tethered mode;
- sliders with a generally smaller edit range, but therefor better fine-tuning capabilities.
The fact that C1 doesn't use the generally overcooked vignetting correction in the raw file profile is a benefit in my view. It gives you more control over light fall-off and a more natural look with wide-open fast aperture lenses.
Even with the gfx 50SII, the worming issues are noticeable and distasteful. I was surprised that they were so distracting in LR given the bayer sensor, but its terrible. I went back to Capture One yesterday after comparing new files shot the same day.
Neither. You need Iridient Developer or Iridient X-Transformer for best results.
CaptureOne version 8.0 was when I uninstalled LightRoom from my laptop for good.
As mentioned above, between LrCC, C1 (lite, for Fuji X-Trans), ON1, and even the software supplied by Fuji, I've found Iridient X-Transformer to be the best of the lot when 'translating' Fuji X-Trans raf files from their raw state into an editable .dng file. This assessment is not a result of color accuracy --that can be corrected/modified as one may choose in Lr or others-- it's an assessment I base on the elimination of 'wormieness' that Iridient provides as opposed to the wormy results of the others.
And if you compare C1 to DxO PL5, the winner despite a solely beta version of their X-Trans demosaicer is DxO...
Firstly - it's not just about RAW conversion. Many people (myself included) use LR because it has far and away the best asset management tools on the market. C1's asset management is little more than a rudimentary file manager. Literally every other photo processing tool on the market does a better job of it than C1. Secondly, if you convert to DNG using Iridient, then there are no issues with the way LR handles X-Trans files. Thirdly, the class-leading RAW conversion and processing tool for Fuji cameras is DxO PhotoLab or DxO PureRAW and since the DxO tools can still be bought outright and not on some half-arsed subscription plan like C1 are sneakily moving to, it's far and away the best tool for the job.