Capturing a stunning landscape is as much about patience as it is about skill. Sometimes, you’re simply at the mercy of the elements, waiting to see if the light will cooperate. But when it does, the results can be magical.
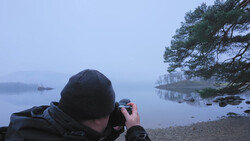
Coming to you from William Patino, this engaging video offers a firsthand look at the process of chasing light and finding the perfect composition. The video takes you through a real-time journey where Patino, accompanied by his friend Federico, navigates a challenging landscape, hoping to capture that perfect moment when the light meets the scene just right. As the sky begins to show potential, Patino emphasizes the importance of letting the conditions dictate the composition. Rather than forcing a shot, he adjusts his approach based on how the light interacts with the landscape, particularly focusing on the flow of water and how it complements the scene.
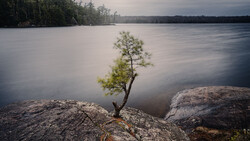
Patino’s method is a blend of intuition and experience. He discusses the significance of using natural elements like trees and rocks to create balance in the frame. For example, he finds a shot with a natural window of separation between layers, using stones in the foreground to balance the composition. It’s a meticulous process, where even a dead tree can change the dynamics of a shot, prompting a shift in position to find a cleaner perspective. This approach highlights the importance of being flexible and ready to move quickly, especially when the light is fleeting.
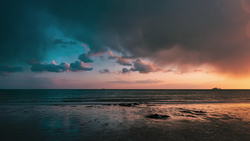
One of the key takeaways from the video is the power of post-processing in bringing a scene to life. Patino shows how a raw file that initially appears flat can be transformed through careful adjustments in exposure and color grading. By exposing for the highlights and then revealing the details in post, he demonstrates how to recover the true vibrancy of the scene. The use of grading to enhance the natural color contrast, particularly between the warm and cool tones, is a crucial step in creating an image that reflects the beauty of the moment. Check out the video above for the full rundown from Patino.
And if you really want to dive into landscape photography, check out our latest tutorial, "Photographing the World: Japan With Elia Locardi!"


Join the Fstoppers community for free
-
Post comments and join in the discussions
-
Browse the site ad-free
-
Share your work and get featured in the community
-
Compete in the photo contests for fun and prizes
1 Comment
Great lessons on getting a golden hour capture. One thing not covered very well but in post covered very well, is capturing for highlights. The Sony cameras are great for it (but all makers mirrorless cameras) where the A7RM5 has a +/- 5EV dial and just turning negative until you see structure in the clouds and the point is knowing what can be done in post. On thing that helps is the IBIS and if using a lens with OSS/IS is bracketing if hand held 3 at +/- 2EV and on sticks 5 at +/- 2EV even works in blue hour. Todays programs do a great job of blending even the newer Lrc for gone is the cartoon looks. I started doing the bracketing 5 for sunsets/rises with the A7RM2 on sticks but have found the 3 hand held is all awesome for the freedom for run and gun for the 1 hour only time frame. The key is you are not only getting just one image but 3 or 5 images to play with that may never happen again.
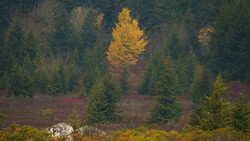
Right now leafing time in North America and cloud cover takes the shine of the leaves with colors that pop BUT what everyone tries to do is keep the capture low with out clouds but a blue or golden hour a sunrise/set colors give colors to the clouds atop the mountains with leaves.
Before I said 5 at 2 the reason is you get a small pin point sun vs a big blown out sun that will take most of your sky. Remember also you can use mono pod for faster run and gun, just remember to turn off steady shot.