
Tonight will be the first of three "supermoons" that will occur this summer. Supermoons are full moons that appear bigger and brighter than the other full moons throughout the year. As you probably suspect, this means that some of the best moon photographic opportunities await for those who come prepared. Here’s a helpful guide that will have you shootin’ for the [super]moon in no time.
Time
Full moons, and the supermoon being no exception, will rise coinciding with the setting of the sun. You can find the specific time and direction for moon rise in your area by using online references such as this one. It is important that you arrive on location early to figure out which compositions you will want to try. Once the moon rises above the horizon, it will move at a fairly fast pace. Keep a close eye on the situation, as the closer the moon is to the horizon, the larger and more impressive it appears. You will only have roughly a half hour of optimal shooting time, so do not skimp on preparedness. Make sure the memory card has ample space available, the camera’s battery is fully charged, and your bladder is empty.
Location
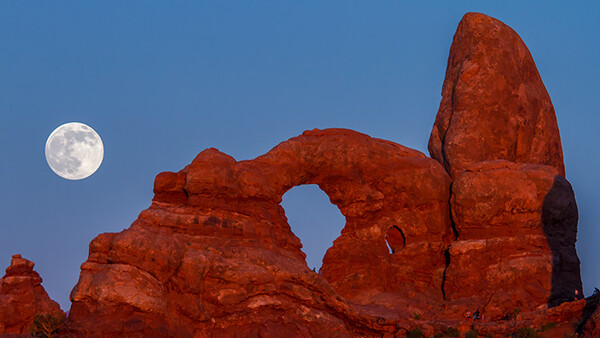
Choice of location is what makes the supermoon so wonderful! Normal full moons can certainly add to a landscape shot, but the supermoon magnifies that theatrical effect. Be sure to include objects in the foreground as reference points. They will only help to make the supermoon seem even larger by relationship of scale. Cityscapes, silhouettes of people, rural red-wood barns, iconic rock formations, your neighbor’s house, you name it- a supermoon is going to take the image to the next level.
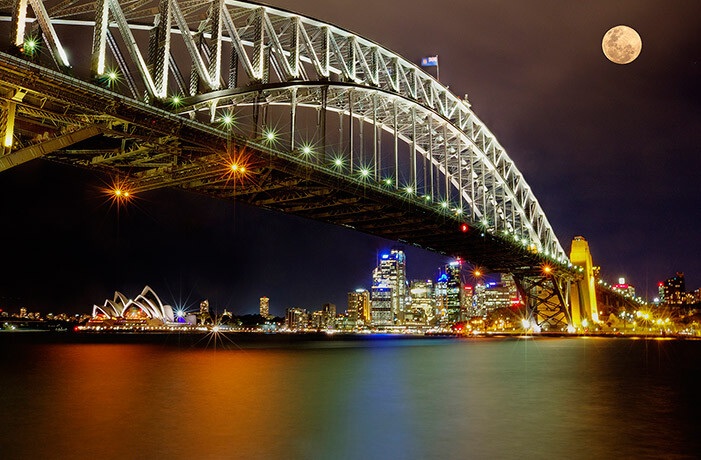
"Sydney Bridge Opera House and Supermoon" by Rex Boggs.
Gear
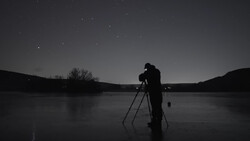
The gear you will want to bring is likely the same you’d take with you for nighttime long-exposure photography. A sturdy tripod and remote shutter release will allow for tack sharp shots in the twilight darkness. Using a telephoto lens, the supermoon will be compressed up against your foreground objects, making it appear larger, and you can bet the results will be absolutely breathtaking. The bigger the lens you use, the more dramatic your supermoon photo is going to be. You will want to find a focal length that balances in your foreground composition while still getting the moon to appear super sized. Think in the 200-400mm range, with 85-100mm being questionable and the bottom end of usability for this purpose (but I’m sure someone creative enough will prove me wrong about that).
The Shot
Photographing the moon can seem challenging. The reality of it however is that it’s not so bad. First thing’s first, keep the ISO on your camera low. With night photography, there are naturally a lot of shadows. These shadows can produce noise easily when tampered with in post processing because they do not store as much data information as highlights do, so a low ISO setting will combat this issue when you try to add some pizzazz later on. Also, the moon is brighter than you may think (it’s reflecting the sun!) and a high ISO won’t be benefitting you any. With your camera in manual mode, set the aperture to f/11 or close to it. This will allow for sharpness throughout your image, from the foreground to the moon in the sky. Now you will want to adjust your shutter speed. The shutter speed you choose will be specific to the surrounding area you are photographing. That is, if you are shooting a cityscape full of lights along with the moon, you are going to be able to get away with a higher shutter speed. For the most part though this is something that you will have to experiment with for a few frames. Start at 1/60 and work you way in the direction that makes sense until you come to the right exposure.
Need a little creative inspiration? Check out this Fstoppers article from last year showing off some of the best supermoon shots in recent years. Also be sure to mark your calendars for the next two supermoons after this one, August 10th and September 9th.
(Lead image provided by Arches National Park.)

15 Comments
Get the longest lens you can IMO and get far away from the subject that your moon will be rising "against". I think you need at least 400mm on a FF camera IMO unless you've got a D800 and will crop the heck out of the shot.
I know this cause I failed miserably trying to do this the last time there was a super-moon. For reference, if you're looking to get the super-moon rising over the skyline of NYC you better be across the river over in Jersey looking off the Boulevard East cliffs.
Heck yeah! Compress the hell out of that moon and make it seem even bigger!
Tried this last night and frankly this was the best I could come up with...a very meh shot. I'd love to see if anyone caught anything better around the NYC area and what they used. This was a D90 and a 70-300 Nikon lens - if I didn't need the zoom and crop-factor I wouldn't have used this combo. The D90 doesn't have all the bracketing features I like on my D700 and doesn't handle shadows nearly as well.
The issues I had were:
1) The app I was using on my iPhone had the right time of moonrise but it still couldn't really tell me exactly where on the horizon....which is significant for composition. You have no idea how you're going to compose your shot over the skyline until the moon is already up there. I essentially pitched my tripod by all these folks on Boulevard East looking right down into 42nd street in NYC thinking these people knew what they were doing....they were wrong IMO. The better shot would have been further downtown with that stretch of low buildings in between mid-town and the ESB to get a lower moon potentially and a more iconic building in the shot.
2) For a super-moon shot with the NYC skyline I guess you would want some significant buildings in there, however, the problem is that by the time the moon finally clears those buildings it's not that super anymore. It looks more and more like a regular full-moon. I think the shots with the most impact show the moon right by the horizon and for whatever reason the moon always looks bigger by the horizon.
3) The ambient light vs moon brightness differential was quite high. I saw someone else post that the evening before was the best shot because even though the moon wasn't technically full it came up earlier with more ambient light to match it. Makes sense, so worth a shot next time.
4) If such a perch exists I still think it would have been better to have been twice as far away than I was with twice if not more the zoom....this would have that moon appear even larger against those buildings.
5) Knowing how important point #4 is you don't need to wait for a super-moon....ANY full moon or any moon frankly will do.
So my takeaways on this second attempt are:
A) Get as much zoom and cropping as you can afford. I've always said I don't need a D800 and a massive superzoom with tele-extensions and I generally don't but it would have helped here.
B) Know exactly where the moon will rise.
C) Get as far away from your foreground subjects as your zoom/crop will allow.
That is still a damn good shot.
Thanks Brian.
Anyone have any experience shooting the moon with a Polaroid or other instant film?
My results last night were lackluster. Next time I'll be more prepared and catch it on the horizon.
The Sydney Harbour Bridge photo must have been bracketed. The exposure required for the moon & the cityscape would be quite a few stops apart.
Yeah, sure seems like it.
Here is my super moon shot.
Nice detail!
An example that rules-of-thumb are meant to be broken... this moon image is neither at f/11 nor at 1/60th! It was captured the day after the July 2014 supermoon since clouds in San Diego did not cooperate on the full moon night. Canon 1D MkIV, 500mm f/4 w/ a 1.4X extender, f/5.6 1/640 ISO 3200. Had to push this exposure a bit more than normal to ensure stop action using just a monopod after discovering my tripod and gimbal head weren't in the trunk. Lesson re-learned: "Always pre-flight your gear (and your trunk)."
As for moon apps: I can't live w/o SoLuna (quick ref times for sun and moon), MoonSeeker (3D horizon image of moon position and path from your current position - never wonder where the moon will rise against a skyline - or flightpath - ever again!), and Photographer's Ephemeris (directional lines from any given location to the moon/sun rise/set). All great for planning AHEAD and for fine-tuning the right position!
You do realize that the moon was photoshopped into that Sydney Bridge photo, right?
https://www.flickr.com/photos/rexboggs5/8016761583/
A long lens is not a necessity. A compositional idea will get you a lot farther. I shot this supermoon last year with my D600 and my 35-year-old 135mm f/2 Ai Nikkor.