
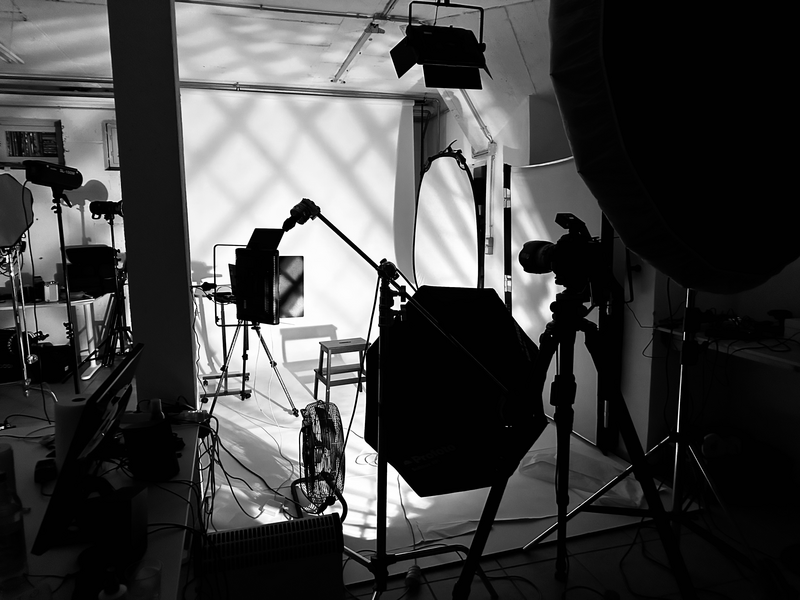
I consider myself a very lucky photographer. After all, I have a studio to myself, plenty of various funky lights, and plenty of lighting knowledge to rely on when I want to create something. This was not the case a few years back. At some point, all I had was a light and an umbrella. If you are in this boat, this is the perfect article for you. There is a lot you can do with just a light and a modifier.
Why did I choose to do one light and a softbox? Well, simply because this is by far the most common setup I see people investing in when starting their off-camera flash journey. There are quite a lot of simple and standard lighting setups available online, but not so many interesting setups that take the concept of using a softbox to another level. This is the point of this article. I want to show you some unconventional ways you can use a single light with a softbox to get interesting images. For reference, I am using a 3’ Octa on a Profoto B2 flash head. While the shape and light quality of the Profoto will be different from other softboxes and flashes, I expect one should get very similar results no matter the brand.
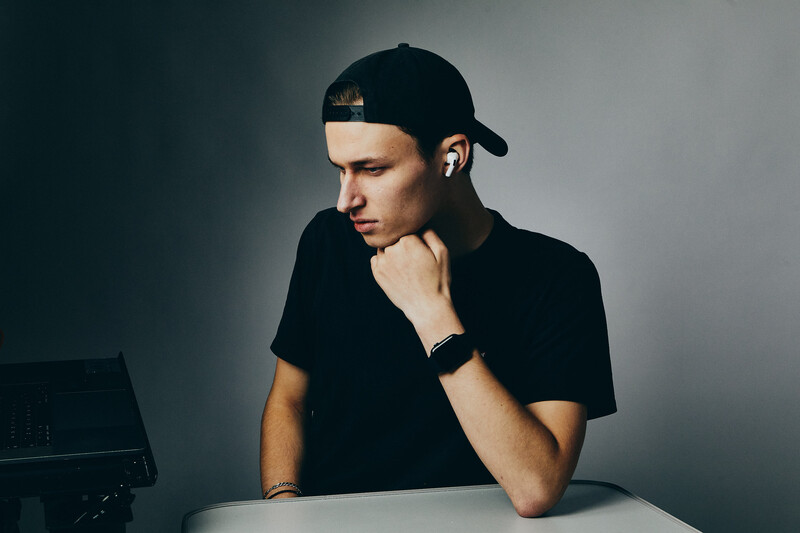
Setup 1: Walking on the Edge
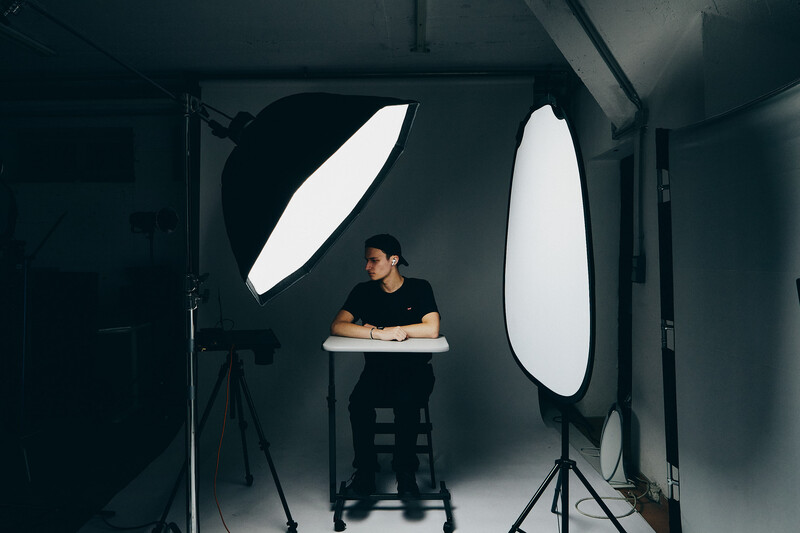
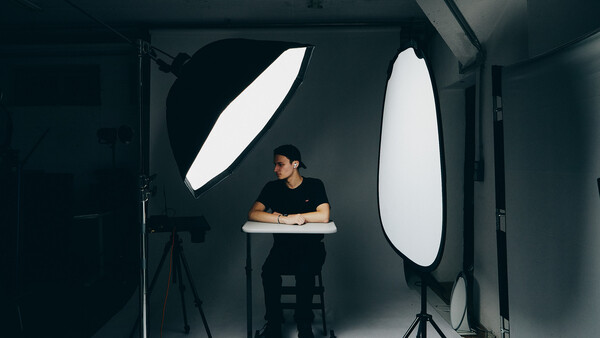
Traditionally, this setup would be considered side-lighting. However, the softbox is placed in front of me, as opposed to by my side. As such, I don’t get the direct hot light that is coming out from the softbox. The light I am getting is coming from the edge of the softbox. This gives the nice gradient you can see on my forehead. I placed a white reflector to my side as well to reduce the light falloff caused by the short distance from me to the light. As such, my face has a smooth gradient going across. This gradient gives the jaw structure, as well as hides the many imperfections my skin has. It almost looks like the light is coming from the other side. You can also notice that I am sitting very close to the background. The roll of paper used is pure white. However, because the softbox is not aimed at the background, we get no shadows on it, as well as a smooth gray tone.
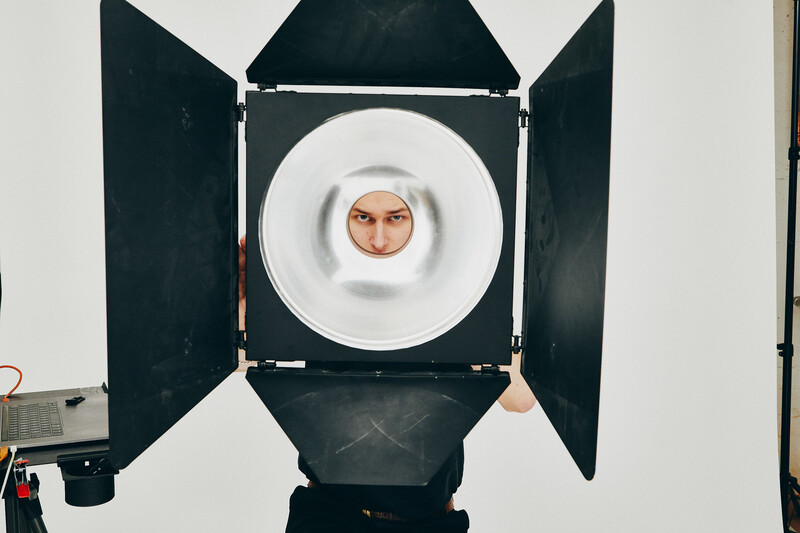
Setup 2: The Gridded Underlight
While the rules of lighting dictate that bottom lighting is unflattering, I beg to differ. Bottom lighting can look quite edgy and fun, as we see in the shot. You might be wondering, how did I get such a strong shadow on the background? Well, the answer is quite simple. Most softboxes have removable diffusion baffles. It is a shame so few people bother to play around with a softbox which has its diffusion removed. The light produced from such a “naked” modifier can be quite interesting and is much better looking than just a bare head. To break up the lighting pattern, I used a grid. As you can see, it makes the light less even and more interesting. In very theoretical terms, this is soft specular light, however, that is not true in practice, as the hotspot from the head overpowers any light that is bounced around inside the softbox. As a sidenote, specular soft light is achieved by using large inverted softboxes or true parabolic modifiers.
Setup 3: The Half-Gridded Softbox
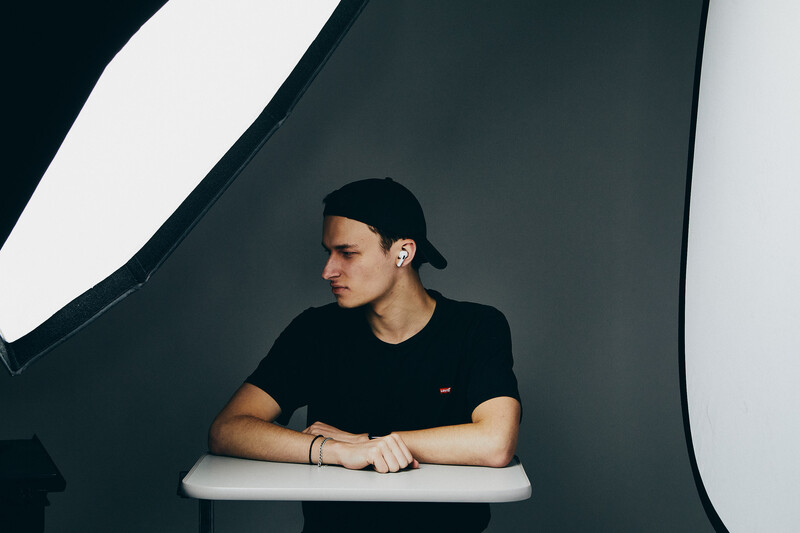
In this setup, I was trying to get an effect similar to what we saw in setup one, however, with more gradient and a slight light spot on the background. To achieve this effect, I used a half-gridded softbox pointed at me. Once again, this setup highlights the facial features such as cheekbones and jawline. I happen to have a very edgy face, so this setup works perfectly for the shape. The half-gridded setup means that there is more light spread coming from one side of the softbox as opposed to the other. This way, you create an uneven light spread and can work with the softbox to achieve gradients on your backdrop. Remember here I am using one light to create both the effect on me as well as on the background.
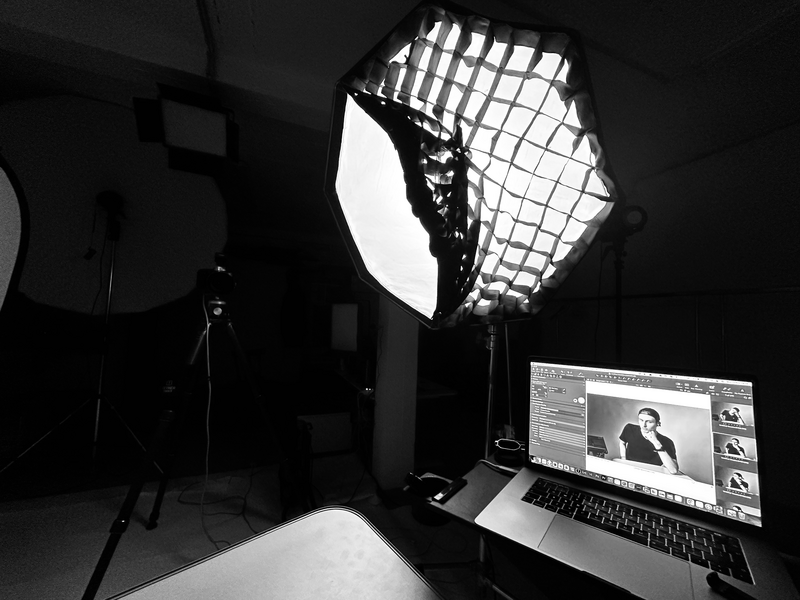
Setup 4: The Softest Light You Can Get
The classic soft light setup, which I popularized in an earlier article. Simply by taking your softbox and pointing it into the ceiling, you create the softest, most diffused light you can achieve in the space you’re shooting in. This is especially useful in small spaces, as the light coming out from a bare flash head will not be as even as the light out of a softbox. As such, you are able to achieve very soft light with the same small softbox. This light is also great for natural-looking eyes. As this is a light that is as close to natural as you can get, you will simply see the reflection of the room you’re shooting in. To add shape to this light, you can choose to aim the softbox to a side, creating a window light. This is quite an easy and affordable way to get natural-looking soft light you’d typically need large modifiers or appropriate weather conditions for.
Setup 5: Overhead Hero Light
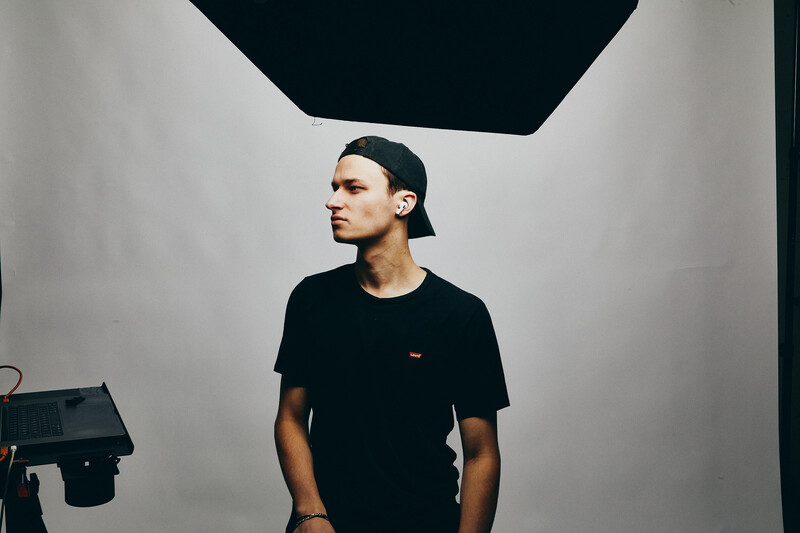

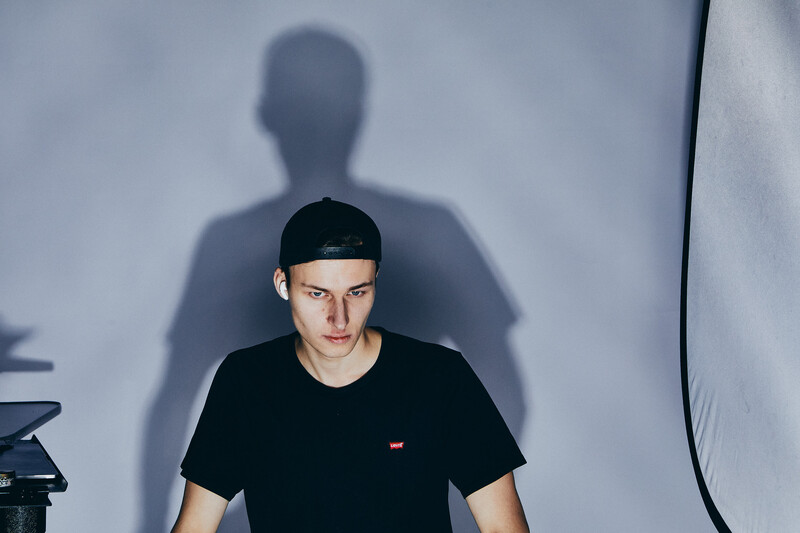
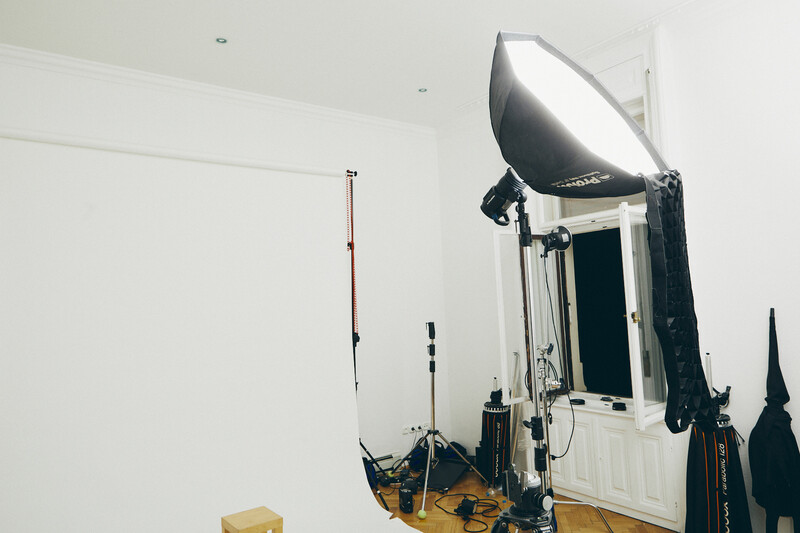
This is fairly standard overhead lighting, however with a small twist. The twist is in the softbox placement and angle. It is angled down, but not at a 45-degree angle as you might find people on the internet suggesting, but at a 10 or so degree angle. This way, I am creating a stark gradient from top to bottom which (together with distance) gives the face a lot of structure and dimension. I must mention that the closer the subject is to the light, the higher the contrast, and the more dimension there is in your image. Additionally, placing the softbox above me and angling it only slightly down means that there is a very smooth gradient on the background, making the image more interesting. You might wonder, where is the shadow from me on the background? The answer is simple, with this light and camera position, the shadow disappears in the background.
Closing Thoughts
Here we are: five simple but interesting light setups you can do at home today. These setups are based on the principle of using the softbox in unusual ways. Be it placement, adding or removing diffusion baffles, or only gridding parts of the softbox. Another technique you can experiment with is covering parts of your softbox with black fabric. All this and more comes from thinking outside the (soft)box, and actively seeking to do something beyond a softbox pointed at a 45-degree angle placed to the right.
Have you tried any of these setups? Any unique setups you have? Share with us in the comments below!

Join the Fstoppers community for free
-
Post comments and join in the discussions
-
Browse the site ad-free
-
Share your work and get featured in the community
-
Compete in the photo contests for fun and prizes
1 Comment
Though I generally gravitate towards hard light, a couple of years ago, I once did a shoot with a 24-25 inch softbox pointing to the ceiling and somewhat towards the model. I'll have to do this again.