
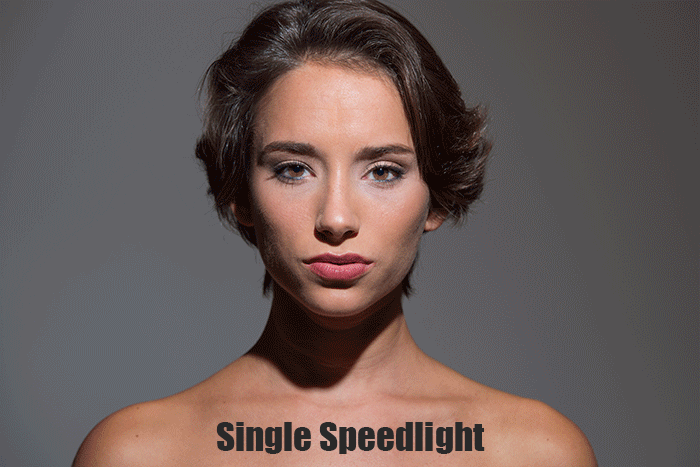
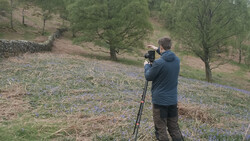
Last week we released our portable light modifier The Fstoppers Flashdisc to the general public through Amazon. While the success of our first ever physical product has been huge, a lot of people have been asking for example images shot with this useful small softbox. Today I am going to break down a simple beauty shot you might see in a magazine that was shot entirely with 4 speedlights and 3 Flashdisc light modifiers.
Beauty shots are primarily used to showcase hair and makeup products. Unlike fashion images which typically rely on hard light to bring out the contrast in clothing, the beauty shot is usually crafted with varying types of softlight. The most popular light modifiers for beauty photography have traditionally been the beauty dish, the large softbox, and the Mola Reflector. I have these modifiers in my studio and use them on a weekly basis but for the average photographer they can be both cumbersome and expensive. If you have ever used a Mola dish for beauty photography, you know they can be hard to store in a small studio and run upwards of $700 for a single dish.
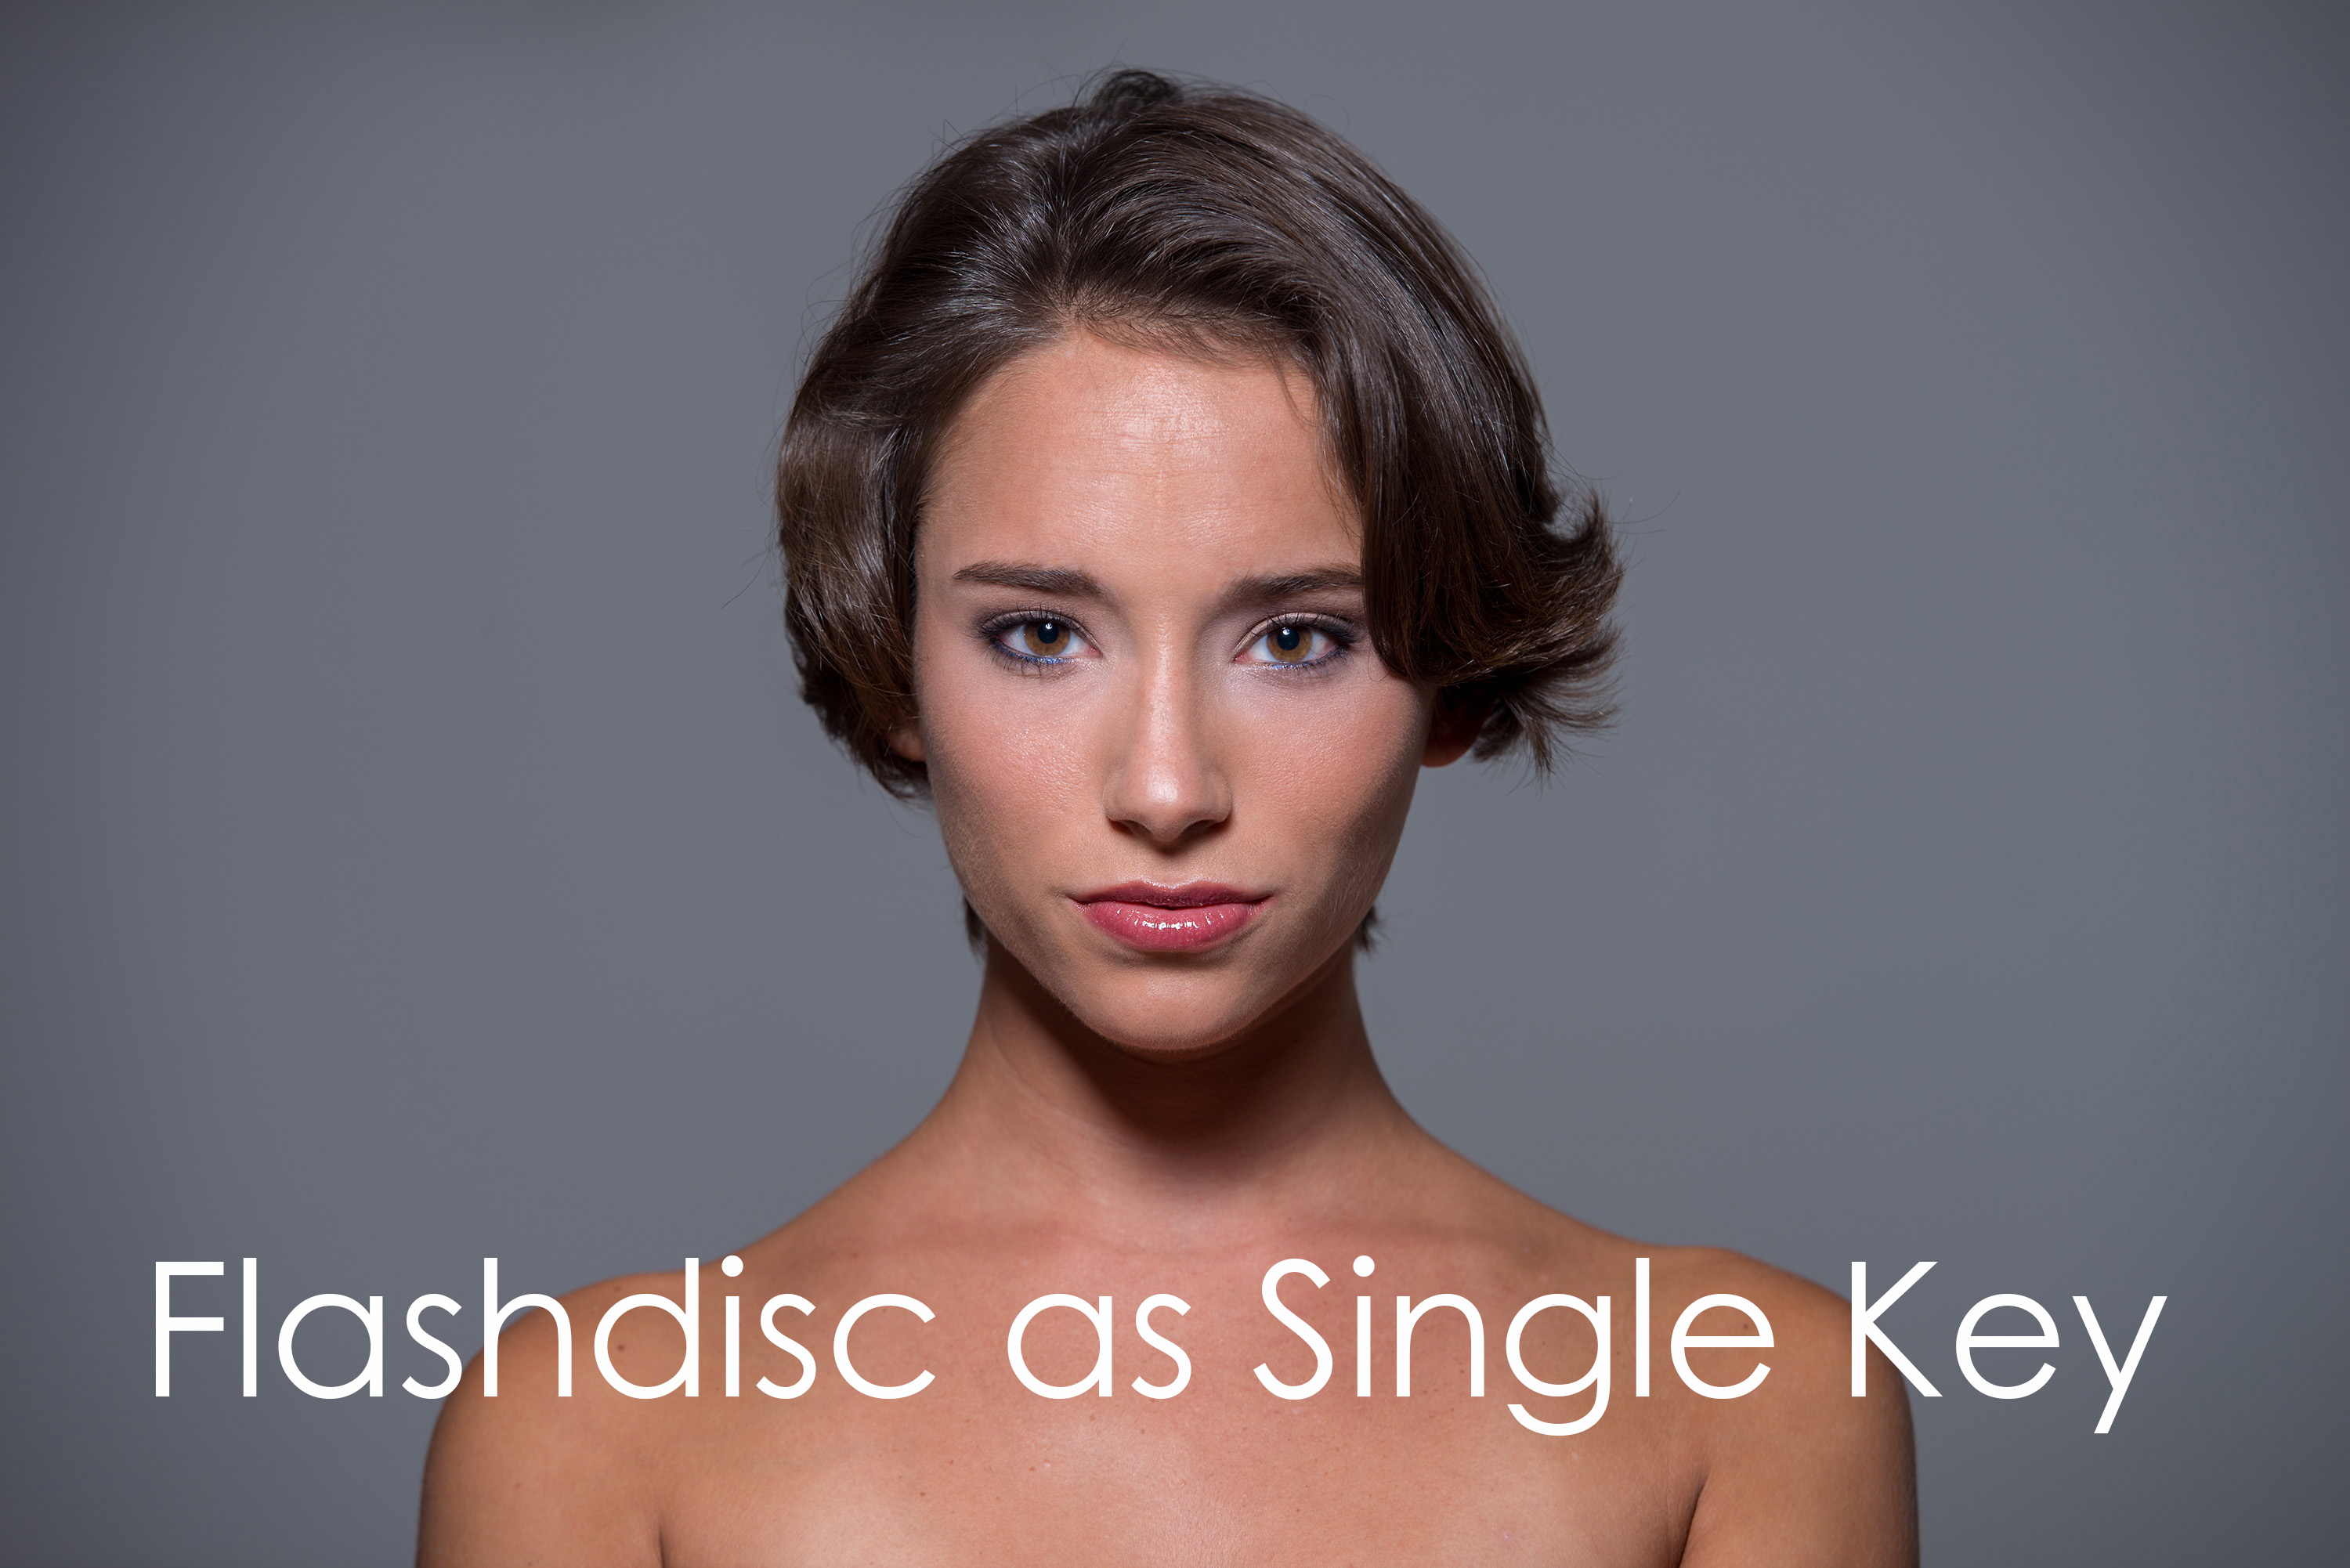

One thing to consider when using speedlights for this type of shot is depth of field. If I were to use my Profoto D1 lights in this situation, I can control my depth of field easily from shooting fairly wide open at f/4 all the way down to f/18 because I can use the monolight's full range of power. With speedlights, you are going to want to shoot at around the 1/4th power or less so that you have a reasonable recycle rate. If you set your camera to ISO 100 or less, you are going to be forced to shoot with your aperture much wider than if you had the power of larger studio lights. At the end of the day your depth of field is a personal preference and you can see from these examples, even at f/5.6, the depth of field is considerably more shallow than the results I would have gotten from my more powerful Profoto studio lights.

Below is an image containing all of the single shots I took to create the final two images. You can easily see how a simple reflector, some rim lights, and a background light can drastically change the mood of your final image. I think the high key white background is the more traditional beauty shot, but my favorite might be the one where the background light was skirted across the cyc wall.
Overall it is pretty exciting to think that you could use 4 cheap Yonguo speedlights with 3 Flashdisc modifiers and create a usuable beauty shot for less than $400 total. This was the first beauty shot I have taken with the Flashdisc but I think it goes to show the versitility this modifier brings to your overall kit. As a wedding photographer, I primarily use the Flashdisc for detail shots such as the rings, shoes, food, and other tabletop items but it really can be used for so much more. Stay tuned to Fstoppers for more examples showing how the Flashdisc can be used in your portable lighting kit. If you have any general questions leave them in the comments below and I will answer them.

Join the Fstoppers community for free
-
Post comments and join in the discussions
-
Browse the site ad-free
-
Share your work and get featured in the community
-
Compete in the photo contests for fun and prizes
22 Comments
Patrick, I'm digging the grunge look:)
Ha, I have to mix it up every now and then. It's either baby face, grunge, or full on beard....
Nice job with the video. I purchased one last week and can't wait to try it out.
Hi Patrick, Is this the same unit you shipped last Christmas? There was some talk that you were redesigning the unit to keep light from spilling out the sides - silver lining to be added if I recall correctly. Is this that same unit from last year or has it been updated?
This is the new version and it does have more reflective sides now
One of the most humble, and cool photographers. You too Lee. Everyone loves your site and I guess I will be buying a few of these discs now!
I'm not knocking the product at all because I think it's great, but this video also tells me that folks who know what they're doing can make most things work well and pull off a great shot. Puts some of the gear-whores to shame really.
This is good work as always...kudos! I'm definitely humbled watching this.
Thanks for the article Patrick - great as always.
Just a note:
I use Yongnuo YN560-III flashes for a lot of my portable work - especially during my photography classes. As you know, the YN560-III flashes have integrated wireless receivers.
Although I have the complete range of Pocket-Wizard gear - which I love - I use a Yongnuo flash controller called YN560-TX together with the YN560-III flashes. With this controller it is possible to set the power and the zoom of the YN560-III flashes remotely from the camera. The YN560-TX controller is very inexpensive over here in Germany - cost around 40 Euro or 50 USD.
This is a lot less than Pocket-Wizard and you also have a lot more control over your flashes :-)
I hope this information helps :-)
Great tutorial Patrick... simple and straight to the point. Gorgeous model! What's her full name or MM#? Keep up with the good work!
No worries. I've found her #2628499 in MM. Promising career!
AWESOME, thank you Fstoppers for making the flash disc, i used it for ring shots and baby shots... can't wait to buy two more... ill be posting an awesome review on amazon after i get the new versions... again super thanks for the 3 for $100 when version 1 came out
I received my flash disk this weekend and I'm very happy with it. This may sound like a stupid question but how do you fold the disk to fit into the bag? I don't want to break it :(
Here is a tutorial on how to fold a reflector. It should be the same process for the flashdisc: http://m.youtube.com/watch?v=YjlsP9KDjcs
Awesome, thanks for the tip Patrick!
That's awesome!
Love the tutorial of how great the flash disc our, but would love to see a vid on how to get the most from the gray card on the back.
Love this tutorial and the Flashdisc modifiers! Makes traveling with equipment a LOT less cumbersome, and the effect is outstanding :-)
how bout asia,
love this "little disc"
He guys,
First off, love the modifier. Love what I can do with it. Amazing little thing.
Second ... don't like the build quality. I got 3 of this little guys and on 2 stitching started to come out after first folding. Not usage, folding.
This is a photo of stitching that secures flash to modifier. Also this is photo before single flash was even inserted in there. I actually use only 1 that is done properly since I'm afraid that other 2 will fall apart withing first few uses. I would expect something like that from cheap knockoff, but I did expect better build quality for product in this price range.
This is the first complaint we have had about this and I can definitely say something is wrong with this particular unit(s). Just send them back to BH or Amazon and they will replace them with a non defective unit.
I have to commend Patrick for contacting me right away and replacing my 2 faulty units.
KUDOS Sir.