Lightroom’s color range mask is a powerful tool for making selective edits that bring your photos to life. Understanding how to precisely target colors can significantly improve your editing skills, giving your images depth and nuance.
Coming to you from Christian Möhrle - The Phlog Photography, this detailed video takes you step by step through using color range masks effectively. Möhrle begins by explaining how basic Lightroom adjustments—such as switching the profile to Adobe Landscape and tweaking highlights, shadows, and white balance—set the stage for more targeted edits later. He emphasizes subtle changes like lowering temperature and tint adjustments, which can greatly improve overall color harmony in your images. The process involves gentle but intentional shifts, ensuring edits remain realistic yet visually compelling. Möhrle’s use of texture combined with carefully lowered clarity and dehaze introduces a subtle glow effect, enhancing the image without overpowering it.
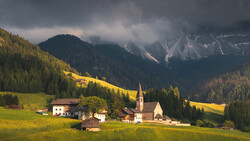
The heart of Möhrle's tutorial is the strategic use of color range masks to selectively enhance specific parts of an image. He shows you how to isolate the sky by intersecting color range masks with sky selection, refining the mask to precisely control adjustments like exposure and contrast. Another practical example involves making foreground flowers stand out by selectively boosting brightness and saturation, carefully refined with Lightroom’s sliders. This technique demonstrates how even slight increases in brightness or saturation within a color-specific mask can dramatically transform your image, making your main subjects pop without affecting unwanted areas.
Möhrle also tackles the trickier edits, such as adjusting green tones separately to enhance landscape elements. He provides clear insights into fine-tuning masks, subtracting overlapping selections, and balancing color tones with careful manipulation of temperature, tint, and saturation controls. These subtle adjustments allow you to gain precise control over the mood and realism of your landscapes, avoiding artificial or overly saturated looks. Further into the tutorial, Möhrle expands on these techniques, adding depth and drama through linear and radial gradients, showing how simple yet focused masking approaches can bring out details and create balanced lighting across your image. His straightforward, non-technical approach makes these concepts accessible, no matter your level of experience with Lightroom. Check out the video above for the full rundown from Möhrle.
And if you really want to dive into landscape photography, check out our latest tutorial, "Photographing the World: Japan II - Discovering Hidden Gems with Elia Locardi!”


Join the Fstoppers community for free
-
Post comments and join in the discussions
-
Browse the site ad-free
-
Share your work and get featured in the community
-
Compete in the photo contests for fun and prizes
No comments yet