

Before you finalize your images for posting or print, here are five general quality control steps in Adobe Lightroom that you should not miss.
Whether you're a professional or a hobbyist photographer, you should always be cautious of the quality of photographs you publish. That means paying attention to every single detail that may make or break your image. If you're an Adobe Lightroom Classic user, here are five simple yet very helpful steps for quality control of your images.
1. Highlight Clipping
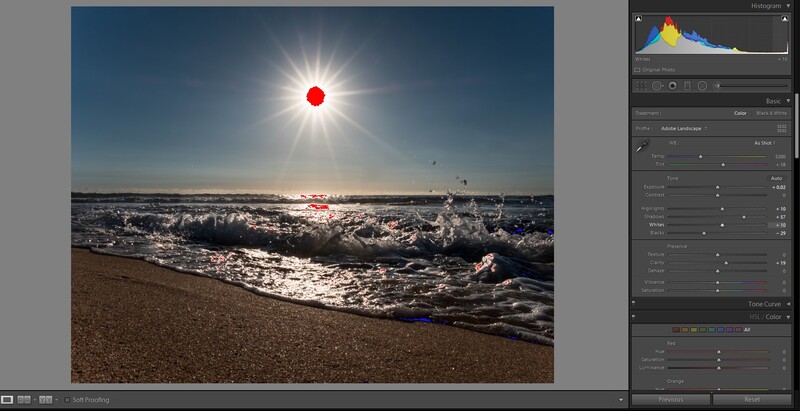
With the hotkey "J," you can turn on this very handy feature, which basically maps out any clipping on your image. The color red is assigned for highlight clipping, or areas where the highlights are blown out and might be losing some retrievable data, and the color blue is assigned for black clipping, or areas where darker tones are flattened into black. Editing your photos in an unevenly lit area may cause you to overlook such easily reversible mistakes, and this simple step can help you in identifying them.
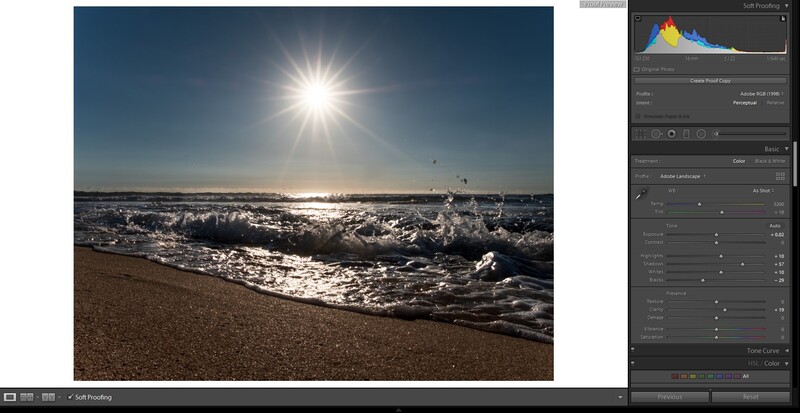
2. Soft Proofing
Soft Proofing is a step more commonly used prior to printing. With a calibrated screen and specified printer settings, soft proofing can help you previsualize the actual output for printing. This, however, also has a certain use for preparing your photos for social media. Soft proofing actually places your image inside a white background that actually serves a simple yet not-so-obvious purpose. This standard white background can be used to simulate how your photo would look on social media, since most platforms use a standard white around the images in posts. As a simple rule, you should compare the brightest parts of the frame to the white background to give you an idea of whether your image might be over or underexposed. This function is activated with the hotkey "S."
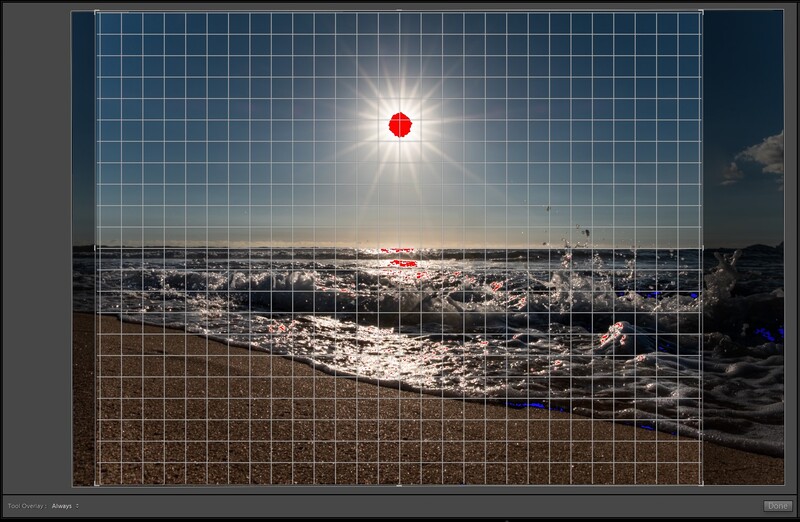
3. Grid Check
With the use of the Crop Overlay module or the hotkey "R," this can help you double-check the lines present in the frame. By pressing "O" within the crop overlay, Lightroom offers a variety of overlays, such as the rule of thirds, golden ratio, and many others. Using the standard grid, you can double-check both your vertical and horizontal lines for any missed skewing or distortion. This comes in handy not just to check if your horizon is straight but also for shooting cityscapes and architecture. By doing a visual scan of the frame, you can avoid any converging verticals that you might not want in order to maintain perspective.
4. 1:1 Zoom
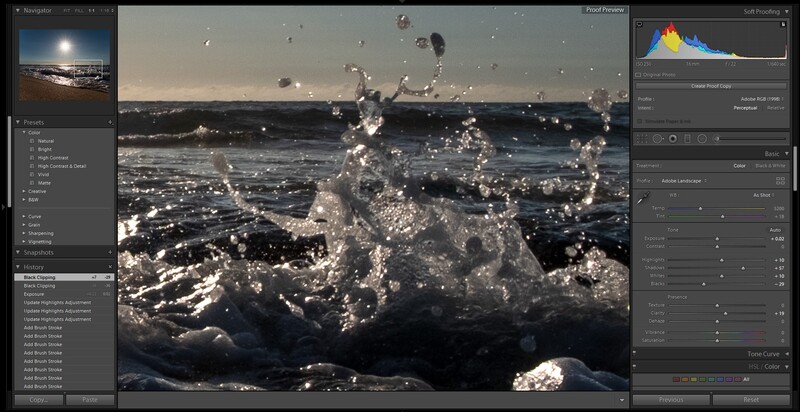
Before you export your photographs, you should always do an in-depth visual scan of the finest details of your photograph. By selecting "1:1" on the navigator tab and hovering or dragging your cursor on crucial parts of your frame, you can visually check for any unwanted clutter, noise, soft spots, or chromatic aberration that you can still correct. This is very useful, especially when you aim to print your photo in any large format.
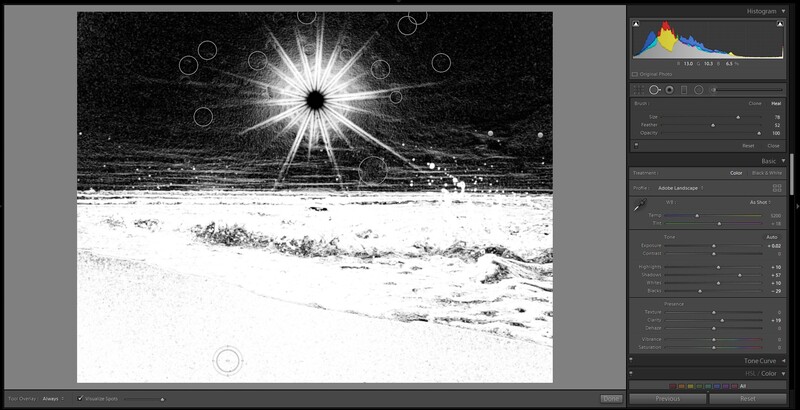
5. Spot Visualization
This is a more sensitive way to look for unwanted clutter in your shot. Use the spot removal tool or the hotkey "Q," and click on the "Visualize Spots" option at the bottom left, Lightroom will simply show you edges in the photo that can help you identify any previously unseen spots. By using the threshold slider right beside the tick box, you can adjust the intensity of this scan and identify any defined spots that may be due to dust particles inside your lens or on your sensor. By simply clicking the spot once it's within the spot removal tool, the unwanted artifact can be cloned out.
After these five easy steps, you should apply the necessary resizing and sharpening for your chosen output. Whether for print or for social media posting, this more refined output can surely make a better impression on your viewers.


Join the Fstoppers community for free
-
Post comments and join in the discussions
-
Browse the site ad-free
-
Share your work and get featured in the community
-
Compete in the photo contests for fun and prizes
No comments yet