

Tired of endlessly cloning out every little image sensor spot on your catalog of photos? Use this automated process to remove spots from hundreds of photos at once, and go put your feet up.
It's really important in product photography, especially when shooting macro. In fact, macro of any kind is likely more prone to show the dust and hairs on your subject. But sensor spots can ruin just about any kind of photo. If you haven't spent time cleaning your image sensor properly or sent it off for cleaning, then you might find yourself having to use this technique to remove the spots.
Sometimes, you only realize after you've shot tens or hundreds of images, when going through each photo would be a real pain. Fortunately, there's a way to automatically remove the sensor spots on every photo.
Mop Up Spots
In Lightroom Classic's develop module, with the spot removal tool selected, zoom in to your offending sensor spots with Ctrl and + (Cmd and + on a Mac) and brush over the speckles. If you have a few in one area, mop them up with one swipe and let Lightroom fill in the area automatically. Sometimes, this doesn't work, because it clones from somewhere else on the image that contains spots, either in an attempt to copy it or just erroneously. That's usually because the size of the area you're spot-removing is too large and Lightroom can't find another space on the photo that's the same size to replace it with. To remedy that, you'll have to move to the next step.
Stipple the Brush

Instead of swiping the spot removal tool over a large area, you can instead use a single click to remove a spot. Resize the brush so that it's just bigger than the spot and using the heal option in the drop-down spot removal tool panel. This is a brilliant way of keeping as much original detail in the photo as possible, but it does come at a price: time. It might take quite a while to notice all those spots, and even then, you might not get them all. Well, good thing Lightroom has a feature to help you with that, too.
Visualize Spots
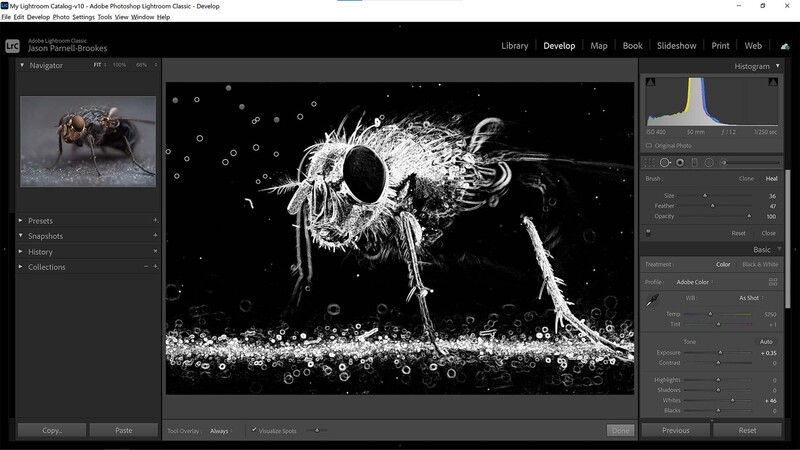
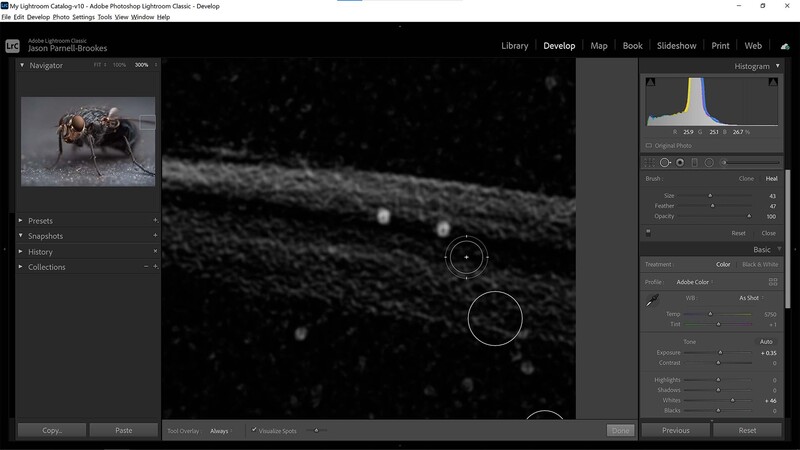
With the spot removal tool selected, you'll notice that at the bottom of the image panel you now have an option to "visualize spots." Tick the box, and you'll get this inverted monochromatic view of your photo. It's a high-contrast overlay that helps you see the spots in order to remove them.
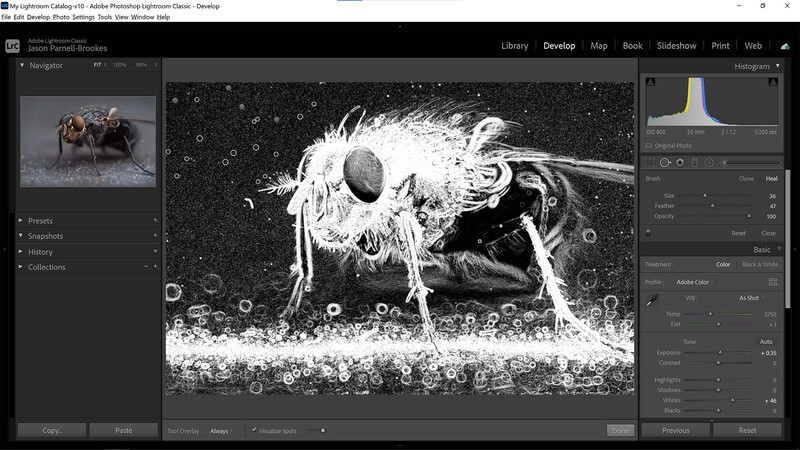
The slider next to the button allows you to increase or decrease the sensitivity in case your photo is high or low key. Be sure to look for spots over the subject, as well as around the edge of the frame, as they are often hidden in busy photos.
Don't Remove Important Detail
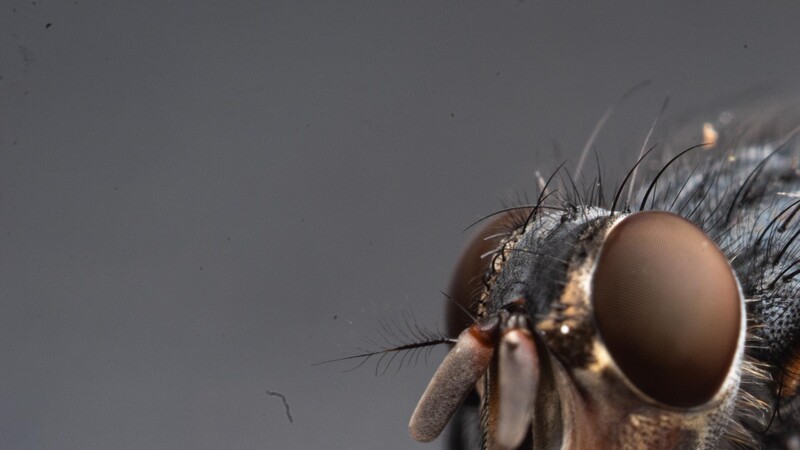
Sometimes, using the visualize spots overlay, you can end up removing something that seems like a spot but is, in fact, part of the image. It's best to toggle the views to double-check what you're removing is dirt and not intrinsic to the shot. For instance, in my macro shot of this fly, I nearly removed the yellow pollen on its back when using the visualize spots overlay until I switched back to the normal view. I think it's an interesting part of the shot and shows just how high magnification this photo is, so I left it alone.
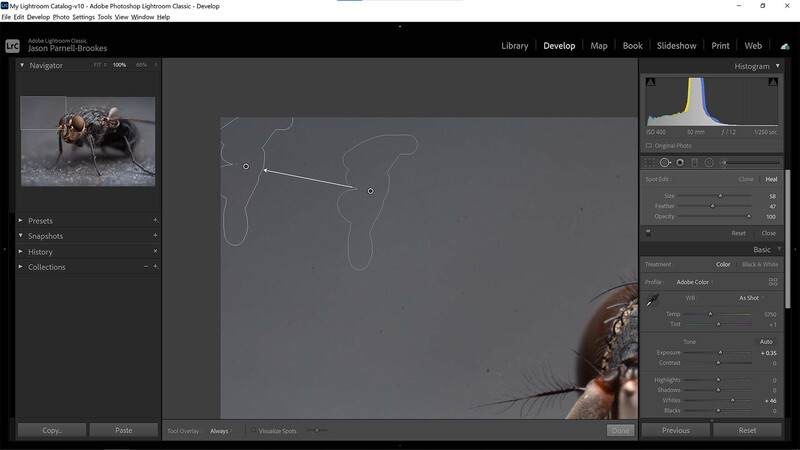
Reposition the Edit Point

Sometimes, even though Lightroom has the best of intentions, the spot removal tool will just fall short of the mark. As you can see in the before/after above, Lightroom has assumed that I want to replace the sensor spot with... another sensor spot! Thanks, Lightroom. But don't fret, because you can easily reposition the selection to compensate.
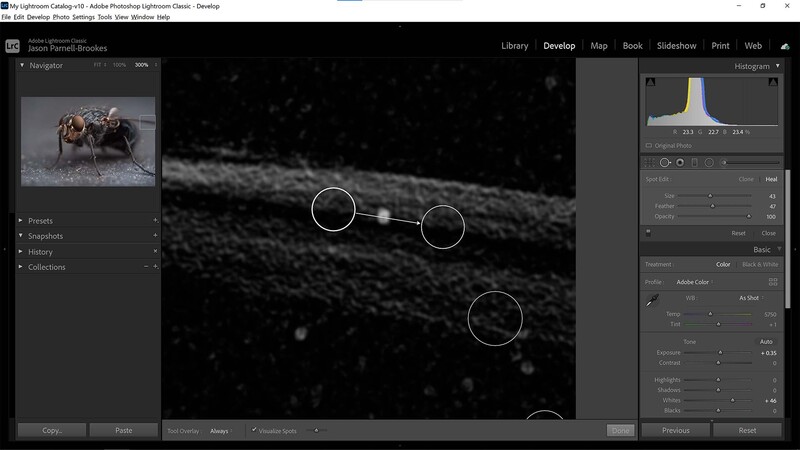
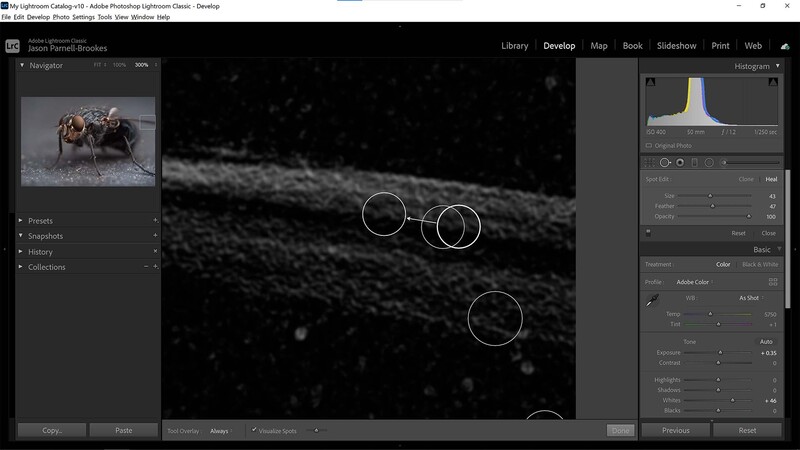
By clicking on the spot, then moving its automatic selection, I'm able to completely remove these sensor spots from the fly's wing. In fact, I did the same thing for the spot right next to it, and it worked a treat. This process is extremely effective if done accurately, but it can take ages. Who really has time to do this to potentially hundreds of photos from a shoot? Not me. So, it's time to kick things up a gear and bring in some automation.
Time for Automation
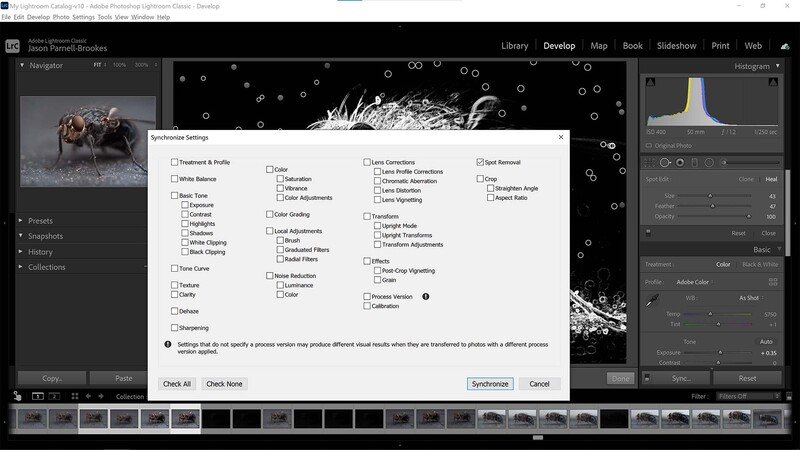
Fortunately for us, sensor spots will be in exactly the same place on the image throughout every photo. To synchronize all those edits you just made with as many other photos as you need to, simply keep your main image selected in the timeline, then press Ctrl and click (Cmd and click on a Mac) to pick individual images or Shift and click to select a bunch in line, then click the sync button in the bottom-right of the window. Make sure only Spot Removal is selected (unless you want to synchronize other adjustments as well), and click Synchronize. Now, all those edits will apply to the selected photos automatically, and you won't have to spend hours working on each individual shot.
It's best to check the other photos if they're meant for anything important, especially if the camera angle has changed during the shoot. That's because while the positions of the edit points on the original image might look good, on another photo the place, it might be sampling from somewhere totally inappropriate. But once you've synchronized and checked through the images, that should be all you need to do. Now, instead of going through this process every time, go and get an image sensor cleaning kit, or if you're not feeling brave enough, then send the camera off for cleaning. If you want to clean your image sensor, why not check out one of our other posts on how to do this and then buy a kit like one of these and give it a go yourself.


Join the Fstoppers community for free
-
Post comments and join in the discussions
-
Browse the site ad-free
-
Share your work and get featured in the community
-
Compete in the photo contests for fun and prizes
10 Comments
The only kind thing about sensor spots is that at least they tend to stay in the same place. Good tips!
If lightroom remembered the original spots and resampled the edits for each new photo this would be a great tip. But it doesn't. It copies the same edit. So you now have to go through each secondary edited shot to make sure remove spot hasn't made it worse.
I'm not sure I understand your concern. Why not save the brush work as a preset and let the program resample spots under each photo?
because it only works if you shot the exact same object from a tripod. Try the same with different images and you'll see the result, because the sampling for the spots will come from different parts of the image then. And I guess most LR might have come to this idea long ago. So to headline it as "automatically" is more like a click bait.
I don't really look at spot removal until I have my final few images selected anyway. I wouldn't trust the automated process. If it gets that bad, it is time for a sensor cleaning anyway.
A good air puffer works wonders, especially since mirrorless attracts more dust. A professional cleaning isn't needed unless there's oil or something sticky on the sensor.
Strangely I've had far LESS dust with mirrorless than DSLRs.
Witchcraft! Maybe it's just luck, the mirror does a great job shielding the otherwise exposed sensor.
I've had my 5DIV for about 3 years and every so often, I take a shot of a blue sky to check it for spots. So far, I haven't had to clean the sensor. One thing I do is when I remove a lens, I always point the camera at the ground/floor so that if there's any gunk around the lens/body connection, it doesn't fall inward. Granted, I don't shoot in dusty conditions like some, but a little extra care goes a long way to prevent dust from getting on the sensor.
The only real automatic removal will be in Nikon cameras and by using their software!