
"I'm a natural light photographer. I don't shoot with artificial lights. I don't like the look of strobe-lit portraits." That's fine, but why are your post-processed images look so unnatural?
Disclaimer
I don't like the term "natural light photographer." If you add a white reflector does that make you a slightly artificial light photographer? What about negative fill? Does it make you a slightly negative-light photographer? You get my point. Whenever I photograph portraits I use the light that suits best the situation, and the client. I make two types of portraits: ones that look lit and those that look natural. I don't limit myself to the way I execute the project. Lit and non-lit-looking portraits can be made both with strobes and without strobes. In case you wonder, I tend to use strobes most of the time. In this article I will focus in a couple of images I photographed with only natural light and without any modifiers.
Pros And Cons of Natural Light
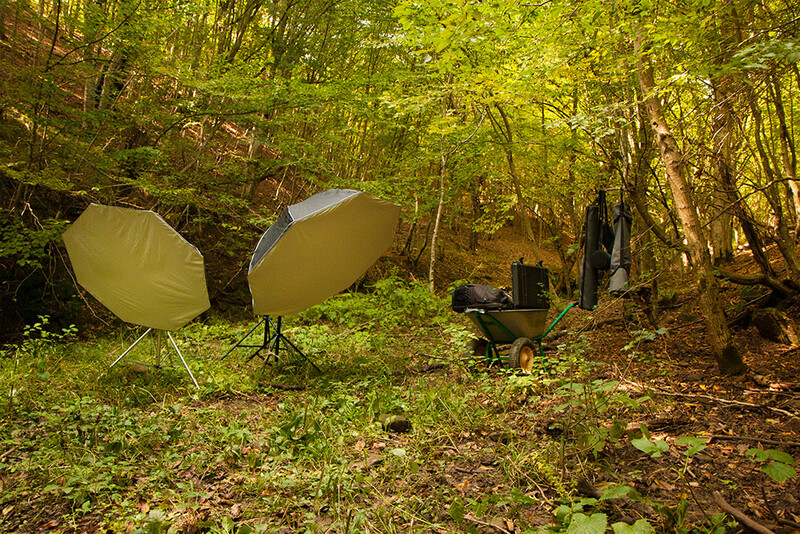
Shooting with strobes on exterior locations has one big disadvantage: you have to carry a lot of extra gear. You need light stands, strobes, heavy batteries, light modifiers, sand bags, you name it. If the available light is perfect you can simply carry your image-recording device, the camera.
The problem with natural light is that we like certain qualities of it at certain times of the day. The famous golden hour lasts for a short interval and it's not always possible to photograph your models at that time. The other problem is the dynamic range of the cameras. Although they got better from what they were 10 years ago, they still don't offer the perfect natural image we see with our own eyes. Yet they are much closer. If we don't have the perfect natural light we have to either use modifiers to shape it, or try to fix it in post. If you are serious about using light shapers to alter natural light you will find that sometimes you have to carry more gear than a simple strobe with a softbox on a light stand.
What You Are Allowed to Fix in Post
Fixing it in post is alright when you have done the best the camera can capture on location. What you are expected to do is to remove distractions you couldn't remove when shooting, remove some, but not all, imperfections from the model, and eventually take advantage of the dynamic range of the modern cameras. For the last part you need to shoot in a raw format.
Changing Light Direction in Post
This is one of the most frequent problems I see in post processing of naturally-lit photographs. The light is coming from one direction shaping the model in a certain way and instead of moving the camera or the model, people photograph what they see and in post they try to change the shadows and highlights completely. Many times this is applied only over the face, leaving the rest of the environment, even the rest of the body of the model, with a different light direction. The proper way to do execute a portrait is to keep the final image with the same light direction, while you can slightly dodge and burn some parts. You made the choice to use that light direction in camera. Stick to that choice in post.
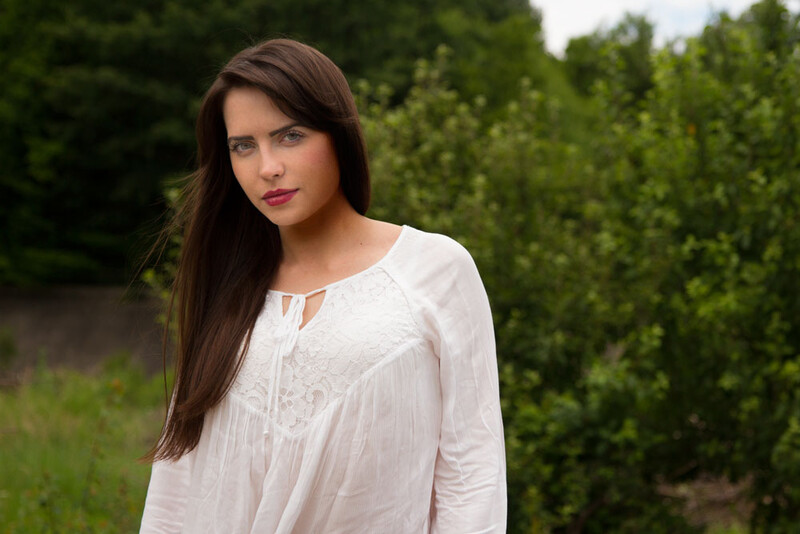
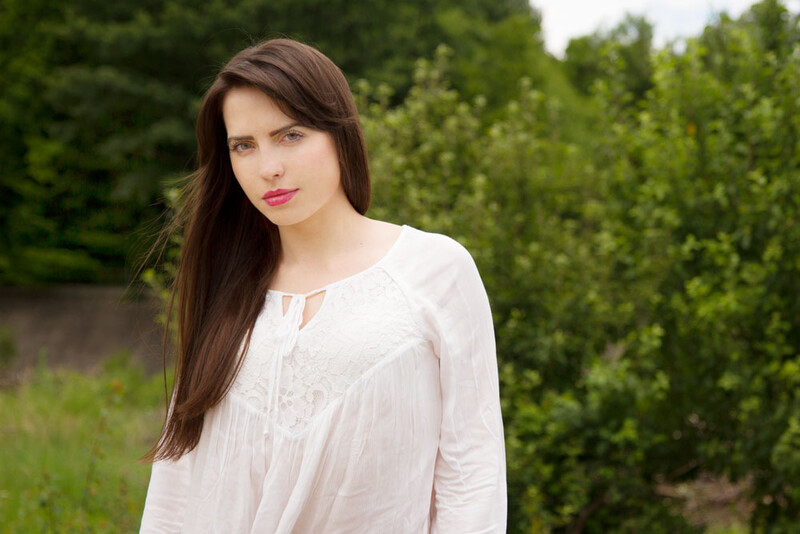
Shadowless Faces
That's the most often case I see. People are without noses, without shadows under the eyes, without shadows under the cheekbones. Their faces look flat. Everything on the face is very bright, and often too bright, while the background is the only natural thing in frame, having both shadows and highlights. That's often what Instagram filters do. Women like it, because it hides all their imperfections, but it also hides their beautiful features.
Fake Light Flares
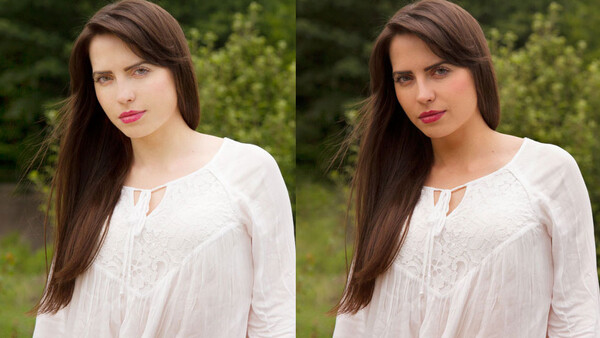
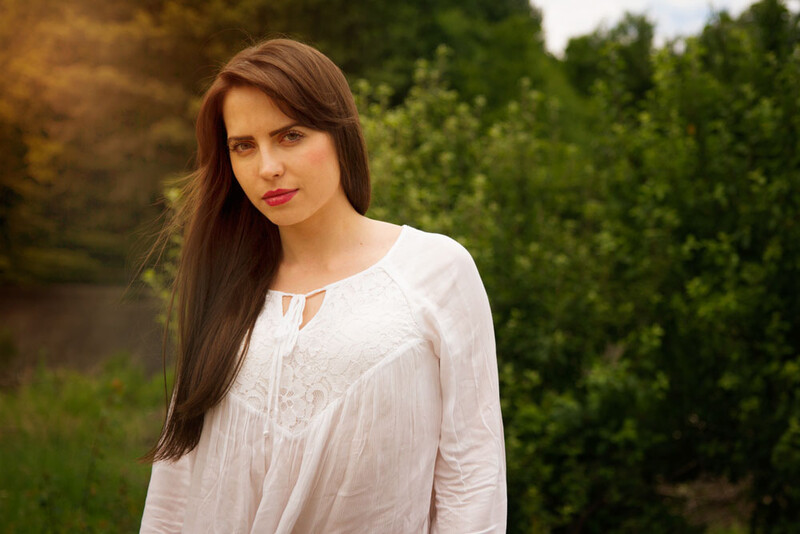
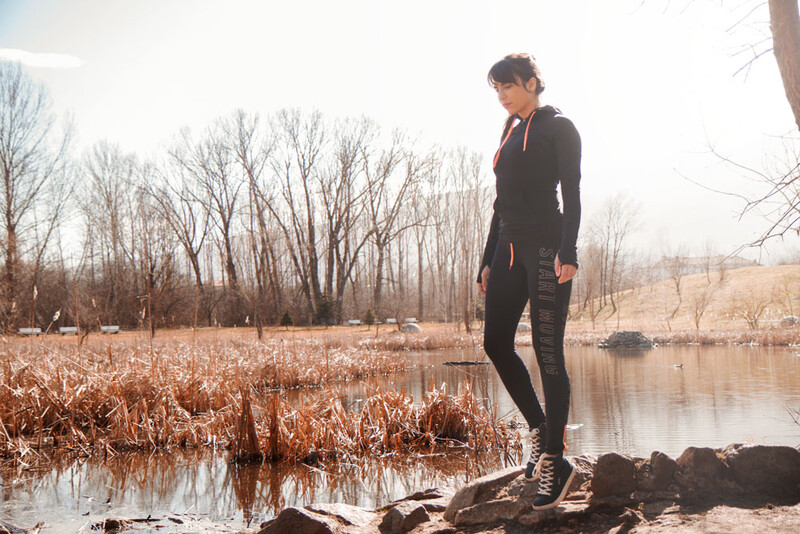
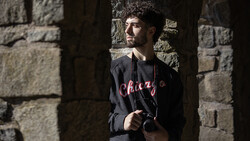
I like flares. I like fake flares when they don't look fake. Adding flares in post has to be motivated by the environment. If there was no sun in the frame or close to the edges of the frame, please, I beg you, do not add any light flares. For the love of naturally-lit portraits, aesthetics, and laws of physics: do not add flares on the opposite side of the frame where light does not come from. Please, don't. In the following photograph the light is naturally coming from the right side, while the fake flare is on the left. Even if the flare was added on the right, it is not needed, because the sun was not that bright that day and warm flares do not look good on overcast blue and green tinted background. If there were natural flares, the background would be with a different color temperature, not just the flares.
Retouching Only the Face
Dodging and burning only the face is going to make the photograph too fake. I understand that there's a lot of information in the raw files you can take advantage of, but do not focus only on the face. If you lighten the dark parts of face, lighten the dark parts of the background too.
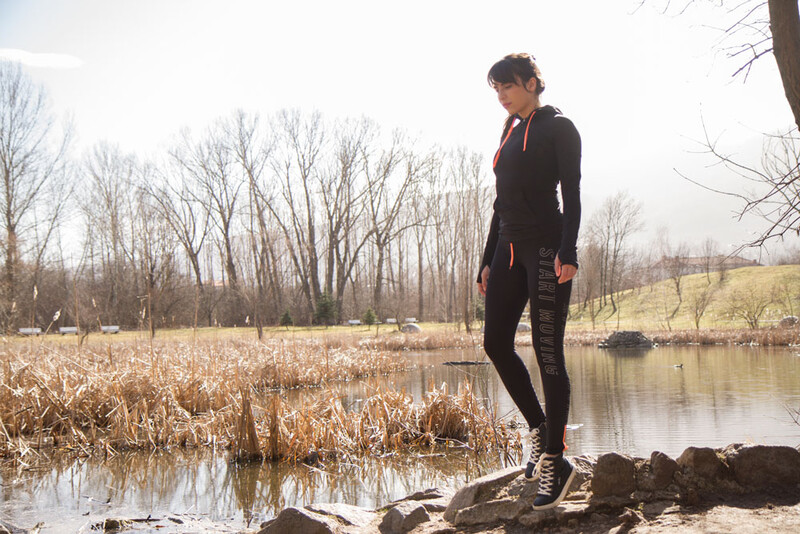
Overexposing is Not Always Bad
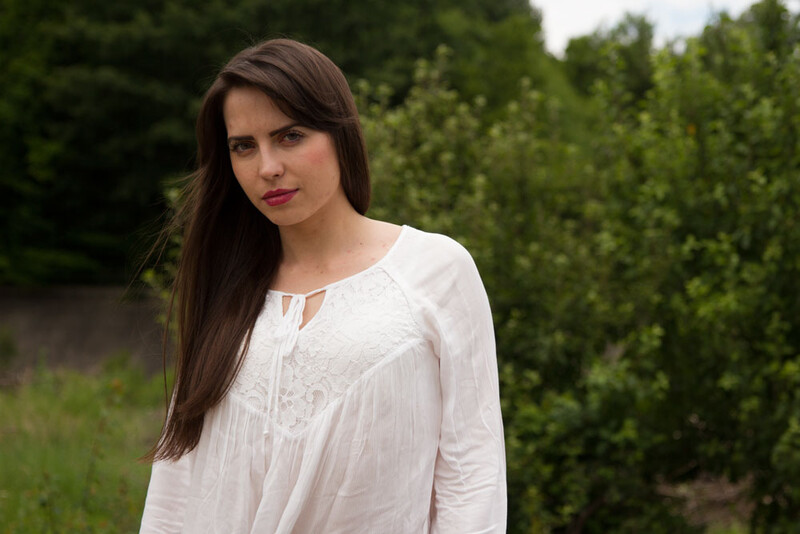
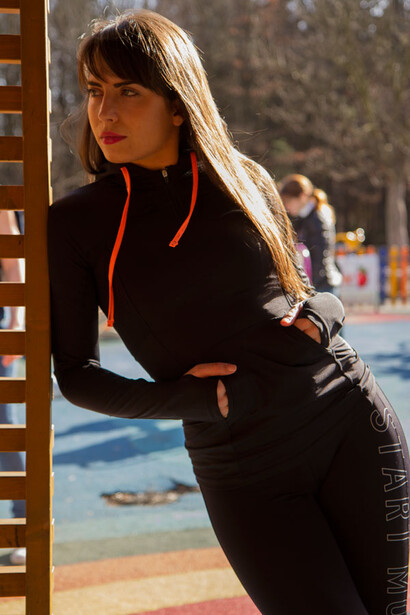
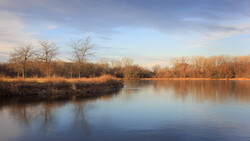
If you photograph a back-lit portrait you will find that you can either have the background or the face properly exposed. You can't have both unless you use extra lights (or modifiers). If you want to shoot without modifiers, you have to make a compromise. In these cases it's fine to let some of the background to blow out, even if you can bring back the details in post. Sometimes having detail everywhere looks unnatural. Do not get too much overwhelmed with photographers' opinions about overexposed or underexposed parts of the background. Keep the final result natural to your eyes. Sometimes it even looks better to overexpose in post certain areas of the image even more, just as I did in the following example:
Leave Some Imperfections
I have seen more unnaturally retouched faces of naturally-lit photographs than such with strobes. It's usually the shadows that outline the imperfections. Leave some of them. You will be amazed how better your photographs would look. Not every shadow is an imperfection. Do not get rid of them all.
Capturing a Proper Image to Work With in Post
In order to make naturally-looking post processing you have to capture the image in the most natural-looking way possible. It's up to you if you're going to use extra reflectors, negative fill, diffusions, or mirrors. Sometimes you have to make a tough decision what to overexpose and what underexpose in order to make the right compromise, just like in the case of a back-lit portrait. Always think about the most important information you have in frame. If you photograph a back-lit model, you can have the face a stop or two underexposed. Try to limit the overexposed or underexposed important parts of the image within two stops at most. This is well-controlled when you shoot in manual mode and you read your internal camera's light meter. If you don't know how to determine the number of stops, read my article about how to understand the internal light meter of your camera or even better, check out Joey Wright's: Swimwear photography tutorial where he predominantly shoots with natural light.
Conclusion
If you want to be keep it natural in the way you photograph, keep it natural in the way you retouch too. My advice is to not limit yourself with the gear you use. It's the final result that matters as long as it looks realistic.

Join the Fstoppers community for free
-
Post comments and join in the discussions
-
Browse the site ad-free
-
Share your work and get featured in the community
-
Compete in the photo contests for fun and prizes
16 Comments
How about, "I'm a 99% ambient light photographer." :D
Consider "1/2000s light photographer" as a valid job description too.
You telling me shooting natural light and then "VSCO" ing it , doesn't make me an amazing creative? WHAT?!! You a hater lol #sarcasm
*Cough* https://www.instagram.com/danidiamondphotography/ *cough*
Dani is a talented photographer. Sadly, his talents end there, I'm sorry to say.
If we talk about the points I outlined here, most of his portraits are taking into an account the direction of the light, he doesn't add fake-looking flares. He has a certain style of retouching that is applied on flash-lit portraits too. He has less and more retouched portraits and I know he knows where's the fine line, because he shows that in many of his portraits. He's not the exact type of photographer/retoucher I'm talking about in the article, although some of his portraits are overdone for my taste.
I completely agree! He has a look and style and keeps it there. I think a lot of his work is fantastic but there are some images that leave me scratching my head especially when you see the before and afters.
I prefer the term "available light" as sometimes you might be using artificial lights that are already there. I admit though having different types of light sources can cause headaches in post-processing but for me just adds to the dubious pleasures of available light photography.
I have no issue if you prefer natural light photography, but if youre saying that because you just dont know how to use flash, then go learn how to use flash. you cant take your photography to a more creative, higher level till you learn how to use flash.
because if youre shooting natural light, youre at the mercy of the light as it is and hoping the light you get will be perfect and aesthetic everytime for the photos.
in my humble opinion, you cant be a good photographer unless you know how to use flash. you dont always need to use it, but have no fear in using when the natural light wont suffice to give you better images.
again, imho, I consider photographers, like myself, high level when you know how to blend flash with ambient light and even the kelvin temperature with ambient light (gels)
learning flash is understanding light, and if you dont know how to read light, you cant get to a higher level in creative images.
and creative work is more then just flash on the subject/person. look at Joe McNally's work. I myself dont shoot everything with flash, but im certain almost everything he shoots does include a flash or 2
Many people who know how to use flash think the same of so called "natural light photographers," i.e. they probably don't know or are afraid to use flash, which is just a short burst of light after all.
Shooting with available sun light is very difficult, and as I mentioned in the article, sometimes you need way more gear to create a shot than if using strobes. Not to mention that the sun moves and you have to adjust your modifiers accordingly.
I don't mind anyone who is afraid or doesn't want to learn to shoot with strobes. It's the retouching that makes it kind of imballanced and unmatching the word "natural" in the self-proclaimed job definition. I prefer slightly raw natural light lit images than post processing that tries to immitate light sources and light modifiers that weren't there.
I prefer to shoot in natural night…
That's why every sentence beginning with "I am …" is not worthy of listening. Shut up and show me your work, I will decide what you are. These day, people spend too much time defining themselves. Marketing bullshit is still not a skill.
The article is not about marketing, because I'm not marketing anything here, but taking some time to write information that is consumed for free. If you are talking about my work, it's not hidden.
The fundamental question, as I see it, is:
What creative boundry do you set for yourself? And I see photogs with two answers:
1. For many, their creative boundry is the image as captured, available or artificial lighting not withstanding, plus minor editing to enhance that image. These I'd call quasi-Realists.
And then the other group says:
2. I don't want to be limited either in the image capture or the post processing. It's fine if my final image bears little resemblamce to the actual capture. These are the Idealists, the frustrated painters, the creators who take raw (no pun intended) material and fashion it into something it wasn't.
Frankly, I'll pretty much stay on the Realist side, but an occasional Walk on the Wild Side with the Idealists can be loads of fun!
For me the answer is in the last sentence of the article:
"It's the final result that matters as long as it looks realistic."
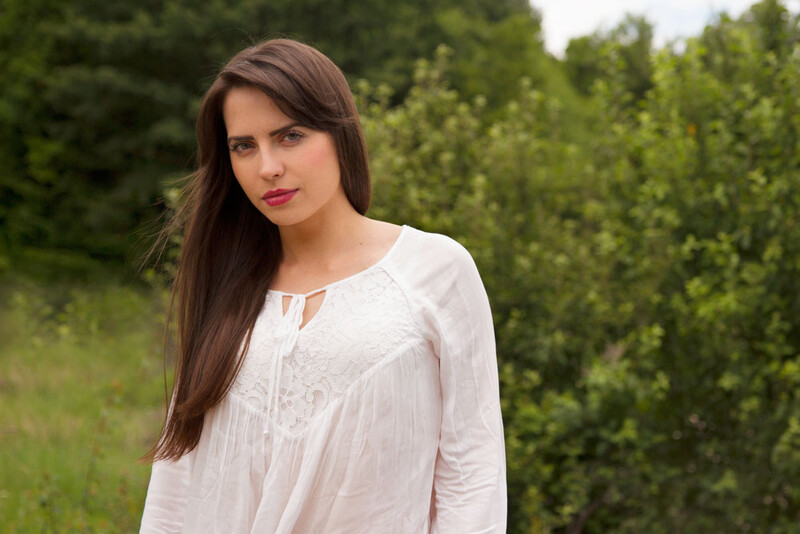
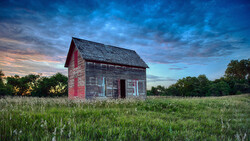
See the following four images from my portfolio. One of them is a composite.
"I'm a professional. I always use P mode."