Adobe Lightroom is full of useful features and tools to help edit your images, but sometimes everything can just get in the way. Here's how to clear the clutter in Lightroom Classic to get a better look at your photos.
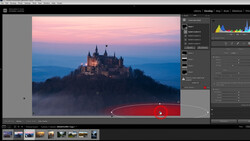
The below viewing options work in any module within Lightroom Classic, with the exception of the info overlay option in modules that don't have this option such as the Web module. The Develop module is likely to be where you spend most of your time editing your photos in Lightroom Classic so I'll be demonstrating each viewing option here.
Every panel has an arrow on it which you can click to hide that specific panel, but there are some useful keyboard shortcuts that'll make your life that much easier when using Lightroom Classic day-to-day, and should speed up your editing workflow as well.
Hide the Dock/Taskbar
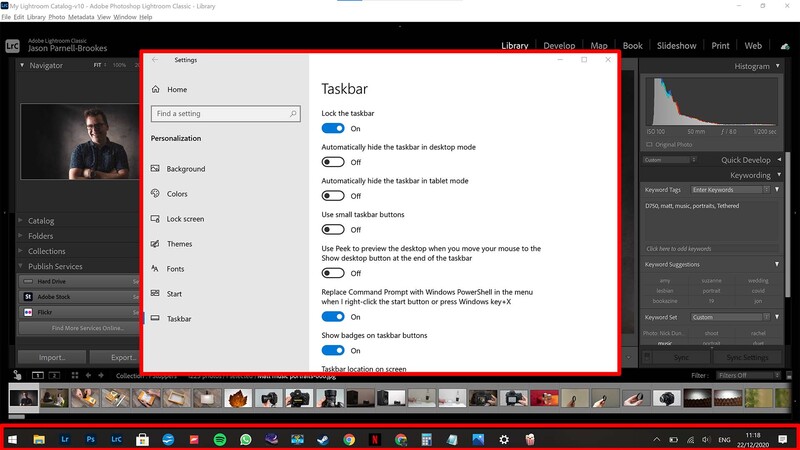
If you want to concentrate on your work in Lightroom then you can hide the taskbar in Windows 10 by navigating to the taskbar settings and clicking "Automatically hide the taskbar"
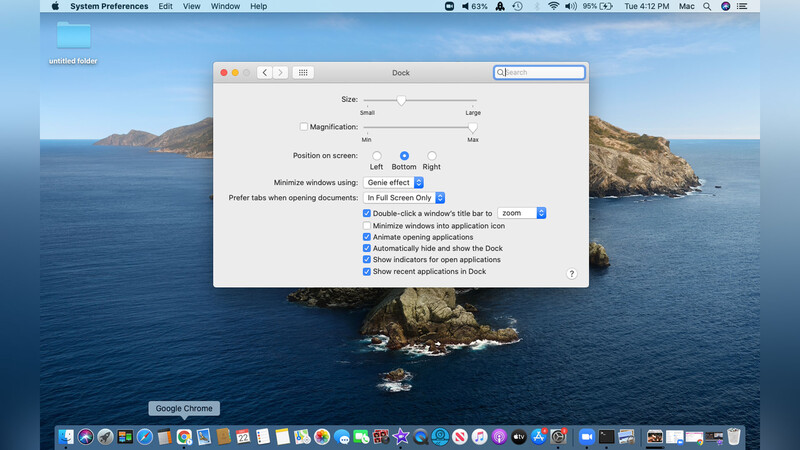
In Windows 10 right-click on the taskbar and click on "taskbar settings" then in the menu that appears click on "automatically hide the taskbar in desktop mode." Now the taskbar should disappear, and reappear if you press the Windows button on the keyboard. You can do the same on a Mac by hiding the dock. Simply go to System Preferences, click on Dock, and tick the button to Automatically hide and show the Dock. Now when you hover the cursor over the dock area you'll see it pop-up.
To get some extra workspace back while working on MacOS you can hide the dock by heading into the system preferences and allowing automatic hide/show dock
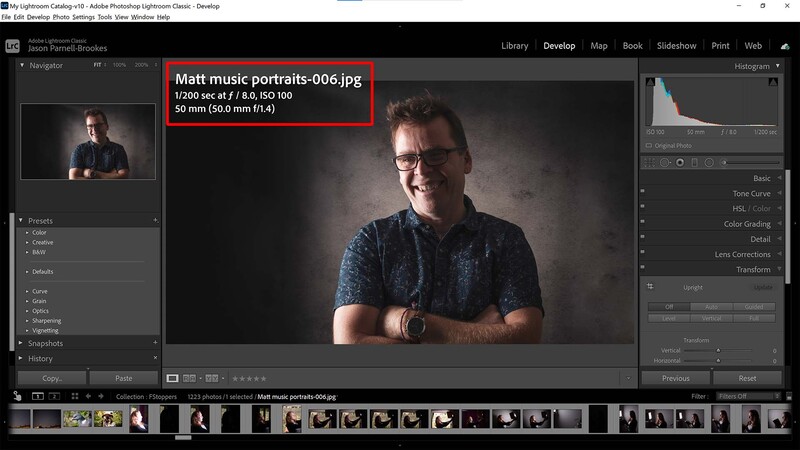
Remove Info Overlay
The info overlay is used to display important EXIF data about the photograph, such as date, time, and camera setting information, but it can be toggled and switched off by pressing I on the keyboard
The info overlay is the patch of text that appears in the top-left corner of the selected photo view in the center of the window. It's helpful for displaying important information such as resolution, and other EXIF data such as the lens used and camera settings. But it can get in the way when we're editing. You can cycle this on and off using the keyboard shortcut I. Press it once and it'll display the name, date taken, time taken, and resolution of the photograph, press it again and you'll see the EXIF data, and press it a third time to remove it completely.
You can remove this info overlay completely by pressing Ctrl+I without having to cycle through the options as outlined above, but I find it easier just to press I a couple of times to remove it.
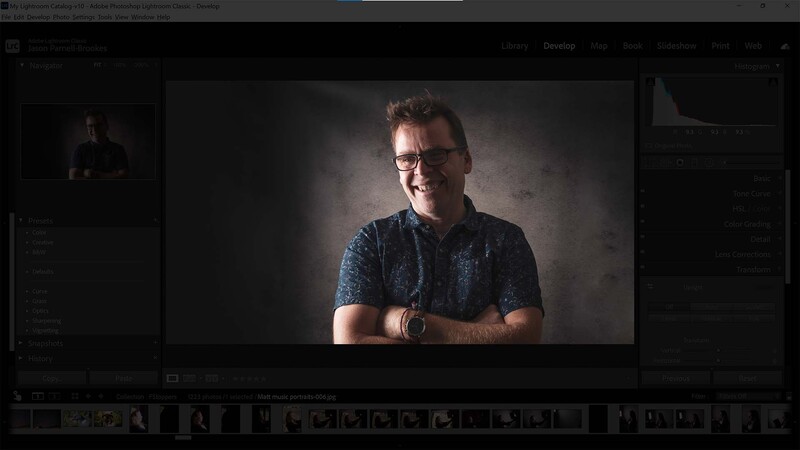
Lights Out Mode
Lights out mode dims all Lightroom controls around the photo so as to eliminate distraction, in its first state you'll see the controls have darkened significantly but are still visible
Lights out mode makes it easier to view your photo without disappearing everything on-screen. By pressing L on the keyboard you can cycle through two types of visual overlay which darkens everything around the selected photo, and then fully blacks it out. This can help judge colors and tones within the photo, especially since the busy surrounding tools and features in the Lightroom Classic window can distract from the details in the shot.
Lights out mode's second state darkens all Lightroom controls to black. It's a useful way to analyze the photo without interference from other colors and shades
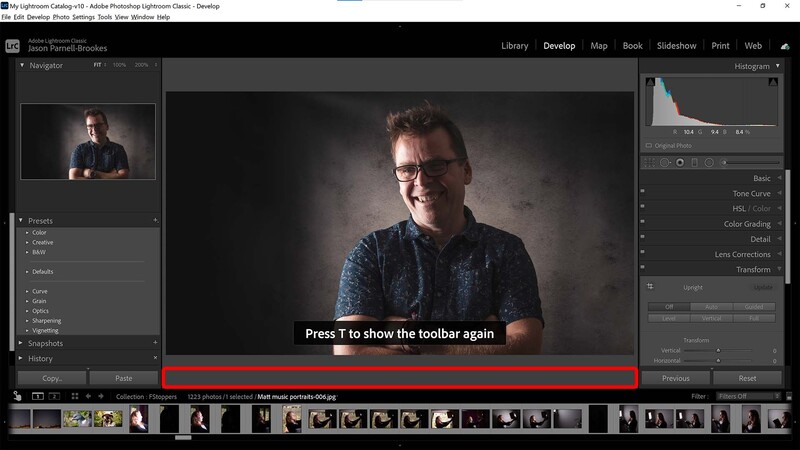
Hide/Show Toolbar
Press T on the keyboard to show or hide the toolbar. The toolbar sits underneath the photo and shows information such as star ratings, flags, tags and more
The toolbar sits below the main image view in the center of the Lightroom window and displays details such as various types of image views, image ratings, color labels, tagging, and more. It's a useful quick view of settings applied to the photo but it can take up a little central real-estate. So press T to make this disappear. If you need it again, press T and it'll pop right back up.
Hide Filmstrip
Make a little more vertical space for tall images by hiding the filmstrip at the bottom of the window, this may help if spending time working on one particular photo
The filmstrip at the bottom of the Develop module is fantastic for quickly accessing different photos in the collection you've got selected, but it does take quite a large chunk of vertical space from the Lightroom Classic workspace. You can remove it quite quickly though, just press F6 to make it disappear. Be aware that some computers (especially Windows-based machines) have an Fn (function) button that you may need to hold down first before pressing F6 in order to activate the button as a shortcut on Lightroom.
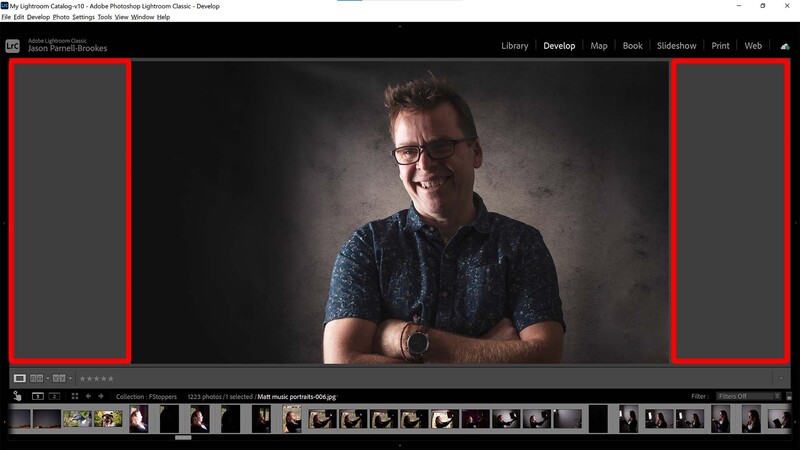
Hide Side Panels
Clear some horizontal space by hiding the side panels using the TAB button on the keyboard. This mode is especially helpful for panoramas and wide-cropped photos
Hiding the filmstrip is great for vertical images that need that extra height, but for those horizontally-oriented photos or panoramas, you might just want a little more width. The organization and editing panels on the sides can be hidden and shown with the TAB button on your keyboard.
Hide All Panels
To eliminate all distractions within the Lightroom Classic window press Shift TAB, this hides all the side panels, the top menu bar, and the filmstrip below
There may be times where you want a closer look at your shots altogether but still need the toolbar visible, and you can do this by hiding all the panels. Just as TAB toggles the side panel visibility, so too with Shift+TAB toggle the visibility of all panels. It'll even hide the filmstrip and the menu bar at the top to maximize the size of your photo.
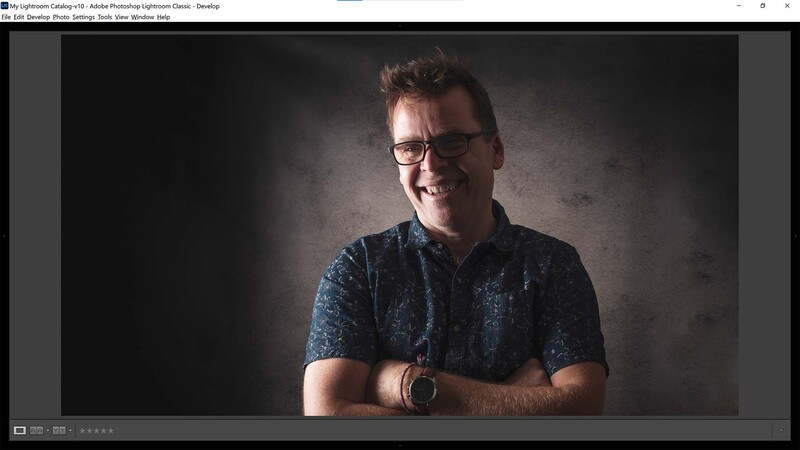
View in Fullscreen
Fullscreen mode (F) shows the selected photo in its entirety with no other options on-screen, whether Lightroom controls or the operating system windows
Though the above picture may just look like I've uploaded the photograph in full, it's actually still a screenshot of the image viewed in Lightroom Classic. To do this you'll need to access full-screen mode. Just press F on the keyboard and your photo will display in its entirety on the screen with no other distractions. If you'd prefer to just hide the operating system window frame and/or the taskbar/dock then hit Shift+F to switch between the three layout states.
Make It Yours
As you can see, there are many ways to remove clutter from the Lightroom Classic workspace, and there are a few more I haven't mentioned here. If you want to take a look at all of the shortcuts for yourself head to the Help drop-down menu and look for the option to display shortcuts. Alternatively, call it up at any time with Ctrl+/ (Command+/ on a Mac). Hopefully, this will keep your work area much cleaner and make it quicker and easier to study your photos during the editing process. Got any other tips? Share them in the comments below.
Main image (made in part) by Brett Sayles via Pexels
Not particularly useful tips. It would have been better to write an article on how to optimise its performance. It’s.a piece of software let down by its performance. It can bring almost any machine to its knees. It needs a fundamental review of its architecture by Adobe .


4 Comments
Not particularly useful tips. It would have been better to write an article on how to optimise its performance. It’s.a piece of software let down by its performance. It can bring almost any machine to its knees. It needs a fundamental review of its architecture by Adobe .
Very helpful ... thanks.
replace the first tip with SHIFT+F (maximize LR toggle)