
Have you ever had an inkling to give self portraits a go? This can be a great way to improve your photography and boost your confidence, but how do you get started? Here's a few tips when it comes to shooting self portraiture!
Self portraits have always been an integral part of art and photography, from the iconic paintings of Frida Kahlo who used self portraiture to express the pain she felt inside, to photographer Cindy Sherman, whose photographs depict a variety of personas and clichés she takes on as she poses for herself. Most photographers will at some point wander into the self portraiture realm because it's a part of natural self discovery, just as you generally would try at least several genres of photography before finding the one that suits you the most.
I started doing photography through self portraits without knowing anything about photography or cameras, but as I've grown in my experience, I wanted to share a few technical tips to get you started with self portraits. It's impossible to teach someone to "see", but I can advise you on ways you can photograph yourself and the things you should consider when coming up with your self portrait concepts.
Why Shoot Self Portraits?
Firstly, self portraiture sessions are a good way for you to walk in your clients' shoes, if your focus is on social photography. Putting yourself in front of the camera will allow you to feel what your clients might feel, and as such you'll begin to find ways that help them relax and enjoy your sessions even more. It's not a one-size-fits-all scenario, however, but being able to understand insecurities or fears your clients might have running through their heads will let you empathize and find ways to alleviate these feelings.
Secondly, it simply is a good way to practice portrait, boudoir, or art photography. Think about this, you do not need to source a model nor make any commitments. You simply set some time aside at your convenience to practice things that you may feel you are lacking in. For example, one day when you're working from home or at your studio, the light might just fall in the perfect spot and instead of letting this opportunity go by, you can simply grab your camera and start shooting. Don't waste these opportunities just because you might not have anyone around to help you.
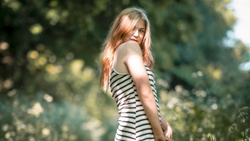
But, more importantly, self portraiture is a good way to boost your own self esteem and to express your thoughts and vision in a very safe and controlled environment. You might have body confidence issues, or you may want to improve on your body language or facial expressions. There's nobody around, unless you shoot in a public area, so you don't have to place any pressure on yourself. Worst case, you simply delete the files and move on with new ideas to try next time. Think of these self portrait sessions as a therapeutic way to create art solely for yourself, until you are ready to share it with the public. However, don't feel obliged to. There are plenty of artists and writers who have created content purely for themselves and not for public consumption.
What Equipment Do You Need?
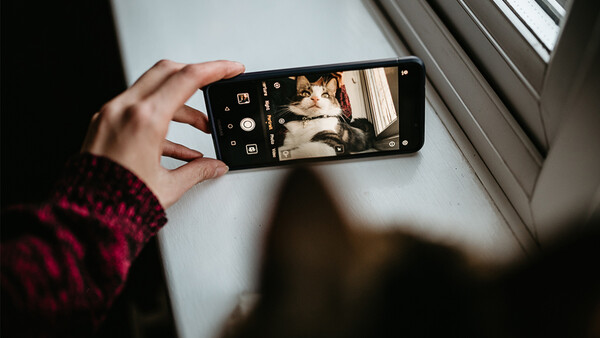
Let's start with the simplest scenario. Most of us own a smartphone with a camera, so you can start off there. This is exactly how I began doing self portraits before committing myself to upgrading my equipment. Nowadays smartphones have cameras that produce images with good enough quality to be uploaded on the web or even printed. You can use either the front or rear facing camera; generally, the rear facing camera produces higher quality images compared to the front facing camera, which is used for making video calls or taking selfies.The upside of using a front facing camera is that you'll be able to see the image on the screen as you are composing it, which can be helpful when you are posing yourself.
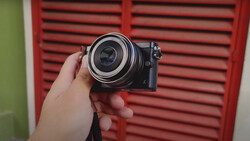
Next step up would be a simple point-and-shoot camera, a bridge camera, a DSLR, or a mirrorless one. Ideally, you'll also want a tripod for your smartphone or camera. There are plenty of affordable options out there, especially if you don't intend to use your camera in harsh weather conditions, but make sure you get yourself one that is suitable for the type of locations you intend to use and for the type of camera you use to support its weight safely. Although, I have a few tripods and stands myself, the urge to shoot self portraits comes at random and in short bursts so I tend to use whatever I have on hand!
How Do I Shoot?
There are a few options for you to choose:
1. Simply Photograph Yourself Using Different Angles and Mirrors
The simplest way to photograph yourself may also be the hardest way. You can use mirrors or different reflections to photograph yourself without using a timer or anything else. This is definitely not the easiest way to create a well composed image but technically it is the simplest one because you don't need to add anything to your camera, you don't need to set a timer, you simple press the shutter. Bear in mind different lenses will have their own unique limitations.
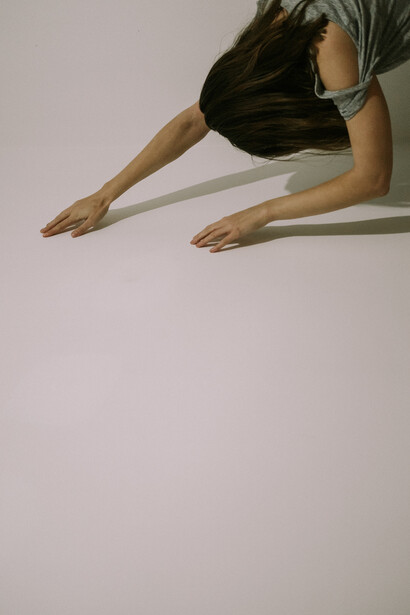
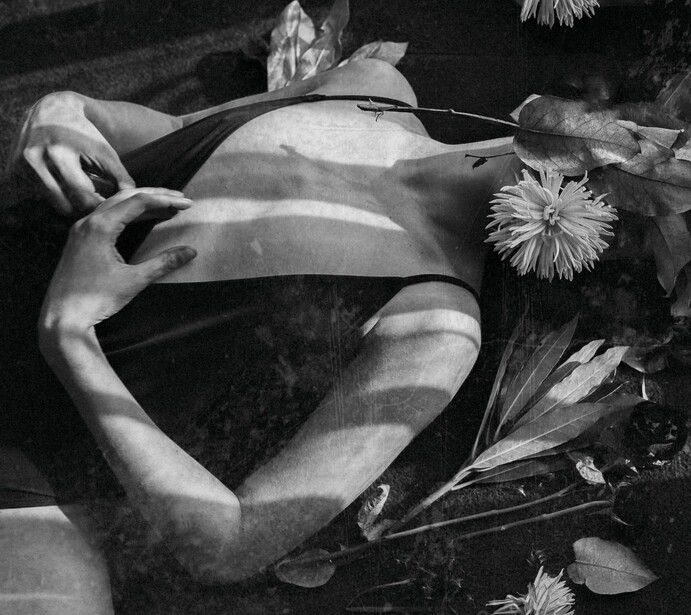
In this photograph below, I used my bedroom mirror. I extended one arm and photographed myself with the other, all the while trying to not get my camera or my body in the mirror reflection. Mirrors and windows can provide you with a great source of inspiration and they tend to be more helpful in allowing you to hide the camera you are holding so as long you choose the right angle for it.
2. On A Timer
Majority of smartphones and cameras will allow you to use a timer function. What you do is set how many seconds before shots are fired, which is called "self-timer delay", how many shots are fired per each session, and how many seconds pass between the shots. Some cameras allow only one shot to be taken per each timer, which can make shooting more complicated but you can still work with that regardless. Normally, I use my Nikon D750 and I set 10 second timer which then fires 5 consecutive shots, with 2 seconds between each shot. This allows me enough time to get in my position and 5 shots give me a good variety of slight changes to make in my pose.
If you are using a simple timer function on your camera, you can use auto focus or do it manually. The easiest way is to place an object, such as a toy, a chair or a pillow, in the exact spot you intend to pose in and focus on that. After you've done it, you release the shutter, get in your position and quickly remove the said object from your frame, or if you focus on any props, you can then incorporate those in your shot.
3. On a Timer With a Remote Release
So, maybe you tried the timer option but still want to have more control over the image? You can always purchase a remote release for your camera, which come wired or wireless, depending on your camera model. Although, this gives you greater control in terms of focusing, don't forget that you can still miss the focus if you're not stood in the plane of your focus point or points. Each camera has different types of focusing methods so make sure you review those to find the most suitable one for you.
With a remote release you can also decide if you want to use it to start the timer or you want the camera to immediately take a shot as you press the button on your remote. Undoubtedly, it is easier to use a wireless one as it gives you more flexibility but either way make sure you know how you want to hide it from the photo.
4. Use Your Smartphone as a Remote Release
You can use your smartphone in a similar way as described above. Certain cameras will have wireless connection that will allow you to pair it with your smartphone. You will need to download the appropriate app for your camera model, and it will allow you to use your smartphone as a remote release. Some apps will allow you to use your smartphone as a live view, some will allow you to make changes to your camera settings but bear in mind not all of these are free. However, if you do have a wireless function on your camera, it generally will work out cheaper than buying a remote release.
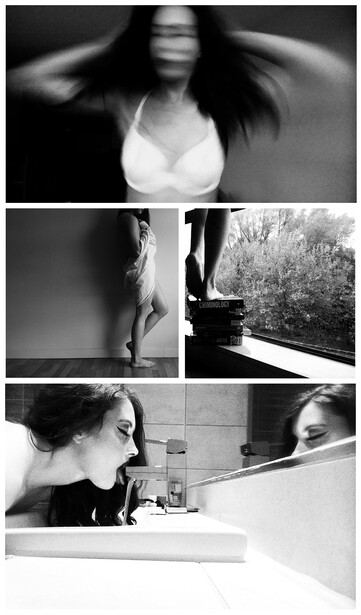
These are just a few ideas to get you started in shooting self portraits. Personally, I don't tend to chase perfection in my self portraits and even though I often miss focus or cut parts of my body off in the frame, I find that these types of images sometimes speak more to me than the technically correct ones. For me it's a way to release tension and creative frustration because I can do it in the spur of the moment.
I'm confident that there are other ways you can photograph yourself and if you have any suggestions, please share it with the rest of us so we can inspire one another! Will you give self portraits a go?


3 Comments
Great story thanks. I've spent a fair bit of time doing self portraits, often because I'm the only model available!
I use my tripod mounted DSLR rather than smartphone. The hardest thing is lining up the image so I like your simple idea of using a mirror. Shooting tethered is of course also good, though it's not the simpler philosophy you're describing.
I was running a public forum 'The Rise of Cyborgs and Post Human Beings', and wanted some publicity shots so I borrowed a projector from work. Spent ages getting a shot that was okay.
Then the newspaper photog and redid the almost the same shot but he had the obvious advantage that he could pose me properly.
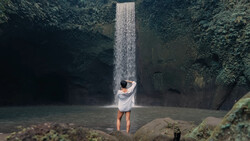
I´d love to know more about self portrait in landscape photography, when I have to be far from de camera. I saw many pictures like this and I kind of confused about the technics about how it can be shooted. Thanks a lot.
I haven't done many shots like that where I am really far away but for that, maybe a good option would be to use a remote release or phone app, walk as far as the distance allows for the remote (this needs to be tested for your particular shot), and release the longest timer you have and most shots you can take, that way even if you lose several shots that are being fired while you are getting to your position, the last few should get you, and of course use a wide angle lens for a more dramatic landscape shot so you appear even smaller in the image.