
On August 21, hundreds of thousands of people in North America and millions watching live at home will be experiencing a once, maybe twice, in a lifetime celestial opportunity. A total eclipse of the sun. Thousands of photographers will be traveling to locations along the path of totality to get the best possible photographs during the event. Photographing an event like this requires some special equipment so I will go over what you’ll need and some extra tools like the Sky-Watcher Star Tracker Mini (SAM) that can help you take your images to the next level.
Important disclaimer: Do not look directly into the sun without proper protection. Viewing the sun with your naked eye will cause damage to your vision. Viewing the sun through your camera viewfinder will not only cause damage to your equipment but can still cause damage to your vision. Photographing the sun requires some sort of filtering device whether a Mylar DIY sheet or threaded sun filter. Even when viewing the sun through a filtered DSLR it is recommended that you only view the sun through the camera's Live View mode.
Anyone can photograph the sun with just about any camera these days. In fact, you can even use a smartphone paired with a telescope and get pretty good results. Experienced astrophotographers break out all the big toys to get the absolute most from the experience; large 2500mm telescopes connected to heavy tracking mounts driven by specialized software on laptops. For a lot of photographers who want to capture this major event, this is all too expensive, complicated, and heavy to travel with. I am going to explain what you need to get great images of the sun with some of what you probably already own, plus the all important filter device and even an affordable, travel-ready star tracker mentioned above.
Location
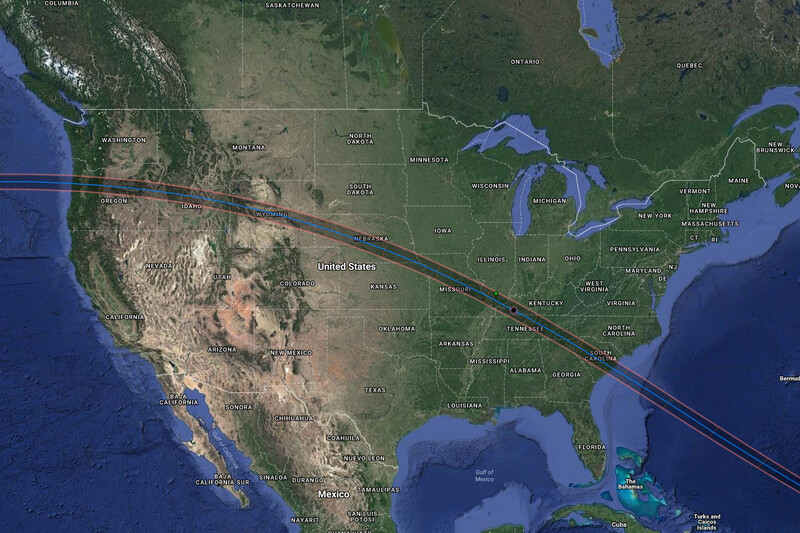
A partial solar eclipse to some degree will be visible from a lot of North America. However, to really enjoy the full solar eclipse you want to be in what is called the path of totality. This is a roughly 70-mile wide band across the U.S. that goes through about eight states: Oregon, Idaho, Wyoming, Nebraska, Missouri, Kentucky, Tennessee, and South Carolina. It may also pass through small portions of Kansas and Georgia at the borders. The absolute best place to find yourself is along the centerline of this 70-mile band. This is where you will experience the longest duration of totality. With less than a month until the eclipse, the vast majority of hotels along this line have been booked for about a year. However for those willing to travel a little extra distance there are still options. Here is an interactive map of the path of totality.
Camera
Like I mentioned above your camera isn't the biggest player in getting good images of the eclipse. Pretty much any DSLR will do the trick. Of course, there are ways to use smaller cameras but I’m going to focus on standard DSLR equipment. Getting the most focal length you can is key, so combining a smaller sensor camera like APS-C or Micro Four Thirds with the longest lens you can get your hands on will give the best results. In addition, you want to use something that has Live View mode so you don't damage your eyes looking for the Sun. Even better if it has an articulating screen. Another thing that is important is to be shooting in raw. Like just about all astrophotography, postproduction and getting the most from one or multiple raw exposures is how to bring out all the details.
Lenses
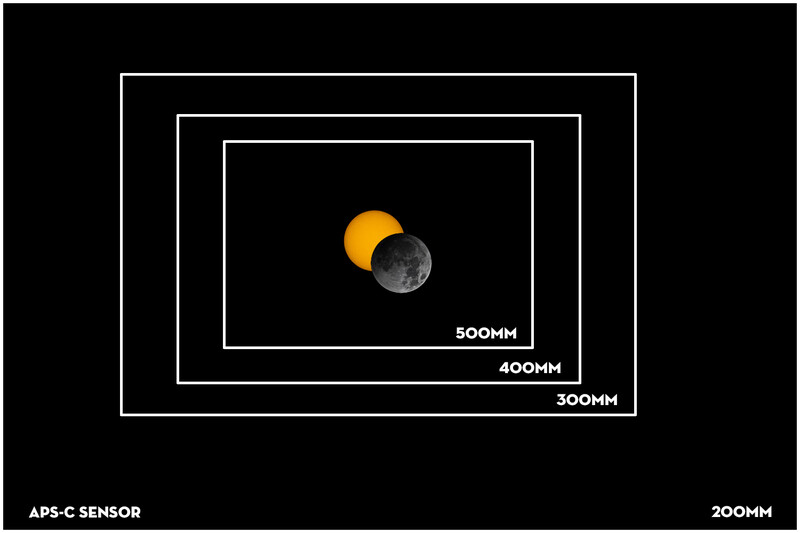
The best lenses to use for capturing the sun really comes down to focal length. The minimum I would recommend is 200mm, but you would be much better off in the 500mm to 600mm range. There are several ways to go about this. For the image of the sun I shot below I started with my Canon 70-200mm f/2.8. Cropping in on the high-resolution image gives you a pretty decent shot, however the sun only makes up a small portion of the full image. If you are planning on capturing the sun’s corona during totality then this will work well since the corona, which is not normally visible, extends quite far past the edge of the Sun. To get the Sun to fill more of the frame I combined the Canon 70-200mm f/2.8 with a 2.0x extender on my Canon 7D Mark II. This gave me a combined equivalent of 640mm. Renting something like Canon 200-400mm f/4 with its built in 1.4x teleconverter or a 1.4x/2.0x teleconverter to use with your existing telephoto lens is an easy and much cheaper solution to purchasing. If you would rather buy something I recommend one of Sigma's 150-600mm lenses. This is a lens I own and have been very happy with. I originally purchased it for the 2016 Olympics in Brazil for its lightweight and small form factor compared to other 600mm lenses. I've used it several times to photograph the moon since, and combined with the 2.0x extender, I can really see some detail on the moon's surface. I plan to set this lens up on a second camera during the eclipse to try and capture the corona during totality in August.
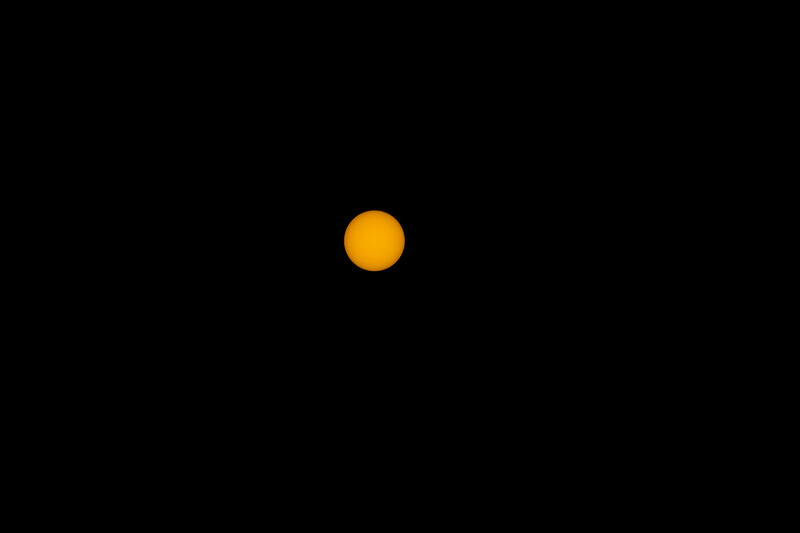

Before: Canon 70-200mm f/2.8 on Canon 7D Mark II; After: Cropped and zoomed in.
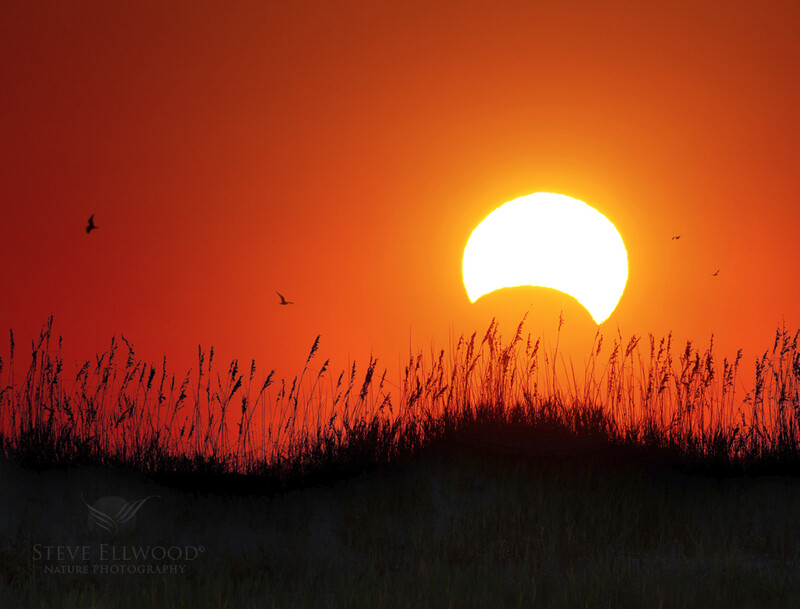
You can, of course, choose to use a wider lens to capture the eclipse if you are interested in combining some foreground features into the photo. This can be a bit more complicated to accomplish and I recommend using an app like PhotoPills to create a detailed plan for where the sun will be during the eclipse. Also, it's important to note that the eclipse will take place for most of the country while the sun is high in the sky. This may make it difficult to compose as part of a scene.
Filter
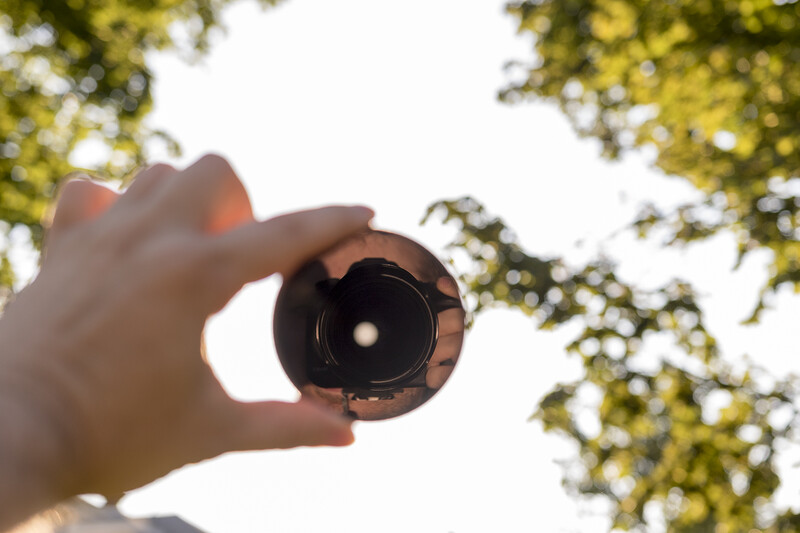
There are a lot of options when looking for filters to use with your DSLR and a quick search on B&H shows items at a variety of prices. Some are made from glass and others optical Mylar film. The easiest and most affordable is to purchase a sheet of the Mylar film and make your own DIY filter either using cardboard or an existing threaded UV filter. Just remember to make sure the film covers the entire lens because just a little light leak is enough to cause damage to your camera. If you have a little more money you can invest in a threaded or even square glass sun filter that is an ND equivalent to 16–29 stops. I purchased the Formatt Hitech 77mm 18-Stop Eclipse ND filter. Just remember to not wait to purchase your filter as most stores are sure to run out the closer we get to the eclipse. Here is a cheap kit that comes with glasses.
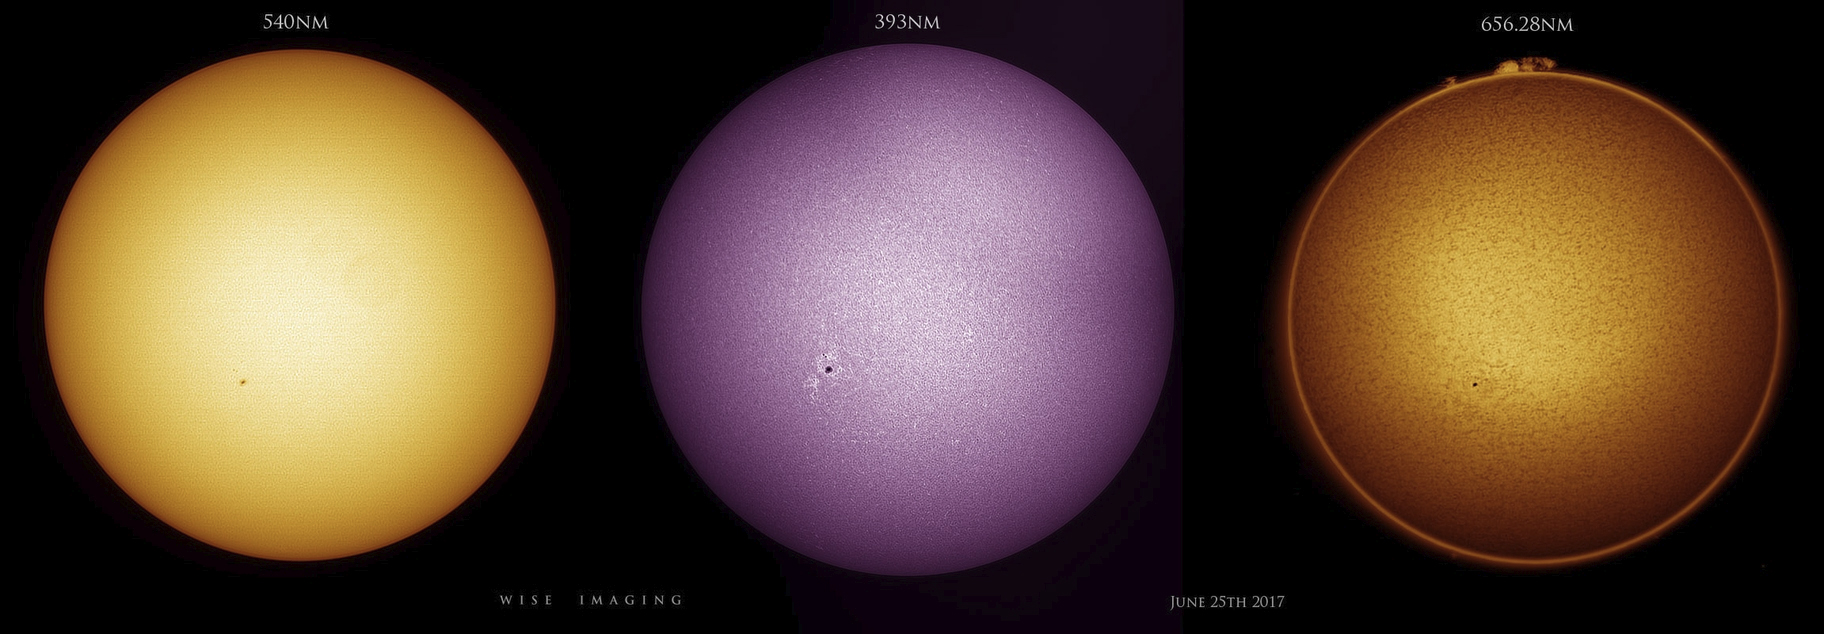
All of these options are what is called white light filters. It is possible to see more information on the sun’s surface using more expensive narrow band filters. With a hydrogen alpha filter, you can see the prominences and churning spicules. A calcium filter will show the faculae and magnetic lines. With devices like these, it is absolutely amazing what just about any photographer can capture these days. If you are interested in learning more about using narrow band filters check out this video by Martin Wise at Wise Imaging. He goes into great detail about how and what he uses to capture amazing images like these.
Stabilization
Since you will most likely be using a long focal length, it is very important to have a sturdy tripod combined with a remote shutter release to reduce as much shake and vibration as possible. Keep your tripod setup low to the ground and don't use its center column. This will even further reduce vibrations. Due to the Earth's rotation the Sun will be rising and moving upward to the right. Even though when we look at the sun it seems to be slow and still, zoomed in at 200-600mm it will quickly move out of your frame. It is important to have a tripod head, preferably a video fluid head, that you can manually track the sun’s movement across the sky. This can be difficult and take practice so be sure to attempt it before the important day.
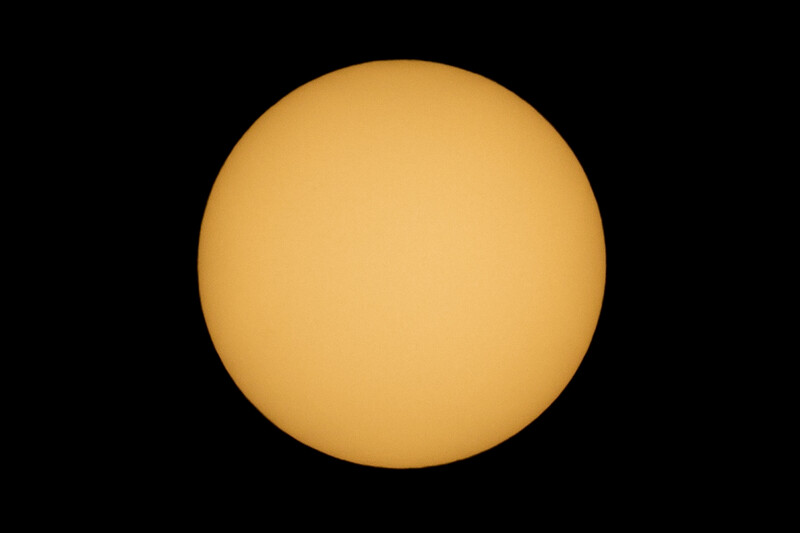
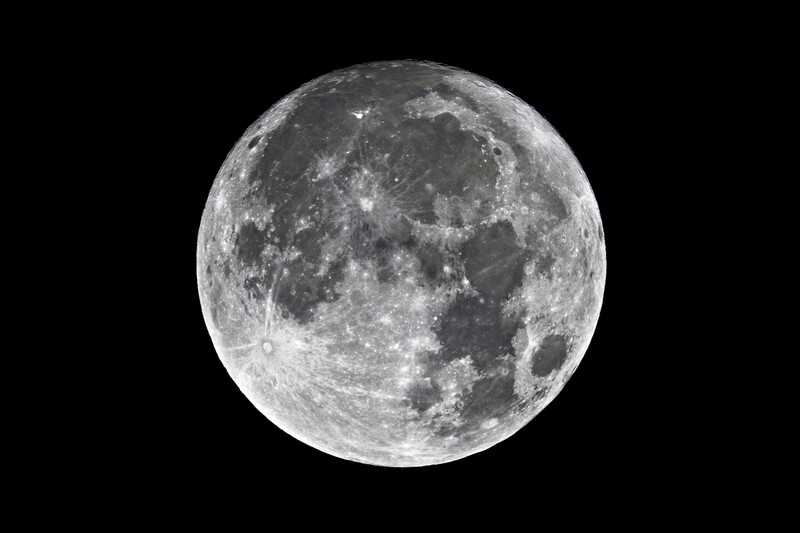
Before: Canon 70-200mm f/2.8 with a 2.0x extender on my Canon 7D Mark II; After: Sigma 150-600mm f/5-6.5 both cropped to show detail.
The eclipse itself will last roughly an hour and a half. The point of totality will only last about 2 to 2.5 minutes. Since tracking the sun’s movement through the sky can be difficult, plus getting the most shots possible during the short period of totality, using a device like the Sky-Watcher Star Adventurer Mini will make the process much easier and give you one less thing to concentrate on. I reviewed the SAM earlier this year and was very happy with the Milky Way shots I was able to get. One of the great features I wasn't able to test at the time of the review was its ability to also track the sun and moon. Since the review, that is exactly what I have been testing and it has turned out to be one of the device's features I'm very excited by.
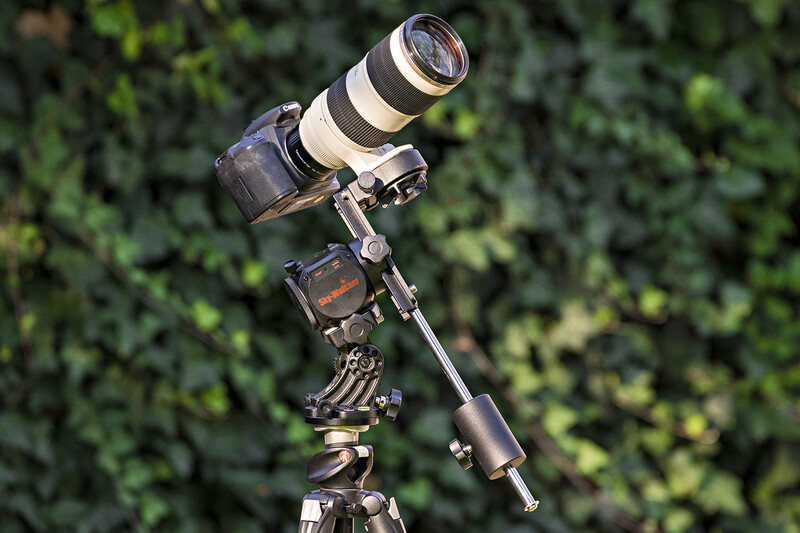
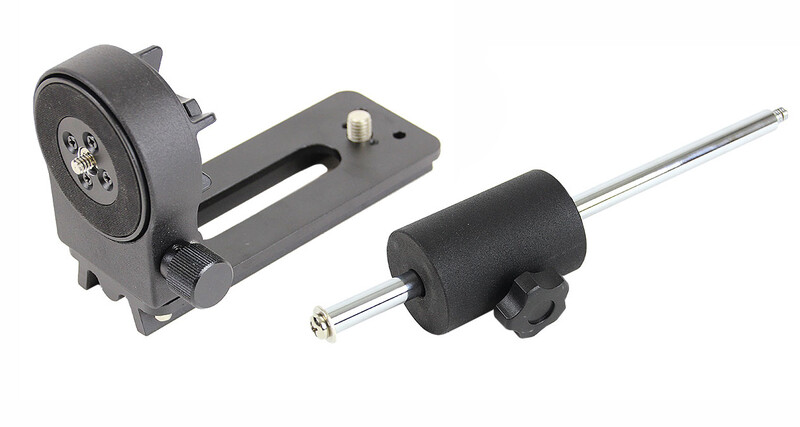
I have set up the SAM with Sky-Watchers' optional DEC bracket and counterweight kit to make mounting my Canon 7D Mark II, 2.0x extender, and 70-200mm f/2.8 much easier and balanced. With less than a month until the eclipse, I might try and see if I can get a filter for my Sigma 150-600mm lens. I haven't tested it yet but going by the weight I think it may be possible to mount this lens on the SAM using this setup. Using the tracker, I plan to attempt to get a lot of different exposures building up to totality and then composite them into a much larger image. This is something you could obviously do without a star tracker, but while shooting the sun in my backyard I quickly realized it would take a lot more patience and skill to do it with such a large focal length. With the SAM setup, I was able to almost completely automate the process. I could let the SAM track the sun and manually press the remote shutter as often as I wanted or have the camera triggered by the SAM similar to a time-lapse. This is a huge advantage and exactly what I plan to do. The hardest part to using the SAM to photograph the sun is daytime polar alignment. It takes a little more work since you cant actually see the North Star, but with a compass or app on your phone you can get pretty close fairly easily.
I will be traveling from Boston down to South Carolina for the eclipse so the lightweight and easily disassembled SAM is a perfect solution for any photographer traveling. In my previous review, I mentioned how the entire device could be packed into a hiking pack not adding much additional weight. In fact, I plan on riding my motorcycle down to South Carolina with all my camera equipment in one medium sized bag. If you are an experienced astrophotographer looking for a smaller more travel-friendly solution for your eclipse trip or just a photographer who wants to increase the quality of his eclipse photos, I highly recommend either of Sky-Watchers Star Adventurer products but especially the Mini.
Experiencing a total eclipse is something you might only get one chance at. Whether you are photographing the event or just watching, it's important to just enjoy and take in the view. I remember seeing a partial eclipse as a child and how big of a deal my school made of it. Every student was outside with special glasses looking up at the sky. The shadow descending on us was such a cool thing to see. I look forward to getting this chance to see my first total eclipse. Let's hope for clear skies!
Have you photographed or have an experience with a solar eclipse? Post your pictures and share your stories in the comments.


Join the Fstoppers community for free
-
Post comments and join in the discussions
-
Browse the site ad-free
-
Share your work and get featured in the community
-
Compete in the photo contests for fun and prizes
5 Comments
I'm hoping for clear skies also.
For wide angle, filter or not to filter?
If you are shooting the eclipse before and after totality you always need a filter. If you just want to shoot totality, when the sun is completely covered then you can use no filter.
At 10mm wouldn't it be the same solar effect on the sensor as any other day? With the sun in frame. With a filter you can't catch foreground without compositing
Wide angle answer.
http://www.kgw.com/mb/news/eclipse/no-eclipse-filter-needed-for-iphone-…