It’s summer now, and that means we have good temperatures and conditions to go out and shoot. Sunrise and sunset are especially great moments to get good photography conditions, not only because you can catch incredible colors but also because the light can be too harsh during the day.
How can you get the most out of the sunrise and sunset? I’ll give you all you need to know in this article.
Shooting Into the Sun
Preparation
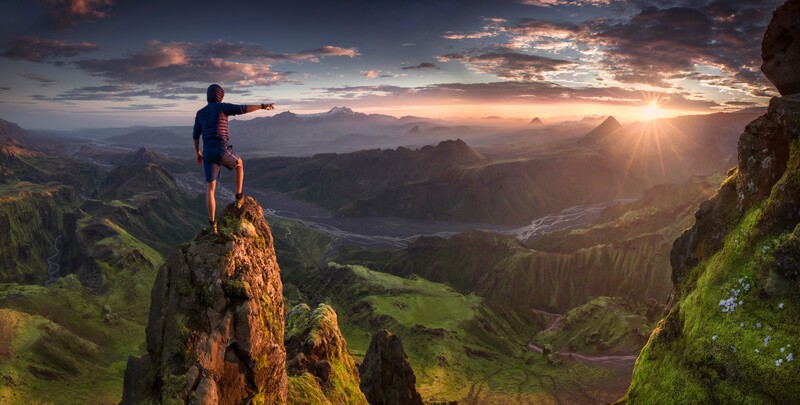
You need to prepare your locations for sunrise or sunset shots. If you want to shoot a great view, knowing the direction where the sun will rise or set is important. When you’re high up a mountain and want a wide shot with a lot of mountain layers, I recommend having the sun inside the frame. You can position the sun in the middle or on the side. If you choose the latter, I recommend finding something in the composition to balance the sun, as it will be such a powerful subject.
First contact, Iceland
Shooting
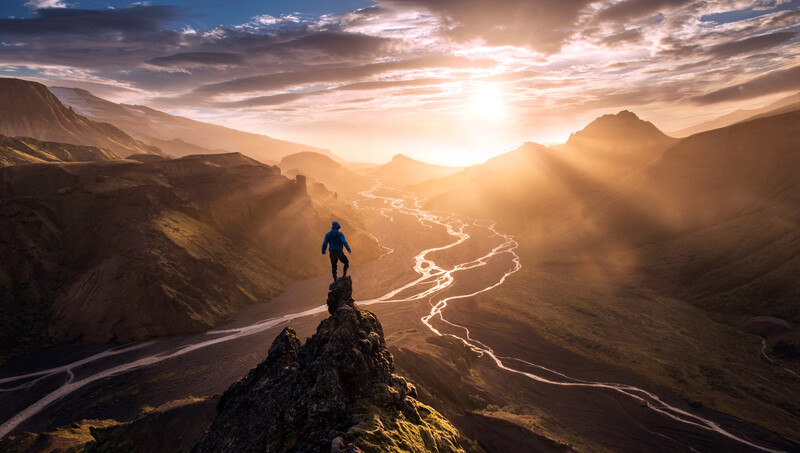
First, make sure you shoot in raw as opposed to JPEG. This way you can make use of your camera’s full dynamic range, which is important to create a well exposed image during editing. When you shoot into the sun, it’s also important to check the exposure settings because your image can quickly become overexposed. When there’s a thin layer of clouds around the sun, this can be even more difficult compared to having no clouds directly around the sun. My advice is to take photos at different exposure settings so you can choose the best exposure in post-processing or combine exposures if the light was really difficult to handle. Use a tripod for this so the exposure blending will be easier.
Blinded
Shooting From Ground Level
Preparation
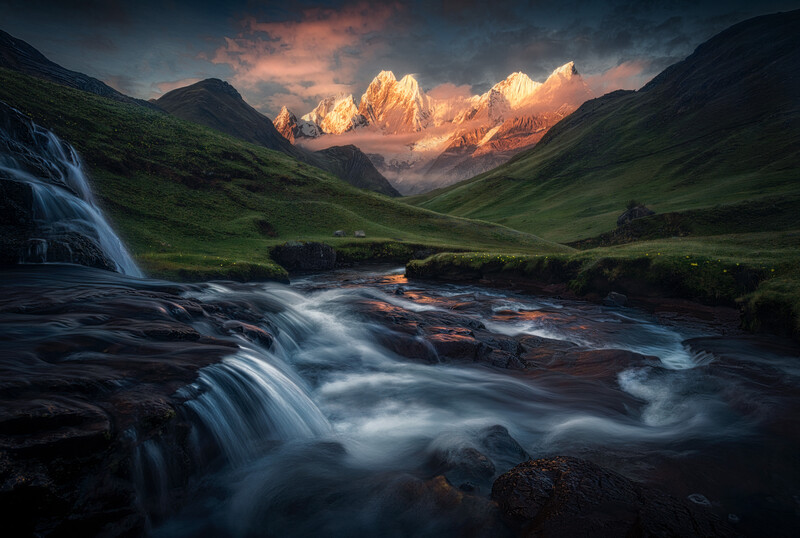
When you shoot from down in a valley with a mountain in the background, I recommend having the sun rise from behind you so the mountain will catch the first or last light. This can be especially powerful when you have some water in front of you that will reflect the light.
To the bright mountains, Peru
Shooting
The exposure is easier to control in these conditions. Set the right exposure at the brightest parts first so you make sure none of the highlights will be overexposed. If you have dark objects that feel underexposed, you can always increase the exposure time just for those dark objects and have the option to either do exposure blending or go with one exposure.
At sunrise and sunset, you usually have a lot of contrast because the light source is very low, and when you shoot into the sun it can be an even greater challenge to get the exposure right. The first thing you have to do is increase the shadow details by a good amount until you can see all of them. Then decrease the highlights until you can see all the details.
You’ll also want to enhance the contrast between the warmer colors and the cooler colors. Therefore, I recommend adding some blues to the shadows and the midtones and adding some warmer colors to the highlights.
Bonus Tips: Shooting at Sunrise and Sunset When the Weather Doesn’t Cooperate
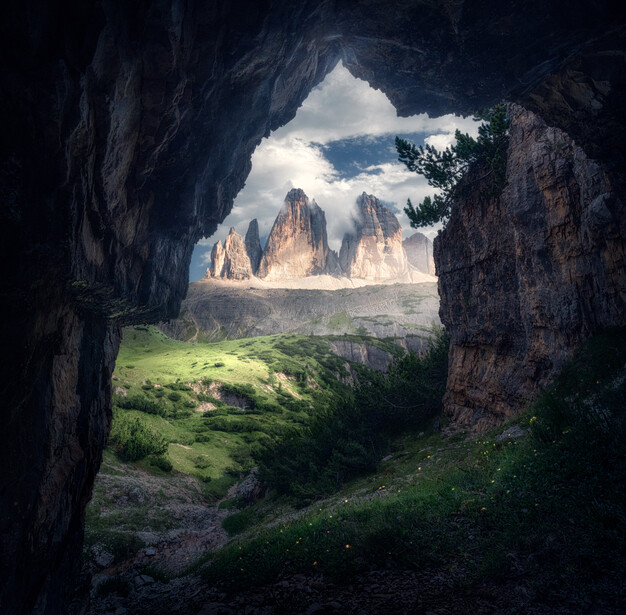
During sunrise or sunset, the light or colors may not be as powerful as you had hoped. This can be due to too many clouds or a lack of clouds. In those cases, I recommend shooting outside the so-called golden hour. Having the most crazy colors in the sky doesn’t mean you’ll have the best photo or mood. First, there are also colors in the landscape, and second, it’s all about the mood.
In the case of this photo in the Italian Dolomites, I could already see that the sun would disappear behind a thick layer of clouds a few hours before sunset. The light was already pretty soft and I liked the mood of the late summer afternoon.
The cave in Dolomites
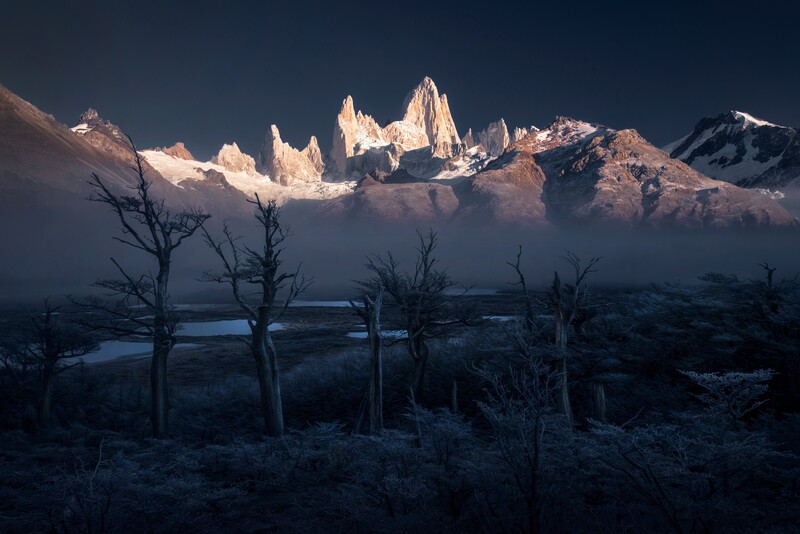
In this case, I was aiming for some incredible sunrise colors looking at Fitz Roy and Cerro Torre in Patagonia. While the actual sunrise didn’t create any special colors due to a layer of clouds on the horizon, later when the sun was higher it broke through the clouds and created some really soft light on the mountains.
In both cases, it was important to stay true to the actual conditions in post-processing. I still recommend making the light warmer, but don’t overdo it and try to make it look like an early sunrise or late sunset.
Have some photos from your last vacation that could use some editing? Now is the perfect time to download a free trial of Luminar 4 and give your images a creative new look while staying safe at home.
Thanks for sharing Max, been a fan of your amazing work for several years. I'm particularly impressed by your tones around the sun in the First Contact, Iceland shot. I always find it difficult to balance the sun with the surrounding area. Can you offer any tips on doing that cleanly? Also do you tend to blend your exposures manually or do you let the software do most of the work?
These photos are awesome, but you missed the hardest step in your article (especially during summer): waking up at a ridiculously early hour to travel to your destination >_>


5 Comments
Thanks for sharing Max, been a fan of your amazing work for several years. I'm particularly impressed by your tones around the sun in the First Contact, Iceland shot. I always find it difficult to balance the sun with the surrounding area. Can you offer any tips on doing that cleanly? Also do you tend to blend your exposures manually or do you let the software do most of the work?
Hello? Is this thing on?
These photos are awesome, but you missed the hardest step in your article (especially during summer): waking up at a ridiculously early hour to travel to your destination >_>
Stunning work and thank you for the tips. I know I will never reach this level of skill, but I love looking at your works.