
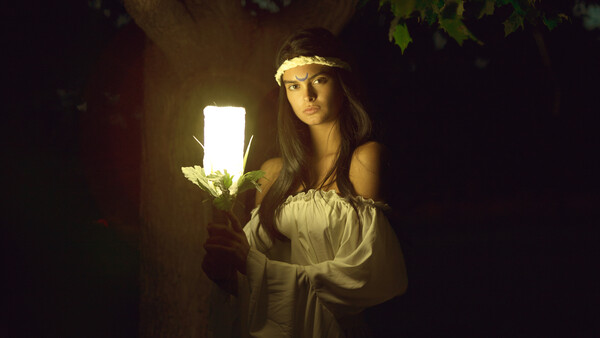
Who knew you could get beautifully lit images with nothing but a flashlight? In this week's lighting breakdown, I'm going to show you how I created this series with nothing but a flashlight and a bit of crafting know-how.
After watching the TV series "Outlander," I was inspired by a particular sequence in the first episode that featured a ceremonial dance around a ring of standing stones in the Scottish highlands at dawn. The lighting was particularly lovely and immediately made me want to try something similar. I'd also recently re-read the book "The Mists of Avalon," and I was dying to create a mashup and put my own creative spin on the final product.
I wanted to use the sequence from the TV series for inspiration, but I put some restrictions on myself: I was going to be working on my own, with just the model and myself, so I wanted a setup that would be as simple as possible. In the past, I've faked candlelight with a flash (which was not easy), but I wanted my model to be mobile for this series so we could catch some motion in her costume, something that isn't possible when you've got to carefully place the gelled flash to mimic the spread of candlelight. I also wanted to use one light, because I wanted to prove to myself that a beautiful photograph could be created with any light source.
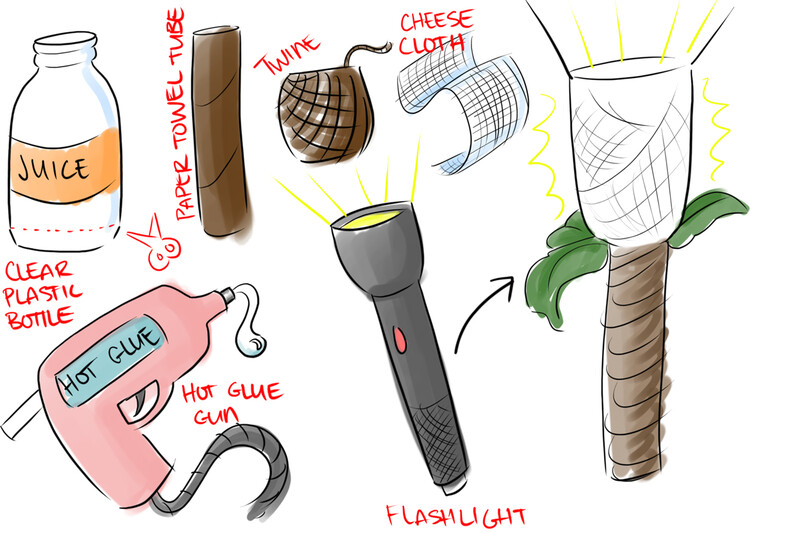
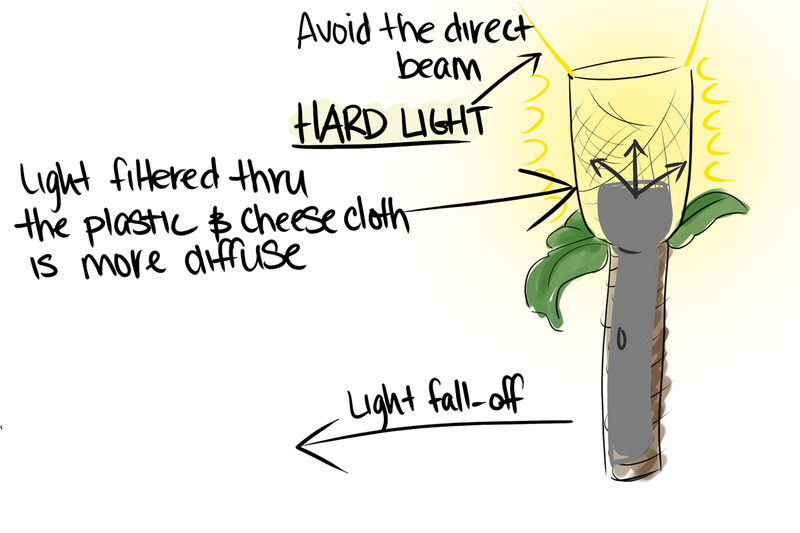
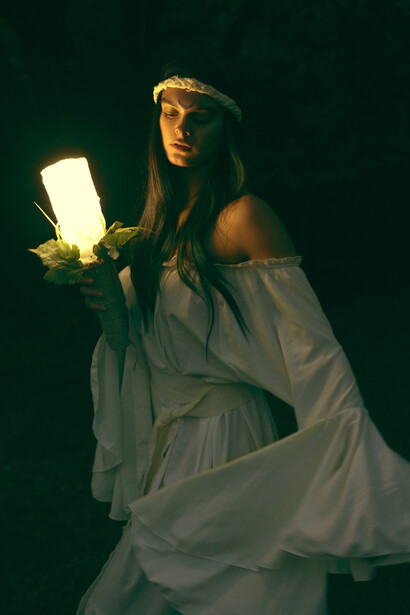
The lanterns used in what I'm going to call the "druid dance" featured in the TV show were the perfect solution. This would allow me to use a flashlight as the key light while also diffusing the light source enough to be flattering on my model, which was important to the final effect. To create the lantern, I cut the bottom off of a large juice bottle big enough to fit the handle of the flashlight. Using hot glue, I attached a cardboard paper towel roll to the bottom of the the juice bottle for a handle that would hide the flashlight. Cheesecloth was wrapped a couple of layers thick around the clear plastic, secured with hot glue, and sprayed with several coats of liquid starch to hold its shape. Then, I used hot glue to stick twine to the handle and secure some leaves to the lower part of the bottle. This took no more than an hour of work, and once it was dry, I turned on the flashlight and slipped it into the lantern, giving myself a believable light source that diffused the light and fit with the theme.
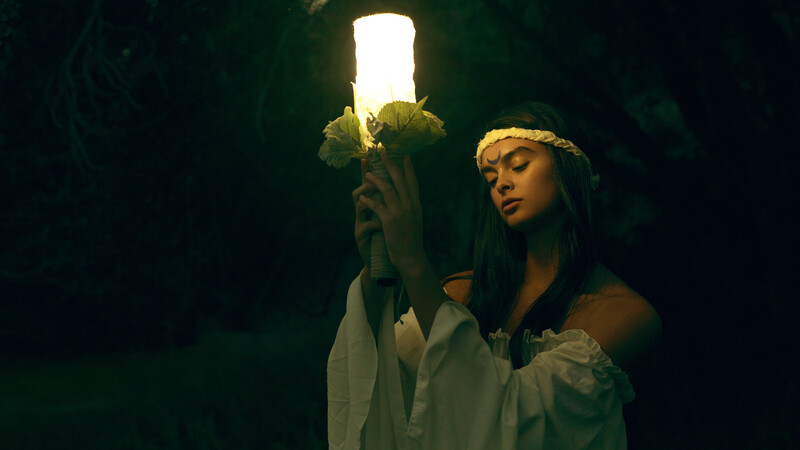
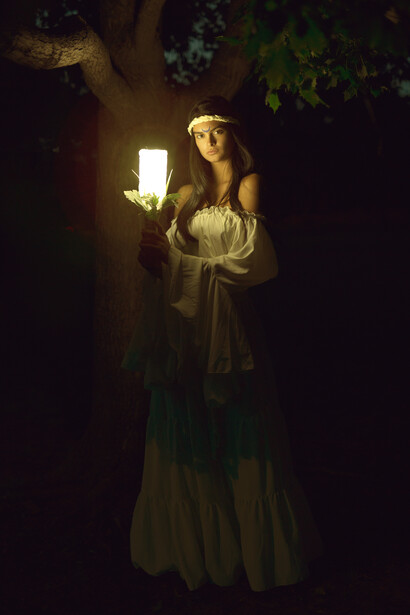
On location, the trick became balancing the light, which was surprisingly bright in the dark, with the darker background, because I wanted to keep hints of the environment in the frame. This took a bit of experimentation, but having the constant light source made it much easier that it would have been if I'd needed to experiment with a flash. The final shutter speed was fast enough give me only a bit of motion blur while allowing in just enough ambient light not to lose the environment entirely. I'm not going to share the final settings, because those would be dependent on the amount of ambient light and the power of the flashlight, which would be different depending on who was shooting, what time in the evening or morning, and what flashlight they used.
If you found the making of these images inspiring, I hope you'll try your own creative take on using just a flashlight to light your images and join the Flashlight Photo Challenge! If you win, I'll write an article all about you and how you created the winning photograph. To read more about the challenge and submit, follow the link!

Join the Fstoppers community for free
-
Post comments and join in the discussions
-
Browse the site ad-free
-
Share your work and get featured in the community
-
Compete in the photo contests for fun and prizes
10 Comments
Stupid question: why not use a real lantern?
maybe they didnt have one..
Because these photos were created for "The Flashlight Photo Challenge"
Because I wanted to use a lantern inspired by the ones used in the show
Because modern lanterns didn't exist in medieval Europe
;)
the end result with grey shadows leaves something to be desired. the lighting is not what id do. I never did images like this. just weddings but I would probably use a large strong lantern right at the edge of the image on the left and let that be my main light. then do a picture of the lantern and PS that in as if it was the item that was lighting.
theres just not enough light in the image and everything is with color noise. it doesnt look good. the shadows are green and trying to bring them up doesnt help.
The photographer hit her target by getting an interesting and intriguing photograph with basic gear and lighting. Your suggestion immediately complicates the process past what was intended. The rest if just your opinion on how much light should be in a photo.
I think these are lovely shots. Focus seems off in some of them but a sharp image isn't always necessary.
mostly that there isnt light which causes too much color artifacts and color shifting. like the green color cast. it needs a bit more light imo.
If that's the way you would approach it, that's totally fine. It's not what I was interested in for this series, though.
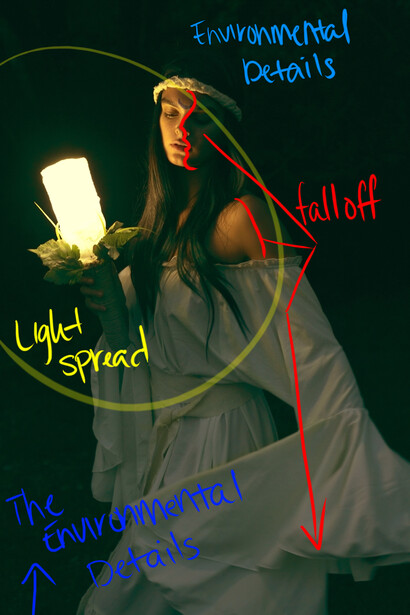
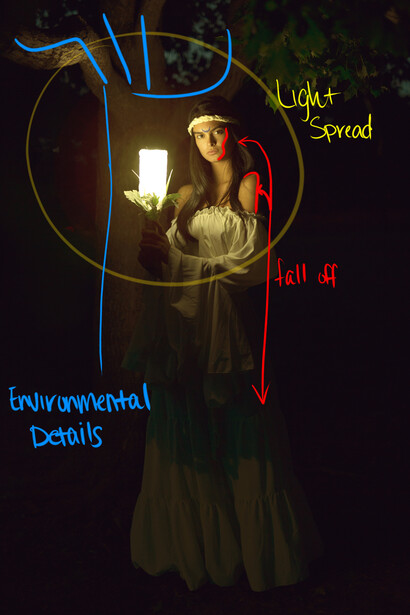
With your approach you'd end up with light in places it doesn't belong, and a light spread and fall-off that aren't proper for the supposed light source. I didn't want to deal with that kind of post-processing. In this circumstance, I don't need to PS anything. I'm happy with the exposure, the noise, and the color. They feel "real" to me.
It's okay that we would do things differently. That's what makes the art of creation so much fun ;)
" It's okay that we would do things differently. That's what makes the art of creation so much fun ;) "
of course.
I do agree with his assessment of the color and shadows. Concept and posing is cool though.
For me the light is too bright, my eye is drawn straight to the light and not the model, was it not possible to make the light look more like a candle?