
Too often portrait photographers obsess with key and fill lighting, and forget about the light that illuminates the background or rear of a subject. In this piece I discover the power of using the back light as my main light source.
If you've ever used the pop-up flash on your camera you'll know that there's more to lighting subjects than just taking them outside and photographing them under the sun. In fact, most portrait photographers focus on getting a good main (or "key") light first by blasting their subject with a flash gun in order to correctly expose their subjects.
While the pop-up flash is a little unflattering, the method of lighting subjects from the front is probably the most common way of lighting portraits, and can be flattering when combined with diffusers. However, few photographers make it through the maze of off-camera lighting to discover just how beautiful a back light can be. When I talk about a back light, I'm referring to any lighting that illuminates the background, or the subject from behind. So let me put my argument to you for using the back light as your main light source, and show you how I approach it to create elegantly balanced portraits.
Back Lighting Enhances Shape and Form
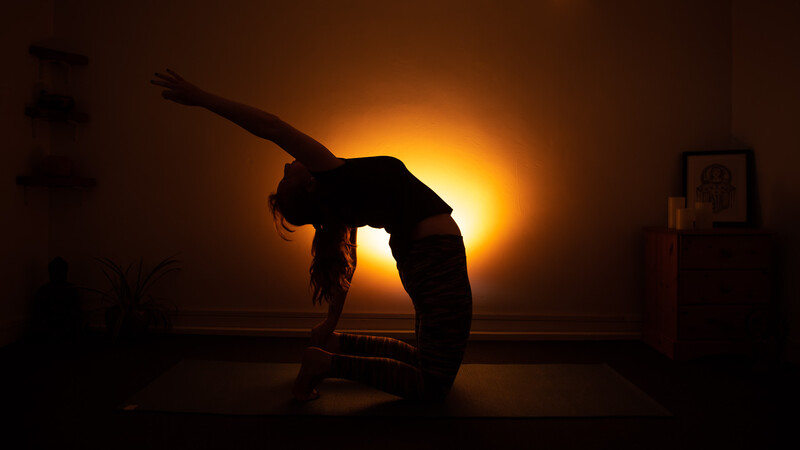
Sometimes I like to highlight form and shape by placing a flashgun behind my subject to light the wall. It's with this flash of light that I can then create a silhouette. Similar to playing with shadow puppets my viewers are now less focused on the features of my portrait subject and their clothing, and instead pay attention to the outline which is especially good for action-based postures.
How Did I Make This?
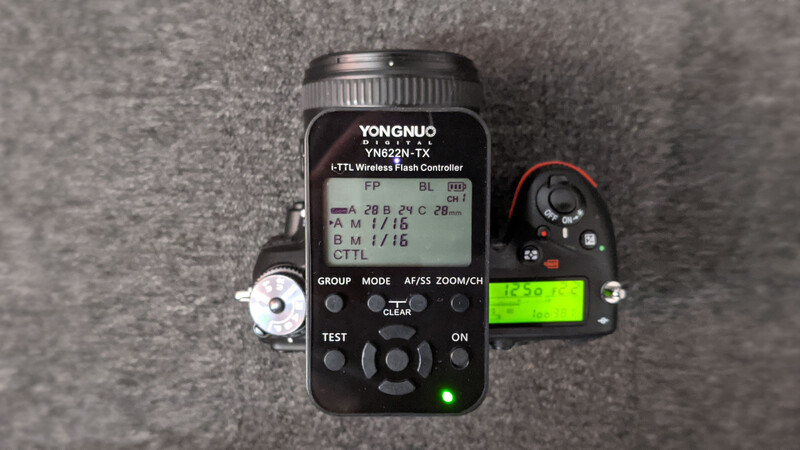
I used a Yongnuo YN685 flashgun with a Yongnuo YN622N wireless trigger set on a block, hidden behind my subject. I shot handheld with my Nikon D750 set to manual mode at: f/2.8, 1/1000 sec, and ISO100. I engaged high speed sync on my Nikon (called Auto-FP) to ensure the flash worked with such a fast shutter speed. Without doing this, only one half of the frame would've been lit.
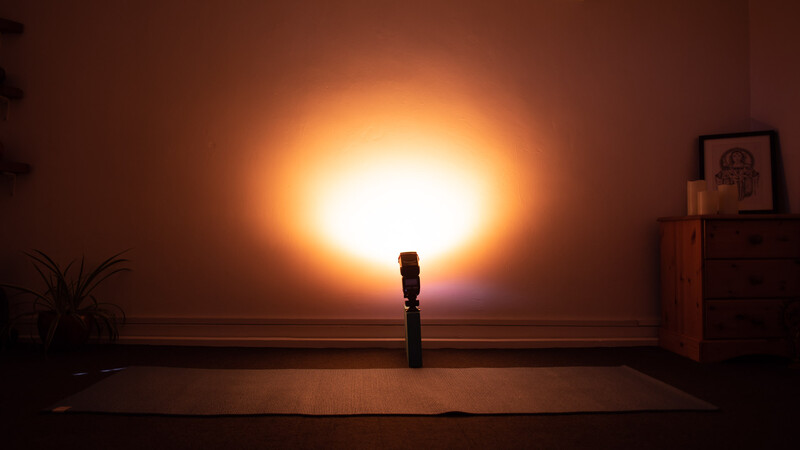
I also placed a full CTO (color temperature orange) gel on my flashgun so that it would give a nice warm, orange glow when bounced off the white wall behind. By aiming the flashgun at the wall and bouncing the light set to 1/16 power, it gave a good burst of light around the center of my subject.
Create Beautiful Portraits
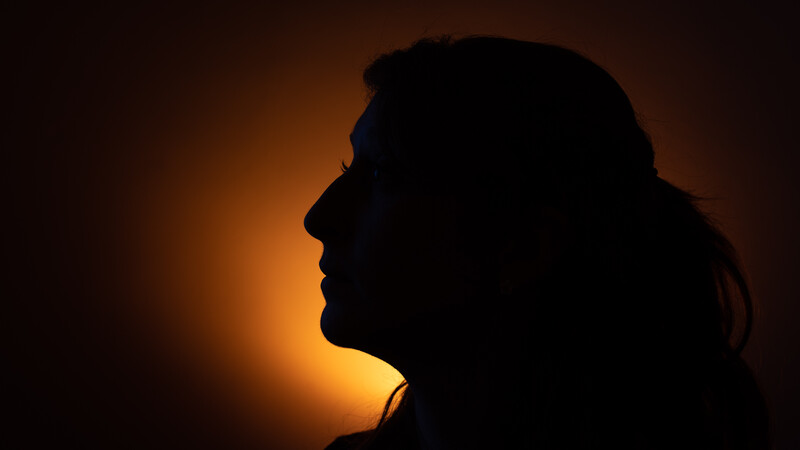
I ran with the silhouette idea and decided to come in close for a headshot. Now, I'm a sucker for a side profile shot — there's something about the graceful curves of the face that reminds me of a treble clef on a stave of music. I find each person's profile is unique and a bit of a facial-equivalent of a fingerprint, so by back lighting in this way we can create a wonderful silhouette that you wouldn't otherwise see in a headshot that was lit from the front.
Introduce a Second Back Light
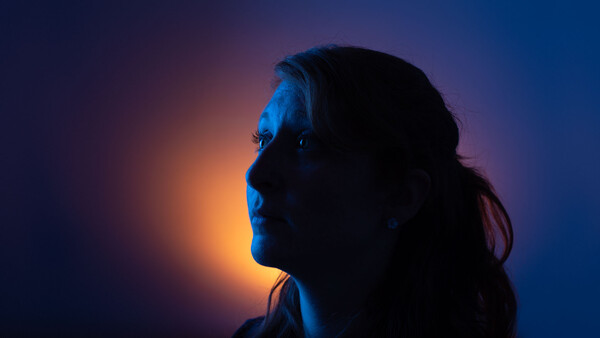
If you want some detail on the face I would argue you still don't need to light from the front. I decided to place another back light behind my subject, camera-left to illuminate the side of her face. By lighting my portrait short (lighting the smallest side of the face relative to the camera) it still kept the strong shadow to the right of her face, but also gave splashes of detail on the face and neck. I even managed to capture a catch light on my subject's left eye (right in the photo) which adds a pop of interest to an otherwise featureless shadowy area.

This method of lighting is so powerful. It's full of character, and rather charming. I can now see my subject, but at the same time she is also still barely lit. Just a trace of light follows her outline, but the rear orange light allows the face to shine through, cutting across the plain backdrop.
Mix up the Colors
As you can tell, I've used a CTB (color temperature blue) gel on my other flash. That's because I wanted my subject to stand out against the orange backdrop, so I cooled it down with the blue. A blue and orange mix is common in editing, and is notably found in blockbuster films like Mad Max: Fury Road where the interplay between warm and cool tones reflect the mood.
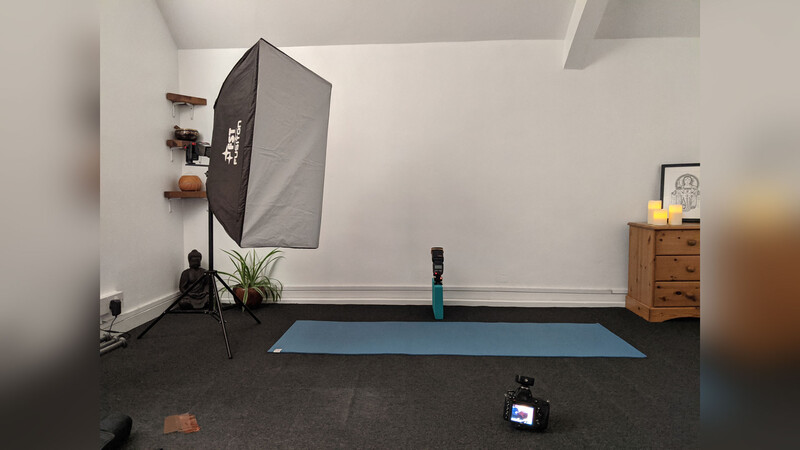
I've also placed the flash gun inside a soft box in order to diffuse the light. I did this because I wanted a tall strip of light to create large catch lights in the eyes and ensure I was lighting up the small outline tracing her face as you can see in the photo.
I used a bare flash initially and found the light was harsher, and too bright in just one small area. Notice how the blue also spills onto the background — this was intentional. By lighting up the darker, black shadowy portions of the background I'm generating a cohesiveness from my foreground subject to my background.
Bring It All Together
Next time, instead of starting with lighting at the front of the subject, take a second to consider the power of the back light. I find it exudes character, allows you to highlight special features on subjects, and create painterly portraits that wouldn't look amiss from the portfolio of classic painters. Mixing color with the lighting helps to create subject and backdrop separation, and look for catch lights in the eyes for that added sparkle.
Join the Fstoppers community for free
-
Post comments and join in the discussions
-
Browse the site ad-free
-
Share your work and get featured in the community
-
Compete in the photo contests for fun and prizes
No comments yet