
Tripods and light stands are found in virtually all photographer's kit bags. While most of these stands already do an excellent job, a few low-cost modifications can make them infinitely more versatile.
You probably don't think all that much about the stands that hold your camera or lights in place. Under perfect conditions, those faithful servants work incredibly well. Throw into the mix some challenging circumstances, however, and all that can go out of the window. Clumsy people, difficult locations, or even mother nature itself can all conspire to give us photographers a headache when we are trying to shoot. Being the tinkerer that I am, I have always made various adjustments to my photography equipment in an attempt to "improve" it. Over the years I have hacked many light stands and tripods when their function didn't quite match my needs. Here are the six best modifications which I have tried that I think are well worth doing to your own stands.
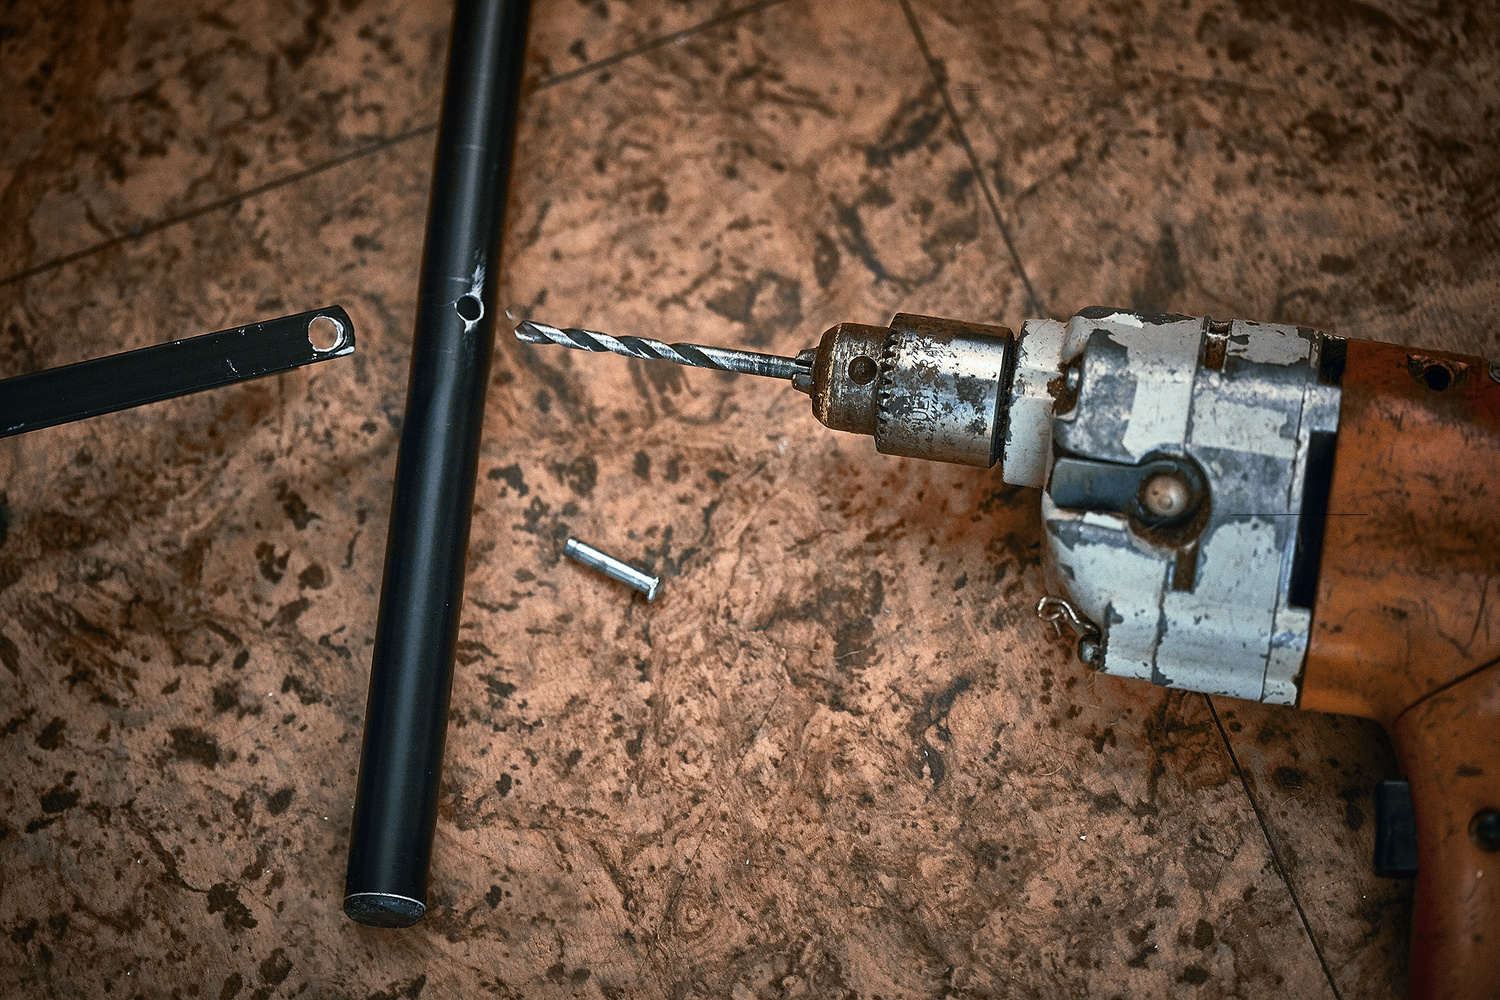
1. Drilling Holes in the Legs

Adding holes to the legs of your tripod or light stand will instantly give you so much more stability when shooting outdoors. By drilling holes near the end of each leg, you make it possible for the stand to accept a metal tent peg. You would not believe how much more stable your stands become when it is anchored to the ground in this way. While I appreciate this won't work for all terrains, it's a quick and cheap hack which could occasionally save the day.

When drilling into metal it is well worth making a small dent into the material with a punch first. This will stop the drill bit skating around when you start to make your hole. If you're precious about your gear then it might be wise to tape the leg up to prevent it getting scratched if the drill decides to wander. I also highly recommend that you carefully file each hole you make smooth as the last thing you want while setting up for a shoot is to draw blood on any rough edges.
2. Make Each Leg Independent
Many light stands have all three legs connected. While this can give the stand extra strength, it can really limit things when it comes to shooting on uneven ground. Problems arise when you need one or more of the legs at a different height to the rest. Have you ever had to place a light on a staircase or shoot on a rocky hillside? There's very little chance you'll find somewhere completely level to place a stand. This leaves you with either having to compromise where you put your lights or you end up precariously balancing or wedging stands in a way that could risk them falling over.
Drilled out rivet is now ready for the light stand's new bolt.
It's for this reason, that having one or more of the legs independent from the rest would make a photographer's life much easier. If you look at the classic light stand design you'll notice that the legs and arms are connected by simple rivets. These rivets can be removed by drilling them out. Once drilled, you should be able to push the fixing out rather easily. If you struggle with this, a nail and a hammer can be used to help encourage it out.
Hole Placement

New nut and bolt added to modified leg.
Now the leg is free it's time to place several holes at intervals all the way up the shaft. How crazy you go with the number of holes is up to you. Personally, I think a handful should be enough to cover most situations and even one extra hole would dramatically increase your shooting options. Once drilled, the arm can be reattached to the various position on the leg with the aid of a nut and bolt. Personally, I like to use nuts which can be tightened and loosened by hand. These fixings are more than secure enough when tightened manually and the fact you don't need any kind of tool to change the leg's position is a huge bonus when out in the field.

Modified light stand securely stood on uneven terrain.

Thanks to being able to move the light stand's legs independently I am able to place my light exactly where I want it. I must say that even on a windy hillside the stand in the picture above felt incredibly safe and secure. If I wanted to make the light stand even more stable I could have doubled up on security and added the tent pegs mentioned earlier. What I like about this particular hack is how much it opens up shooting possibilities and it cost virtually nothing to do.
3. Adding a Bungee Cord
For those that understandably don't want to start drilling holes all over their stands but would still like to add more security to their setups, this addition is for you. The versatile bungee cord karabiner strap can be used on both a light stand or tripod to help anchor them to their surroundings.
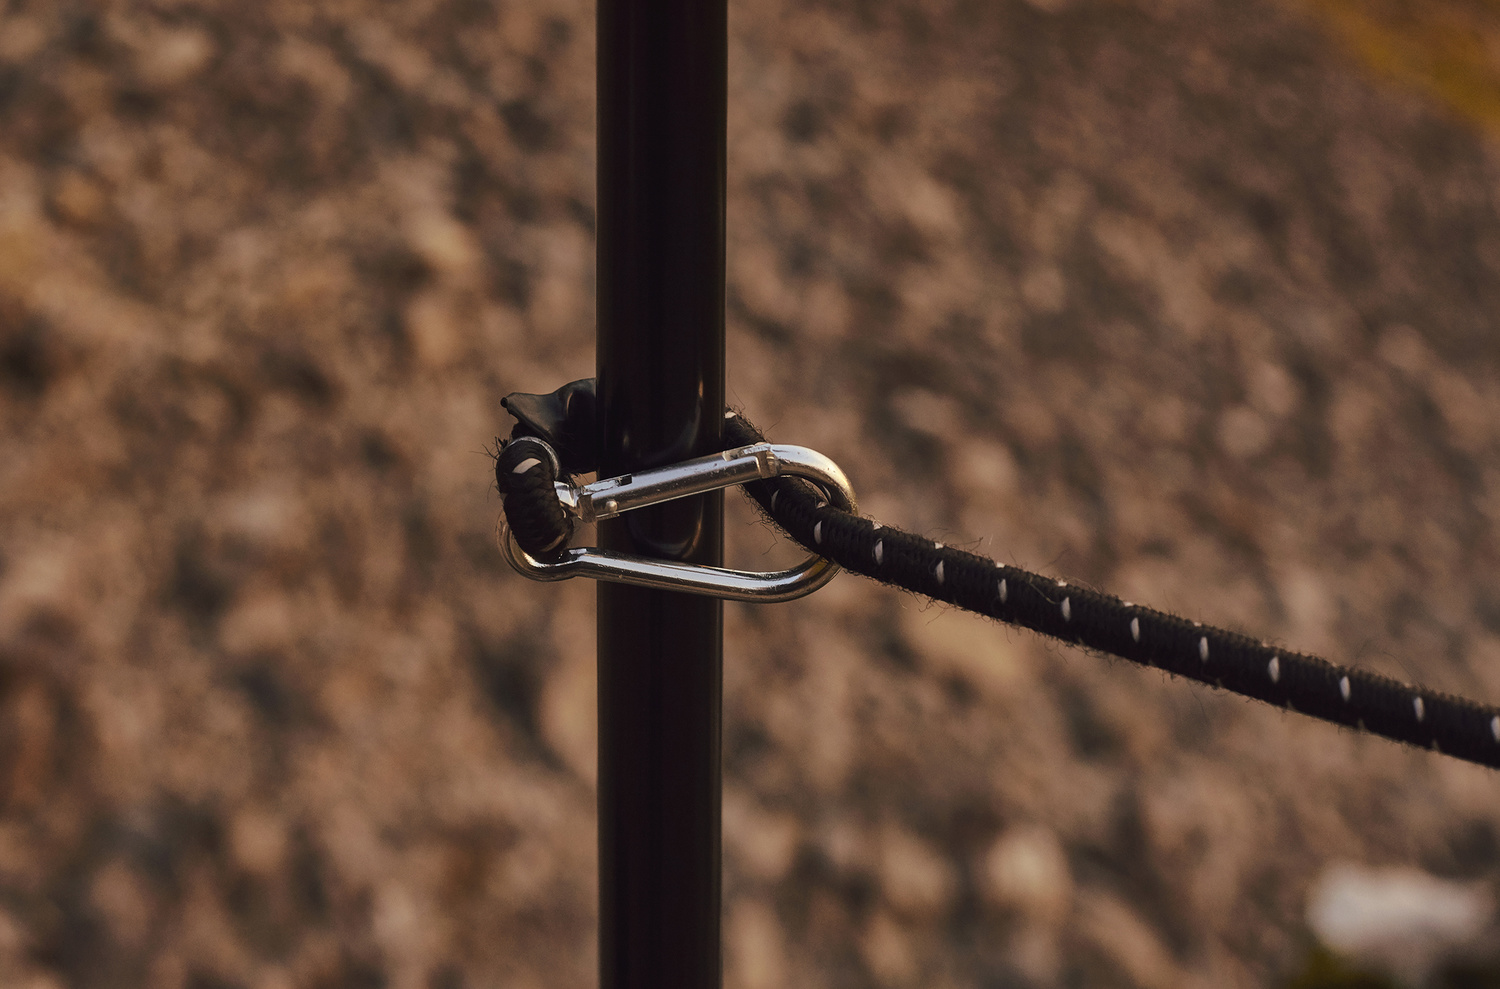
This hack requires no modification to the stand as the bungee can be easily looped back on itself to hold it in place.

What I like about this addition is that I can literally tie down my gear to anything that is close by. Large rocks and trees are often very good anchors although anything large and heavy will do the trick. As an added bonus these bungees always come in handy when it comes to packing gear up and keeping it organized.

Several bungee cords connected together between two stands can also provide a useful cordon while out on a shoot. I can see this being used by photographers who often need to control guests at a wedding or maybe while on set when you need to stop people from venturing where they shouldn't be. If you think you might occasionally use this hack as a cordon, I'd consider buying bungee cords in a color which is eye-catching. It also goes without saying that this set up should only be done with empty stands. Having your cordon attached to stands with expensive gear on top of them will only end in tears if someone decides to walk into them.
4. Adding a Tennis Ball to Your Legs

Drilling holes into tennis balls may sound like a waste of a good ball but it's actually an important addition to a photographer's kit bag. By adding a hole you'll be able to attach the ball to the end of each leg of your stand. This might look a little odd at first but it's a great way to stop your light stands from possibly scratching people's floors. I know clients do appreciate the consideration when you explain to them why you do it. The luminous green color also helps to improve the visibility of the stands and reduces the chances of someone tripping over them. While I'd highly recommend this add-on to most photographers if you photograph dogs then adding their favorite toy to the end of your stands might not be the best idea!
5. Thread Adapters

The two most common bolt sizes you'll come across in photography are 1/4" and 3/8". Light stands tend to come with the larger of these two sizes and your tripod plate will usually be the smaller one. There will be times when the stand you want to use won't fit the screw thread on your accessory. Photographers who use Speedlights off camera will have experienced this frustration. Thankfully, there are adapters which can be used to turn a 3/8" tread into 1/4". All you need to do is screw them onto your existing thread and you'll be good to go. There are also similar adapters that will turn a 1/4" thread into 3/8" which will actually allow you to use your tripod as an additional light stand if you're running short on stands. While I wouldn't want to add too much weight to this kind of setup I have used this combination with a few cobbled together spigot adapters and it worked quite well.
6. Bolting on Accessories

With a strategically placed bolt, you can take advantage of existing stands that you're currently using and piggyback onto them. By utilizing something like the 1/4"-20 threaded bolt, which is a standard fitting for many cameras and accessories, you'll be able to easily attach a whole host of extra items to your stand.

To work out where you should drill a hole it is best to fully extend the stand and consider what height those accessories will be needed. Something like a GoPro high up would need to be at a very different position to a light meter which you may need constant access to. The great thing about this hack is that by adding several holes you'll be ready to accept all kinds of accessories. While I appreciate there are clamps that exist to hold items to light stands already, the humble bolt is a very secure and cheap way to add functionality to a stand. A handful of bolts won't take up much space up in your camera bag either.
So there you have it, six ways to make your stands even more versatile than they already were. All these modifications take minimal effort and cost very little to do. Considering both light stands and tripods hold your most expensive equipment, it really does make sense to double up on a few of the additions mentioned above. For me personally, anything that can make a shoot go more smoothly is more than welcome in my book.
Over to You
Have you tried any of these hacks yourself already? Do you know of any similar adjustments worth making to photography gear? I'd love to hear from you in the comments below.


If anyone is interested, this was the clamp which I used to grip my phone holder to the modified light stand. It's a super clamp with 1/4"-20 to 1/4"-20 screw converters built into the body. They come in handy all the time while on shoots...
https://www.bhphotovideo.com/c/product/1303047-REG/indipro_tools_scw14a_...
^ you can get them much cheaper on eBay too!!
Yeah. I'm not drilling holes in my $800 tripod...
The tennis ball trick might be useful for shooting in snow though!
Totally understand you not wanting to drill into your $800 tripod. Not sure if you're joking about the tennis balls in snow or not. I actually think that's a good idea!
For snow, you might just want to carry a few mall pieces of plastic, like what you get from a cheap cutting board. put the spike though that and it will sit on top of the snow like snowshoes.
That would work. Would take up less room in the gear bag too.
I wouldn't recommend drilling into carbon fiber. I work at a place that uses composite parts, it's notoriously difficult to work with. Metal is fine. If it was me, I'd put it in a vice and drill a pilot hole.
I might actually use the bungee cord trick to use my octopad as extra weight, though.
Excellent idea about using the bungee cords to anchor more weight to it Alex.
A vice & pilot hole are always a good idea too!
I filled the legs of my lights stands with small gauge bird shot. Added about 10-15 pounds of weight to the stands and now dont need to carry sand bags with me when using larger lights or modifiers in the field. Yes it makes them a little harder to carry around but having that piece of mind when im out shooting really makes it worth it.
I drilled a hole below the pivot point on each of the legs, filled it with silicone. Let dry. Then took the plastic caps off the bottom of the legs. filled each tube with appropriate amount of shot, silicone over the shot about 1-2" before end of tube. Let dry, replaced plastic end caps.
What a great idea Christopher. Something I've never thought of doing. I think I might just do this to one of my stands & have that as my "heavy stand". The one I use when I need even more security.
Thank for the tip!
Rather than drilling a hole in the tennis ball, Simply cut an 'X' in it, makes it a snug gripping fit on any light stand or tripod then.
That's an excellent point Rob thank you. Im gonna switch to X over O...
Drill holes into your tripod leg or... buy spikes.
Maybe do both!
I grind a flat spot on all my C-stands, Arms, and Booms to prevent heads from sliding when tipped/angled..... makes life so much easier.
This sounds like a great idea Andrew. Id love to see a picture of this.
I do like kupo arms for this reason since they are hex shaped :)
couple good lengths of velcro the kind that wraps back on itself
Yes! Velcro is the photographers friend. Are you thinking in this instance that you don't actually attach it to the stand itself? I'm visualising it being like the Velcro strip you get on some laptop power cables where it just loops round the cable. I want to try this!
yeah I just have a couple lengths about a foot or so and wrap it around the stand base in case I need it ? for me I found when I did weddings with the godox 360 light it was enough to strap the battery from bouncing and I just kept it on there found it handy later for things once in a while
rare chance have used it wrapped around a leg and the leg to a pole so the wind did not blow it over reckon a bungie would have worked to but the velcro wont stretch
I'm gonna invest in a decent roll of velcro now. Thanks for the idea!
I know I buy the 1 inch wide in the 50 foot roll or whatever it is :)
also use it to wrap my seamless roll up :)
Great ideas ! My contribution - a metal sleeve that fits over the foot of my C-stands, extending that leg for uneven surfaces. It has a wing bolt to fix it at the chosen extension.
What a fab idea Mark. I'm visualising a slightly oversized tube with holes all along it & you just slide your stand's leg inside where it sits on the bolt you insert at the height you need.
Did you just invent this idea Mark? If so you should make them!
No photo to illustrate, but, my hack which I've used a few times is using a simple cable/zip tie to hang my pop-up reflector from my light stand or tripod, works a treat indoors or outdoors if there's little to no wind.
Cable ties are a photographer's best friend! I should have mentioned them in the article.
Great tricks. Is it possible to remove an adapter thread from a stand? I have one that was broken (it's taken off a few mil off the thread itself when it fell) that I want to replace. Are those pins on the side stopping it from being removed?