
Oniric, from Composite Nation, is a plugin I've been looking for for a long while. Last year I caught an advert for it on Instagram and I haven't looked back since.
Creating composites has always been a passion of mine. Ever since I was a child I relished in the works of artists such as Chris Achilleos, Tim White, Boris Vallejo, Julie Bell, and Frank Frazetta. Their fantastic fantasy artworks always resonated with me but unfortunately, I was never that good at art so when Adobe Photoshop came along things changed, and the images that I had always wanted to create were becoming possible. With practice of course, but within reach.
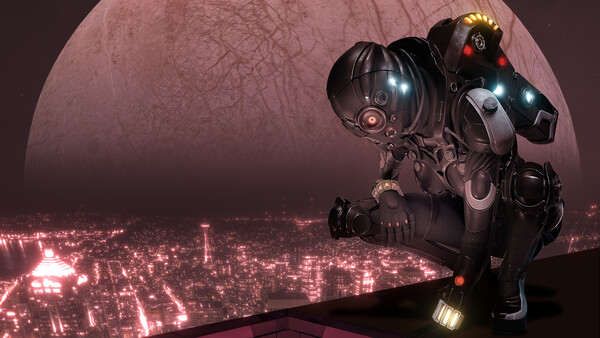
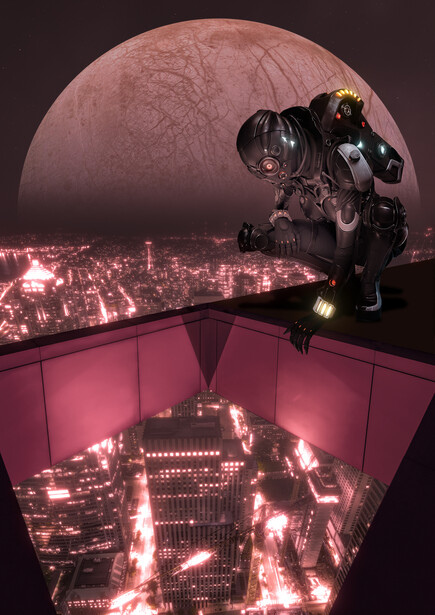
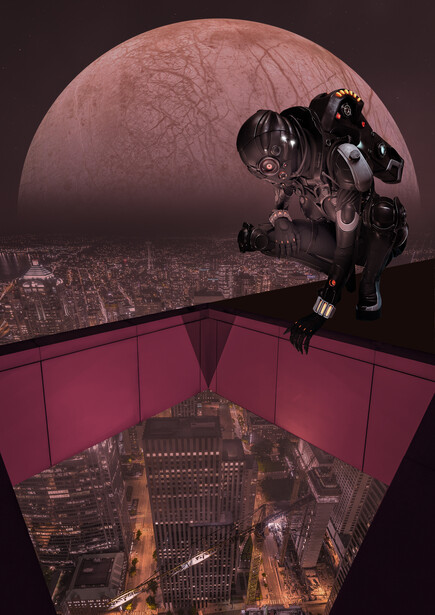
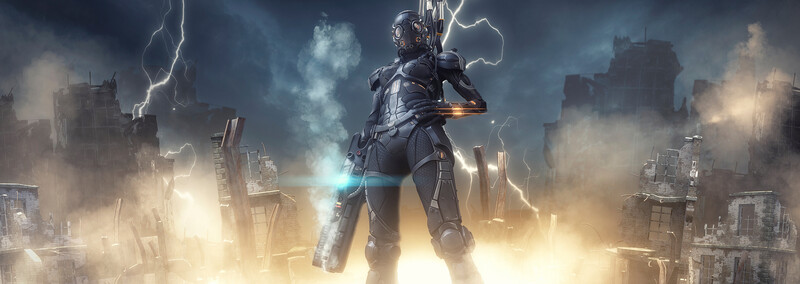
In this tutorial, I'm going to take you through the steps of how I created this image here using Adobe Photoshop and Oniric to enhance the city lights and also provide other examples of how this versatile plugin can be used for other genres of photography.
The Thought Process and Creation
Once the initial concept for the image was in my head, I went about layering up the background elements, starting with a gray base layer. Now, this is not necessary by any means, but it's just something that I do when the concept is a little hazy in my head, i.e. I'm not entirely sure what blending processes I'll go through to create a background. It's also something from my art study days when drawing and painting, the gray worked as the neutral color and you could work from there. A black or white blank canvas can be quite daunting at times.
A background of stars was added and masked to allow for a better blend with both the cityscape and the moon, as I needed to create depth to the image. The magenta hue/saturation layer was a later addition as I needed to balance out the overall feel of the composite and subsequently, I added another three of these hue/saturation layers at varying points throughout the edit with different intensities. The sky layer again was added after I had completed the city glow using Oniric.
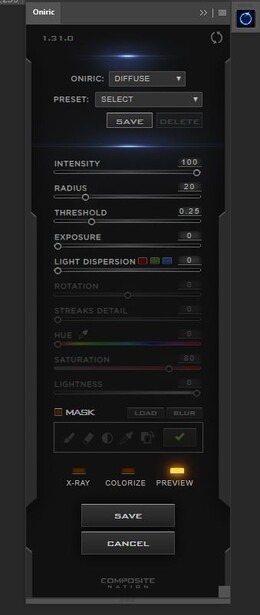
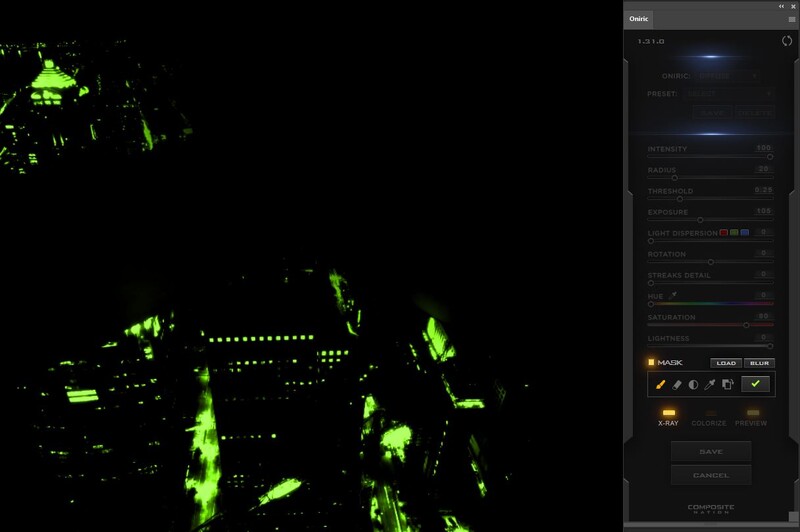
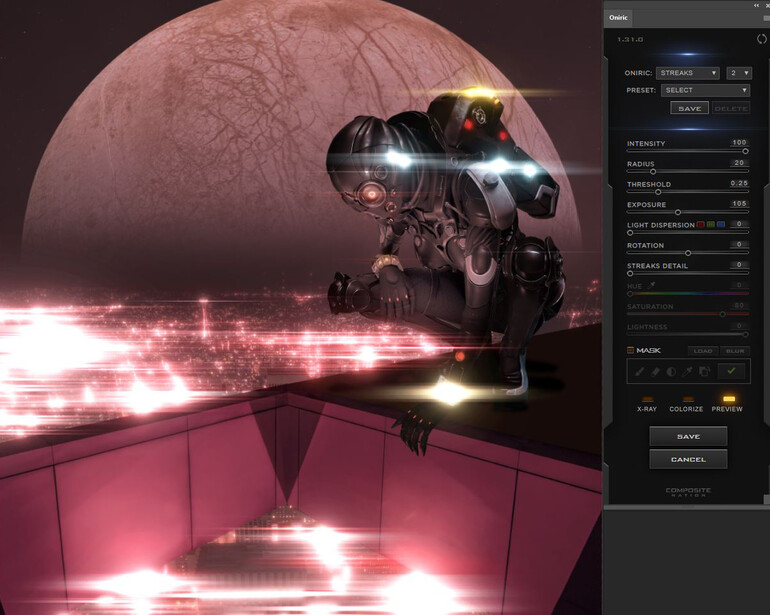
The Oniric plugin, once installed into Photoshop, can be accessed via Windows > Extensions, and after trying it out a few times you'll quickly get the hang of it. For this edit, I required it to push the city lights from a flat non glowing image to something that I felt would suit the scene. I turned off the moon layer, although I didn't need to as you can mask in the areas you want to be affected by the glow. But visually this helped me to see it better. I also opted to use the colorize feature so that I could create uniformity within the lights.
The plugin has a few really nice features that can really help with the edits and help you visualize what will be affected as you tweak it. One of them being "x-ray", which you could think of as a kind of luminosity mask and it works well. When using this you also have the ability to paint in your mask and apply the effect to the areas you want.
Once you are happy with your results, you can just click save. A pop-up box appears, and for me, I normally just order them numerically so that I know what one was created first. It doesn't make a difference what you save them as, numbers just work for me. Saving these creates a new layer mask in Photoshop with the Oniric edits, allowing you to blend, change opacity, and mask as you wish.
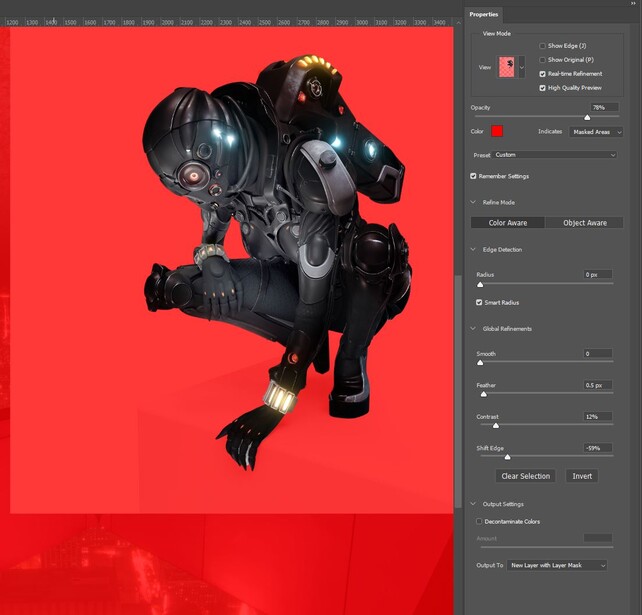
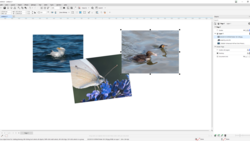
The next stage was to cut out the android quickly and efficiently. In the past, I would have used the pen tool to do this, but with the improvements in the Select Subject feature in Photoshop I honestly find that I rarely have to use it anymore, and in this case, when I had clean edges and a white background, it was a no-brainer to just select subject and mask.
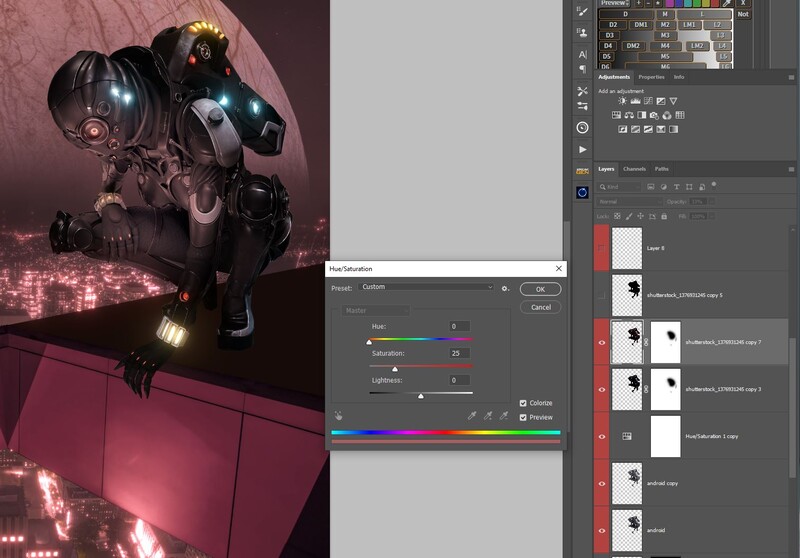
With the image coming together now I just had to think about how the light would shine upwards and how in my mind the ambient light would affect the android. To achieve the effect I was after, I made a few copies (just in case) of the layer and on two of them applied the layer mask. One of these aforementioned layers was not turned on during the final render. The Hue/Saturation layer was the same as mentioned previously to balance out the overall image. The Levels balanced layer had a slight decrease to the midtones to darken them slightly and to allow the underlying lighter layer to show through the mask. On the layer above this one, I added a magenta hue throughout to allow for the ambient light creation and then copied the mask up from the layer below.
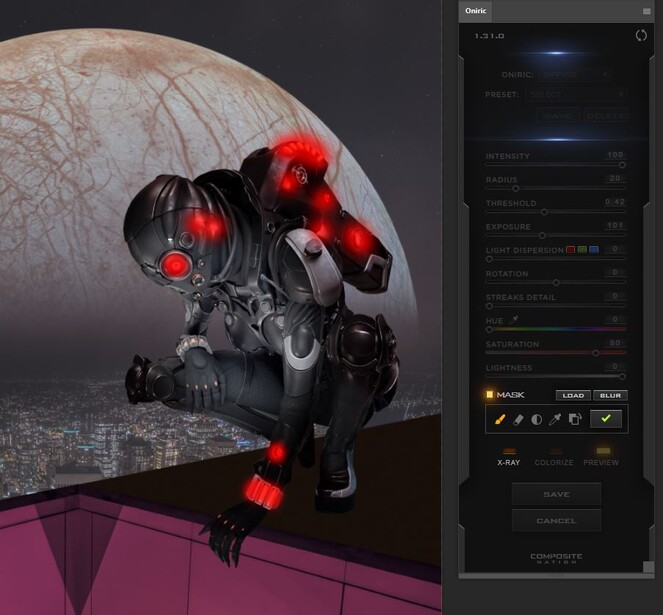
Next up for me was to work on the android and create a subtle glow to selective areas, where it could be seen but not overdone. The 3D model had illuminated areas throughout the costume, but I only wanted to emphasize a few of them so I jumped back into Oniric a couple more times separately to work on the reds, blues, and yellows masking each color selectively as I went. All this may seem time-consuming, but I assure you it's a relatively quick process, and the final results when using the plugin speak for themselves.
With the composite nearing completion it was time to balance out the entire Hue/Saturation with the addition of magenta color adjustment layers, as mentioned previously. These were added at varying degrees throughout based on depth and intensity and I think they worked well in this instance. There's always room for improvement but as always everything it's a learning curve.
From where I started to where the image went didn't stray too far from what I had visualized, but for me, the journey was made so much easier with the Oniric plugin. Yes, I could have completed it all in Photoshop and probably only taken a little longer to do so, but I'm a software geek, or should I clarify, an editing software geek, and I love to see what different software or plugins can do to increase creativity. Oniric is one of those plugins that are a part of my workflow and one that is so much fun to use.
And There Is More...
Although Oniric is simple to use, once you have gotten over the fun of the intensity of the effects, how much is too much, or the very few mistakes that you will make at the beginning, you can dive deeper into what it can actually do. To be honest, it does what it says on the tin, but it does it so incredibly well. I've mentioned x-ray and the diffused glow that I used in the creation of this image, but it has other features.
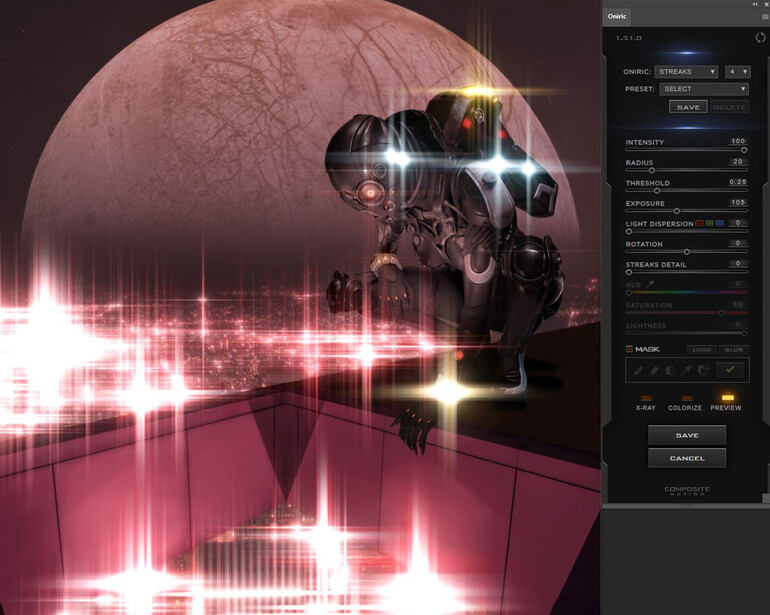
The Load function allows you to load up any channel mask you have created and work from there, allowing even greater flexibility when editing. The Blur button allows you to soften the intensity of the affected mask, again creating flexibility in your edits. I haven't even touched on the Light dispersion in this tutorial, I'm saving that for another one. As you can see from below the Diffuse function can be changed to Streaks where you can have two or four and also rotate them to suit your image. And remember you still have the sliders to affect all of the above.
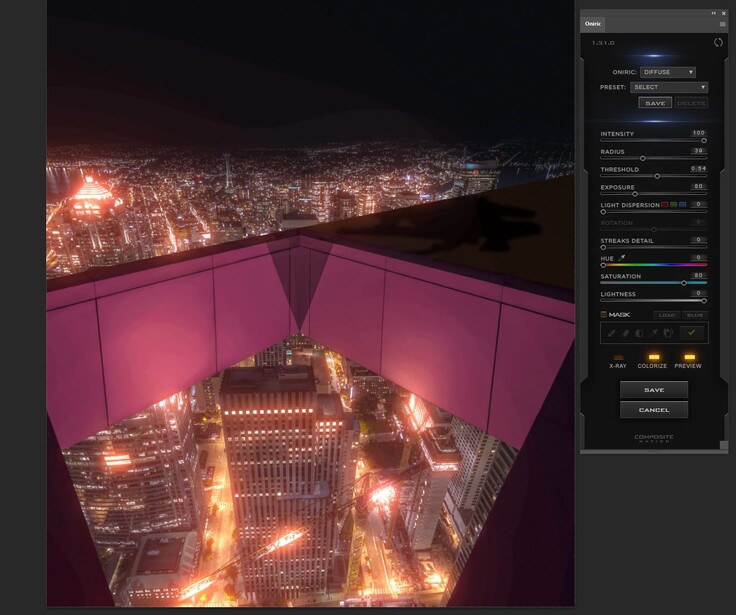
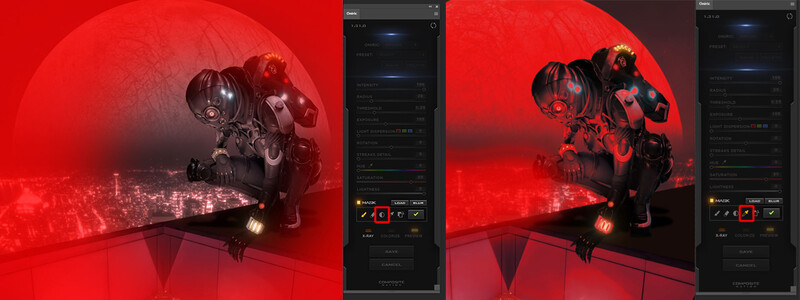
You can also mask the entire image and selectively edit areas depending on the effects you are seeking, as in the example image below where I masked the entire image and then used the eraser to remove an area. The eyedropper tool allows you to select areas of different value where you can also apply the effects to and again yield great and quick results.
In Conclusion
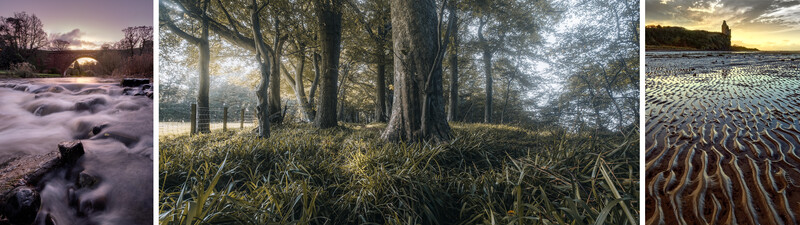
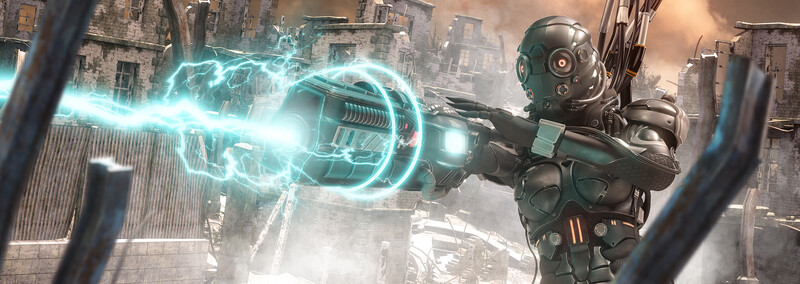
As a composite artist, Oniric has proven to be very useful for me, has provided great results in very little time, has opened up future possibilities for edits, and has been fun to use along the way. That is one of the main things in software or a plugin: has it been fun to use and push your creativity? I hope by the example above you can see the possibilities of the plugin, and I'm just merely scratching the surface with this image may I add. There are some more examples below of where I have pushed it further with my Last Outpost series, but these were the first initial edits when playing around with the plugin. I have also used it to enhance sunrises and sunsets in my landscape work, including days when the sun has been too bright for a decent dynamic range, and I have been very happy with the results.

If you are interested in checking out Oniric and some of the other plugins including BreakGen that Composite Nation has to offer, you can find out more here. Examples of the BreakGen plugin I used in some of my own images can be found here.


Join the Fstoppers community for free
-
Post comments and join in the discussions
-
Browse the site ad-free
-
Share your work and get featured in the community
-
Compete in the photo contests for fun and prizes
2 Comments
It’s a good tool and he’s always improving it. I’d recommend it.
Definitely, and there's something new coming soon I see.