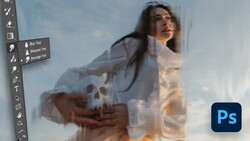
This great tutorial video will show you how to better sharpen your portrait images in Photoshop.
Getting it right in camera is only half the battle. Oftentimes what separates a good from a great image is the post-processing. Aaron Nace of Phlearn demonstrates a great technique for sharpening portraits in Photoshop with clear step-by-step instruction. Along the way, he offers a multitude of helpful tips and insights including how to ensure your sharpening effects only the details and not the color of your image and how to make use of smart objects and filters for maximum versatility and capability.
The crux of the process is using a High Pass filter with an appropriate Blend Mode, bringing out detail in the highlights and shadows of the image. As with all things Photoshop, subtlety is key. Keeping the High Pass filter radius small and adjusting the opacity of the layer to taste will result in a much more professional result. Additionally, you need to be strategic with the areas you choose to sharpen; for example, most of the time it will make sense to focus on sharpening your subject's eyes, eyebrows, and lips but not the rest of their face.
What is your sharpening workflow in Photoshop? Comment below with best practices and tips.


Join the Fstoppers community for free
-
Post comments and join in the discussions
-
Browse the site ad-free
-
Share your work and get featured in the community
-
Compete in the photo contests for fun and prizes
14 Comments
Woahhh, he butchered that portrait!
Yeah, that was pretty harsh. It's a good skill to know and a pretty good tutorial but way overboard. Those eyebrows gave me the chills.
Subtlety is definitely key!
Because it's not always possible to get tack sharp focus, even with good equipment. My canon 5d 4 only has 61 focus points, and more importantly, doesn't cover the entire sensor, so i'm almost always focus and recomposing in the studio to get the subject framed the way i need. And trying to stay on the exact same plane of focus after recomposing is not easy, especially when you are shooting different angles... thereby creating less than ideal sharpness around the eyes, etc. (And this is with a "good lens", i.e. 70-200L II and 24-70L)
Right now, only Sony seems to have focus points that cover the entire sensor, in addition to eye tracking focus lock.
I seldom have these problems. It all depends on how you utilize the lens and skill. I focus and recompose 95% of the time and it doesn't seem to produce that many out of focus shots. Sure you will run into issues every now and then, it's normal. Even Sony systems aren't immune to shots being out of focus even slightly.
These techniques provide enhanced results even when you get everything right in camera. It's hard to "save" an out of focus shot - the idea is to better sharpen your in-focus or close enough shots.
That of course, depends on what you're trying to salvage- in my case, all i'm concerned about is sharpening the eyes, everything else can remain out of focus... so editing in post helps rescue that.
I agree, the degree of defocusing is very slight most times, and easily fixed in post, and the majority of my focus recomposing photos are fine. It's when you focus and then shoot at a different angle (in my case, i'll shoot from low to the ground to high, that i'll get a slight shift in focus in the eyes).
Have yet to see an in depth test on the new Sony's as to how sharp they can keep the eyes under the different types of shooting conditions someone can go through.
Why, do you think it's out of focus? I think the final duplication result was a bit overboard, but a single pass on it looked fine.
Cool!
Thanks for the comment! Which multi scale sharpener do you use and why do you prefer the results over sharpening with the "old style methods"?