In this article, you’ll discover how to spice up your portrait lighting using colored gels. You are about to discover how to easily gel your strobe lights to create different lighting effects from gelled key lights to creating different color backgrounds.
These tips will work equally well for you whether you are using studio strobes or speed lights. You can also apply these concepts to a variety of different light modifiers including beauty dishes, soft boxes, umbrellas, and even bare strobes.
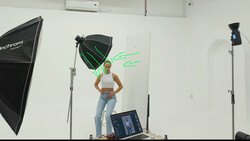
Let’s start off with the quickest and easiest way to attach a gel to a strobe, and that is with gaffers tape. You can also go with more elaborate gelled filter attachments, depending on your strobe setup, but gaffers tape is probably the most affordable and simple solution for attaching gels.
If you are a speedlight user, you can pick up a very affordable speed light gel kit made by Roscoe that makes it super simple to attach a variety of different colored gels to your speed lights.
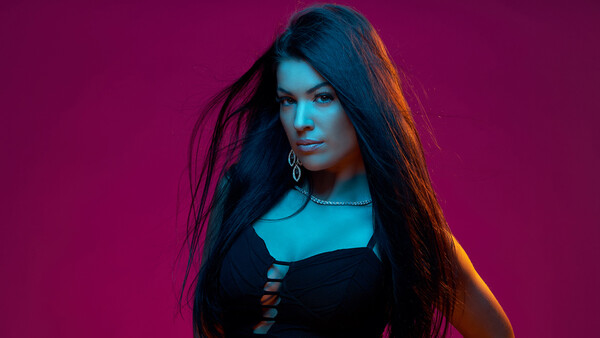
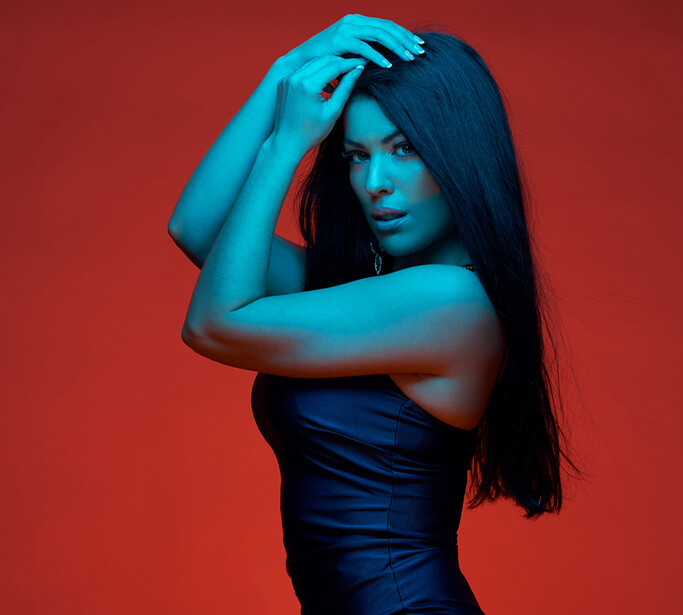
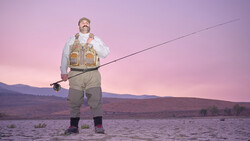
You can use colored gels in your portrait photography as subtle hair lights or for fill lights, adding a little color to the shadows in your image. Or if you are looking for more impact and drama, you can use colored gels on your key lights.
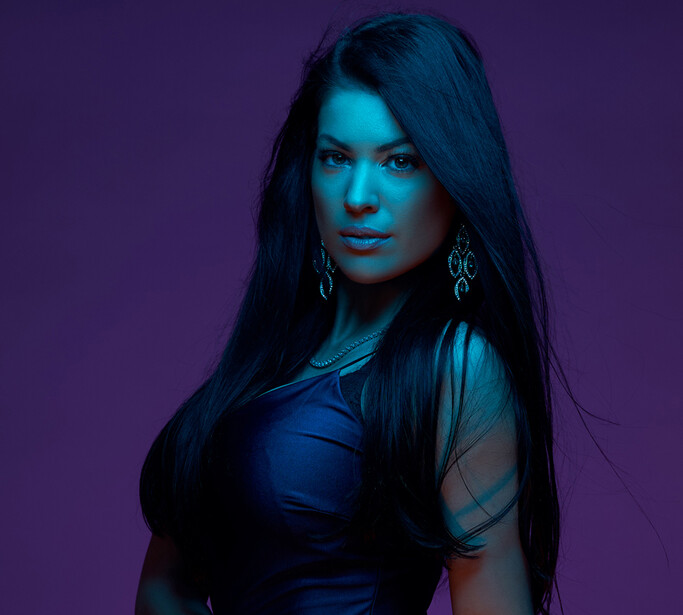
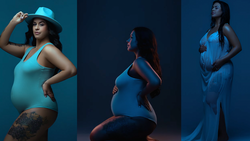
You can also use gels to change the color of your background but there is some debate on whether it is easier to gel a white backdrop or a gray. You’ll find that you can gel either color fairly well, so don’t let that stop you from experimenting, and choose what works best for you.
As far as color theory, there are certain colors that work well together, such as orange in the highlights and teal in the shadows. Although, don’t be afraid to be creative and feel free to reverse the formula by going with teal as a highlight color and adding some orange to the shadows.
You can also alter the color and saturation of your gels by varying the power of your strobe and by changing the distance of your strobe from either the background or by moving it closer or farther away from your subject.
In regards to getting a correct exposure, it can be a little more challenging when working with gels. You should aim to protect your highlights by enabling your highlight indicator warning on your camera or by shooting tethered to Capture One or Lightroom so you can get a better idea of the lighting and saturation in your images.
In this video, I was using various Lee filter gels with the Sony a7 III and the Sony 85mm F/1.8 lens at f/5.6 with gaffers tape used to attach the gels to the strobes and modifiers. Hopefully, this article and video sparked some creative ideas for you and how you can incorporate colored gels to spice up your portrait photography in the future.
Let me know if you have any gelled lighting tips of your own; you can share your tips in the comment section below.
Join the Fstoppers community for free
-
Post comments and join in the discussions
-
Browse the site ad-free
-
Share your work and get featured in the community
-
Compete in the photo contests for fun and prizes
7 Comments
Sorry, I really have never understood the overlygelled look. Blue skin? I don't see anything creative with it.
Each to their own I guess. You're having fun, that's most important.
"there are certain colors that work well together, such as orange in the highlights and teal in the shadows"
Or don't.
The colour looks like a skin of a dead body; totally lifeless, totally ugly. What is the point?
"Party gels" look just as amateurish for stills as they do for videos. But many seem to have to get it out of their system; best to do it as quickly as you can.
Used PROPERLY gels can enhance an image, working with existing color schemes etc...BUT- lately I have noticed that gels are often seemingly used randomly and without artistic purpose. They signal 'hip/cool/trendy' and can attract the eye quickly in a crowded media space. They seem to be a shortcut to deliver an image to an editor quickly when a photographer can't think of an actual well composed and posed picture.
I don't want to sound like an a**hole but the photos (didn't watch the video) doesn't really show great ways of using gels.
On the last photo, whether the gel was gobo'd or blocked, it's casting a darker color over her mouth and jaw, giving her what looks like a day-old beard.
Her arm is also now split toned (i would have blended the transition so it's not so obvious, though it doesn't matter if she has a beard). :/