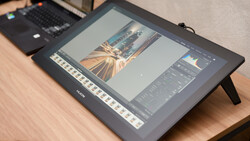
We are two weeks into our 2011 BTS contest and the entries are starting to trickle in. I just watched Robert Simpson's video called "Small World" and I was really impressed with the results. Robert used a D70 and kit lens in conjunction with some pretty interesting Photoshop techniques to create a very unique looking image.
To keep an eye on all of the contest entries as they come in you can check out the the contest section on our forum.
Related Articles


28 Comments
GAHHHHHH Why teach bad Photoshop Techniques!? Never Flatten your images. Stop Destructive Editing.
didn't he have to flatten it to make the "world" effect work?
As long as the final result is as desired... Why not?
Heya! I flattened it to facilitate quick non-repetitive clone-stamping for the tutorial... notice I source the origin point from both left and right of the target. Having said that, you make a great point that there are always better ways and processes, time permitting. Thanks for your input :)
Thanks really inspirational
Cheers! If you happen to try the technique, I'd love to see your results - I'm sure you could reply with a link ;)
Fun idea, Robert... thanks for sharing. I'm still trying to place that accent, is Texas or Georgia? :)
HAHA! Yuh, the place I'm from is south of Texas, Mike ... waaaaaaaaaaay south! :)
I really like this idea!
Plenty of ways it could be varied too. Taken a night on top of a muddy brown hill, or a big mound of concrete.
With a bit of editing and good lighting, it could look like your stood on the Moon :) Or another planet!
NOW you're talking! Some of the most interesting variations on this are when you have a very small "planet" and lots of features reaching up above the horizon in your photo. Are you going to give it a go? I'd love to see a "moon" version ....
Great Idea :-)....Nice
Thanks Leonardo .... and thanks for posting with a hottie in your thumbnail :)
ive been trying to figure this out FORRR EEVVVEERRRR thank you so much both f stoppers and the man who created the video :)
You're welcome! (BTW, stumbled across the technique while playing with built in PS tools while trying to correct curve caused by taking a wide shot. Ironic huh!)
....and I agree. THANKS Fstoppers!
I knew how this technique worked, and so the content wasn't very interesting to me. However, the tutorial was great and I still watched the whole thing through.
Thanks Clay! My next video will be 'tutorial' like too, but no photoshoping this time... watch this space. Are you going to enter?
I liked it! Though it would have been even better had he explained a bit more in detail why he did some of the steps he did, like squeezing the image before applying the final effect (probably because that effect stretches the image back out, but would be nice to hear that from him). Also, I imagine that the subject can't fill to much of the frame or the head will be bigger than the rest of the body when the world effect is applied.
But a very fun and creative effect, I'll definitly try it out for fun. :)
Hey Jock ... yuh, I wanted to spend a little more time on "why" too, but I was planning to post on YouTube at first and they limit you to 10 minutes.
Crunching the pic in to a square makes the final result a circle. Crunching a rectangle results in an oval. This can be used to your advantage if you want to avoid skewing your subject (as mentioned) and then trim off the bottom leaving the top half looking like "the curve of the Earth" ....
Please do give it a try, I'd love to see your results!
It was a nice video, Ive done this before but bot from one image.. I used a fisheye and captured alot of area around my subject.
Can you post a link to your wide-angle pics? I've LOVE to get my hands on a fisheye, but for now they're out of my ...uh.. budgetary limits.
What is the website he mentioned for HDR Tutorial? Stackingcustoms.com? (2:35 mark)
that would be: http://www.stuckincustoms.com/hdr-tutorial
Thanks for the "what the hell is that accent" translation! :) Rock on!
AARGH! The accent claims it's first victim! ... but Marcelo got it right, Trey Ratchiffs website is www.stuckincustoms.com, and he has a great HDR tutorial. Remember though, you can do HDR even if you don't have an expensive camera with auto-bracketing. Any camera that takes RAW pics - you can post-expose the source photo in to several for HDR processing as there's a lot more data in the RAW that you can "see", if you get my meaning. For non-RAW capable camera such as compact cameras, you can take the shots seperately while manually adjusting the exposure between each shot - software will re-align the shots for you, but movement in the scene will look weird in the finished product.
....maybe I should do a vid "HDR for cheaper camera owners...." :)
Ojas, if you do try HDR, please post your results! I'd love to see them.
I'm pretty sure I saw this in a European photo magazine a few years ago. Cool tut though.
Cheers, M!
Robert, you taught me couple of photoshop tricks :-) I was smiling ear to ear with your video on this, well done.
Cheers, O'nev, I'm glad you got something out of it. Mission accomplished! ;)