
Infinite Color for Infinite Tools is a color grading plugin for Photoshop. We put it through its paces.
The great thing about photography is that it is so varied. We photographers all have tastes and different skill sets. Color grading is one of those things that some take to and others don’t. I appreciate it when it is done well, but I have never turned my hand to it with any seriousness. There are three reasons for this, and I suspect others will have similar experiences. Firstly, my photographic style and usual subjects don’t lend themselves to the technique. Secondly, I don’t particularly relish spending hours in front of my computer processing photos.
The third reason is that I don’t have the time to learn the skills. If I learn to do something, I want to do it well, and color grading seems like it would take time to learn. Previously, I have scoured the internet for high-quality how-to videos, but the content was limited. I saw some excellent color-grading work that accompanied a few good tutorials, but they were always convoluted processes. Furthermore, the tutors’ settings rarely worked well with my images.
So, when the opportunity arose to review Infinite Color from Infinite Tools, I put my hand up and volunteered to do it. I had previously reviewed Infinite Black and White and had been impressed with the ease with which decent black-and-white conversions could be created within Photoshop. Would applying color toning be as straightforward for an absolute beginner?
Installation is easy. After downloading the file, you install it in C:\Program Files (x86)\Common Files\Adobe\CEP\extensions on a Windows computer or (your user name) > library > Application Support > Adobe > CEP > extensions on a Mac. Restart Photoshop, and the plugin will appear in the Plugins menu. You then enter the license keycode. The Infinite Color Suite opens and is ready to use. So far, so good.
I’m lucky! I’m blessed with the ability to suss software quickly and find most programs intuitive. The best way for me to understand new software is to dive in and get my hands dirty; I learn from my mistakes. With Infinite Black and White, the first click of the Create button produced a pretty good result, and it was just a matter of tweaking those. It would surely be the same with Infinite Color, wouldn't it?
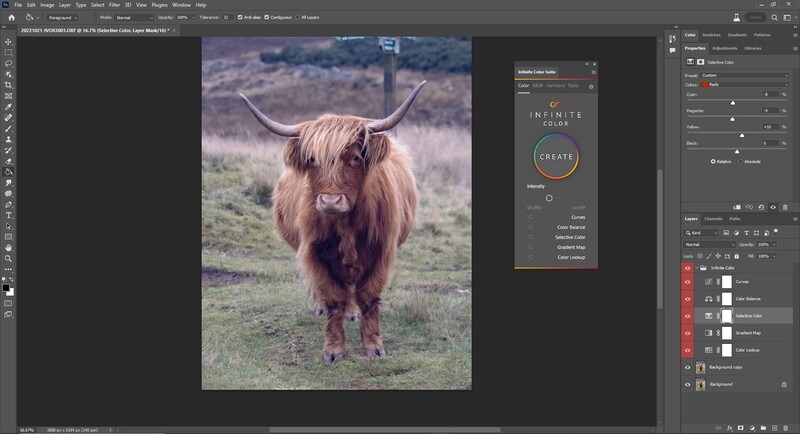
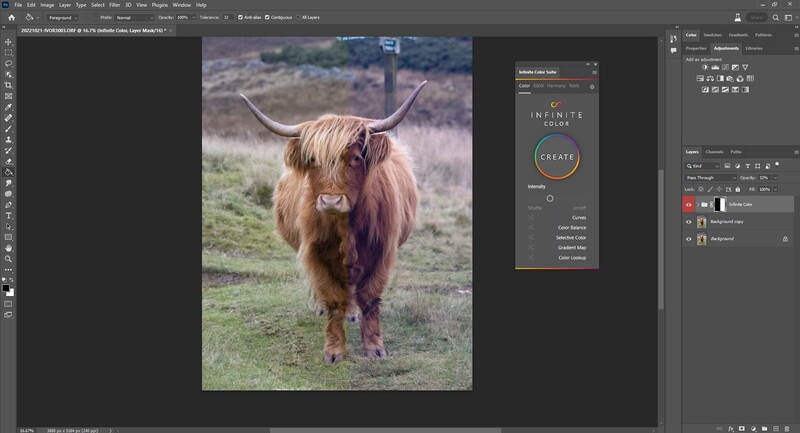
There on the screen was the plugin panel with the big Create button, urging me to click it. So, I did. My reaction was, “Yuck!” I pressed it again, and the result was equally unpleasant.
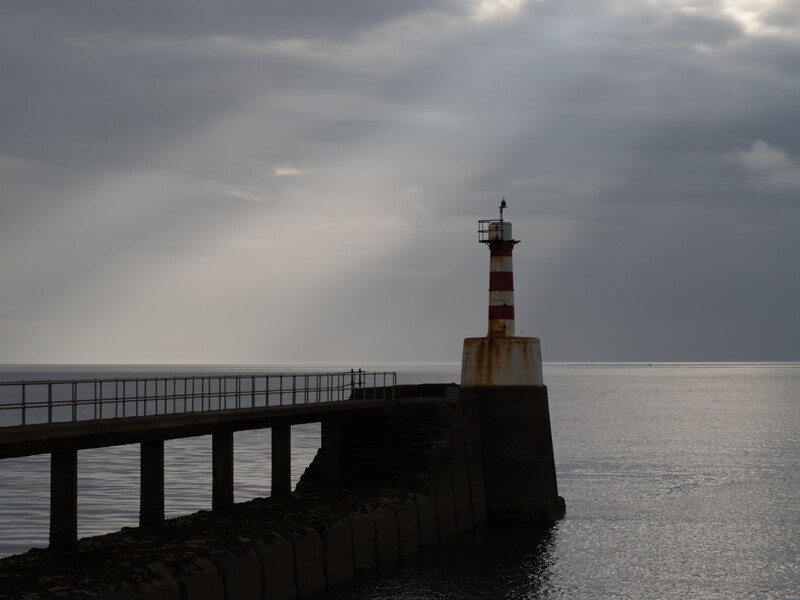
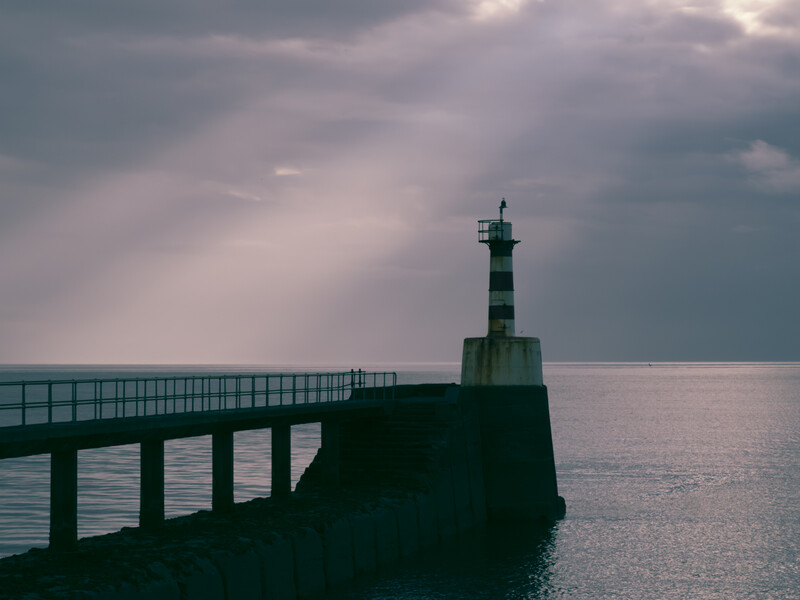
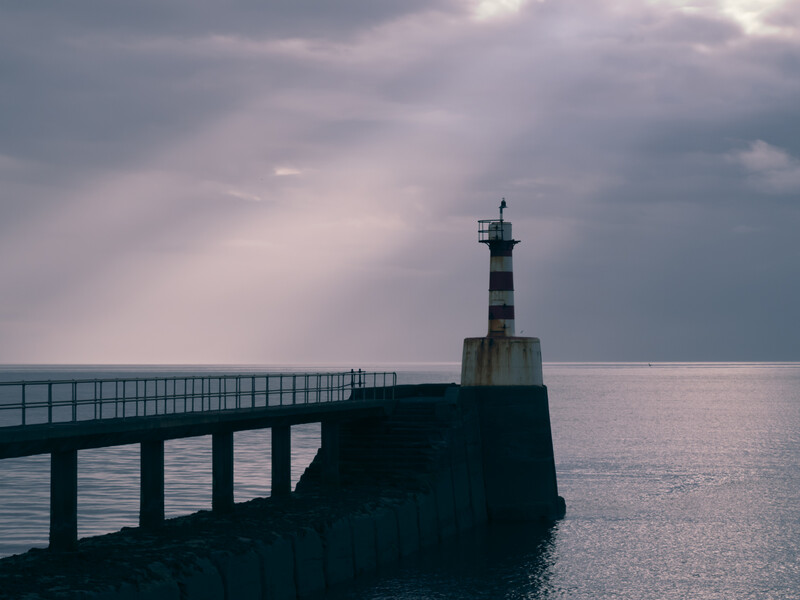
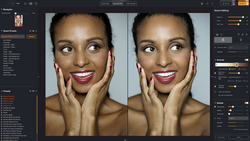
To illustrate that, the above before and after frame shows an image straight out of camera and the same image with the default settings of Infinite Color applied. It is subjective, but this was not to my taste at all. Was I doing something wrong? To cut a long story short, yes, I was. The secret was to pull the Intensity slider to the left. Suddenly, the resulting image was quite pleasant.
When you press the Create button, the program produces five adjustment layers in a group and applies settings to each.
Each click of the Create button activates an action that creates the adjustment layers and applies a semi-randomized set of adjustments to them. Although seemingly infinite combinations of these settings exist, they are designed to work within set parameters. Those parameters were made by the program’s designer using his color grades.
For the learner, hitting the shuffle button of the layer will change the results and give a different, usually pleasant effect. If you decide you liked a previous version better, stepping back using Photoshops history panel allows you to return to that. Of course, those who are au fait with color grading within Photoshop can use the layers panel to make individual changes to the adjustment layers. This plugin will suit them too, as it speeds up the entire editing process. Moreover, adjustment sets can be saved and reused on further images.

Infinite Color doesn’t stop there. Each of the layers can be turned on and off within the tool. That allows you to see the effect those adjustments have on the image. One can then shuffle the settings of each individual adjustment to find something that matches the look you want — a great learning tool and a fast way to get great results.
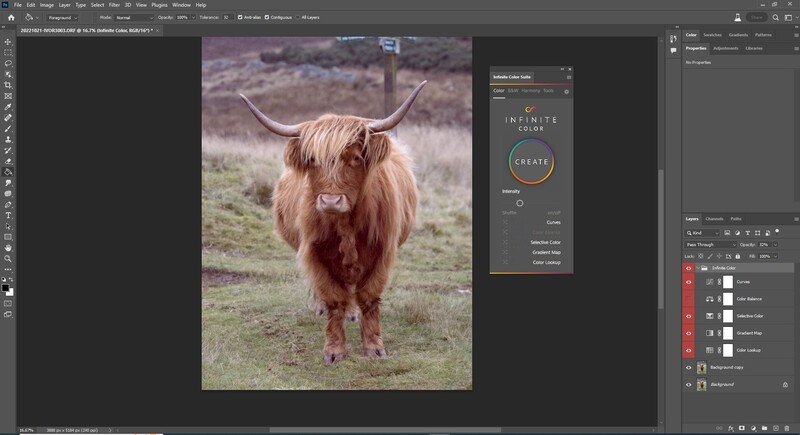
So, what are the layers that Infinite Color produces? There are five of them, and the following is a short and simplified explanation of each:
Color Lookup applies different appearances to the photo, simulating the look of various film types and effects.
A Gradient Map allows you to apply different colors to different tones in a photo. For example, you might add blues to shadows and oranges to highlights, with a gradual shift between them.
Selective Color works by selectively modifying the amount of a single primary color, and it does that without changing the other primary colors within the image.
Color Balance was initially designed to correct the entire color of the lighting when an image was shot, allowing a photographer to make white appear white. The color of the rest of the image was similarly shifted, often being warmed or cooled. It can also be used creatively, as it is with the color grading process.
The Curves adjustment layer allows you to adjust the brightness of individual points of brightness throughout an image’s tonal range, thus precisely affecting the contrast.
Each of these adjustments can be mastered with varying difficulty outside the plugin; some are easier to grasp than others. But how those five interact with each other is another matter altogether. So, one could create these adjustment layers in Photoshop and adjust them yourself, but that takes time and the knowledge of how to change them. Those who are already proficient in color toning will probably still do just that. But plenty of photographers like me have never ventured into this field of creativity and would like a tool that simplifies and speeds up the process.

Infinite color has many other tricks that tap into Photoshop's functionality, such as keeping the adjustment stack at the top of the pile and color-coding the layers. The video at the top of this article gives you a good oversight of what this software can do.
What I Liked and What Could Be Improved
This handy piece of software has made me interested in color grading. It’s simple to use and a great way of learning how to color-grade photos. It’s especially well-suited to artistic portrait work, which is not a genre in which I specialize. Nonetheless, in my subjective view, the results are excellent.
I got a digital artist to try it on his drawings and he too was impressed.
I particularly liked that it worked within Photoshop, not an external application such as Nik Color Efex or On1 Effects that have to be opened externally. It's very fast at creating those layers. It's also great to use at any level of experience and is suitable for beginners, learners, and experts, although I suspect many experts will still create color-grading layers manually.
For my taste, the default intensity level could be reduced, but others might prefer the stronger setting. I did like that a double-click on the Intensity slider returned it to its default value.
At $129, it isn't particularly cheap compared to other plugins. But it isn’t the same as other plugins; it carries out all its functions within Photoshop, and it speeds up the workflow compared to external plugins. For a professional photographer who color grades many images, this cost will be recouped in time saving. Moreover, the layers are non-destructive and can be tweaked. It’s down to personal budgets and whether you consider it affordable. Some will, and some won’t.

Will I use Infinite Color? Maybe occasionally. I am interested in it, although, as I said at the beginning, color grading doesn’t match my usual photographic style. I can see plenty of photographers for whom it will be a valuable addition to their toolbox. It’s certainly a nifty tool for learning how color grading works; it gives excellent results and speeds up the editing process. Additionally, it enabled me to get results within Photoshop I would not otherwise achieve.
For openness, I received a free copy of this software to review.


Join the Fstoppers community for free
-
Post comments and join in the discussions
-
Browse the site ad-free
-
Share your work and get featured in the community
-
Compete in the photo contests for fun and prizes
No comments yet