
Capture One has a great reputation for image quality but comes with a premium price tag. Does it live up to its reputation, and is that extra cost worth it compared to other programs? I tested it side by side with Adobe Lightroom Classic.
If you read my previous article, you will have seen that I was testing different cameras' raw files in Lightroom Classic. Using Lightroom as a benchmark, I now compare how the same images appear in other programs, and my first stop is Capture One. I hope you will refer back to that article to compare some of the results.
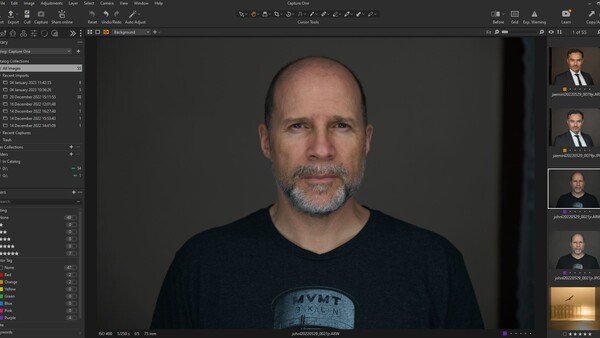
Capture One Pro is very different in its layout from Lightroom, and that took me a little while to get used to it. From a Digital Asset Management DAM perspective, the range of functions is very similar, but they are presented and operated in very different ways. I like the layout better in Lightroom, but that may be because it is what I am used to. Saying that, the workspaces in Capture One are customizable.
An even more significant difference falls in how the adjustment sliders behave. For example, the contrast slider in Lightroom emphasizes darkening the shadows to increase contrast. Whereas, in Capture One, the overall effect is brightening and darkening the tonal extremes of the image much more evenly, even perhaps with an emphasis on brightening. Other sliders, such as Saturation, have less effect on the more saturated colors and more on the more muted shades.
I ran the same pictures through Capture One as I had with Lightroom for my previous article. I've also tested some additional ones but have not included them in the article for copyright reasons. There are significant differences.

These tests are solely image quality results on raw files straight out of the cameras. The raw files can be adjusted. Every program is unique and has its own extra features besides its raw engine algorithms. Consequently, other factors may persuade you to use one program or another. Furthermore, I don't have the resources to test every camera on the market and certainly not under the same lighting conditions.
Where appropriate, I've mentioned that I have developed photos to achieve what I think are better outcomes. Still, these results are subjective, so I have only included them to illustrate a particular point. Furthermore, as I have said before, I am more experienced at adjusting images in Lightroom Classic than in Capture One. So, others will be more skilled. Therefore, they may get better results than I did.
Camera Brand-Specific Test Results
Nikon and Capture One
In my previous article, I said Nikon users would be happy with the resulting image quality if they owned Lightroom. Now that I have tried Capture One, I am amending that statement. A Nikon user will be happy with the image quality of Lightroom Classic but probably happier with Capture One.
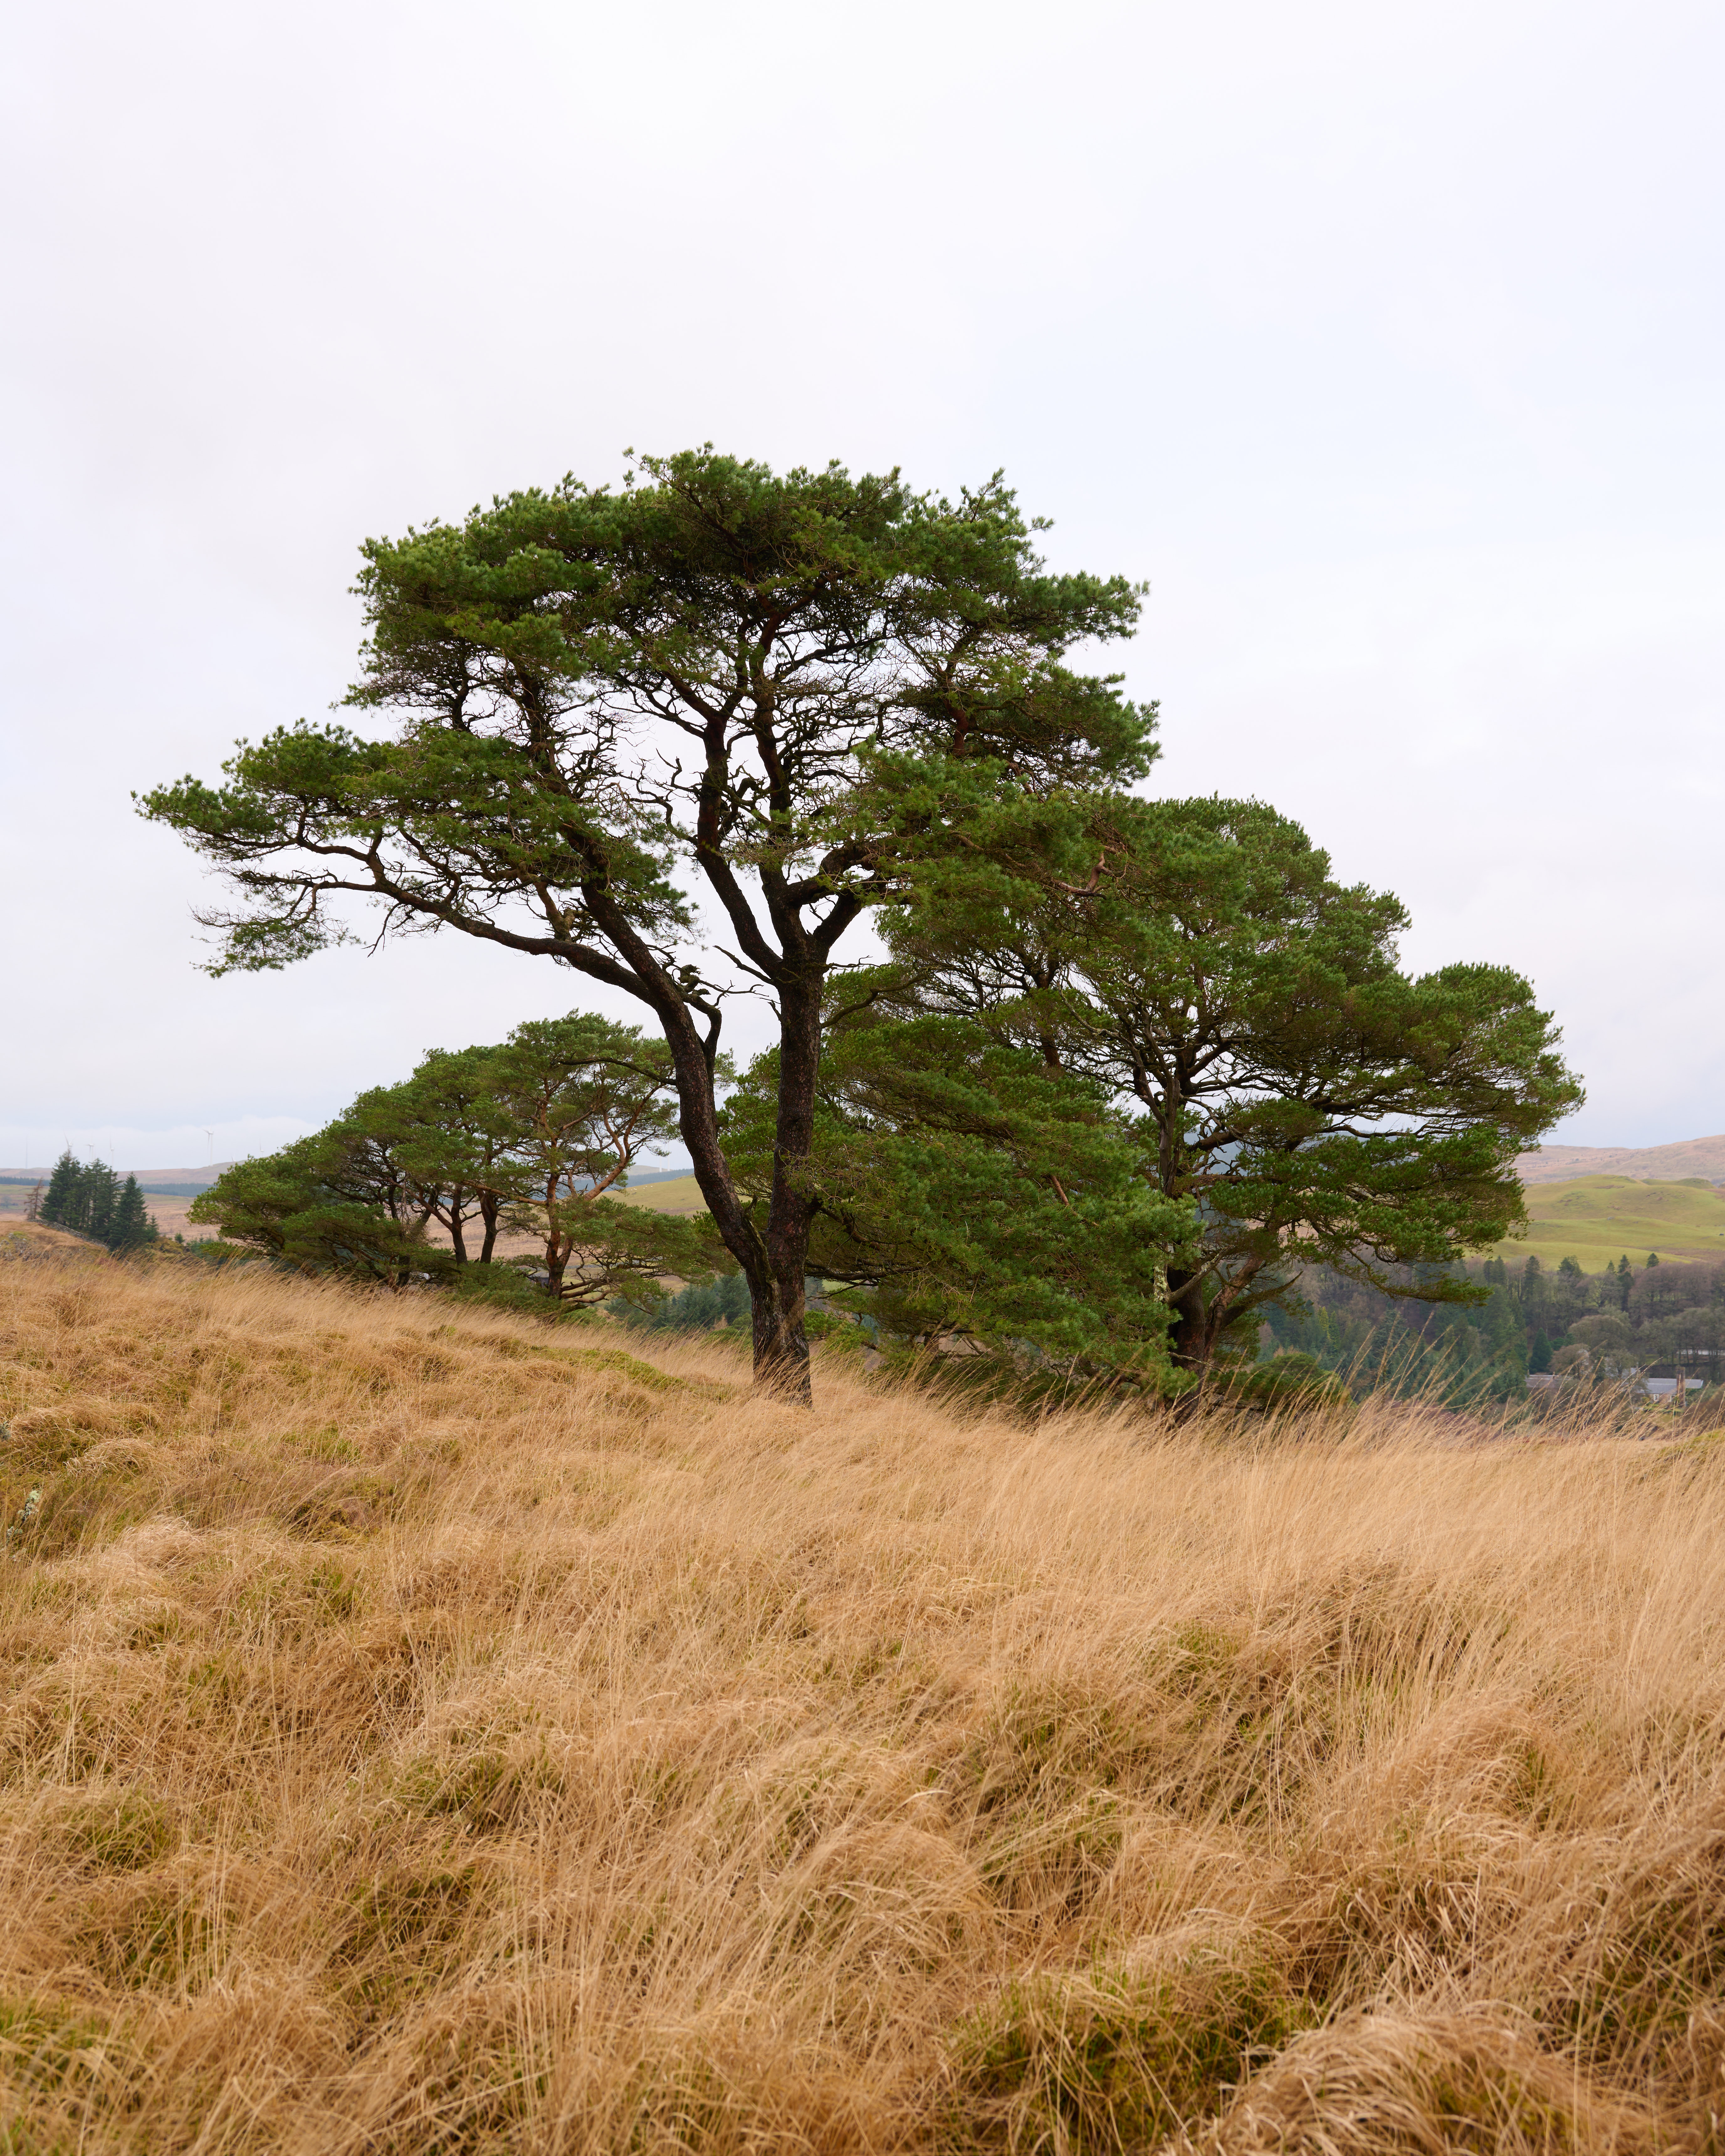
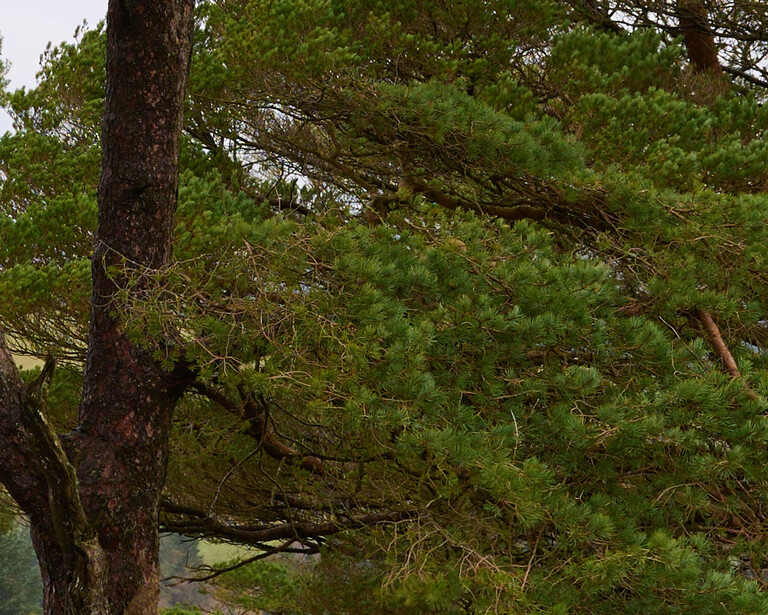
With Capture One at default values, the raw previews with Nikon images are bolder and sharper than with Lightroom. In the test image, I can see individual pine needles on the tree much more clearly at a 100% zoom in Capture One.
There is more contrast with the unadjusted image too. This gives the overall effect of the preview image looking darker. Despite the darker shadows, I increased them without producing any noise in the picture. There was also little evidence of noise in Lightroom when the image was viewed at 100% zoom on increasing the shadows.
The other thing that Capture One did better was the handling of global color adjustments. With a landscape shot, I reduced the highlights slider, and the pale blues in the sky became visible. In Lightroom, achieving the same effect required significantly increasing the Vibrance slider. However, that oversaturated the greens of the trees and yellows in the grass, which then needed adjusting back in the HSL panel.
Skin tones in portraits also looked bright and vibrant, and the color seemed accurate too. This wasn't true of all camera brands.
Canon and Capture One
The overall look of the default image was similarly improved in Capture One over Lightroom Classic. The image was more impactful, and the fine details were sharper when zooming right in.
As I reported in my previous article, Lightroom did not accurately reproduce colors, and this difference is stark when comparing the same photo with Capture One and Lightroom. The blues of the model's top look purple in Lightroom Classic, whereas they are more accurate in Capture One.

Similarly, at default, the skin tones in Lightroom appear flat in Lightroom, whereas Capture One gave bright and impactful results. Increasing the brightness of the shadows in both programs produced similar noise levels, although this was well controlled in both.
OM System and Capture One
The results from Capture One with raw files from the OM System didn't surprise me. Several top pros who use the system develop images in Capture One for one good reason: the resulting pictures look far better. I agree.


In Capture One (right in the above shot), the overall exposure is much closer to what one sees through the viewfinder; it's brighter. I've found that Lightroom drops the exposure by at least half a stop.
Unexpectedly, in the shot shown above, I could entirely recover the sun's blown highlights without them turning grey in Capture One; I needed to reduce the exposure by 1.5 stops for that to happen. In comparison, with Lightroom, despite the overall image already looking darker, it took 2.1 stops of reduction to do the same, and the sun became a muddy grey.
One would expect the reverse to be true at the other end. On the contrary, a hugely underexposed image took 2.46 stops of exposure adjustment to recover shadow details and only two stops in Capture One. This would suggest that the effective dynamic range using Capture One is greater than in Lightroom.


However, there was one area where Lightroom outperformed Capture One. In the under-exposed image shot at night, +2 EV has been added in exposure during processing. Some faint reds and blues are reflected in the water, seen center-left of the above heavily cropped images. Lightroom Classic (left) could recover these colors, but Capture One (right) couldn't see them. Even on adjustment, only the tones appeared, and they were colorless. However, the rest of the image looked far better when processed by Capture One: most colors were more saturated, and there was no proliferation of digital artifacts visible in the Lightroom version.
As I reported in the previous article, Lightroom's big failure is that it produces some nasty digital artifacts with OM System files at default settings. At default, all images are hugely over-sharpened, and even reducing the sharpening to zero leaves some graininess. These issues are not the case with Capture One, which gives clean images with little visible noise even when increasing the luminance of the shadows.
Sony and Capture One
The one brand that would make me less likely to swap from Lightroom to Capture One is Sony, but only for one specific reason.
The exposure differences experienced with Lightroom images with the OM System camera were evident with Sony raw files. However, although the Lightroom images appeared darker, the browns in Capture One appeared both darker and a lot more yellow. Consequently, in Capture One, a man's brown face appeared jaundiced at default values. This was not evident with caucasian models. If you photograph people of color, the combination of Sony and Capture One does not seem a good choice. I struggled to get the skin color correct.
Below is the straight-out-of-camera result. Lightroom is on the left and Capture One on the right.


I am sure some readers do photograph people of color using a Sony camera and develop in Capture One. If that is you, I would be fascinated to hear your experiences in the comments; I fully accept that it may be my lack of experience with the program was the cause.
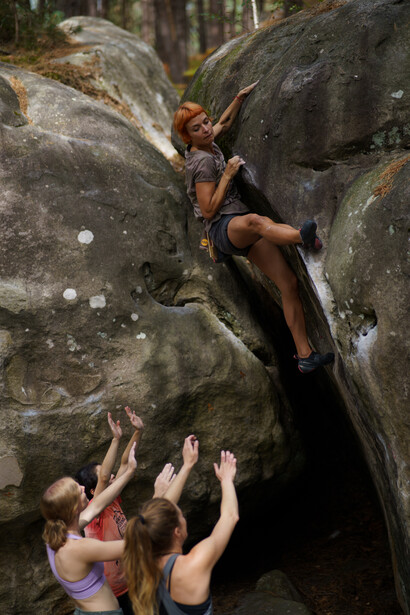
The strange thing was that when I compared the same image of a caucasian climber in the two programs, the subject appeared more yellow in Lightroom. Again, Capture One is on the right in the following image comparison.
Capture One produces brighter previews for Sony raw files than Lightroom Classic. Furthermore, Adobe's program also produces some nasty-looking artifacts with images shot at ISO 400 that were not there in Capture One. Also, recovering shadows in Capture One led to less noise.
Fujifilm and Capture One
You may remember from my Lightroom tests that it performed poorly with Fujifilm images, lacking detail in greens. Again, the results could have been better here, although they are far improved over Lightroom Classic's offering.
Noise control is great in Capture One. Like with all the modern cameras I tested, noise is far less of an issue nowadays.
Although chromatic aberrations were very pronounced in the default settings – the Fujifilm lens was the only one I tested that showed it significantly – those were removed by checking the appropriate box in the lens correction panel. Also, its removal didn't leave a thin halo, as can happen with Adobe's programs. I don't know why that isn't checked by default.
All colors were bolder and more saturated in Capture One than in Lightroom and grays were slightly warmer, giving landscapes a richer look. This warming seemed less than in the Sony images. In comparison, the default Lightroom version appeared pasty and needed more punch.
What I Like and What Can Be Improved in Capture One
Compared to Lightroom, in most circumstances, Capture One's image results compared favorably to Lightroom's. Where it fell behind using the default values. It could be adjusted to match or surpass Lightroom. I could also adjust Lightroom to equal the Capture One default image, but in almost every circumstance except with the Sony portraits, I could achieve far better results with Capture One.
Across all brands, the images looked more vibrant, had better contrast, and had better detail. Moreover, noise reduction did not leave the photos looking muddy as Lightroom's tool does.
I prefer Lightroom's layout. I find it more intuitive, but that may be because of its familiarity; I've used it for many years, and Capture One is new to me.
The elephant in the room, though, is the cost. The lowest subscription price is $179/year, around $60/year more than the Adobe Photographer Plan, and you get a lot more tools from Adobe; it includes Photoshop and its mobile cloud service. However, if image quality is of primary importance to you, you do most of your work in raw development, and you have a flexible budget, then Capture One is a good choice.
That doesn't make Lightroom Classic a lousy program for developing images. If it were, it would not be as successful as it is. However, as these real-world tests show, there are other choices, and Capture One produces excellent results. But is it the best?
Next time, I'll review DxO PhotoLab 6 and see how it compares with Lightroom Classic. Will it do an even better job than Capture One?
I want to once again thank my fellow writers for generously sharing their images for me to play with: Used with the kind permission of Peter Morgan, Canon; Gary McIntyre, Fujifilm X-T5 and Nikon Z 7II; Andy Day, Sony a7 III, and John Ricard, Sony A7 and Nikon Z6.


Join the Fstoppers community for free
-
Post comments and join in the discussions
-
Browse the site ad-free
-
Share your work and get featured in the community
-
Compete in the photo contests for fun and prizes
60 Comments
The next perpetual version of C-1 will likely be my last for at least a decade. I'm running an older Mac, so at the moment I don't have access to all the new features of PS.
But guess what - I don't need them all... There comes a point where we may have all that we need (not want), and it isn't cost effective to keep chasing the latest thing. Pros spend their money wisely. If it isn't making us extra ££ or significantly making our lives easier and faster, the ££ stay in our pockets / business accounts.
My MacPro is a 2010 model - albeit pimped out with oodles of RAM, 12 cores and an *GB graphics card... I haven't had the need to upgrade yet. Maybe next year with an M1 Studio. And my camera is a Canon 5D3, because clients don't pay me by the pixel. Maybe next year I'll upgrade, but I'll likely sit with that camera for another decade or more.
So yes, there are lots of us who are happy to sit with a perpetual licence, and not upgrade for a very long time.
Your section on the Fuji files did not mention if you were using an X-Trans camera or the Bayer sensor GFX camera. Did you try both or just one of them?
Thanks for asking. It's right at the bottom of the article where I thank the photographers who lent me the images; it was an X-T5. I didn't have access to any GFX files when I wrote the article. Similarly, I didn't have any Pentax, Panasonic, Leica, or Hasselblad files either. I hope that those who have those cameras will download trials of the software and see whether they get better results.
I am very satisfied with the way Lightroom works and my workflow evoldved very much over the past years in photography. In my next holidays I will give C1 a chance to show me better RAW Processing. I love recovering shadows and this exactly should be one of the advantages of C1. I am very curious if this applies to my Canon 5D Mark.
Started with C1 back when I got my first Sony camera A7s ('14) at a cost of $30 and have used both when Adobe Photo Plan came about. C1 is a very Pro software mainly for studio work and tethered. Lr was first with sensor dust where C1 you had to use a white plastic squire it also did LC's and color corrections. I loved how I was able to get white stars when doing Milky Way's. I could also get the perfect colors of the yin and yang of Pegasus and air glow colors. Also it was doing masking like Lr does now kind of like PS does it's layers. But Lr has the best list of LC's of even unchipped lenses and at the top of Lr your first step is to pick a Color Profile adobes best guess as to the camera makers profile you would if doing a JPG, portrait is good for night beach and get rid of the dark blues and highlights reds. The key to colors is a Calibrated monitor even if it is only a sRGB.
The bad about C1 is it brings your whole file that an image is in, I mean you click on one image and on the right the whole file of images and when saved the whole file is saved under the original file, Pro's like that but Lr lets you bring just one in and yes most all pros import the whole file in on catalog and arrange by stars but us hobbyist just keep images a directory of files my date and edit just one at a time. C1 also does not keep up with normal LC's it may take a year or two to get your new lens in.
Neither has done Noise Control very well through the years always had to use Topaz years ago and today it is great that Lr does a edit in Topaz apps with a return, yes you can do that with C1 too, now!
I have many old like Photomatix Pro that does 5 @ 3ev HDR for sharp moons over a bright foreground. Now LR and ON1 Photo RAW can do a panorama almost like PTGui. I just discovered both can do a HDR blend of a 3 @ +/- 1 or 2EV Milky Way shot I did with the unchipped Rokinon 14mm f/2.8 I did back in '15 not knowing NR is turned off when bracketing and knew nothing about MW capture Lr 1. a 5 @ +/- 1ev, 2. 3 @ +/- 1 ev, Todays SW is super great. Brought back the unuseable images! Imagine Lr's select Sky and never cover the limbs giving the 3D look!
You can use Lr's LC or HDR merge and then open in C1 both for great playtime! For a big review all Sony Cameras mod 1's and 2's have on camera apps like Digital Filter that does filters in camera and a raw output. 3. Using C1. 4. C1 in '15
Looks like the A7 is a typo in the credits. It's actually an A1.
To me this also speaks to Sony's ever-changing color science.
On the video side of things, Sony's skin tones were generally more difficult to work with until the latest batch of cameras (A7sIII, FX3, FX6, FX9). Perhaps Lightroom and C1 aren't recognizing the efforts that Sony have put into their latest and greatest cameras, and are still trying to compensate?
I agree this is a software issue more than a camera one, and I have seen some other superb portraits from the A7 iv and A1. Thanks for the comment.
I switched to C1 after LR ended its standalone version. C1 said i could import all of my images from LR so i gave it a try... and C1 kept crashing during the import. It took about 6 months of back and forth with C1 TS before i had all of my images imported into C1.
Since then i have found C1 to be buggy and locks up or crashes frequently. I've put up with its annoying behavior over the years because it IS a very good photo editor- when it works. The balance of good vs bad was precarious but i muddled through, until i upgraded to C1 22 when C1 lost almost all of the masks I've created on my images over the years. C1 says this was caused by a known bug that has now been fixed. The bug is fixed now but my masks are still gone. Their bug fix prevents this from happening again but they haven't been able to fix my masks.
So now the balance of good vs bad for C1 has tilted significantly toward bad.
There are a lot of good editing tools out there now so it's no longer a choice only between LR and C1.
C1's new licensing scheme also seems to be designed to push their customers into another subscription service - the same thing that happened with LR years ago. I want to OWN my software, not rent access to it.
I am now actively working towards dumping C1 and moving to another editor. C1 is too broken and f'ed up for me to continue using it.