
DSLR Viewfinder:
The cost of gear gets crazy sometimes. Check out this DIY video on how to produce a decent viewfinder for you DSLR. This video gets a bit off track with some goofy segments but overall you end up with a functional product. Let us know if you try this one out.
https://www.youtube.com/watch?v=p_KgMbOU8Wo&feature=player_embedded
Video Crane:
This video does not take you through the steps to create a video crane, however if you are a DIY badass you could replicate it. I mean I could do it! This one turns out real solid and the smooth video clip is proof.
https://vimeo.com/20906079
Portrait Class:
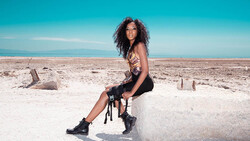
A step by step tutorial on shooting outdoor portraits. Very detailed instructions and guidance with the model. The instructor even gives a little point and shoot lesson at the end.
https://www.youtube.com/watch?v=jYlpLRA8Mbw&feature=related


Join the Fstoppers community for free
-
Post comments and join in the discussions
-
Browse the site ad-free
-
Share your work and get featured in the community
-
Compete in the photo contests for fun and prizes
10 Comments
That is an impressive crane system. Looks really simple to make actually. Nice work!
Yeah the video was pretty clean looking. I think the hardest part is getting the camera to stay straight as it moves up and down. I found a little how to on instructables. http://www.instructables.com/id/DIY-Camera-Crane/
that crane is sexy
i'm not into video that much, but that viewfinder trick is awesome as well. Great videos this Wednesday guys! Thanks a lot!
Brilliant, I love the level of innovation and all the different techniques people use in photography these days.
@Antoine I think the viewfinder would be perfect for shooting during the day also. I always have a hard time looking at the back of the screen on very sunny days.
amazing videos...these videos would really help photographers who are really in a budget...thank you for sharing fstoppers...
Only issue with the viewfinder is that it technically is just for video or if you are solely using a tripod as you can't actually look through the eyepiece while it is installed. Unlike a product like the Hoodman HoodLoupe for example.
@Jerrit you know what? You are absolutely right! sometimes on location its so damn hard to see anything... you may have something here! I'm gonna give it a shot :) i wonder if it'd be doable to do one for a 13" laptop... ;) maybe with a fabric softener bottle or somethin' ? ;P
One thing I noticed in the John Freeman video: In the backlit scene, he uses the reflector to bounce the light from below . This way, the lower part of the face is lighter than the top part and the highlights are at an un-natural location.
Holding the reflector higher and bouncing the light down on the model would put the highlights in a more natural place. Makes the assistant look a bit goofy but the end result looks much better.