
Professional Aerial Photographers Paul Hoelen, Emmanuel Coupé, and Scott Jon McCook are here with the ultimate guide to getting you started with aerials yourself. And of course, they shared some mouthwatering imagery that will make you ask the question: “Are these shot on Earth at all?”
Personal Style
Paul Hoelen
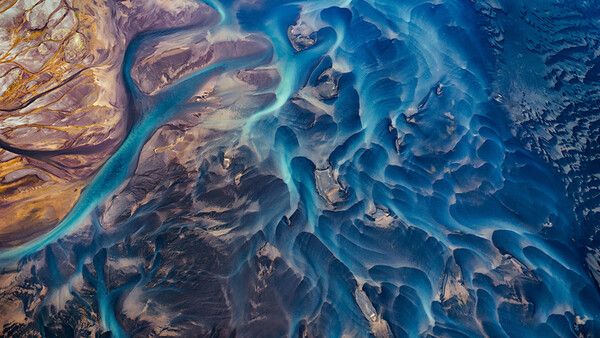
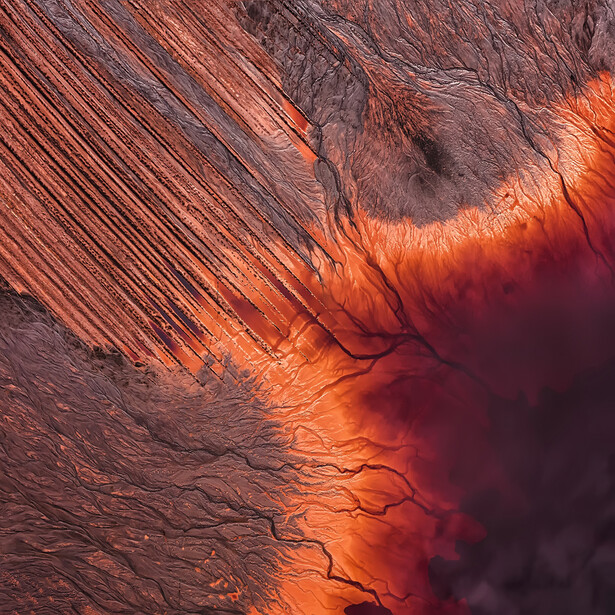
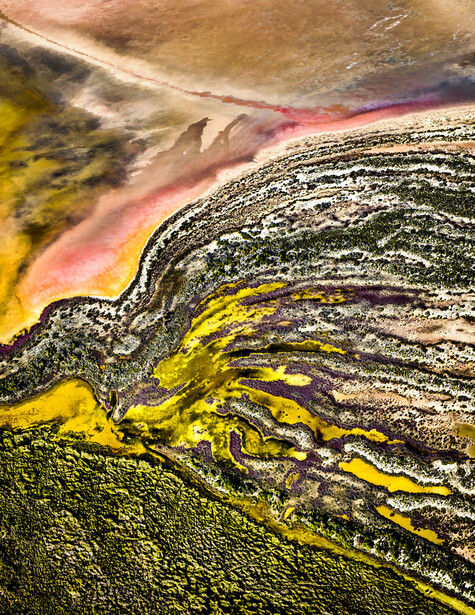
From an artistic point of view, Tasmania-based Photographer Paul Hoelen describes his style as imagery with a sense of elegant simplicity, balance and flow. He’s naturally drawn to sensual shapes, rich textures, and compositions with a strong graphical element, and the use of colour is also a big feature in Hoelen’s work. It goes without saying that his imagery is abstract by its very nature. This, he says, requires something of the viewer that will allow them to potentially take a few different paths with their interpretation.
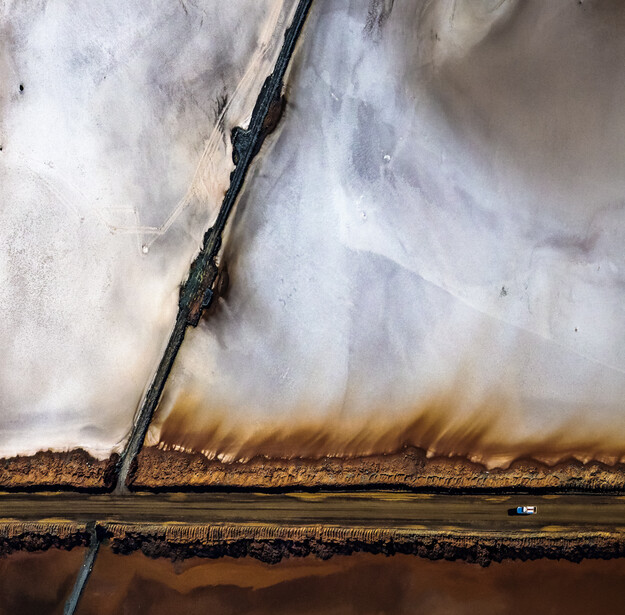
Paul Hoelen is also supportive of imagery with a message. His current "Altered Lands" group exhibition in Sydney (more information at the bottom) with Scott McCook and Sheldon Pettit is an excellent example of all these elements coming together. It’s a visual exploration of the impacts we have through using the earth as a resource. The concept is to use the universal appeal of aesthetic beauty and strong colour and design to draw people in, then letting the abstract nature of the imagery and underlying layers of meaning take people on a bit of a journey. Hoelen hopes that viewers find themselves at a point of personal reflection concerning their position with the environmental message and cultural comment held within the imagery.
Emmanuel Coupé
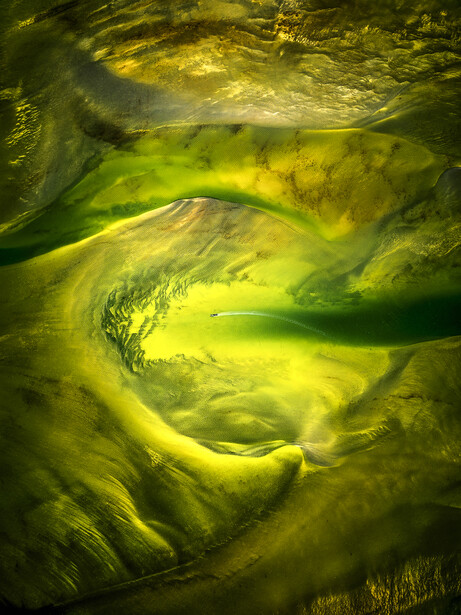
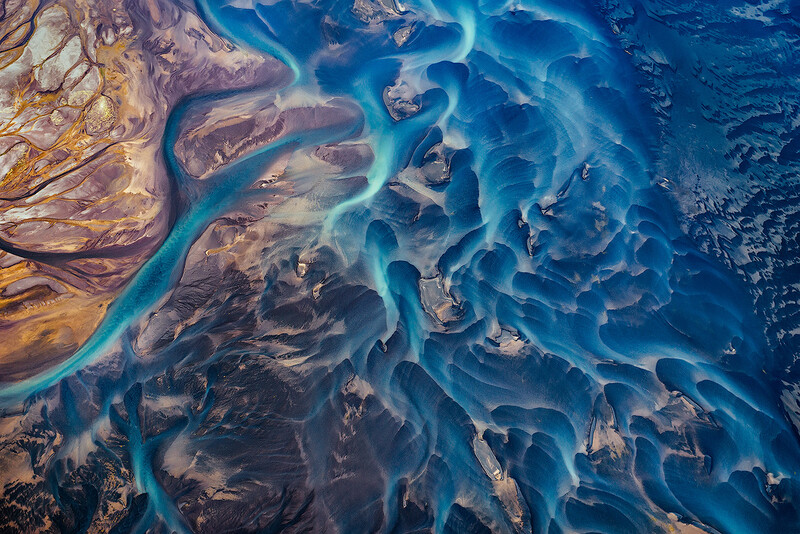
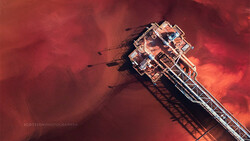
For French Photographer Emmanuel Coupé, aerial photography has been an entirely different proposition from what he had done before. The idea of not having dynamic movement within the scene didn’t interest him before he got on his first flight. But in the case of shooting these aerials, it goes to show that theory doesn't always translate in practice, as Coupé felt quite comfortable about not portraying unlimited movement, as he does with his landscape work on the ground. He now had a flat subject about which he simply moved in a parallel way.

He also approached aerial shoots significantly differently from his non-aerials. Coupé’s style is a concoction of reacting in an instinctive manner to the scenes below him, while maintaining a rhythm of shooting that feels organic. "Organic" is also the operative word which he considers carrying through to post-processing later on. The aim in his aerial post-processing is to achieve clear tonal articulation. The mid-tones at times demand more attention in order to achieve the desired tonal and color separations.
Scott Jon McCook
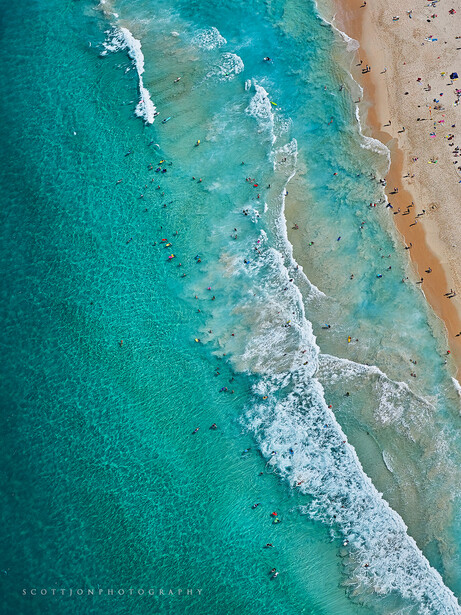
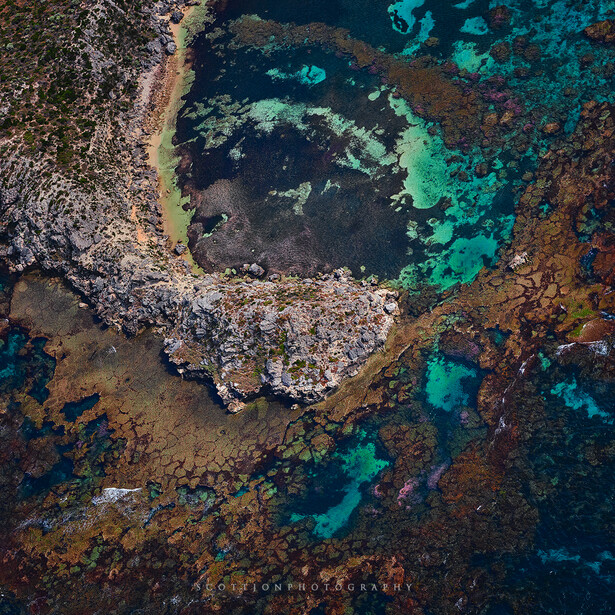
These days, our resume is online for the world to see anytime and within a few clicks of a button. Western Australian Photographer Scott Jon McCook is all too aware of that when he tries to convey a certain style of quality over quantity when it comes to his image-making. One of the key factors for his aerial photography is making sure the images are tack sharp. It’s what separates them from drone imagery and travel shots. This is by design as well, because McCook always tries to shoot with the best gear possible, and he has spent countless hours experimenting with which setups work best. When you mix all the planning, equipment, camera craft, and processing in a big pot, you start to see a style emerging. One of the final elements that forms his style are the emotions and feelings he gets from going on an adventure. Mix that in, and you’re pretty close to what his imagery is all about.

McCook goes on by saying that it’s a fantastic compliment when someone comments that they can tell your work from just the image and nothing else. That is when you know you’re on the right track. He’s very keen on developing his personal style even further and warns us to be wary of who you ask for criticism of your work.
An example might be this comment: "Scott, I like the detail and texture on that image, but the colours are too powerful for my liking and it looks too abstract. Oh, and you’ve got chromatic aberrations."
McCook would take on board the comments about nailing the detail and that he has chromatic aberrations, but he’s careful with the comments about colour and the image looking too abstract. These areas might be related to your emerging style, so you need to be sure to ask the right people and take criticism the right way or risk losing track of your style.
Tips on Developing a Style of Your Own
1. Expand your sphere of influence into areas outside of photography for creative inspiration. Whether it be art, philosophy, painting, dance, or graphic design, you can easily underestimate what influences these may have on the way you see, feel, and work within your image-making process.
2. Try to develop ideas about the direction your images or project will take. It doesn't have to be an exact science (it's not), but having a compass guide you when you’re out shooting keeps you focused.
3. Shooting aerials with a pilot is very much a team effort. If you like to work at your own pace and by yourself, you’d do well by giving good and clear directions to the pilot in order to get the images you’re after. Repeatedly flying over of a certain scene might be needed as well as plane placement adjustments, and for that, communication and planning is important.
4. Don’t be afraid to experiment. One of the great advantages of the digital medium is it gives us a colossal amount of freedom to play and try new things and techniques. It also has a built-in instant feedback loop that allows us to see if we’re being successful or moving towards where we’d like to go right then and there.
5. Fail and do it all over again. Look for dead ends and stop searching for the right path. This approach to experimentation helps in finding your style. For every 50 dead ends, you’ll find one door that opens, and that door will often be one that no one else has opened in such a way. No one else will follow the exact same path of experimentation. Almost like a unique key that cannot be copied, the final door will lead you to one aspect of your personal style, but it doesn’t come without all those failures first.
6. Do what you love and love what you do. Your own brilliance can’t shine through outside of what you truly love in Hoelen’s opinion. You’ll be more motivated, connected on a deeper level and willing to go the extra mile with subject matter that you feel really strongly about. As such, your own body of work will grow in depth and layering, and your style will have more room to develop and shine through in the images themselves. So, whether you are drawn to urban designs, patterns and textures, wildlife and nature, or abstract art in your aerial imagery, the world is literally your oyster!
7. Listen, but don’t listen to constructive criticism. While it may sound confusing, it’s good practice to be very conscious of who you ask for a critique and when to take on board technical aspects of constructive criticism. Know when to gloss over personal taste. This is incredibly important in the online world where people put work up for it to be criticized by hundreds of photographers they really don’t know or have never spoken to. If you’re not careful, this can shape your style in a negative way. Teach yourself to separate your inner voice and personal style from your lack of knowledge in a certain area.
8. Have fun, take it seriously, but also don’t! If you take photography too seriously and focus on technical aspects too much, you’ll miss all the fun and adventures unfolding in front of you, and that’s really important, because I think I have when shooting. Make sure you’re in touch with feeling the scenes and the adventures you’re going on; they will shape your style.
What gear do you take with you?
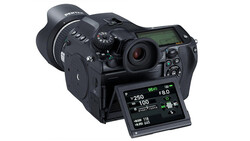
McCook and Hoelen regularly hire a plane and some insane resolution cameras together. Cameras such as the Pentax 645Z or PhaseOne XF and IQ150 back. Renting a medium format camera is a good alternative to buying one of these bad boys, as their price tag will make you rethink if you really don’t want to buy that Mercedes after all. But there are also some great modern full-frame cameras out there.
9. Go high resolution. Try to get access to the largest resolution camera body you can get your hands on. The pros often end up cropping their images and (unlike with traditional landscapes), you don’t have the capacity for stitching any together.
10. Get your bodies up there. Speaking of camera bodies, it’s a good idea to bring multiple, with various lenses mounted to them. You don’t want to be changing lenses when you hang out the back of a Cessna, but having some flexibility is good practice if you can afford it.
11. Mind the field of view. The choice of lens depends on what you’re trying to capture, what height you are shooting from, and most especially what kind of aircraft you are flying in. Many of the planes have fixed wing and wheel struts and if you get a chance to jump in the plane before you take off, you’ll have a better idea of what focal length will work in dealing with this added challenge. Often, with the smaller Cessnas like the 172, a 50mm prime’s field of view will fit nicely between the gaps in the struts. But in a Cessna 210 with the doors off in the back, you have an almost 180-degree view and sometimes can go as wide as 16mm on a full-frame camera. One should consider that even a mid to wide-angle lens is still quite capable to isolate parts of the landscape, and it is not necessary to have a long lens for that.
12. Take your lens hoods off and opt for shorter barrel prime lenses. Anything that helps to minimize wind resistance will help you produce sharper images. Using a fixed focal length lens is less flexible compositionally, but allows you to avoid potential creeping of the zoom ring in the wind and can be an advantage when shooting in lower light conditions, as they let more light in. That being said, the pros have used both fixed and zoom lenses successfully.
13. Practice with your equipment in moving situations ahead of time. Before spending a lot of money hiring a private plane in a remote location, it’s a good idea to be familiar with your equipment and its technical abilities. While on a plane, it is important to be focused on composition rather than gear. Constantly checking settings becomes a distraction that should be best avoided. Having doubts about your gear when shooting aerials will quickly become a pricey endeavor.
14. Bring reliable accessories. Use longer and secure shoulder straps to allow more freedom of movement and separation between the two cameras. Changing lenses, batteries or memory cards in the air is not ideal and often tricky, so use larger capacity cards and make sure the batteries are fully charged. There are a lot of dollar signs flying past with missed shots from fumbling about making changes in cards, batteries, or lenses.
Creativity and Workflow
Coupé feels comfortable with images taking a life of their own. He just needs a connecting thread going across the pictures and that's when any initial considerations come into play. There are a number of factors that he gets into place before he flies to ensure the greatest potential for a successful pool of imagery from a flight: choosing a good pilot and the best aircraft type for example, but also planning a great flight path with potentially a lot of good material. He also feels getting comfortable with his gear and the ideal camera settings and setting up to fly at the right time of day and season of year for the lighting conditions that best suit the subject matter is very important. And lastly, building some flexibility into his flight plan’s direction and duration leaves him free to change plans on a moment’s notice through what the light, weather, or any new point of interest draw him towards. So, despite having specific ideas beforehand, he doesn't worry too much about preconceived ideas nor forcing them as the shoot develops. All three aerial photographers prefer to be in the moment, allowing for the reactive part to just be there. But they have some recommendations that will help your creative juices to flow.
15. Do your research. A fair amount of research about the land will help you to approach compositions and aid in communication with the pilot. You’ll want to shoot early or late in the day, to allow the land to catch the light at an oblique angle, as it brings out texture and saturation of the landscape. Research the direction of sunlight and how long you have. During summer in the arctic, you’re prone to run out of fuel before light, while the deserts of Australia may see only a half a golden hour at times.
16. Plan, then plan some more. Draw out flight paths on a map which you then give to the pilot and communicate how long you want to be over certain areas, at which time and from which direction. McCook adds that he likes to scout for his location on Google Maps and find a pilot and plane that suit his budget. In Australia, the average price for a Cessna 182 is about $650 AUD per hour. Make this large sum of money count by making your flight path as targeted as possible. He’ll normally screenshot Google Maps and use Photoshop to overlay markers and information like “circle area in clockwise direction, 3x laps”. This gives the pilot an idea of not only where you want to go, but how long you may want to spend in certain areas so he can give some sort of estimate on flight time. This will translate in knowing roughly what you will be spending.
17. Leave pre-visualisation on the ground. Setting up specific images will be very hard when you first get into the Cessna. With all that research and planning, it’s hard to not see an image already. Of course, your creative brain will create some specific ideas beforehand. Often enough, those ideas don’t exactly translate into the final picture, and the creative process takes a twist somewhere down the line. Parting from pre-visualisation before takeoff is a real bonus if you’re after that unique shot.
18. Isolate areas for abstract images. When you’re dealing with a vast space, it’s best to isolate parts of it. Place your subject in the frame devoid of context, while simultaneously trying to create a sense of curiosity or mystery about the surroundings that complete the scenery, but refrain from showing context inside the frame.
19. Return to the same area, but not too often. When you get to know an area well, you can choose to return again in different lighting conditions or another season. Exploring new and lesser known areas you haven’t been to before can and will challenge you, keep things fresh, and expand your portfolio.
By setting yourself up with excellent planning, you’re free to let your intuitive and responsive self take control. This is when your most powerful images tend to come through and getting yourself in a good position will allow spontaneous moments the breathing room to happen.
Best Word of Advice
I’ve asked Scott Jon McCook, Emmanuel Coupé, and Paul Hoelen what they would recommend a beginner in aerial photography. Here are their best words of advice.
Paul Hoelen
20. Shutter speed has priority. The one single message that stands out the most for Hoelen is: "Shutter speed is king." In the process of setting up ideal camera settings and having to decide between a smaller aperture, lower ISO, or higher shutter speed, make a fast shutter speed the ultimate priority, even at the expense of the others. Paul Hoelen doesn’t like to shoot at less than 1/1600 s and usually faster if he can.
I wouldn’t care to admit just how many potentially strong captures have slipped through my fingers from having too low a shutter speed with resultant image blur.
The bottom line is, you can’t fix blur in post, but with noise from a higher ISO, you at least have a chance with the right techniques and software. And if you’re shooting straight down, aperture is much less of an issue than in traditional landscape photography.
Emmanuel Coupé
21. Pick your pilot carefully. If the pilot has prior experience with photographers, it's a big help and makes everything simpler. He might even have good tips for you. But Coupé would also place importance in the piloting skills alone, since you want to feel safem, especially when you ask for a maneuver that lines the plane up in a specific angle to get that shot. You don't want a pilot doing more than he can handle in order to please you as the client. It's important to talk with the pilot about everything in advance to make sure you are both on the same page.
Practice goes a long way to help, so if you can do a shorter first outing to get the hang of it and then repeat with a longer flight, I would highly suggest that.
This way, you have a better chance to evaluate the lighting you want, increase your certainty of any camera settings, go over compositions, and allow for more ideas to develop. Going up twice might be expensive, but for first-timers, I think it's essential and will make a difference in the quality of the images.

Scott Jon McCook
22. Tie everything down. Just remember the plane will be traveling fast — 160-200 km an hour, and you will have lots of wind buffeting you. At first, it may be a little disorienting, but you’ll quickly adjust.
Make sure you have nothing in the cabin that isn’t fixed down or fixed to you, and before taking off, make sure you have told the pilot exactly what you’ll require in the cabin and that he is happy with that. At the end of the day, what the pilots says and what the rules state in your country are what you need to work within; safety is the key. After that, it’s takeoff time.
At this point, you’ll just be smiling and enjoying the stunning landscape below; nothing else will matter!
Altered Lands
Leading Australian Photographers Scott Jon McCook, Paul Hoelen, and Sheldon Pettit are exposing their aerial work daily until June 5th in Sydney, Australia. The exhibition is "a visual exploration of how we use the earth as a resource in Australia" and can be viewed in the Customs House, Circular Quay, Sydney, NSW, Australia.
Images and words used with permission by Scott Jon McCook, Paul Hoelen and Emmanuel Coupé.

Join the Fstoppers community for free
-
Post comments and join in the discussions
-
Browse the site ad-free
-
Share your work and get featured in the community
-
Compete in the photo contests for fun and prizes
6 Comments
I'm just wondering why tip number 1 isn't 'GET TO DA CHOPPA!!'
Jokes aside cool read since I've sometimes wondered how they photograph aerial landscapes.
Awesome article. I love aerial photography, especially the ones shot directly from above. such a cool graphic look. How expensive is it to hire a plane/pilot ? would love to try my hand at this.
Look for a pilot that needs the hours. Checking with local municipal airports would be a good starting point.
That might cut costs. :) Hiring a plane and pilot will set you back about 475 EUR or 650 AUS an hour. Thanks for reading!
these pictures are amazing
I LOVE these photos.